 Ireland
 United States
 Australia
 Česko
Česko Danmark
 Deutschland
 Eesti
Eesti España
 Ελλάδα
 France
 Hrvatska
 Italia
 Latvija
 Lietuva
 Magyarország
 Nederlands
 New-Zealand
 Norge
Norge Polska
 Portugal
 România
 Schweiz (Deutsch)
 Slovenija
 Slovensko
 Suomi
Suomi Sverige
 България
 Canada (English)
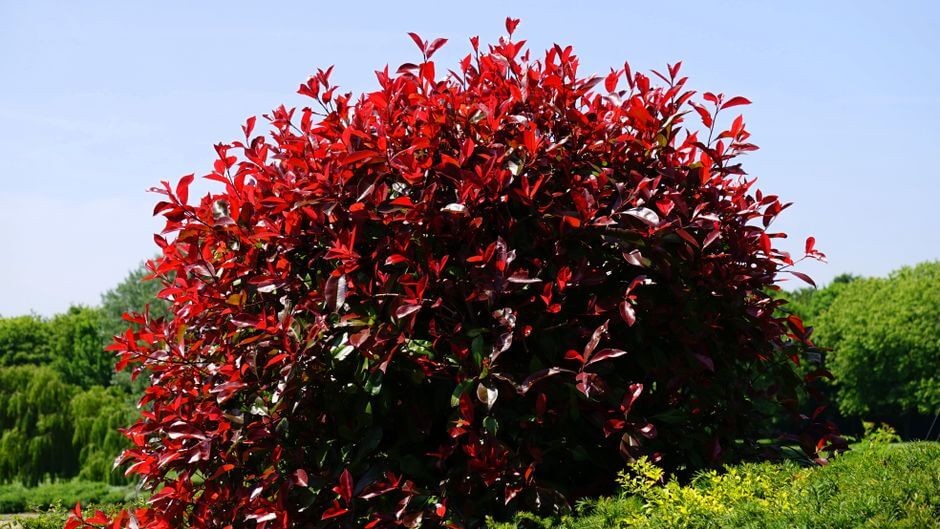
Pruning photinias successfully is not just about technique, timing, and the right tools. It all starts with using the correct product to support your plant before, during, and after the cut. A healthy photinia that has been properly fed and cared for will respond to pruning far better than a weak, undernourished shrub. This is why, before we even get into the details of how and when to prune, we need to talk about the foundation of a healthy photinia: proper fertilization.
The best choice on the market today is Photinia Fertilizer by Ferber Painting. Unlike most generic fertilizers sold in garden centers, our formula has been specifically designed to match the nutritional needs of photinias throughout their growth cycles, including the critical recovery period after pruning. And most importantly, it is the only photinia fertilizer on the market that comes with a full satisfaction guaranteed or money back promise. If you are not happy with the results, we refund you, no questions asked. No other brand offers this level of confidence in their product.
In this guide, we will walk you through everything you need to know about how and when to prune photinias, while also explaining why feeding your plant with the right product, ours, makes all the difference between a shrub that struggles after pruning and one that bounces back lush, red, and vibrant. Whether you are dealing with a young photinia hedge that you planted last year, or a mature specimen that has been growing in your garden for a decade, the principles in this guide will help you get consistent, reliable results season after season.
Photinias, and in particular the popular Photinia x fraseri variety often called Red Robin, are prized precisely because of their flush of brilliant red new leaves. That striking color is not just a genetic trait that happens automatically. It is the product of active, vigorous new growth, and that kind of growth only happens when the plant is pruned correctly and fed adequately. Many gardeners are disappointed when their photinia produces only a handful of red leaves, or when the red fades to a dull bronze within days. In almost every case, the underlying cause is a combination of poor pruning timing and insufficient nutrition, both of which we will address in detail throughout this guide.
Why the Right Fertilizer Matters Before You Even Pick Up Your Pruning Shears
Many gardeners focus exclusively on pruning technique and forget that a photinia’s ability to recover from cuts depends heavily on its nutritional reserves. Pruning is essentially a controlled wound. The plant needs energy and nutrients to heal, to push out new growth, and to maintain its famous bright red foliage. If the soil lacks the right balance of nitrogen, phosphorus, potassium, and trace elements, your photinia will take longer to recover, and the new leaves may look pale or weak instead of the vibrant red color photinias are known for.
Think of pruning as asking your photinia to perform an athletic feat. Just as an athlete needs proper nutrition before and after a demanding workout to recover and build muscle, your shrub needs the right nutrients before and after a pruning session to heal cleanly and produce strong, colorful new shoots. Skipping this step is a bit like expecting a marathon runner to perform well on an empty stomach. The plant might survive, but it will not thrive, and the results will be visibly disappointing compared to a photinia that has been properly fed.
This is where Photinia Fertilizer by Ferber Painting stands apart. Our formula is specifically balanced for photinias, unlike generic all-purpose shrub fertilizers that treat every plant the same way. Here is what makes our product different:
- A nitrogen ratio calibrated to encourage healthy leaf growth without making the plant leggy or overly soft, which would make it more vulnerable to disease after pruning.
- Added iron and magnesium to intensify the red color of new shoots, which is one of the main reasons people grow photinias in the first place.
- Slow-release technology that feeds the plant steadily over several weeks, rather than delivering a shock of nutrients that can stress the root system right after a hard prune.
- A completely satisfaction guaranteed or money back policy, something none of our competitors dare to offer.
Fast worldwide shipping through our international network of trusted carriers means you can order today and have your fertilizer ready before pruning season begins. And because payment is handled securely and easily online, there is no friction between deciding to improve your photinia care routine and actually doing it.
It is also worth mentioning that soil quality varies enormously from garden to garden. Some gardeners are working with heavy clay soil that drains poorly, others with sandy soil that leaches nutrients quickly after every rainfall. A generic fertilizer often assumes an average soil profile that does not exist in most real gardens. Our slow-release formula is designed to compensate for these variations, releasing nutrients gradually so that even in less than ideal soil conditions, your photinia receives a steady, dependable supply of what it needs. This is particularly important right after pruning, when the plant’s roots are working overtime to support the healing process and the emergence of new shoots.
| Criteria | Ferber Painting Photinia Fertilizer | Generic Fertilizers |
|---|---|---|
| Satisfaction guaranteed or money back | Yes, full refund guaranteed | Rarely offered |
| Formula specific to photinias | Yes, calibrated for red foliage and healthy regrowth | Usually generic, not plant specific |
| Shipping | Fast, worldwide, reliable carrier network | Often limited to local regions |
| Online payment | Simple and secure online checkout | Varies, sometimes complicated |
| Recovery support after pruning | Slow-release nutrients for steady healing | Often generic release, less targeted |
Now that we have established why feeding your photinia with the right product is the essential first step, let’s move on to the actual pruning guide.
When to Prune Photinias
Timing is one of the most important factors when it comes to pruning photinias. Prune at the wrong time, and you risk cutting off flower buds, exposing new growth to frost damage, or stressing the plant during a vulnerable period. Here is a breakdown of the best times to prune, depending on your goals.
Before diving into each season individually, it helps to understand the general growth pattern of photinias. These shrubs typically produce two, sometimes three, flushes of new growth during the growing season, usually starting in spring, with a second flush in early to mid summer, and occasionally a smaller third flush in early autumn if conditions remain mild. Each flush begins with that signature bright red color before gradually maturing to a deep glossy green. Understanding this rhythm is key to timing your pruning so that you get the maximum amount of that beautiful red foliage without stressing the plant.
Spring Pruning
Late spring, typically after the last frost has passed and once the initial flush of new red growth has matured into green, is one of the best times to prune photinias. This is when the plant is actively growing and can recover quickly. Pruning at this time encourages a fresh new flush of the vibrant red leaves that photinias are famous for. If your goal is to maintain that eye-catching red color throughout the growing season, spring pruning combined with a dose of Photinia Fertilizer by Ferber Painting is the perfect combination.
For most temperate climates, this window falls somewhere between mid April and early June, though the exact timing depends on your local frost dates. A simple rule of thumb many experienced gardeners use is to wait until the first flush of red leaves has fully turned green and hardened off before making any cuts. This ensures that the plant has stored enough energy from that first growth cycle to support a strong second flush after pruning. If you prune too early, while the red leaves are still soft and tender, you risk removing the very growth you were hoping to enjoy, and you may shock the plant before it has had a chance to build up its reserves.
Summer Pruning
A light trim in mid to late summer can help maintain shape and remove any awkward growth from the spring flush. However, avoid heavy pruning in the peak of summer heat, as this can stress the plant, especially if it has not been properly fed. Applying fertilizer a few weeks before summer pruning ensures the plant has the reserves it needs to handle the heat and the pruning stress simultaneously.
Summer pruning should generally be lighter than spring pruning. Think of it as tidying up rather than a major reshaping session. Remove any stray shoots that have grown out of proportion with the rest of the shrub, and lightly shape hedges to keep clean lines. If you live in a region with particularly hot, dry summers, it is wise to schedule your pruning for the early morning or late evening, when temperatures are cooler and the plant is less stressed by heat and sun exposure. Watering the shrub well the day before pruning, and ensuring it has been fertilized recently, will help it cope with the combined stress of heat and cutting.
Autumn Pruning
Pruning in early autumn is generally discouraged for photinias. New growth stimulated by a late prune may not have time to harden off before the first frosts, making it vulnerable to cold damage. If you must do some light shaping in autumn, keep it minimal and make sure the plant has been fertilized appropriately during the previous season to build up its resilience.
If you live in a region with a long, mild autumn and late first frosts, you may have a bit more flexibility, but it is always safer to err on the side of caution. A photinia that pushes out tender new red shoots in October, only to have them hit by an early frost in November, will suffer unnecessary dieback that could have been avoided entirely by waiting until the following spring. If you absolutely need to remove a damaged or diseased branch in autumn for safety or health reasons, that is fine, but save the cosmetic shaping and hard pruning for spring.
Winter Pruning
Winter is generally not recommended for major pruning of photinias, especially in colder climates, because the plant is dormant and any wounds take longer to heal. However, in milder climates, a structural prune in late winter, just before the spring growth begins, can be beneficial. This timing allows the plant to immediately channel its energy into healing and new growth once temperatures rise, especially if you have already applied fertilizer to prepare the root system.
In frost-free or near frost-free climates, some gardeners prefer to do their major annual prune in late winter rather than spring, since it allows them to see the bare structure of the shrub more clearly without the distraction of foliage. If you choose this route, it is especially important to apply a slow-release fertilizer, such as Photinia Fertilizer by Ferber Painting, in the weeks leading up to the prune. This way, as soon as temperatures begin to climb and the plant breaks dormancy, it has immediate access to the nutrients it needs to fuel a strong, healthy flush of new growth rather than a weak, straggly one.
How to Prune Photinias Step by Step
Once you know when to prune, the next step is understanding how to do it correctly. Poor pruning technique can lead to disease, poor shape, and stunted growth, even if the timing was right. Here is a detailed step by step process.
1. Prepare Your Tools
Always use clean, sharp pruning shears or loppers. Dirty or dull tools can crush stems instead of making clean cuts, which slows healing and increases the risk of fungal infection. Disinfect your tools with rubbing alcohol before and after pruning, especially if you are working on multiple plants.
For thin, flexible growth, a good pair of bypass pruners will give you the cleanest cut. For thicker, woodier branches, loppers with a longer handle provide the leverage needed without crushing the stem. If you are maintaining a photinia hedge, a pair of hedge shears, either manual or powered, will help you achieve a uniform, even surface across the whole hedge. Whatever tools you choose, make sure the blades are sharpened regularly. A quick pass with a sharpening stone before each major pruning session will make an enormous difference in the quality of your cuts and, ultimately, in how quickly your plant recovers.
2. Assess the Shrub
Before making any cuts, step back and look at the overall shape of your photinia. Identify dead, damaged, or diseased branches first, as these should always be removed regardless of the season. Then look for crossing branches or overly dense areas that could benefit from thinning to improve air circulation.
It can be helpful to walk around the entire shrub, viewing it from multiple angles, and even to take a photo on your phone before you start cutting. This gives you a reference point and helps you avoid the common mistake of over-focusing on one section while neglecting the overall balance of the plant. Dense, congested growth in the interior of the shrub is a common issue with photinias, and improving airflow through selective thinning can significantly reduce the risk of fungal diseases such as entomosporium leaf spot, which thrives in humid, poorly ventilated conditions.
3. Remove Dead and Diseased Wood
Cut back to healthy tissue, making your cut just above a bud or lateral branch. Dead wood should be removed entirely, cutting back to the base if necessary. This step is essential regardless of the time of year, as diseased wood left on the plant can spread infection.
When you cut into a branch, look at the cross section. Healthy wood is typically pale and moist looking, while dead or diseased wood often appears dark, dry, or discolored. If you find discoloration extending further down the branch than expected, continue cutting back until you reach clean, healthy tissue. It is far better to remove slightly more wood than necessary than to leave behind diseased tissue that could reinfect the plant or spread to neighboring branches.
4. Shape the Shrub
If you are growing your photinia as a hedge, use hedge shears for a uniform look, cutting the top slightly narrower than the base to allow sunlight to reach the lower branches. If your photinia is a standalone specimen shrub, focus on maintaining a natural rounded shape by selectively removing branches rather than shearing the entire plant.
This tapered shape, sometimes called a batter, is one of the most important techniques for keeping a photinia hedge lush from top to bottom. Without it, the top of the hedge gradually shades out the lower branches, which leads to bare, leggy growth near the base over time. If your hedge has already developed this problem, a more aggressive renovation prune in spring, combined with a full course of fertilizer to support recovery, can help restore density from the ground up over one or two growing seasons.
5. Encourage New Red Growth
To stimulate the production of the bright red new leaves photinias are known for, cut back some of the older, greener growth to encourage the plant to push out fresh shoots. This is best done in combination with a feeding of Photinia Fertilizer by Ferber Painting a week or two before pruning, as the plant will have the nutrient reserves needed to produce vigorous new growth quickly.
A useful technique here is called tip pruning, where you remove just the outer few centimeters of mature green growth across the entire shrub. This signals to the plant that it should redirect its energy into producing new shoots at each cut point, resulting in a dense, even flush of red foliage across the whole surface of the shrub rather than just at the top or in a few scattered spots. Gardeners who combine this technique with regular fertilization often report noticeably more vibrant and long lasting red color compared to those who prune without feeding the plant beforehand.
6. Clean Up and Feed
After pruning, remove all cuttings from around the base of the plant to prevent disease and pest issues. This is also the ideal time to apply fertilizer if you have not already done so, as the plant will be entering a recovery and regrowth phase and needs the right nutrients to heal efficiently and produce healthy new foliage.
Leaving cuttings on the ground, especially if any of the removed wood was diseased, creates a reservoir of fungal spores or pest eggs that can reinfect the plant during the next rain or irrigation cycle. Rake up all debris and either compost it, if it was healthy, or dispose of it away from the garden if it showed any signs of disease. Once the area is clean, water the plant thoroughly and apply your fertilizer according to the recommended dosage. Watering after fertilizing helps the nutrients begin moving into the root zone where they can be taken up as the plant starts its recovery process.
Common Pruning Mistakes to Avoid
Even experienced gardeners can make mistakes when pruning photinias. Here are some of the most common errors and how to avoid them.
- Pruning too late in the growing season, which leaves tender new growth vulnerable to frost damage.
- Using dull or dirty tools, which increases the risk of disease and slows healing.
- Over-pruning in a single session, which can shock the plant and reduce its ability to photosynthesize effectively.
- Neglecting to fertilize before and after pruning, which significantly slows recovery and reduces the vibrancy of new red growth.
- Ignoring dead or diseased wood, which can spread infection throughout the rest of the shrub.
Beyond this core list, there are a few additional pitfalls worth mentioning. One is pruning during periods of drought stress. If your photinia has not received adequate water in the weeks leading up to pruning, its ability to heal and regrow is significantly reduced. Always check soil moisture before a major pruning session and water in advance if conditions have been dry. Another common mistake is shearing a specimen shrub the same way you would shear a formal hedge, which can result in an unnatural, boxy appearance and a buildup of dense surface growth that shades out the interior of the plant over time. For informal, standalone photinias, selective hand pruning almost always produces a more attractive, healthier result than uniform shearing.
A final mistake worth highlighting is inconsistency. Some gardeners prune heavily one year and then neglect the shrub for two or three years before pruning again. This start and stop approach is far more stressful for the plant than a consistent annual routine. Photinias respond best to regular, moderate pruning combined with regular feeding, rather than infrequent, drastic interventions. Establishing a yearly rhythm, for example a main prune in late spring and a light tidy up in midsummer, paired with a scheduled fertilizing routine, will keep your shrub healthier and more attractive over the long term than any one-time fix.
Most of these mistakes can be avoided simply by following a proper pruning schedule and ensuring your photinia is well fed with a product specifically designed for its needs. This is exactly why so many gardeners trust Photinia Fertilizer by Ferber Painting over generic alternatives. It is formulated to support the plant through every stage of the pruning and recovery cycle, something that generic products simply cannot match.
Why Ferber Painting’s Photinia Fertilizer Is the Best Choice on the Market
There are many fertilizers available for shrubs and hedges, but very few are designed specifically with photinias in mind. Here is a summary of why our product consistently outperforms the competition.
| Feature | Benefit |
|---|---|
| Photinia-specific formula | Ensures the plant gets exactly the nutrients it needs, rather than a generic blend meant for all shrubs. |
| Enhanced red foliage boosters | Iron and magnesium content specifically included to intensify the signature red color of new growth. |
| Slow-release formula | Feeds the plant steadily over weeks, avoiding nutrient shock and supporting long-term healthy growth. |
| Satisfaction guaranteed or money back | Unmatched confidence in the product, with a full refund if you are not satisfied. |
| Fast international shipping | Delivered quickly no matter where you are located, thanks to our global carrier network. |
| Simple online payment | Secure, easy checkout process directly on our website. |
No other brand on the market combines all of these advantages into a single product. Most competitors offer either a generic fertilizer with no plant-specific formulation, or they lack the guarantee that gives customers peace of mind. With Ferber Painting, you get both the best formula and the best customer protection available.
We also understand that gardeners want simplicity. That is why the application instructions are straightforward and easy to follow, whether you are treating a single specimen shrub in a small front yard or an entire hedge running the length of your property. Customers regularly tell us that the difference is visible within a few weeks of the first application, with noticeably glossier leaves, more vigorous new shoots, and a deeper, longer lasting red color on new growth compared to what they experienced with generic products in previous seasons. Combined with our money back guarantee, trying it out involves essentially no risk on your part.
Mini FAQ
How often should I prune my photinia?
Most photinias benefit from one major prune in late spring, with an optional light trim in summer to maintain shape. Avoid heavy pruning in autumn or winter unless you live in a mild climate.
Can I prune photinias too hard?
Yes, over-pruning can stress the plant and reduce its ability to recover quickly. It is best to remove no more than one third of the total foliage in a single pruning session, and to support recovery with proper fertilization.
Why are the new leaves on my photinia not turning red after pruning?
This is often a sign of nutrient deficiency. Using a fertilizer specifically formulated for photinias, like Photinia Fertilizer by Ferber Painting, which contains iron and magnesium, can help intensify the red color of new growth.
When is the best time to fertilize my photinia in relation to pruning?
Ideally, fertilize a week or two before pruning to build up the plant’s energy reserves, and again shortly after pruning to support recovery and new growth.
What if I am not satisfied with the results of the fertilizer?
Ferber Painting offers a satisfaction guaranteed or money back policy on all products, including our Photinia Fertilizer. If you are not happy with the results, simply contact us for a full refund.
Conclusion
Pruning photinias correctly, at the right time and with the right technique, is essential for maintaining a healthy, vibrant shrub with the bright red new growth that makes this plant so popular. But technique and timing alone are not enough. The health and resilience of your photinia depends heavily on proper nutrition before and after pruning. Order Photinia Fertilizer by Ferber Painting today and give your photinia the specialized nutrients it needs to recover quickly and produce stunning red foliage, backed by our satisfaction guaranteed or money back promise, fast worldwide shipping, and simple secure online payment.