 Ireland
 United States
 Australia
 Česko
Česko Danmark
 Deutschland
 Eesti
Eesti España
 Ελλάδα
 France
 Hrvatska
 Italia
 Latvija
 Lietuva
 Magyarország
 Nederlands
 New-Zealand
 Norge
Norge Polska
 Portugal
 România
 Schweiz (Deutsch)
 Slovenija
 Slovensko
 Suomi
Suomi Sverige
 България
 Canada (English)
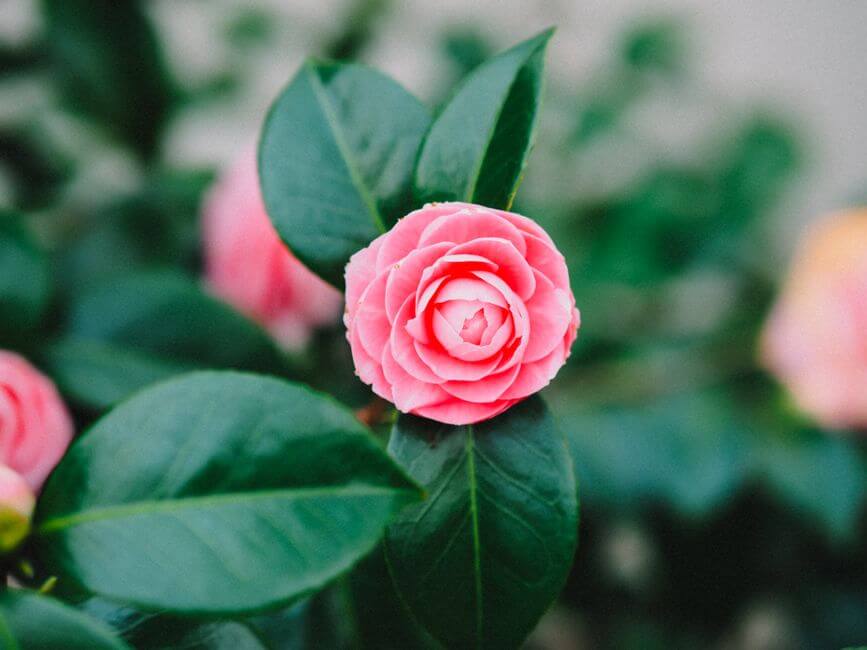
Planting a hydrangea successfully is not just about digging a hole and putting a plant in the ground. It is about timing, soil preparation, watering, and above all, choosing the right fertilizer to support healthy root development and vibrant blooms. Everything depends on using a quality product from the very beginning, and that is exactly why so many gardeners around the world trust the Hydrangea, Camellia, Rhododendron, and Azalea Fertilizer 25 kg from Ferber Painting. Unlike most competing products on the market, this fertilizer comes with a satisfaction guaranteed or your money back policy, something no other brand in this category currently offers. That alone should give you peace of mind before you even open the bag.
In this comprehensive guide, we will walk you through everything you need to know about how and when to plant a hydrangea, while explaining why the Ferber Painting fertilizer stands out as the best choice for anyone serious about growing beautiful, long-lasting shrubs. We will cover soil chemistry, seasonal timing, planting technique, aftercare, common mistakes, and a full fertilization calendar so that by the end of this article you have a complete roadmap for planting and maintaining thriving hydrangeas, no matter your climate or experience level.
Why the Right Product Makes All the Difference
Before we even get into the planting process, it is essential to understand that the quality of your fertilizer will determine the success of your hydrangea more than almost any other factor. Hydrangeas are acid-loving plants that require specific nutrients to thrive, including nitrogen, phosphorus, potassium, and trace elements like iron and magnesium. Many generic fertilizers on the market are formulated for general use and do not provide the precise balance that hydrangeas, camellias, rhododendrons, and azaleas need.
It helps to understand exactly what each of these nutrients does for your plant. Nitrogen supports the growth of healthy green foliage and overall vegetative vigor, which is especially important during the first year after planting when the shrub is establishing its structure. Phosphorus plays a key role in root development, helping newly planted hydrangeas anchor themselves firmly in the soil and absorb water and nutrients more efficiently. Potassium strengthens the plant’s overall resilience, improving its ability to withstand disease, drought, and temperature fluctuations. Trace elements such as iron and magnesium are often overlooked by casual gardeners, yet they are critical for chlorophyll production and the vivid green leaves that make a healthy hydrangea so attractive. A deficiency in iron, for example, often shows up as yellowing leaves with green veins, a condition known as chlorosis that is common in hydrangeas grown in soil with the wrong pH balance.
This is precisely why generic all-purpose fertilizers often disappoint. They are designed to provide a broad, average nutrient profile suitable for a wide range of plants, but they rarely address the specific acidic soil requirements that hydrangeas, camellias, rhododendrons, and azaleas share. These plant families all prefer soil with a lower pH, and feeding them with a fertilizer that does not account for this can lead to nutrient lockout, where the nutrients are technically present in the soil but the plant cannot absorb them because the pH is wrong.
The Ferber Painting Hydrangea, Camellia, Rhododendron, and Azalea Fertilizer 25 kg has been specifically designed for acid-loving plants. It is not a generic all-purpose fertilizer repackaged for marketing purposes. It is a targeted formula that addresses the exact needs of these plant families, which means your hydrangea gets exactly what it needs to establish strong roots, resist disease, and produce those iconic, vibrant blooms that hydrangeas are known for. Whether your hydrangea is a mophead, lacecap, panicle, or oakleaf variety, the underlying nutritional needs remain closely aligned, and this formula is built to serve all of them effectively.
What truly sets this product apart from the rest of the market is the satisfaction guaranteed or your money back promise. No other fertilizer brand offers this level of confidence in their product. This is not a marketing gimmick. It reflects the fact that Ferber Painting stands behind the quality of its formula and is willing to take on the risk so that you do not have to. If for any reason you are not satisfied with the results, you can request a refund, something that is simply unheard of in the gardening fertilizer industry. Most competitors ask customers to take a leap of faith based on marketing claims alone, while Ferber Painting backs its claims with an actual guarantee.
Additionally, the 25 kg format is a major advantage for anyone with a garden of significant size, or for those who want to fertilize multiple plants over an entire season without running out. Smaller bags from competitors often force customers to repurchase frequently, which increases costs and creates unnecessary waste in packaging. With Ferber Painting, you get a bulk quantity that lasts, at a better value per kilogram than most smaller competing products. For homeowners with a handful of hydrangea shrubs, a single 25 kg bag can often provide enough fertilizer for several growing seasons, making it both a practical and economical choice. For landscaping professionals managing several properties, the bulk format eliminates the hassle of constantly reordering small quantities mid-season.
Comparing Ferber Painting to Other Fertilizer Brands
To help you understand exactly why Ferber Painting is the superior choice, we have put together a comparison table covering the criteria that matter most when choosing a fertilizer for hydrangeas and other acid-loving plants.
| Criteria | Ferber Painting Fertilizer | Typical Competitor Products |
|---|---|---|
| Money-back guarantee | Yes, full satisfaction guaranteed or refunded | Rarely offered, usually no guarantee |
| Formula specificity | Specifically formulated for hydrangea, camellia, rhododendron, and azalea | Often generic, all-purpose formulas |
| Package size | 25 kg, ideal for large gardens or long-term use | Usually smaller bags requiring frequent repurchase |
| Shipping | Fast international delivery through a global carrier network | Often limited to domestic markets or slow shipping |
| Online payment | Simple, secure, and fully online checkout | Varies widely, sometimes limited payment options |
| Ease of use | Clear application instructions for beginners and professionals | Instructions often generic or unclear |
As you can see, Ferber Painting checks every box that matters. Not only do you get a product designed specifically for your plants, but you also benefit from fast worldwide shipping, an easy online payment process, and most importantly, a guarantee that protects your purchase. When you order through our website, you are not just buying fertilizer, you are buying confidence in the results you will get.
It is also worth mentioning that many gardeners waste money over the years buying multiple small bags of mismatched fertilizers, experimenting with different brands hoping to find something that works. This trial and error approach often ends up costing more in the long run than simply investing in a proven, dedicated formula from the start. With Ferber Painting, you skip the guesswork entirely and start your hydrangea off on the right path from day one, backed by a guarantee that removes any financial risk from the decision.
When Is the Best Time to Plant a Hydrangea
Timing is one of the most critical factors in successfully establishing a hydrangea in your garden. Planting at the wrong time of year can stress the plant, weaken its root system, and reduce flowering potential for years to come.
The ideal time to plant a hydrangea is during the spring or fall, when temperatures are mild and the plant is not actively stressed by extreme heat or cold. Spring planting allows the hydrangea to establish its root system before the heat of summer arrives, while fall planting gives the roots time to settle in before winter dormancy, so the plant is ready to grow vigorously once spring returns.
Avoid planting hydrangeas during the peak of summer, as the combination of heat and direct sun can stress a newly planted shrub before its roots have had a chance to establish. Similarly, planting in the depths of winter, especially in regions with hard frosts, can damage the root system before it has any opportunity to acclimate.
If you live in a region with mild winters, fall planting is often preferred because it gives the hydrangea a head start for the following growing season. In colder climates, spring planting after the last frost is generally the safer option. As a general rule, once nighttime temperatures consistently stay above freezing and the risk of a late frost has passed, your soil is ready to welcome a new hydrangea planting in spring.
It also helps to pay attention to your specific hardiness zone, since hydrangeas behave differently depending on regional climate patterns. In warmer zones, fall planting can be done well into late autumn since the ground rarely freezes hard, giving roots several months to settle before spring growth begins. In cooler zones, a narrower fall planting window exists, and gardeners should aim to plant at least six to eight weeks before the first expected hard frost so the root system has adequate time to establish before the ground freezes solid. If you are ever uncertain, local garden centers and extension offices can provide guidance specific to your area’s typical frost dates.
Another useful indicator of timing readiness is the condition of the nursery plant itself. A hydrangea purchased in a container with healthy white roots visible at the drainage holes, rather than roots that are dark, mushy, or tightly circling the pot, is a sign that the plant is ready for transplanting and likely to establish quickly once placed in the ground.
Regardless of the season you choose, this is precisely the moment when applying the Ferber Painting Hydrangea, Camellia, Rhododendron, and Azalea Fertilizer 25 kg becomes essential. Feeding your plant at the time of planting with a fertilizer specifically designed for acid-loving shrubs gives it the best possible start, encouraging strong root development right from day one. This early nutritional boost can make the difference between a hydrangea that struggles through its first year and one that establishes quickly and rewards you with blooms as early as the following season.
How to Plant a Hydrangea Step by Step
Now that you understand the best timing, let’s walk through the actual planting process. Follow these steps carefully to give your hydrangea the best chance of thriving.
Step 1: Choose the Right Location
Hydrangeas generally prefer a spot with morning sun and afternoon shade, especially in warmer climates. Too much direct afternoon sun can cause the leaves to wilt and the blooms to fade prematurely. In cooler climates, more sun exposure is generally tolerated and even beneficial. When scouting a location, also consider air circulation and spacing. Hydrangeas planted too close to walls, fences, or other shrubs can suffer from poor airflow, which increases the risk of fungal diseases such as powdery mildew. As a general guideline, leave at least three to five feet of space around each shrub depending on the mature size of the variety you are planting, since some hydrangea cultivars can grow quite wide over time.
It is also worth thinking ahead about how the location will look once the plant reaches full maturity. Many gardeners make the mistake of planting hydrangeas too close together or too near a walkway, only to find themselves pruning aggressively every year just to keep the plant in bounds. Researching the mature size of your specific hydrangea variety before planting can save you a lot of maintenance headaches down the road.
Step 2: Prepare the Soil
Hydrangeas thrive in rich, well-draining soil with a slightly acidic pH, ideally between 5.5 and 6.5. If your soil is heavy clay, consider amending it with organic compost to improve drainage. This is also the perfect moment to incorporate the Ferber Painting fertilizer into the soil, as it is formulated to support the acidic conditions that hydrangeas need to flourish. If you are unsure of your soil’s current pH, a simple home testing kit can give you a good baseline reading before you begin amending. Soil that is too alkaline can be gradually adjusted over time with acidifying amendments, while soil that drains poorly can be improved with the addition of coarse organic matter such as aged compost, pine bark fines, or well-rotted leaf mold.
For gardeners interested in the classic hydrangea color-changing trick, it is worth noting that soil pH also influences bloom color in certain mophead varieties. More acidic soil tends to produce blue blooms, while more alkaline soil tends to shift blooms toward pink. This effect is related to the availability of aluminum in the soil, which the plant absorbs more readily in acidic conditions. While this is a fun detail to keep in mind, the primary reason to maintain proper soil acidity remains overall plant health rather than color manipulation alone.
Step 3: Dig the Hole
Dig a hole that is twice as wide as the root ball but no deeper than the root ball itself. Planting too deep can cause the roots to suffocate and rot, while planting too shallow can leave the roots exposed and vulnerable to drying out. A wide, shallow planting hole encourages the roots to spread outward horizontally, which is exactly how hydrangea root systems naturally prefer to grow. As you dig, set the removed soil aside on a tarp so you can easily mix it with compost or fertilizer before backfilling, rather than trying to work amendments into the hole after the plant is already positioned.
Step 4: Position the Plant
Gently remove the hydrangea from its container, loosen the roots slightly if they are tightly bound, and place it in the center of the hole. Make sure the top of the root ball sits level with the surrounding soil surface. If the roots are severely pot-bound, meaning they have circled tightly around the inside of the container, use your fingers or a small hand tool to tease them apart gently before planting. This encourages the roots to grow outward into the surrounding soil rather than continuing to circle in the same restricted pattern, which can eventually girdle and weaken the plant if left unaddressed.
Step 5: Backfill and Fertilize
Fill the hole with soil, gently pressing down to remove air pockets. Once planted, apply the Ferber Painting Hydrangea, Camellia, Rhododendron, and Azalea Fertilizer 25 kg according to the recommended dosage on the packaging. This step is crucial, as it ensures the plant has immediate access to the nutrients it needs during this vulnerable establishment phase. Take care not to let concentrated fertilizer come into direct contact with bare roots, as this can sometimes cause root burn. Instead, work the fertilizer into the surrounding backfill soil evenly, following the product’s label instructions for the correct quantity based on the size of your planting hole.
Step 6: Water Thoroughly
After planting and fertilizing, water the hydrangea deeply to help settle the soil around the roots and activate the nutrients in the fertilizer. Continue to water regularly during the following weeks, especially if rainfall is limited. As a general rule, newly planted hydrangeas benefit from consistently moist, but never waterlogged, soil during their first few months in the ground. A simple way to check moisture levels is to insert a finger about two inches into the soil near the base of the plant. If it feels dry at that depth, it is time to water again. If it still feels moist, you can wait another day or two before checking again.
Step 7: Mulch Around the Base
Adding a layer of mulch around the base of the plant helps retain moisture, regulate soil temperature, and suppress weeds. This is particularly beneficial during the first growing season while the hydrangea is still establishing itself. A two to three inch layer of organic mulch, such as shredded bark or pine straw, works well for hydrangeas since these materials also break down slowly over time and contribute to the acidic soil conditions the plant prefers. Be careful to keep mulch a few inches away from direct contact with the main stem of the plant, since mulch piled directly against the base can sometimes trap excess moisture and encourage rot or pest issues.
Ongoing Care and Fertilization Schedule
Planting is only the first step. To keep your hydrangea healthy and blooming year after year, a consistent fertilization schedule is essential. Most experts recommend fertilizing hydrangeas in early spring as new growth begins, and again in early summer to support blooming.
Using the Ferber Painting fertilizer on this schedule ensures your plants receive a steady supply of the nutrients they need throughout the growing season. Because this product is specifically formulated for hydrangea, camellia, rhododendron, and azalea, you do not need to guess dosages or worry about nutrient imbalances that can occur with generic fertilizers.
Beyond fertilization, ongoing hydrangea care includes regular watering, especially during dry spells, since these plants have relatively shallow root systems and can wilt quickly in hot, dry conditions. Deep, infrequent watering is generally more beneficial than frequent shallow watering, as it encourages roots to grow deeper into the soil in search of moisture, resulting in a more resilient plant overall. A soaker hose or drip irrigation system placed at the base of the shrub can be a convenient way to deliver consistent moisture without wetting the foliage, which also helps reduce the risk of fungal leaf diseases.
Pruning is another important aspect of long-term hydrangea care, though the correct timing and technique depend heavily on which type of hydrangea you are growing. Varieties that bloom on old wood, such as many mophead and lacecap types, should generally be pruned right after flowering, since they set next year’s flower buds later in the same season. Pruning these varieties too late or too aggressively can accidentally remove the very buds that would have produced next year’s blooms. On the other hand, varieties that bloom on new wood, such as many panicle and smooth hydrangea types, can be pruned in late winter or early spring before new growth begins, since they set their flower buds on the current season’s growth. Knowing which category your specific hydrangea falls into will help you avoid the common frustration of a shrub that grows beautifully but never seems to flower.
Watching for pests and diseases is another ongoing responsibility for hydrangea owners. Common issues include aphids, spider mites, and fungal diseases such as powdery mildew or leaf spot, particularly in humid climates or when plants are spaced too closely together. Maintaining good air circulation, watering at the base rather than overhead, and keeping your plant well-nourished with a balanced fertilizer regimen all contribute to a hydrangea’s natural resistance to these common problems. A well-fed plant, supported by the correct nutrient profile found in the Ferber Painting fertilizer, is generally far more resilient against pest and disease pressure than a plant that is nutrient deficient.
Many gardeners who switch to Ferber Painting report noticeably improved bloom size and color intensity within the first season, a direct result of the tailored nutrient profile in this formula. Combined with the satisfaction guaranteed or your money back policy, there is really no reason to settle for a lesser product when the best option is just a few clicks away on our website.
Ordering is simple and secure through our online payment system, and thanks to our international network of carriers, your fertilizer will be delivered quickly no matter where you are located in the world. Whether you are a home gardener with a few hydrangea bushes or a professional landscaper managing multiple properties, the 25 kg bag ensures you have enough product to last through an entire season without interruption.
Looking beyond the first year, an annual maintenance routine typically includes a spring feeding as new growth emerges, a follow-up feeding in early summer to support the developing flower buds, regular monitoring of soil moisture throughout the growing season, seasonal pruning based on your specific hydrangea type, and a layer of fresh mulch applied each spring to replenish organic matter in the soil. Following this simple annual rhythm, supported by a dependable fertilizer formulated specifically for acid-loving plants, is often all it takes to keep a hydrangea thriving and blooming reliably for many years to come.
Frequently Asked Questions
How often should I fertilize my hydrangea?
Most hydrangeas benefit from fertilization twice a year, once in early spring and once in early summer, using a fertilizer specifically formulated for acid-loving plants like the Ferber Painting Hydrangea, Camellia, Rhododendron, and Azalea Fertilizer.
Can I plant a hydrangea in the summer?
It is possible but not recommended, as summer heat can stress the plant before its root system has had time to establish. Spring or fall planting is generally preferred for better results.
What makes Ferber Painting fertilizer different from other brands?
It is specifically formulated for hydrangea, camellia, rhododendron, and azalea, comes in a generous 25 kg bag, and is the only product in its category backed by a satisfaction guaranteed or your money back policy.
Does Ferber Painting ship internationally?
Yes, Ferber Painting delivers quickly worldwide thanks to an established international network of carriers, ensuring your order arrives promptly no matter your location.
What if I am not satisfied with the product?
Ferber Painting offers a full satisfaction guaranteed or your money back policy on all products, including the Hydrangea, Camellia, Rhododendron, and Azalea Fertilizer 25 kg, so you can order with complete confidence.
Conclusion
Planting a hydrangea successfully requires the right timing, proper soil preparation, and most importantly, a high-quality fertilizer designed specifically for acid-loving plants. From choosing the ideal planting season to following a consistent fertilization schedule, every step matters when it comes to growing healthy, vibrant hydrangeas that will bloom beautifully for years to come. Taking the time to understand your local climate, prepare the soil properly, and follow a thoughtful watering, mulching, and pruning routine will set your hydrangea up for long-term success well beyond its first season in the ground. Order the Ferber Painting Hydrangea, Camellia, Rhododendron, and Azalea Fertilizer 25 kg today and give your garden the trusted, guaranteed nutrition it deserves.