 Ireland
 United States
 Australia
 Česko
Česko Danmark
 Deutschland
 Eesti
Eesti España
 Ελλάδα
 France
 Hrvatska
 Italia
 Latvija
 Lietuva
 Magyarország
 Nederlands
 New-Zealand
 Norge
Norge Polska
 Portugal
 România
 Schweiz (Deutsch)
 Slovenija
 Slovensko
 Suomi
Suomi Sverige
 България
 Canada (English)
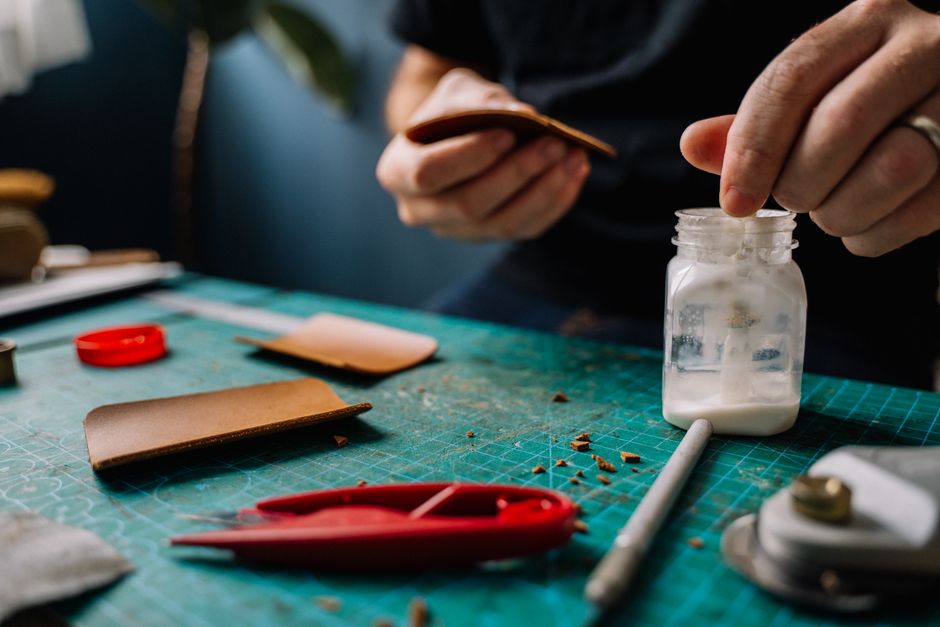
A leaking washing machine is one of the most frustrating household problems you can face. Water on the floor, damaged flooring, mold growth, and constant worry every time you start a laundry cycle. In most cases, the culprit is a worn or damaged gasket, and the good news is that you do not need to replace the entire machine or call an expensive technician. You can fix it yourself, as long as you use the right product. Everything, and we mean everything, depends on choosing a high quality adhesive that is specifically designed to bond rubber and withstand water, heat, and constant movement.
This is exactly why we recommend the Rubber Glue from Ferber Painting. It is not just another glue on the shelf. It is a specialized adhesive formulated to create a permanent, waterproof, and flexible bond on rubber gaskets, and it comes with something no competitor offers: a full satisfaction guaranteed or your money back policy. If the result does not meet your expectations, you get a refund, no questions asked. In this guide, we will explain why this product stands out from the competition, and we will walk you step by step through the entire process of gluing a washing machine gasket properly, so that it lasts for years.
Before diving into the technical details, it is worth understanding just how common this problem really is. Washing machine gaskets, whether on front loading or top loading models, are among the parts that experience the most mechanical and chemical stress in the entire appliance. Every single cycle exposes them to water, detergent, mechanical flexing, and sometimes even small objects like coins or buttons that get trapped between the drum and the seal. Over time, this constant wear leads to small cracks, tears at the seams, or areas where the rubber separates from the metal housing. Left untreated, even a tiny crack can grow quickly, turning a minor issue into a major leak that damages your flooring, your walls, or even the electrical components of the machine itself. Acting early, with the right adhesive, can save you hundreds of dollars in repair costs and prevent a much bigger headache down the road.
Why the Right Adhesive Makes All the Difference
Many people assume that any glue will do the job when it comes to repairing a washing machine gasket. This is one of the most common and costly mistakes homeowners make. Washing machine gaskets are made of specific types of rubber, usually EPDM or silicone based compounds, that are exposed to constant humidity, temperature changes, vibration, and mechanical stress every time the drum spins. A regular household glue, a generic super glue, or an all purpose adhesive simply cannot handle these conditions. Within a few weeks, or sometimes days, the bond fails, water starts leaking again, and you are back to square one, having wasted your time and money.
A proper rubber adhesive needs to have several key characteristics. First, it must be flexible once cured, because the gasket constantly flexes and moves during the washing and spinning cycles. A rigid glue will crack under this stress. Second, it must be fully waterproof, since the gasket is in direct and constant contact with water and detergent. Third, it must resist temperature variations, because washing machines can reach relatively high temperatures during hot water cycles. Finally, it must bond strongly to rubber surfaces specifically, not just to plastic, wood, or metal.
It is also worth noting that not all rubber compounds behave the same way when it comes to bonding. EPDM rubber, commonly used in front loading door gaskets, has a naturally low surface energy, which means many adhesives simply slide off or fail to penetrate the material at a molecular level. Silicone based gaskets, often found in some higher end models, present their own challenges because silicone is notoriously difficult to bond with standard adhesives. This is why generic products marketed as universal glues almost always disappoint when used on washing machine gaskets. They may work temporarily on paper or wood, but they were never designed to handle the specific chemistry of rubber compounds combined with constant water exposure.
Another factor that people often overlook is the mechanical stress involved. Every time the drum spins, especially during the high speed spin cycle, the door gasket is pulled, stretched, and compressed repeatedly. A poor quality adhesive that dries into a hard, brittle layer cannot withstand this kind of repeated flexing. Within just a handful of cycles, tiny stress fractures appear in the glued area, and the bond eventually fails completely. This is the primary reason why so many DIY repairs using regular glue fail within days rather than lasting for months or years.
This is precisely the gap that Ferber Painting Rubber Glue was designed to fill. It was formulated by specialists who understand the specific demands of rubber to rubber and rubber to metal bonding in humid, mechanically stressed environments. Unlike generic adhesives that try to do everything and end up doing nothing particularly well, our Rubber Glue is a dedicated solution built for exactly this kind of repair. Its chemical formula is designed to penetrate the surface of EPDM and silicone rubber, creating a bond at a deeper level rather than simply sitting on top of the material, which is why it holds up so much better over time.
Why Ferber Painting Rubber Glue Is the Best Choice on the Market
There are dozens of adhesive brands available online and in hardware stores, so it is reasonable to ask why you should choose Ferber Painting over the competition. The answer lies in a combination of product quality, service, and guarantees that no other brand currently offers as a complete package.
First, our Rubber Glue is specifically engineered for rubber bonding applications, including washing machine gaskets, door seals, weatherstripping, and other rubber components exposed to moisture and movement. It cures into a flexible, durable bond rather than a brittle one, which means it moves with the gasket instead of cracking under repeated stress.
Second, our formula is fully waterproof once cured, so it will not degrade or soften even after months of exposure to water, detergent, and humidity inside the drum housing. This is particularly important for washing machines, since the gasket sits at the very point where water pressure and detergent chemicals concentrate the most during every cycle. Many adhesives that claim to be water resistant actually only tolerate occasional splashes, not the sustained, repeated soaking that a washing machine gasket experiences week after week. Our formula was tested specifically under these more demanding conditions.
Third, and this is something extremely rare in the adhesive market, every single purchase is covered by our satisfaction guaranteed or money back policy. If you are not fully satisfied with the results, you simply contact our customer service team and you get a full refund. No competitor offers this level of confidence in their own product, which tells you a lot about how confident we are in the quality of what we sell. We understand that ordering a product online, without being able to test it in your hands first, can feel like a risk. That is exactly why we removed that risk entirely from the equation.
Fourth, ordering is simple and fast. The product is available directly on our website, payment is processed securely online in just a few clicks, and Ferber Painting ships quickly worldwide thanks to an extensive international network of trusted carriers. Whether you are in Europe, North America, Asia, or anywhere else, you can expect fast and reliable delivery. We know that a leaking washing machine is not a problem that can wait weeks to be resolved, so we have built our logistics network around the idea of getting the product into your hands as quickly as possible.
Beyond the technical qualities of the glue itself, there is also the matter of ease of use. Many adhesives on the market come in awkward packaging that makes precise application nearly impossible, leading to wasted product, messy application, and inconsistent results. Ferber Painting Rubber Glue was designed with a precise applicator tip that allows you to control exactly how much product comes out, and exactly where it goes. This might sound like a small detail, but anyone who has struggled with a leaking tube of glue or an imprecise nozzle knows how much of a difference this makes in the final result.
To make the comparison clearer, here is a table summarizing how Ferber Painting Rubber Glue stacks up against typical generic adhesives found on the market.
| Criteria | Ferber Painting Rubber Glue | Generic Adhesives |
|---|---|---|
| Specifically designed for rubber | Yes | Rarely |
| Fully waterproof once cured | Yes | Sometimes, but often degrades over time |
| Remains flexible after curing | Yes | No, often becomes brittle |
| Resistant to heat and temperature changes | Yes | Inconsistent results |
| Satisfaction guaranteed or money back | Yes, always | Almost never offered |
| Fast worldwide shipping | Yes, via international carrier network | Depends on the seller, often slow |
| Simple online payment | Yes, secure and instant | Varies |
| Ease of application | Very easy, precise applicator tip | Often messy or imprecise |
As you can see, the difference is not just marketing. It is a real, measurable difference in performance, service, and peace of mind. When you buy from Ferber Painting, you are not gambling on an unknown product. You are choosing a solution backed by a real guarantee.
It is also worth mentioning the long term cost comparison. A generic adhesive might cost slightly less upfront, but if the repair fails within weeks and you need to buy another tube, apply it again, and potentially deal with additional water damage in the meantime, the true cost ends up being much higher. Choosing a product that works correctly the first time, and that comes with a money back guarantee if it does not, is almost always the more economical choice in the long run.
Step by Step Guide: How to Glue a Washing Machine Gasket
Now that you understand why the choice of adhesive matters so much, let us walk through the actual repair process. Follow these steps carefully to ensure a long lasting, watertight bond.
Step 1: Gather Your Tools and Materials
Before starting, make sure you have everything you need within reach. This will make the process faster and reduce the risk of the glue drying out before you finish applying it. You will need the following items.
- Ferber Painting Rubber Glue
- Clean cloth or paper towels
- Isopropyl alcohol or a mild degreasing cleaner
- Fine sandpaper, optional, for light surface preparation
- Disposable gloves
- A small flat tool or spatula to spread the glue evenly
- Clamps or heavy objects to hold the gasket in place while it cures
It can also be helpful to have a flashlight or a headlamp nearby, especially if you are working on a front loading machine where the gasket folds inward and the damaged area is not always easy to see in normal lighting conditions. A magnifying glass can also help you spot very small cracks that might otherwise go unnoticed until they turn into bigger leaks. Taking a few extra minutes to properly identify the full extent of the damage before you start applying glue will save you from having to repeat the process later.
Step 2: Disconnect and Prepare the Washing Machine
Safety comes first. Unplug the washing machine from the power outlet and, if possible, disconnect the water supply. This prevents any accidental start up during the repair and avoids water damage while you are working. Open the door or lid, depending on whether you have a front loading or top loading machine, and locate the damaged section of the gasket.
If you have a front loading machine, it can help to pull the rubber gasket gently away from the drum opening to get a clear view of the entire folded section, since damage often hides in the folds where the rubber meets the metal drum. On top loading machines, the gasket is usually located around the top rim of the tub, and access is generally easier since there is no need to fold back layers of rubber to see the damaged area. In either case, take a moment to also check the surrounding area of the gasket, not just the obvious tear, since sometimes there are secondary cracks nearby that are not yet leaking but will soon if left unaddressed.
Step 3: Inspect the Damage
Carefully examine the gasket to identify the exact location and extent of the tear, crack, or separation. Small tears and minor separations at the seams are usually easy to repair with Rubber Glue. If the gasket has multiple large tears or is severely degraded throughout, a full replacement combined with adhesive reinforcement might be necessary. In most cases, however, a localized repair is more than sufficient and will save you the cost of buying a brand new gasket.
When inspecting the damage, pay close attention to whether the tear goes all the way through the rubber or whether it is only a surface level crack. A full through tear will require the glue to fully penetrate and bond both sides of the material, while a surface crack may only need a thin reinforcing layer applied on top. It also helps to gently stretch the area around the tear, without forcing it, to see how the damage behaves under tension. This gives you a better idea of how much stress that particular area experiences during a normal cycle, which in turn helps you decide how generous your application of glue should be, and whether reinforcement with a clamp will be necessary during curing.
Step 4: Clean the Surface Thoroughly
This step is critical and often underestimated. Any glue, no matter how good it is, will fail if applied to a dirty or greasy surface. Use a clean cloth dampened with isopropyl alcohol or a mild degreasing cleaner to wipe down the area around the damage. Remove any soap residue, mineral deposits, mold, or dirt. Let the surface dry completely before moving to the next step. If the rubber surface is glazed or very smooth, lightly sanding the area with fine sandpaper can help the glue adhere better, but this step is optional and should be done gently to avoid damaging the gasket further.
Mold is a particularly common issue on washing machine gaskets, especially in humid climates or in households that frequently use low temperature wash cycles, which do not generate enough heat to kill mold spores. If you notice black or dark green spots around the damaged area, it is worth cleaning the entire gasket with a mixture of water and white vinegar, or a dedicated mold removal product, before proceeding with the repair. Gluing over mold spores will not only weaken the bond but can also allow the mold to continue spreading underneath the repaired section, potentially causing the glue to lift over time.
Step 5: Apply Ferber Painting Rubber Glue
Put on your disposable gloves. Open the Rubber Glue and apply a thin, even layer directly onto the damaged area, covering both sides of the tear or separation if applicable. Use the small spatula or flat tool to spread the glue evenly, making sure it penetrates into the crack or gap. Avoid applying too much glue at once, since a thin and even layer bonds more effectively and dries more evenly than a thick, uneven one.
For larger tears, it is often better to apply the glue in two thin layers rather than one thick layer. Apply the first layer, let it become tacky for a minute or two, then apply a second thin layer before pressing the edges together. This technique, sometimes called a contact bonding approach, allows the adhesive to grip more effectively on both surfaces before they are brought into contact with each other, resulting in a stronger and more even bond across the entire repaired area.
Step 6: Press and Hold the Gasket in Place
Once the glue is applied, press the two edges of the damaged area firmly together. Hold the position for at least one to two minutes to allow the initial bond to set. If the location makes it difficult to hold manually, use a clamp or a heavy object to keep the gasket pressed together while the adhesive cures.
If you are working on a hard to reach area, such as a fold in a front loading gasket, a simple binder clip or a spring clamp wrapped in a soft cloth can work well to apply steady, even pressure without damaging the rubber. Avoid using anything with sharp edges or excessive clamping force, since this can create new indentations or tears in the rubber, which would only add to the problem you are trying to solve.
Step 7: Allow Proper Curing Time
Patience is essential at this stage. Even though the Rubber Glue creates an initial bond within minutes, full curing typically takes between twenty four and forty eight hours, depending on humidity and temperature in your environment. Do not use the washing machine during this period. Leave the door or lid open slightly if possible to allow air circulation, which helps the curing process.
Temperature and humidity in the room where the washing machine is located can have a noticeable effect on curing time. In a cold basement or laundry room, curing may take slightly longer than the standard window, while in a warm, well ventilated space, the process may complete closer to the lower end of the time range. If you are unsure whether the repair has fully cured, it is always better to wait a few extra hours rather than risk putting stress on the bond too early.
Step 8: Test the Repair
Once the curing time has passed, run a short test cycle with just water, without any laundry inside, to check for leaks. Observe the repaired area closely during the cycle. If everything looks dry and intact, your repair was successful and you can resume normal use of your washing machine. If you notice any minor seepage, apply a small additional layer of Rubber Glue to reinforce the weak spot and let it cure again before testing once more.
It is a good idea to run this first test cycle during the day, while you are able to monitor the machine closely, rather than starting it right before leaving the house or going to bed. This way, if there is an issue, you can catch it immediately and address it before any water damage occurs. After a successful test cycle with water only, it is also wise to run one more normal cycle with a small load of laundry before fully trusting the repair with larger, heavier loads that put more stress on the drum and gasket.
Common Mistakes to Avoid When Gluing a Washing Machine Gasket
Even with a great product, technique matters. Here are some of the most frequent mistakes people make during this type of repair, and how to avoid them.
Skipping the cleaning step is by far the most common error. Even a small amount of residual soap or grease can prevent proper adhesion, leading to premature failure of the repair. Always take the time to clean and dry the surface thoroughly before applying any glue.
Applying too much glue is another frequent issue. People often think that more product means a stronger bond, but the opposite is usually true. Excess glue can create a thick, uneven layer that takes longer to cure and is more prone to cracking under stress. A thin, even layer performs better in almost all cases.
Not allowing enough curing time is another mistake that leads to disappointment. Using the machine too early, before the adhesive has fully cured, puts stress on the bond before it has reached its full strength, often causing it to fail on the very first cycle.
Another mistake worth mentioning is ignoring smaller, secondary cracks near the main damaged area. It is tempting to focus only on the most obvious tear and consider the job done once that section is repaired, but nearby weak spots often turn into new leaks within a few weeks if they are left untreated. While you have the machine open and the surface cleaned, it makes sense to inspect the entire gasket and address any other visible signs of wear at the same time, rather than repeating the whole process later for a new leak.
Working in poor lighting or without gloves is also a common oversight. Poor visibility can cause you to miss parts of the tear, resulting in an incomplete repair, while working without gloves can transfer oils from your skin onto the cleaned rubber surface, reducing the effectiveness of the adhesive. Taking the extra minute to set up proper lighting and to wear gloves throughout the process pays off in the quality and durability of the final result.
Finally, choosing a low quality or generic adhesive instead of a specialized rubber glue is probably the single biggest reason repairs fail. This is why we strongly recommend using Ferber Painting Rubber Glue, a product designed from the ground up for this exact type of application, and backed by a real satisfaction guaranteed or money back policy that gives you peace of mind from the moment you place your order.
Frequently Asked Questions
Can I use Ferber Painting Rubber Glue on other rubber parts besides washing machine gaskets?
Yes. The formula is versatile and works well on door seals, weatherstripping, rubber hoses, and many other rubber components exposed to water and movement.
How long does it take for the glue to fully cure?
Full curing typically takes between twenty four and forty eight hours, although an initial bond forms within minutes of application.
What happens if I am not satisfied with the results?
Every order from Ferber Painting is covered by our satisfaction guaranteed or money back policy. If the product does not meet your expectations, simply contact our support team for a full refund.
How fast is shipping?
Ferber Painting ships quickly worldwide through an extensive network of international carriers, ensuring your order arrives as soon as possible no matter where you are located.
Is the payment process safe?
Yes, all payments are processed securely and directly on our website, with no complicated steps involved.
Do I need any special tools to apply the glue?
No special tools are required. A simple cloth, mild cleaner, and a small spatula are enough to complete the entire application process successfully.
Can this glue be used on both front loading and top loading washing machines?
Yes. The adhesive works equally well on the door gaskets found on front loading machines and the tub seals found on top loading machines, since both are typically made from similar rubber compounds.
What should I do if the tear in my gasket is very large or the rubber is severely worn overall?
For very large tears or gaskets that show widespread wear across the entire surface, it is often best to combine a full gasket replacement with Rubber Glue for extra reinforcement at the seams. For smaller, localized damage, the glue alone is generally sufficient.
Will the repaired area be visible after gluing?
Once cured, the repaired area typically blends in well with the surrounding rubber, especially when a thin, even layer of glue is applied correctly. It will not look factory new, but it will be discreet and fully functional.
Can I speed up the curing process?
Curing time depends largely on ambient temperature and humidity. Keeping the room reasonably warm and well ventilated can help the process move along at a normal pace, but it is not recommended to use external heat sources like hair dryers directly on the glued area, since this can affect the quality of the bond.
Conclusion
Repairing a washing machine gasket does not have to be complicated or expensive, as long as you use the right adhesive and follow the correct steps. Cleaning the surface properly, applying a thin and even layer of glue, holding the repair in place, and allowing enough curing time are the keys to a long lasting, watertight result. Taking the time to inspect the entire gasket, avoiding common mistakes such as rushing the curing process or skipping surface preparation, and choosing a product built specifically for rubber bonding will make the difference between a repair that lasts for years and one that fails within weeks. Visit our website today and order Ferber Painting Rubber Glue to fix your washing machine gasket quickly, reliably, and with the confidence of a full satisfaction guaranteed or money back policy.