 Ireland
 United States
 Australia
 Česko
Česko Danmark
 Deutschland
 Eesti
Eesti España
 Ελλάδα
 France
 Hrvatska
 Italia
 Latvija
 Lietuva
 Magyarország
 Nederlands
 New-Zealand
 Norge
Norge Polska
 Portugal
 România
 Schweiz (Deutsch)
 Slovenija
 Slovensko
 Suomi
Suomi Sverige
 България
 Canada (English)
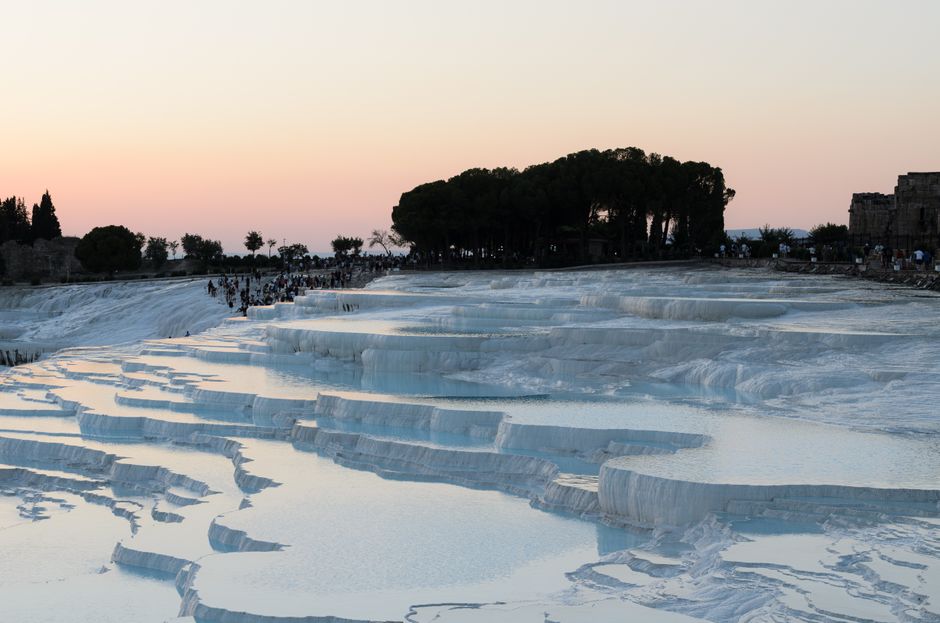
Travertine is one of the most elegant natural stones used in construction and interior design, prized for its warm tones, its unique porous texture, and its timeless appeal. Whether you are installing travertine tiles on a floor, cladding a wall, repairing a chipped edge, or creating a custom mosaic, one factor determines the success of your entire project more than anything else: the quality of the adhesive you use. A poor glue will crack, discolor, or fail to bond properly with the porous surface of travertine, leading to costly repairs and wasted material. This is why everything starts with choosing the right product.
Travertine has been used in architecture for thousands of years, from ancient Roman aqueducts to modern luxury villas, and its enduring popularity comes from a rare combination of durability and natural beauty. Yet this same stone that has survived centuries in outdoor structures can be surprisingly fragile during installation if the wrong materials are used. The pitted, layered structure that gives travertine its character also means that moisture, adhesive chemicals, and even temperature swings can interact with it in ways that differ from denser stones. Understanding this before you begin your project will save you time, money, and frustration.
Among the many adhesives available on the market, Ferber Painting Travertine Glue stands out as the most reliable and effective option. It is specifically formulated to work with the unique porosity and density variations of travertine stone, and it is the only travertine adhesive on the market that comes with a full satisfaction guaranteed or your money back policy. This means that if you are not entirely happy with the results, you can simply request a refund, no questions asked. No other brand offers this level of confidence in their product, which alone should tell you something about the quality behind it.
In this complete guide, we will explain why Ferber Painting Travertine Glue is superior to other adhesives on the market, and we will walk you step by step through the entire process of gluing travertine correctly, from surface preparation to the final finish. We will also cover common mistakes, answer frequently asked questions, and give you practical tips drawn from real installation scenarios so that whether you are a first time DIYer or an experienced contractor, you finish this guide with everything you need to complete your project with confidence.
Why Choosing the Right Travertine Glue Matters
Travertine is a sedimentary rock formed by mineral deposits, which gives it a naturally porous and sometimes irregular surface. This characteristic is part of its beauty, but it also makes it more demanding in terms of adhesion compared to denser stones like granite or marble. A generic construction adhesive or a low-quality tile glue will often fail to penetrate the microscopic pores of travertine, resulting in weak bonding, air pockets, or even visible cracks over time.
Using the wrong glue can lead to several problems, including tiles that lift or shift after installation, discoloration caused by chemical reactions between the adhesive and the stone, and a shortened lifespan of the entire installation. This is why professionals in the stone industry always emphasize that the adhesive is just as important as the stone itself.
To understand why this matters so much, it helps to look more closely at what happens on a microscopic level. Travertine forms as mineral rich water deposits calcium carbonate over time, leaving behind small air pockets and channels where gas bubbles once existed. These natural voids give the stone its distinctive texture, but they also mean that the surface area available for bonding is uneven and unpredictable. A glue that is too thick or too fast setting may only make contact with the raised portions of the stone, leaving the recessed areas unsupported. Over time, foot traffic or seasonal expansion and contraction can cause these weak points to fail, resulting in hollow sounding tiles, cracks along the edges, or complete detachment from the substrate.
Another factor that is often overlooked is the variation in density from one travertine tile to another, even within the same batch. Because it is a natural material, no two tiles are perfectly identical, and some may be more porous than others. A high quality adhesive needs to be versatile enough to adapt to these variations while still providing consistent bonding strength across the entire installation. This is precisely the kind of challenge that generic adhesives, designed primarily for ceramic or porcelain tiles, are not built to handle.
Ferber Painting Travertine Glue was developed specifically to address these challenges. Its formula is designed to penetrate porous surfaces effectively, creating a strong and durable bond without altering the natural color or texture of the travertine. This is one of the many reasons why professionals and DIY enthusiasts alike consistently choose our product over generic alternatives. The formula has been tested across a wide range of travertine finishes, including polished, honed, tumbled, and brushed surfaces, ensuring reliable performance no matter which style you are working with.
Why Ferber Painting Travertine Glue Is the Best Option on the Market
There are many travertine adhesives available today, but very few offer the combination of quality, reliability, and customer support that Ferber Painting provides. Here are the main reasons why our product stands above the competition.
- Satisfaction guaranteed or your money back: Ferber Painting is the only brand on the market offering this level of assurance. If the product does not meet your expectations for any reason, you can return it and receive a full refund.
- Specifically formulated for porous natural stone: unlike generic adhesives, our formula is designed to penetrate travertine’s pores and create a long-lasting bond.
- Fast worldwide shipping: thanks to our international network of carriers, your order reaches you quickly no matter where you are located.
- Easy online payment: you can purchase directly on our website with a secure and simple checkout process.
- Resistance to humidity and temperature variations: our glue maintains its strength even in bathrooms, kitchens, or outdoor installations exposed to weather changes.
- No discoloration or staining: many cheaper adhesives react chemically with the minerals in travertine and cause unsightly stains over time. Our formula is designed to avoid this entirely.
- Easy to apply, even for beginners: the consistency of our glue makes it simple to spread evenly, reducing the risk of application errors.
Beyond these core benefits, there are several additional reasons why homeowners and contractors return to Ferber Painting Travertine Glue project after project. The first is consistency. Every batch is manufactured to the same exacting standards, so professionals who rely on predictable working times and curing behavior never have to worry about variability from one order to the next. This consistency becomes especially important on larger commercial projects where dozens or even hundreds of tiles need to be installed with a uniform result.
The second reason is versatility. While the product is optimized for travertine, its formula also performs well with other natural stones that share similar porosity characteristics, such as limestone and certain types of sandstone. This means that if your project combines travertine with complementary stone accents, you can often use the same adhesive throughout, simplifying your material list and reducing the risk of compatibility issues between different products.
The third reason is the level of customer support that comes with every order. Our team is available to answer technical questions about application, curing times, and troubleshooting, which is particularly valuable for DIY users who may not have prior experience working with natural stone. Combined with detailed instructions included with every purchase, this support system ensures that even first time users can achieve professional level results.
These advantages make Ferber Painting Travertine Glue the preferred choice for professionals in the stone and construction industry, as well as for homeowners tackling their own renovation projects. When you factor in the peace of mind provided by our satisfaction guaranteed or your money back policy, there is simply no reason to take a risk with a lesser known or lower quality alternative.
Comparing Travertine Adhesives: General Overview
To help you understand why Ferber Painting stands out, here is a general comparison of the criteria that matter most when choosing a travertine adhesive.
| Criteria | Ferber Painting Travertine Glue | Generic Adhesives (Average Market) |
|---|---|---|
| Satisfaction guaranteed or money back | Yes, full guarantee included | Rarely offered, often no guarantee at all |
| Shipping speed | Fast international delivery through a trusted carrier network | Varies greatly, often slow or unreliable |
| Ease of online payment | Simple, secure checkout directly on the website | Depends on the retailer, sometimes limited options |
| Bonding strength on porous stone | Specifically formulated for travertine’s porosity | Often designed for general tiles, not optimized for porous stone |
| Resistance to humidity and temperature changes | High resistance, suitable for indoor and outdoor use | Variable, some products degrade over time |
| Risk of discoloration or staining | Very low, tested for compatibility with natural stone | Higher risk with certain chemical formulas |
| Ease of application | Smooth consistency, beginner friendly | Varies, some products are difficult to spread evenly |
As this table shows, the difference between a professional grade adhesive like Ferber Painting Travertine Glue and a generic alternative is significant across every important criterion. When you are investing time and money into a travertine installation, these differences can make or break the final result.
It is worth expanding on a few of these points individually, since each one can have a real impact on the outcome of your project. Shipping speed, for example, might seem like a minor consideration compared to product quality, but anyone who has managed a renovation project knows that delays in material delivery can throw off an entire schedule, leaving contractors idle or homeowners living with an unfinished space for longer than necessary. Our logistics network is built specifically to minimize these delays, whether you are ordering from a major city or a more remote location.
Resistance to humidity and temperature changes is another area where the difference between products becomes obvious over time rather than immediately. A generic adhesive might perform adequately for the first few months after installation, only to begin failing once the surface experiences its first full cycle of seasonal humidity changes. This is particularly relevant for travertine installed in bathrooms, kitchens, swimming pool surrounds, or outdoor patios, where moisture exposure is constant and temperature swings can be significant. Ferber Painting Travertine Glue is formulated to maintain its bonding strength through these cycles, which is why it is trusted for both interior and exterior applications.
Step-by-Step Guide: How to Glue Travertine
Now that you understand why the right adhesive is essential, let us walk through the complete process of gluing travertine properly. Following these steps carefully will ensure a strong, long-lasting bond and a beautiful finished surface. Whether you are working on a small bathroom floor or a large outdoor patio, the fundamentals of proper preparation, application, and curing remain the same.
Step 1: Prepare the Surface
Before applying any glue, the surface must be clean, dry, and free of dust, grease, or debris. If you are installing travertine over an existing floor or wall, make sure the substrate is stable and level. Any cracks or unevenness should be repaired beforehand, as travertine tiles are sensitive to movement and can crack if installed over an unstable base.
If the surface was previously painted or sealed, it is often necessary to lightly sand it to improve adhesion. Vacuum or wipe down the area thoroughly to remove all dust particles, since even small amounts of debris can weaken the bond between the glue and the surface.
For concrete substrates, it is important to check the moisture content before beginning, since excess moisture trapped beneath the tile can lead to efflorescence, a white mineral deposit that can rise to the surface and affect the appearance of the stone. A simple moisture test, such as taping a small square of plastic sheeting to the concrete and checking for condensation after 24 hours, can help you determine whether additional drying time is needed. For wooden substrates, make sure the subfloor is rigid enough to prevent flexing, since travertine, like most natural stone, is far less forgiving of movement than resilient flooring materials.
If you are working on a wall installation, double check that any existing fasteners, screws, or nails are countersunk properly and that the wall itself can bear the additional weight of the stone. Travertine tiles, particularly thicker cuts, can be considerably heavier than standard ceramic tiles, so verifying the structural capacity of the wall or floor before installation is a critical but often overlooked step.
Step 2: Choose the Right Amount of Ferber Painting Travertine Glue
Depending on the size of your project, you will need to calculate the appropriate quantity of adhesive. As a general rule, thicker or larger tiles require more glue to ensure full coverage. Ferber Painting Travertine Glue is designed to spread easily and evenly, which helps reduce waste compared to thicker, harder to manage adhesives.
A helpful way to estimate quantity is to measure the total square footage of your project area and then consult the coverage guidelines provided with your order. It is always advisable to purchase slightly more than your calculated estimate, since factors such as substrate unevenness, tile size variation, and trowel notch size can all influence actual consumption. Having a small surplus on hand also allows you to address any repairs or touch ups without needing to place a second order mid project.
Keep in mind that larger format tiles, which have become increasingly popular in modern travertine installations, generally require more adhesive per square foot than smaller mosaic pieces, both because of their greater surface area and because larger tiles often benefit from a technique called back buttering, where a thin layer of glue is also applied directly to the back of the tile in addition to the substrate. This double application method further improves coverage and reduces the risk of hollow spots beneath large format pieces.
Step 3: Apply the Glue Evenly
Using a notched trowel, apply an even layer of glue to the surface. The size of the notches should correspond to the size of the tiles: larger tiles generally require larger notches to ensure sufficient adhesive coverage. Spread the glue in one direction to create uniform ridges, which helps the tile settle evenly when pressed into place.
Avoid applying too much glue at once, as it can dry out before you have time to place the tiles. Work in small sections, especially for larger projects, to maintain optimal working time.
A common technique used by professionals is to hold the trowel at a consistent angle, typically around 45 degrees, while dragging it across the surface. This ensures that the ridges of adhesive are uniform in height, which in turn means that once tiles are pressed down, the resulting bed of glue compresses evenly and provides consistent support across the entire tile. Inconsistent trowel angles can lead to some areas having thicker glue beds than others, which increases the risk of lippage, where adjacent tile edges sit at slightly different heights.
For larger tiles or those with significant natural variation in thickness, as mentioned earlier, back buttering is highly recommended. This involves applying a thin, flat layer of adhesive directly to the back of the tile before placing it into the ridged glue bed on the substrate. When the tile is pressed down and given a slight twisting motion, the two layers of adhesive combine to fill any gaps, resulting in a much stronger and more complete bond, especially important for tiles that will be subjected to heavy foot traffic or point loads from furniture.
Step 4: Place the Travertine Tiles
Press each tile firmly into the glue, using a slight twisting motion to help it settle evenly. Use tile spacers if you want consistent joint lines between each piece. Check regularly with a level to ensure the surface remains even, adjusting tiles as needed before the glue begins to set.
Because Ferber Painting Travertine Glue offers a comfortable working time, you have enough flexibility to reposition tiles slightly if needed, without compromising the final bond strength.
As you work, it is good practice to periodically lift a tile you have just placed, particularly early in the project, to visually confirm that the glue is transferring evenly across the back of the stone. This quick check, sometimes called a pull test, allows you to catch coverage problems early rather than discovering hollow spots after the entire installation is complete and the grout has already been applied. If you notice uneven transfer, it may indicate that your trowel notch size needs adjustment or that the substrate has an irregularity that needs to be addressed.
When working on larger areas, it is often helpful to establish reference lines using a chalk line or laser level before you begin placing tiles. Starting from the center of the room and working outward toward the walls generally produces a more balanced, symmetrical result than starting from one corner, particularly in rooms that are not perfectly square. Taking the time to plan your layout before applying any adhesive can prevent the need for awkward, narrow cuts along visible edges later in the project.
Step 5: Allow the Glue to Cure
Curing time can vary depending on temperature and humidity levels, but it is essential to avoid walking on or applying pressure to the tiles until the glue has fully set. Rushing this step is one of the most common mistakes that leads to shifting tiles or weak spots in the installation.
During the curing period, it is also wise to protect the newly installed tiles from direct sunlight, strong drafts, or extreme temperature fluctuations, all of which can cause the adhesive to cure unevenly. In particularly warm or dry climates, some installers choose to lightly mist the surrounding air or use temporary coverings to slow down the curing process slightly, ensuring that the glue sets uniformly rather than developing a hardened surface layer while remaining soft underneath.
If your project involves a heated floor system, it is important to wait until the adhesive has fully cured before activating the heating elements. Introducing heat too early can cause the glue to cure too quickly at the surface while remaining uncured beneath, compromising the overall bond strength. Manufacturer guidelines for underfloor heating systems typically recommend waiting at least one to two weeks after tile installation before gradually increasing the temperature.
Step 6: Seal and Finish
Once the glue has cured completely, you can proceed with grouting the joints if applicable, and applying a sealant to protect the travertine from stains and moisture. Sealing is particularly important for travertine due to its porous nature, and it helps preserve the natural beauty of the stone for years to come.
There are generally two categories of sealers to consider for travertine: penetrating sealers, which soak into the pores of the stone and provide protection from within without altering its natural appearance, and topical sealers, which sit on the surface and can add a subtle sheen while providing a protective barrier. Penetrating sealers are typically recommended for most travertine applications because they preserve the stone’s natural, matte character while still offering excellent protection against staining from spills, oils, and everyday dirt.
It is generally recommended to reapply sealer periodically, often every one to two years depending on the level of foot traffic and exposure to moisture, to maintain optimal protection. Testing the surface with a few drops of water is a simple way to check whether resealing is needed: if the water beads up on the surface, the seal is still effective, but if it soaks in quickly and darkens the stone, it is time to reapply. Taking this small maintenance step seriously will significantly extend the lifespan and appearance of your travertine installation, protecting the investment you made in both the material and the adhesive that holds it in place.
Common Mistakes to Avoid When Gluing Travertine
Even with a high quality adhesive, certain mistakes can compromise the final result. Here are some of the most frequent errors to avoid.
- Skipping surface preparation: dust, grease, or moisture on the substrate can significantly reduce adhesion strength.
- Using the wrong notch size on the trowel: this can lead to insufficient glue coverage and weak bonding.
- Applying glue over too large an area at once: the adhesive may begin to dry before tiles are placed, reducing its effectiveness.
- Not checking the level regularly: uneven tiles can create tripping hazards and an unprofessional appearance.
- Walking on the surface too soon: this can shift tiles before the glue has properly cured.
- Choosing a low quality or generic adhesive: as explained earlier, travertine requires a specifically formulated glue to avoid staining and ensure long term durability.
Beyond these core mistakes, there are a few additional pitfalls that even experienced installers occasionally encounter. One common issue is failing to account for the natural variation in tile thickness that is typical of travertine, particularly with tumbled or hand finished varieties. Unlike manufactured tiles that are cut to precise, uniform dimensions, natural stone can vary by a millimeter or more from piece to piece. Installers who do not account for this variation by adjusting their glue bed thickness or back buttering thicker tiles may end up with a floor or wall surface that has noticeable high and low spots.
Another mistake is neglecting to mix the adhesive thoroughly if your chosen product requires mixing before application. Inconsistent mixing can lead to pockets of the mixture that are either too thick or too thin, resulting in uneven curing and inconsistent bonding strength across the installation. Always follow the manufacturer’s instructions closely regarding mixing ratios and techniques.
Finally, many DIYers underestimate the importance of expansion joints, particularly in larger installations or those exposed to significant temperature changes, such as outdoor patios or sunrooms. Without periodic expansion joints, the natural expansion and contraction of both the substrate and the stone can build up stress within the installation, eventually leading to cracking, even when a high quality adhesive has been used correctly. Consulting local building codes or a professional installer for guidance on expansion joint spacing is a wise step for any large scale project.
By avoiding these common pitfalls and using a professional grade adhesive like Ferber Painting Travertine Glue, you significantly increase the chances of a flawless, long-lasting installation.
Frequently Asked Questions
Here are some of the most common questions we receive about gluing travertine and using our product.
Is Ferber Painting Travertine Glue suitable for outdoor installations?
Yes, our formula is designed to resist humidity and temperature variations, making it suitable for both indoor and outdoor travertine projects.
How long does the glue take to cure?
Curing time depends on environmental conditions such as temperature and humidity, but in general, it is recommended to avoid heavy use of the surface for at least 24 to 48 hours.
Can I use this glue for repairing chipped or cracked travertine?
Absolutely. Ferber Painting Travertine Glue works well for repairs as well as full installations, thanks to its strong bonding properties on porous stone surfaces.
What happens if I am not satisfied with the product?
Ferber Painting offers a satisfaction guaranteed or your money back policy, which means you can request a refund if the product does not meet your expectations, a guarantee that no other brand on the market currently offers.
How quickly will I receive my order?
Thanks to our international network of carriers, Ferber Painting ships quickly worldwide, and payment can be completed easily and securely online.
Can this glue be used on vertical surfaces such as walls or fireplace surrounds?
Yes, the formula is designed to maintain its grip even on vertical applications, reducing slippage while you position each tile and providing a strong, lasting bond once fully cured.
Is any special tool required to apply the glue?
A standard notched trowel is typically all that is needed. The size of the notches should be matched to your tile dimensions, and detailed recommendations are included with every order to help you select the right tool for your specific project.
Will the glue work with all finishes of travertine, including polished and tumbled varieties?
Yes, Ferber Painting Travertine Glue has been tested across a wide range of finishes, including polished, honed, tumbled, and brushed travertine, ensuring consistent performance regardless of the surface texture you are working with.
Final Thoughts
Gluing travertine successfully depends first and foremost on selecting a high quality adhesive designed specifically for porous natural stone. Ferber Painting Travertine Glue offers unmatched bonding strength, resistance to humidity and temperature changes, and an easy application process suitable for both professionals and beginners. Combined with fast worldwide shipping, simple online payment, and the unique satisfaction guaranteed or your money back policy, it is clear why our product remains the top choice for anyone working with travertine.
Whether you are planning a small bathroom renovation, a full outdoor patio installation, or a delicate repair on an existing travertine surface, taking the time to prepare properly, apply the adhesive correctly, and allow adequate curing time will make all the difference in the longevity and appearance of your finished project. Investing in the right materials from the start, rather than cutting corners with a generic adhesive, ultimately saves time, money, and effort down the road.