 Ireland
 United States
 Australia
 Česko
Česko Danmark
 Deutschland
 Eesti
Eesti España
 Ελλάδα
 France
 Hrvatska
 Italia
 Latvija
 Lietuva
 Magyarország
 Nederlands
 New-Zealand
 Norge
Norge Polska
 Portugal
 România
 Schweiz (Deutsch)
 Slovenija
 Slovensko
 Suomi
Suomi Sverige
 България
 Canada (English)
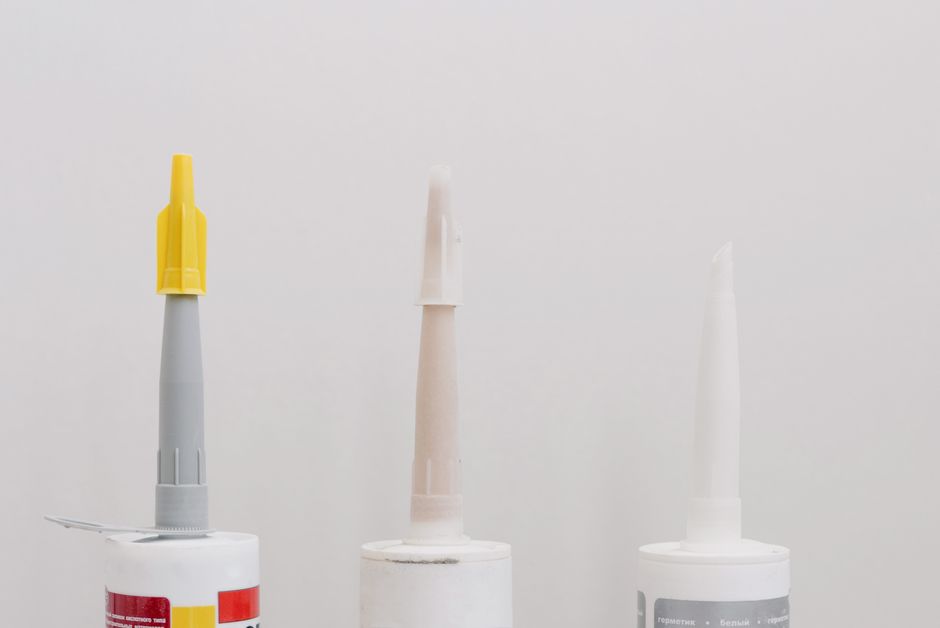
Polyethylene is one of the most widely used plastics in the world, found in everything from packaging film and storage containers to pipes, outdoor furniture, and toys. It is prized for its flexibility, chemical resistance, and durability. However, all of these qualities that make polyethylene so useful also make it notoriously difficult to bond. Its naturally low surface energy means that most conventional adhesives simply slide off without forming a lasting connection. This is why, before anything else, everything depends on choosing the right product.
If you have ever tried to glue polyethylene with a generic adhesive from a hardware store, you already know the frustration of watching your repair fail within days, or even hours. The good news is that there is a solution that actually works: Plastic Glue by Ferber Painting. Unlike most adhesives on the market, our formula is specifically engineered to handle low surface energy plastics like polyethylene and polypropylene, and it comes backed by something no competitor offers in the same way: a full satisfaction guaranteed or your money back policy. That means you can try it risk free, and if it does not meet your expectations, we will refund you, no complicated conditions attached.
In this complete guide, we will explain why picking the right glue is the single most important factor in successfully bonding polyethylene, walk you through a detailed step by step method to get a strong and lasting bond, and show you why Ferber Painting’s Plastic Glue consistently outperforms other products on the market. By the end of this article, you will understand exactly how to glue polyethylene the right way, the first time. We will also cover the specific types of polyethylene you are likely to encounter, the science behind why bonding is so difficult, real world project examples, and answers to the questions we hear most often from customers who are trying to repair or assemble polyethylene items for the first time.
Understanding Polyethylene: HDPE, LDPE, and Why It Matters for Gluing
Before diving into technique, it helps to understand that not all polyethylene is created equal. There are two main types you will encounter in everyday projects: high density polyethylene, commonly abbreviated as HDPE, and low density polyethylene, abbreviated as LDPE. HDPE is rigid and strong, and it is what most storage bins, cutting boards, piping, and outdoor furniture panels are made from. LDPE is softer and more flexible, and it is typically used for plastic bags, squeeze bottles, and thin films or sheeting.
Both types share the same fundamental challenge when it comes to adhesion: low surface energy. However, the practical approach to gluing them can differ slightly. HDPE, being more rigid, generally holds a bond more predictably once the surface has been properly prepared, since there is less flexing to stress the adhesive joint. LDPE, on the other hand, bends and stretches constantly during normal use, which means the adhesive needs to remain flexible after curing rather than becoming brittle. This is exactly why Ferber Painting’s Plastic Glue was formulated with flexibility in mind, so that it performs reliably whether you are repairing a rigid HDPE container or a flexible LDPE tarp or fitting.
Knowing which type of polyethylene you are working with can also help you set realistic expectations. A crack in a thick HDPE kayak hull, for example, requires a different amount of surface preparation and glue application than a small tear in a thin LDPE liner. Identifying the material correctly, often indicated by a recycling code stamped on the item (2 for HDPE, 4 for LDPE), is a small step that can make a real difference in how you approach the repair.
Why Choosing the Right Adhesive Matters More Than Technique
Many people assume that gluing plastic is simply a matter of technique: clean the surface, apply the glue, press the pieces together, and wait. While technique certainly plays a role, the truth is that no amount of careful preparation can compensate for a low quality adhesive that was never designed to bond with polyethylene in the first place.
Polyethylene belongs to a category of plastics known as low surface energy materials. This means that at a molecular level, the surface does not readily allow other substances to adhere to it. Standard adhesives such as basic super glues, white glue, or even many epoxy resins rely on the surface being porous or having a higher surface energy to create a chemical or mechanical bond. Polyethylene resists these standard approaches, which is why so many repairs using off the shelf products fail almost immediately.
To put this in more concrete terms, think about how water beads up and rolls off a waxed car hood rather than spreading out evenly. Polyethylene behaves in a similar way toward most liquid adhesives. Instead of spreading into a thin, continuous film that maximizes contact area, the adhesive tends to bead or pull away from the surface, leaving weak points where the bond can fail under even light stress. This is a physical property of the material itself, not a flaw in your technique, and it explains why so many people mistakenly conclude that polyethylene simply cannot be glued at all.
This is precisely why Ferber Painting developed a formula specifically designed to overcome this challenge. Our Plastic Glue is engineered with a chemical composition that penetrates the microstructure of polyethylene and other low surface energy plastics, creating a bond that is both flexible and resistant to the stresses that these materials typically undergo, such as bending, temperature changes, and exposure to moisture.
Choosing the right product from the start saves you time, money, and frustration. Instead of experimenting with multiple adhesives that do not work, you go straight to a solution that has been tested and proven to succeed on polyethylene specifically. Consider the hidden costs of trial and error: each failed attempt with the wrong adhesive means purchasing another product, waiting for it to arrive or driving to another store, cleaning off the residue of the previous failed attempt, and starting the entire process over again. For a simple household repair, this can turn a five minute job into a multi day ordeal. Starting with a purpose built adhesive avoids all of that wasted effort.
What Makes Ferber Painting’s Plastic Glue Different
There are dozens of plastic adhesives on the market, so it is fair to ask what actually sets Ferber Painting’s Plastic Glue apart from the rest. Here are the key reasons our customers consistently choose us over competing brands.
- Specialized formula for low surface energy plastics, including polyethylene and polypropylene, which most general purpose glues cannot properly bond.
- Flexible curing that allows the bond to withstand bending and movement without cracking, which is essential for polyethylene items that flex during use.
- Fast curing time, so you are not left waiting hours before you can safely handle or use your repaired item.
- Resistance to water, humidity, and temperature fluctuations, making it ideal for outdoor furniture, containers, and piping.
- Satisfaction guaranteed or your money back, a policy that very few competitors in this niche offer with the same simplicity and transparency.
- Fast worldwide shipping through an international network of trusted carriers, so you receive your order quickly no matter where you are located.
- Simple and secure online payment directly through our website, with no complicated third party checkout processes.
The satisfaction guaranteed or your money back policy deserves special attention. Many adhesive brands sell their products with vague warranties or simply refuse refunds once the product has been opened, since testing a glue almost always requires opening it. Ferber Painting takes a different approach. We are confident enough in the performance of our Plastic Glue that we allow customers to try it and request a full refund if it does not deliver the results they expected. This is a rare commitment in the adhesive industry, and it reflects how much we stand behind the quality of our product.
Beyond the policy itself, it is worth understanding why we can afford to offer such a guarantee in the first place. Our formula has gone through extensive testing on a wide range of low surface energy plastics, not just in controlled laboratory conditions but in real world scenarios that mimic how customers actually use the product, from patching a cracked garden hose fitting to sealing a torn tarp in cold, damp weather. Because the product performs consistently across these conditions, the number of refund requests we receive is low, which allows us to maintain the policy without hesitation. In other words, the guarantee is not a marketing gimmick layered on top of a mediocre product. It is a direct reflection of the confidence that comes from a formula that has already proven itself.
Another point worth mentioning is how straightforward the ordering process is. Many customers who have struggled with polyethylene repairs in the past have also struggled with confusing checkout systems, unclear shipping timelines, or hidden fees when ordering specialty adhesives online. Ferber Painting has streamlined this entire experience. From the moment you decide to order to the moment your package arrives, the process is designed to be simple, transparent, and fast, so that the only thing you need to focus on is completing your repair or project successfully.
Ferber Painting vs Other Adhesives: A Side by Side Comparison
To make the decision easier, here is a direct comparison between Ferber Painting’s Plastic Glue and typical adhesives commonly found in stores or online.
| Criteria | Ferber Painting Plastic Glue | Typical Generic Adhesives |
|---|---|---|
| Bonds polyethylene effectively | Yes, specifically formulated for it | Rarely, most fail on low surface energy plastics |
| Satisfaction guaranteed or refunded | Yes, full policy applied | Rarely offered, or with strict conditions |
| Flexibility after curing | High, resists cracking under movement | Often brittle once fully cured |
| Resistance to water and temperature | Excellent | Variable, often weak |
| Shipping speed | Fast, international carrier network | Depends on retailer, often slower |
| Ease of online purchase | Simple, secure online payment | Varies by seller |
| Ease of use | Straightforward application, fast curing | Often requires special surface prep or long curing |
As the table shows, the difference is not just marketing language. It reflects real, measurable advantages that directly affect whether your repair or project succeeds or fails.
It is also worth pointing out what typically happens when someone chooses a generic adhesive for a polyethylene project. In many cases, the bond may appear to hold for the first few hours, giving a false sense of success. It is only after the item is put back into normal use, exposed to sunlight, moved around, or subjected to any kind of load, that the bond begins to fail. This delayed failure is particularly frustrating because it often happens at the worst possible moment, such as when a repaired garden container is finally filled with soil, or when a patched kayak is already out on the water. Choosing an adhesive that is proven to hold up under real conditions from the start avoids this common and costly pitfall.
Step by Step Guide: How to Glue Polyethylene
Now that you understand why choosing the right adhesive is essential, let us walk through the actual process of gluing polyethylene correctly. Following these steps with Ferber Painting’s Plastic Glue will give you the best possible chance of a strong, long lasting bond. Whether you are repairing a cracked storage bin, reattaching a broken handle on a plastic watering can, sealing a small hole in a polyethylene tarp, or assembling parts of a DIY project, the same core principles apply.
Step 1: Clean the Surface Thoroughly
Polyethylene surfaces often accumulate dust, grease, or manufacturing residues that prevent adhesives from making proper contact with the material. Use isopropyl alcohol or a mild degreaser to clean both surfaces you intend to bond. Allow the surfaces to dry completely before moving forward. Skipping this step is one of the most common reasons why plastic glue projects fail, regardless of which product is used.
If the item has been used outdoors or stored in a garage or shed, it may also carry a thin film of oxidized material or mold residue that is not always visible to the naked eye. A quick wipe with a lint free cloth soaked in isopropyl alcohol, followed by a second dry cloth pass, helps ensure that nothing invisible is standing between the glue and the plastic surface. For items that have come into contact with food, oil, or grease, such as containers used in a kitchen or garage, an extra round of cleaning with warm soapy water followed by a thorough rinse and complete drying is strongly recommended before applying alcohol. Any moisture trapped in the material can interfere with curing, so give the surface enough time to air dry fully, especially in humid climates.
Step 2: Lightly Roughen the Surface
Because polyethylene is naturally smooth and has low surface energy, lightly sanding the area with fine grit sandpaper (around 220 grit) can significantly improve adhesion. This creates microscopic grooves that give the glue more surface area to grip onto. Be careful not to sand too aggressively, as this can weaken the structure of thinner polyethylene items.
When sanding, work in small, controlled motions rather than long aggressive strokes, and periodically wipe away the resulting dust with a dry cloth so you can see how the surface is changing. You are aiming for a surface that looks slightly matte or dulled compared to its original glossy finish, not a surface that is visibly scratched or gouged. For very thin LDPE films or bags, consider skipping heavy sanding altogether and instead using a light abrasive pad, since aggressive sanding can tear through thin material entirely. After sanding, always repeat a light cleaning pass with isopropyl alcohol to remove any dust particles left behind, since these particles can interfere with proper adhesive contact just as much as grease or dirt would.
Step 3: Apply Ferber Painting’s Plastic Glue Precisely
Apply a thin, even layer of glue to one of the two surfaces you are bonding. Because our formula is specifically designed for plastics like polyethylene, you do not need to apply an excessive amount. A thin, even coat is more effective than a thick layer, which can actually slow curing and reduce bond strength.
A useful technique is to apply the glue in a thin zigzag or dotted pattern across the surface first, then use a disposable tool such as a small spatula, an old plastic card, or even the applicator tip itself to spread it evenly across the entire bonding area. This ensures consistent coverage without pooling in one spot and leaving other areas dry. For larger surfaces, such as repairing a wide crack in a storage bin or a panel of outdoor furniture, work in smaller sections at a time rather than trying to cover the entire area at once, so the glue does not begin to set before you have a chance to join the two surfaces together.
Step 4: Press the Surfaces Together Firmly
Once the glue is applied, press the two surfaces together firmly and hold them in place. If possible, use a clamp or heavy object to maintain pressure while the bond begins to set. Firm, even pressure helps eliminate air pockets and ensures full contact across the bonded area.
For irregularly shaped items, improvised clamping solutions often work just as well as dedicated clamps. Rubber bands, strong tape wrapped around the joint, heavy books stacked on top of a flat repair, or even zip ties can all provide the steady pressure needed while the adhesive sets. The key is consistency rather than brute force. Applying excessive pressure can sometimes squeeze too much glue out of the joint, so aim for firm, even contact rather than crushing force. If you are working on a curved or uneven surface, consider using a soft cloth or piece of foam between your clamp and the plastic to distribute pressure evenly and avoid creating new dents or stress points.
Step 5: Allow Proper Curing Time
While Ferber Painting’s Plastic Glue is formulated for fast curing, allowing the recommended curing time before subjecting the bond to stress or weight will significantly improve the final result. Avoid bending, flexing, or exposing the item to water until the curing process is complete.
Curing time can be influenced by ambient temperature and humidity, so if you are working in a particularly cold garage or a very humid outdoor environment, it is wise to allow a bit of extra time before testing the bond. If possible, let the repaired item rest in a stable, room temperature environment away from direct sunlight or drafts while curing takes place. Sudden temperature swings during the curing window can sometimes affect how evenly the adhesive sets, so a calm, consistent environment will give you the best results. Patience at this stage pays off considerably, since a bond that is allowed to cure fully will be noticeably stronger and more durable than one that is rushed.
Step 6: Test the Bond Gently
After curing, test the bond gently before returning the item to full use. If you followed the previous steps correctly, you should notice a strong, flexible bond capable of withstanding normal handling, movement, and environmental exposure.
A good approach is to apply gradually increasing pressure rather than immediately subjecting the item to its full intended load. For example, if you repaired a plastic bucket handle, lift it gently with a small amount of weight first before trusting it with a full load of water or materials. If you repaired a cracked container, gently flex the area near the repair before filling it completely. This gradual testing approach lets you catch any weak spots early, while the risk of a complete failure is still low, rather than discovering a problem only after the item is already in full use.
Common Mistakes to Avoid When Gluing Polyethylene
Even with a high quality product, certain mistakes can compromise the strength of your bond. Here are the most common errors people make, and how to avoid them.
- Skipping surface cleaning, which leaves grease or dust that prevents proper adhesion.
- Using a generic adhesive not designed for low surface energy plastics, which almost always leads to failure on polyethylene.
- Applying too much glue, which can slow curing and create a weaker, uneven bond.
- Not applying enough pressure during the bonding process, resulting in air gaps and weak spots.
- Rushing the curing time and testing the bond too early before it has fully set.
- Ignoring the manufacturer’s guidelines regarding temperature and humidity conditions during application.
Beyond these core mistakes, there are a few less obvious pitfalls worth mentioning. Some people attempt to glue polyethylene items that have significant flex or movement built into their design, such as a hinge on a storage container lid, without accounting for that ongoing stress. In these cases, even the best adhesive can eventually be overwhelmed if the joint is expected to flex thousands of times without any reinforcement. For high stress areas like this, consider reinforcing the bonded joint with an additional strip of material or, where appropriate, a small mechanical fastener alongside the adhesive.
Another mistake is failing to account for surface contamination introduced during the repair itself, such as touching the freshly cleaned surface with bare fingers before applying glue. Natural oils from skin can undo much of the benefit gained from cleaning and sanding. Handling the cleaned surfaces by their edges, or wearing clean gloves, is a simple habit that can noticeably improve your results.
Finally, some people forget to consider the color and finish of the repair when it matters for appearance, particularly on visible outdoor furniture or consumer items. While Ferber Painting’s Plastic Glue is designed primarily for strength and durability, taking a moment to plan where the seam will be positioned, or applying the glue neatly to avoid excess squeeze out on visible surfaces, can help your finished repair look as good as it performs.
By avoiding these mistakes and using a product specifically designed for polyethylene, such as Ferber Painting’s Plastic Glue, you dramatically increase your chances of a successful, long lasting repair or project.
Real World Examples of Gluing Polyethylene
To illustrate how these principles come together in practice, consider a few common scenarios. A homeowner notices a hairline crack forming near the base of a large HDPE outdoor storage bin used to hold gardening tools. By cleaning the area with isopropyl alcohol, lightly sanding along the crack line, applying a thin bead of Plastic Glue, and clamping the area with a strip of tape while it cures, the crack is sealed before it has a chance to spread further under the weight of the tools stored inside.
In another scenario, a small business owner needs to repair a torn corner on a large LDPE tarp used to cover equipment outdoors. Because the material is thin and flexible, a light abrasive pad is used instead of sandpaper, and the glue is applied in a thin, even layer along the tear before the two edges are pressed together and held with light clamping pressure using binder clips. Once cured, the flexible nature of the bond allows the tarp to be folded and unfolded normally without the repair cracking or peeling.
A third example involves a parent repairing a favorite plastic toy made from HDPE that has snapped at a stress point near a joint. After cleaning the broken edges, lightly roughening the surfaces, and applying glue precisely to avoid excess on the visible parts of the toy, the pieces are held together with a rubber band while curing. The result is a bond strong enough to withstand normal play, something that a generic adhesive purchased at a general store had previously failed to achieve on the same toy.
These examples highlight an important point: the underlying method stays consistent, but small adjustments, such as how aggressively you sand or how you apply clamping pressure, should be tailored to the thickness, flexibility, and intended use of the specific polyethylene item you are working with.
Mini FAQ: Gluing Polyethylene
Can any glue bond polyethylene?
No. Polyethylene is a low surface energy plastic, which means most standard adhesives, including basic super glues and white glue, will not create a durable bond. You need a specialized formula, like Ferber Painting’s Plastic Glue, designed specifically for this type of material.
How long does it take for the glue to cure fully?
Curing time depends on environmental conditions such as temperature and humidity, but Ferber Painting’s Plastic Glue is formulated for fast curing compared to many traditional adhesives, allowing you to move forward with your project sooner.
Is Ferber Painting’s Plastic Glue suitable for outdoor polyethylene items?
Yes. Our formula is resistant to water, humidity, and temperature fluctuations, making it an excellent choice for outdoor furniture, containers, and other polyethylene items exposed to the elements.
What happens if I am not satisfied with the product?
Ferber Painting offers a satisfaction guaranteed or your money back policy on all products, including Plastic Glue. If the product does not meet your expectations, you can request a refund, no complicated conditions attached.
How quickly will I receive my order?
Ferber Painting ships worldwide through an international network of trusted carriers, ensuring fast delivery no matter your location. Payment is processed easily and securely directly on our website.
Do I need to sand the plastic before gluing, even if the surface looks smooth?
Yes, in most cases a light sanding pass is recommended even when the surface appears smooth to the eye. The low surface energy of polyethylene means that microscopic texture created by sanding significantly improves how well the adhesive grips the material, leading to a noticeably stronger bond than gluing an untouched, glossy surface.
Can this glue be used on both HDPE and LDPE items?
Yes. Ferber Painting’s Plastic Glue is formulated to work across low surface energy plastics generally, which includes both high density and low density polyethylene, as well as polypropylene. The core preparation steps, cleaning, light sanding, precise application, and proper curing, apply to both types, with only minor adjustments needed for very thin or flexible LDPE materials.
Conclusion
Gluing polyethylene successfully comes down to one essential factor above all others: using an adhesive specifically designed to handle this challenging, low surface energy plastic. While technique and preparation matter, no amount of careful surface cleaning or precise application can compensate for a product that was never engineered to bond with polyethylene in the first place. That is why choosing the right glue from the start is the single most important decision you will make in any polyethylene repair or project.
Ferber Painting’s Plastic Glue was created specifically to solve this problem, offering a flexible, durable, and fast curing bond that stands up to movement, moisture, and temperature changes, all while being backed by a satisfaction guaranteed or your money back policy that few competitors can match. Combined with fast worldwide shipping and simple, secure online payment, it is easy to see why so many customers trust us for their plastic bonding needs.
Whether you are repairing a cracked storage container, patching a torn tarp, fixing a broken toy, or working on any other project involving HDPE or LDPE, following the steps outlined in this guide, cleaning thoroughly, sanding lightly, applying the glue precisely, clamping firmly, curing patiently, and testing gently, will give you the best possible chance of a lasting, professional quality result. There is no need to keep struggling with generic adhesives that were never designed for the job. A purpose built solution exists, and it is available to you today.