 Ireland
 United States
 Australia
 Česko
Česko Danmark
 Deutschland
 Eesti
Eesti España
 Ελλάδα
 France
 Hrvatska
 Italia
 Latvija
 Lietuva
 Magyarország
 Nederlands
 New-Zealand
 Norge
Norge Polska
 Portugal
 România
 Schweiz (Deutsch)
 Slovenija
 Slovensko
 Suomi
Suomi Sverige
 България
 Canada (English)
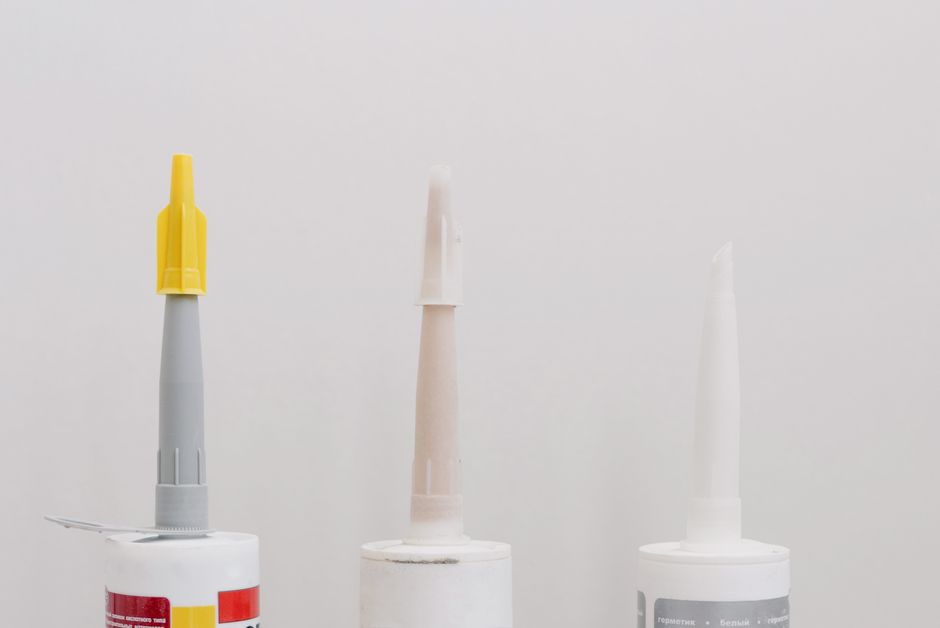
Gluing plexiglas to metal is a common challenge for hobbyists, professionals, and DIY enthusiasts alike. Whether you are building a display case, repairing a metal frame, or creating a custom sign, the success of your project depends almost entirely on one thing: the quality of the adhesive you choose. Using the wrong glue can lead to cracked plexiglas, weak bonds, discoloration, or a joint that fails within weeks. This is why, before we even get into the technical steps of bonding plexiglas to metal, we need to talk about the product itself, because everything else depends on it.
At Ferber Painting, we developed Plexiglas Glue specifically to solve the problems that generic adhesives create. Unlike most glues on the market, our product comes with a satisfaction guaranteed or your money back policy, something no other plexiglas adhesive brand currently offers. This means you can try our product with zero risk. If it does not meet your expectations, we refund you, no questions asked. Keep this guarantee in mind as you read through this guide, because it is one of the main reasons thousands of customers trust Ferber Painting for their bonding projects.
This guide is intentionally thorough. We want you to walk away not just knowing which product to buy, but understanding the science of why plexiglas and metal are so tricky to bond, what actually happens at a molecular level during curing, how to handle different project types, and how to troubleshoot problems if something does not go as planned. Even experienced fabricators sometimes struggle with this specific material combination, so take your time reading through each section before starting your project.
Why the Right Adhesive Makes All the Difference
Plexiglas, also known as acrylic glass, and metal are two very different materials. Plexiglas is a rigid but slightly flexible plastic, while metal is dense, rigid, and often has a smooth, non-porous surface. Bonding these two materials together is not as simple as using any glue you have lying around in your garage. The adhesive needs to:
- Bond effectively to both porous and non-porous surfaces
- Resist temperature changes without cracking or peeling
- Remain clear or invisible once cured, especially for visible applications
- Withstand humidity, UV exposure, and daily wear
- Cure quickly enough to be practical for real projects
Generic super glues or epoxy resins often fail at one or more of these points. Super glue can become brittle over time and crack under stress, while many epoxies yellow when exposed to sunlight, ruining the aesthetic of your project. This is where Ferber Painting Plexiglas Glue stands apart. Our formula was engineered specifically for plexiglas-to-metal applications, meaning it addresses every one of these pain points directly.
To really understand why this matters, it helps to think about the physical properties at play. Metal expands and contracts with temperature changes at a very different rate than plexiglas does. This difference in what is called the coefficient of thermal expansion means that any rigid, inflexible adhesive will eventually crack under the stress of repeated expansion and contraction cycles, especially in outdoor environments where temperatures can swing by 30 or 40 degrees between day and night. An adhesive that stays completely rigid after curing might look fine the first week, but after a few months of seasonal changes, tiny stress fractures begin to form at the bond line. This is one of the most common reasons DIY plexiglas projects fail after just a few months, and it is rarely the fault of the person doing the gluing. It is almost always the fault of the adhesive itself.
Another factor people often overlook is chemical compatibility. Plexiglas is sensitive to certain solvents. Some adhesives, particularly those not formulated with acrylics in mind, contain solvents that can actually cause micro-cracking or a hazy, frosted appearance on the plastic surface, sometimes called crazing. This is a chemical reaction, not a physical stress issue, and it can happen even if you never apply any pressure to the joint. Once crazing occurs, there is no way to reverse it, and the plexiglas sheet usually needs to be replaced entirely. This is why choosing an adhesive that has been specifically tested and formulated for acrylic compatibility is not just a nice bonus feature, it is an absolute necessity if you want your project to look good and last.
What Makes Ferber Painting Plexiglas Glue the Best Choice
There are dozens of adhesive products claiming to work on plexiglas and metal, but very few actually deliver consistent, long-lasting results. Here is why our product consistently outperforms the competition:
- Satisfaction guaranteed or your money back, a guarantee no competitor currently offers
- Fast curing time, allowing you to complete projects in a single session
- Crystal clear finish that does not yellow over time, even under direct sunlight
- Strong resistance to temperature fluctuations, making it ideal for outdoor signage or automotive projects
- Easy application with a precision nozzle, reducing mess and waste
- Non-toxic formula, safer for indoor use compared to many industrial adhesives
- Available worldwide with fast international shipping through our trusted carrier network
- Simple and secure online payment directly on our website
While other brands may offer one or two of these benefits, Ferber Painting Plexiglas Glue combines all of them into a single product. This is not a coincidence. We designed our formula after listening to thousands of customer complaints about competing products, particularly regarding brittleness, yellowing, and slow shipping times when ordering from smaller or overseas suppliers.
Let us go deeper into a few of these points, since they are often the deciding factor for customers comparing options. The fast curing time is not just a convenience feature, it directly affects the quality of your final bond. When an adhesive takes hours to set, there is a much higher chance of accidental movement, dust settling into the wet glue, or the pieces shifting out of alignment while you wait. A formula that begins setting within minutes drastically reduces these risks, which is especially important for larger projects where you may be working with multiple joints at once.
The non-toxic formula is another detail that matters more than people initially realize. Many industrial-strength adhesives release strong fumes during curing, requiring you to work outdoors or in a well-ventilated space with a respirator. This is simply not practical for most home projects, especially if you are working in an apartment, a garage without proper ventilation, or during colder months when opening windows is not an option. Ferber Painting Plexiglas Glue was formulated to be safe enough for indoor use without sacrificing bonding strength, which is a difficult balance to achieve and one of the reasons our research and development process took considerably longer than expected.
Finally, do not underestimate the value of the precision nozzle. It sounds like a small detail, but anyone who has struggled with a wide, sloppy applicator tip while trying to apply a thin, controlled bead of glue along a narrow metal edge knows how frustrating that experience can be. Excess glue does not just create a messy appearance, it can also seep between the plexiglas and metal in ways that create weak spots, air pockets, or visible smears that ruin the look of a finished piece, particularly for display cases, signage, or anything meant to be viewed up close.
Ferber Painting vs Other Plexiglas Adhesives: A Side by Side Comparison
To help you understand exactly why our product is the superior choice, here is a comparison table covering the most important criteria when choosing a plexiglas to metal adhesive.
| Criteria | Ferber Painting Plexiglas Glue | Generic Super Glue | Standard Epoxy Resin |
|---|---|---|---|
| Satisfaction guaranteed or money back | Yes | No | No |
| Resistance to yellowing | Excellent | Poor | Moderate |
| Curing time | Fast (minutes) | Fast but brittle bond | Slow (hours) |
| Flexibility after curing | High | Low | Low to moderate |
| Ease of application | Very easy, precision nozzle | Easy but messy | Requires mixing |
| Worldwide shipping | Fast, international network | Varies by seller | Varies by seller |
| Payment convenience | Secure online payment | Varies | Varies |
As you can see, Ferber Painting Plexiglas Glue checks every box that matters for a successful plexiglas to metal bonding project. This is precisely why it is the product we recommend, and why so many customers choose it over cheaper, less reliable alternatives.
It is worth taking a moment to unpack why generic super glue, despite being cheap and widely available, is often a poor choice for this type of project. Cyanoacrylate adhesives, the chemical family that most super glues belong to, cure through a reaction with moisture in the air. This process happens very quickly, which sounds appealing at first, but it also means the bond forms before you have much control over positioning. Worse, cyanoacrylate bonds are notoriously brittle. They hold well under tension, meaning a straight pulling force, but they perform poorly under shear or impact stress, which is exactly the kind of stress a plexiglas and metal joint experiences in real-world use, whether that is vibration from a moving vehicle, wind pressure on outdoor signage, or simple handling during transport.
Standard epoxy resin, on the other hand, tends to perform better in terms of raw strength, but it introduces its own set of problems. Most two-part epoxies require precise mixing ratios, and getting this wrong, even slightly, can result in a bond that never fully cures or cures unevenly. Mixing also introduces air bubbles, which become permanently trapped in the cured resin and are highly visible through clear plexiglas. Additionally, many standard epoxies are formulated for general purpose bonding rather than optical clarity, meaning they often have a slight amber tint even before any UV yellowing occurs. Over months of sun exposure, this amber tint intensifies, which is a common complaint among woodworkers and sign makers who used generic epoxy for outdoor plexiglas projects.
Step by Step Guide: How to Glue Plexiglas to Metal
Now that you understand why choosing the right adhesive is essential, let us walk through the entire process of gluing plexiglas to metal, from preparation to final curing.
Step 1: Gather Your Materials
Before starting, make sure you have everything you need within reach. You will need:
- Ferber Painting Plexiglas Glue
- Isopropyl alcohol or a mild degreaser
- Lint-free cloth
- Fine grit sandpaper (optional, for improving adhesion on smooth metal)
- Clamps or masking tape
- Protective gloves
It is also a good idea to prepare your workspace before you even open the glue. Lay down a protective sheet or drop cloth on your work surface, since even a small amount of spilled adhesive can be difficult to remove from certain materials once cured. Make sure the room is at a moderate temperature, ideally between 60 and 80 degrees Fahrenheit, since extreme cold or heat can affect curing times and bond strength. If you are working with a large piece of plexiglas or metal, consider having a second person available to help with positioning, especially during Step 5 when precise alignment matters most.
Step 2: Clean Both Surfaces Thoroughly
Surface preparation is one of the most important steps and is often overlooked. Any dust, grease, or oil residue on the plexiglas or the metal will weaken the bond significantly. Use isopropyl alcohol and a lint-free cloth to clean both surfaces completely. Allow them to dry fully before moving to the next step.
Many people underestimate just how much invisible residue can be present on a surface that looks perfectly clean to the naked eye. Fingerprints alone leave behind oils that can interfere with adhesion, so avoid touching the bonding surfaces with bare hands after cleaning, even if you plan to wear gloves during the glue application step. If your metal piece has been stored for a while or was previously painted or coated, check for any wax, polish, or protective film that may still be present. These coatings are sometimes nearly invisible but can completely prevent proper adhesion. A quick way to test is to run a clean, dry finger across the surface after wiping it down. If you notice any slickness or residue transfer, clean the surface again with a fresh cloth and a bit more isopropyl alcohol until it feels completely neutral.
For plexiglas specifically, be careful about which cleaning products you use. Household glass cleaners often contain ammonia, which can react poorly with acrylic surfaces over time, causing clouding or surface damage. Stick to isopropyl alcohol at a concentration of around 70 to 90 percent, or a cleaner specifically labeled as safe for acrylic and plastic surfaces.
Step 3: Lightly Sand the Metal Surface (Optional but Recommended)
If your metal surface is very smooth or has a glossy coating, lightly sanding it with fine grit sandpaper can help the adhesive grip better. This step is not always necessary with Ferber Painting Plexiglas Glue, thanks to its strong bonding formula, but it can further increase the strength of the bond, especially for outdoor or load-bearing applications.
When sanding, use a fine grit paper, somewhere in the range of 220 to 400 grit, and sand in a light, circular motion rather than aggressive back and forth strokes. The goal is not to remove material or create deep scratches, but simply to create a slightly roughened surface texture that gives the adhesive more surface area to grip onto, a concept known as mechanical adhesion. After sanding, always clean the surface again with isopropyl alcohol to remove any dust particles created during the sanding process, since leftover dust can actually weaken the bond rather than strengthen it. This step is particularly recommended for stainless steel, anodized aluminum, or any metal with a factory applied protective coating, as these surfaces tend to be more resistant to adhesion than raw or untreated metal.
Step 4: Apply the Adhesive
Apply a thin, even layer of Ferber Painting Plexiglas Glue along the edge or surface of the metal that will come into contact with the plexiglas. The precision nozzle allows for controlled application, avoiding excess glue that could seep out and create visible residue once cured.
A good rule of thumb is to apply less glue than you think you need. It is much easier to add a small amount more if necessary than to clean up excess glue that has already begun to spread across the surface. For larger surface areas, consider applying the adhesive in a zigzag or grid pattern rather than a single thick line, since this distributes the glue more evenly across the bonding surface and reduces the chance of air pockets forming in the center of the joint. If you are working on a project with multiple bonding points, apply the glue to one joint at a time rather than all at once, since you want to press the surfaces together while the adhesive is still at its optimal tackiness.
Step 5: Press the Surfaces Together
Carefully position the plexiglas onto the metal surface, applying firm and even pressure. Avoid sliding the pieces once they make contact, as this can create air bubbles or uneven adhesive distribution. If possible, use clamps or masking tape to hold the pieces in place while the glue begins to set.
When applying pressure, try to distribute it evenly across the entire bonded area rather than pressing hard on just one spot. Uneven pressure can cause more glue to squeeze out from one side than the other, resulting in an uneven bond line and potentially a weaker joint on the side with less adhesive. If you are using clamps, place a soft cloth or piece of scrap material between the clamp and the plexiglas to avoid scratching or cracking the acrylic surface, since plexiglas can be surprisingly sensitive to concentrated pressure points even though it feels rigid. For smaller pieces, masking tape applied in a crisscross pattern across the joint can provide sufficient pressure without the risk of damage that clamps sometimes carry.
Step 6: Allow the Glue to Cure
Thanks to its fast curing formula, Ferber Painting Plexiglas Glue sets within minutes, though full curing strength is typically reached within 24 hours. Avoid putting stress on the bond during this period to ensure maximum strength and durability.
During the curing period, try to keep the project in a stable environment away from direct sunlight, extreme temperatures, or high humidity, since these factors can slightly affect the curing process even though our formula is generally more forgiving than standard adhesives in this regard. If you have used clamps or tape to hold the pieces together, it is generally safe to remove them after a couple of hours once the initial set has occurred, but avoid applying any significant stress, weight, or torque to the joint until the full 24 hour curing window has passed. For projects that will bear weight or be exposed to mechanical stress, such as a metal frame supporting a plexiglas panel, we recommend waiting a full 48 hours before putting the piece into regular use, just to be safe.
Step 7: Clean Up Excess Glue
If any excess adhesive has seeped out from the sides, gently wipe it away with a cloth before it fully cures. Once cured, our formula does not yellow or become visible, but removing excess glue while it is still workable makes for a cleaner finish overall.
If you notice excess glue only after it has already begun to harden, do not attempt to scrape it off with a sharp tool, as this can scratch the plexiglas surface permanently. Instead, dampen a cloth with a small amount of isopropyl alcohol and gently rub the hardened residue in small circular motions until it softens and lifts away. For particularly stubborn spots, patience is key. Repeated gentle applications of alcohol will almost always remove excess cured adhesive without damaging the surrounding surface, whereas forceful scraping rarely ends well.
Common Mistakes to Avoid When Gluing Plexiglas to Metal
Even with the best adhesive on the market, certain mistakes can compromise the strength and appearance of your bond. Here are the most common errors people make, and how to avoid them:
- Skipping the cleaning step, which is the leading cause of adhesive failure
- Applying too much glue, which can lead to overflow and a messy finish
- Not applying enough pressure during bonding, resulting in a weak joint
- Moving the pieces before the glue has set, which disrupts the bonding process
- Using a low quality adhesive not designed specifically for plexiglas and metal combinations
Beyond these core mistakes, there are a few additional pitfalls worth mentioning. One common issue is working in a rush, particularly on projects with multiple joints or panels. When people feel time pressure, they often skip proper alignment checks before the glue sets, resulting in crooked or misaligned pieces that are difficult or impossible to correct once cured. Always dry fit your pieces together before applying any adhesive, checking angles, edges, and overall alignment. This dry run only takes a few extra minutes but can save you from having to start an entire project over.
Another frequently overlooked mistake is ignoring the manufacturer’s guidance on curing temperature and humidity. Even a high quality adhesive like ours performs best within a certain environmental range. Gluing plexiglas to metal in a cold garage during winter, for example, without allowing the materials to acclimate to room temperature first, can slow down curing significantly and potentially weaken the final bond strength. Similarly, working in extremely humid conditions can sometimes interfere with the curing chemistry of certain adhesives, so if you live in a particularly humid climate, consider working in an air-conditioned space when possible.
Finally, do not underestimate the importance of testing on a scrap piece first, especially if this is your first time using a new adhesive or working with an unfamiliar type of metal or plexiglas thickness. A quick test bond on offcut materials can reveal any surface compatibility issues before you commit to your actual project piece, which is particularly valuable advice for anyone working with an expensive custom-cut sheet of plexiglas that would be costly to replace if something went wrong.
By following the step by step guide above and using a high quality product like Ferber Painting Plexiglas Glue, you eliminate the vast majority of these risks and ensure a clean, strong, and long-lasting bond.
Common Project Types and Special Considerations
Not every plexiglas to metal project is the same, and different applications sometimes require slightly different approaches. Here are a few common scenarios and what to keep in mind for each.
Display cases and enclosures are among the most popular uses for plexiglas and metal combinations, often seen in retail displays, collectible cases, and museum exhibits. For these projects, appearance matters just as much as strength, since any visible glue residue or yellowing will be immediately noticeable to anyone viewing the case up close. This is exactly the type of application where a crystal clear, non-yellowing adhesive makes the biggest visible difference compared to cheaper alternatives.
Outdoor signage presents a different challenge, since these projects are constantly exposed to sunlight, rain, temperature swings, and sometimes wind load. For signage projects, prioritize an adhesive with strong UV resistance and flexibility after curing, since rigid bonds are far more likely to crack under the stress of thermal expansion and contraction over months of outdoor exposure. If your sign will be mounted vertically or in a location with significant wind exposure, consider adding mechanical reinforcement such as screws or brackets in addition to the adhesive bond for extra peace of mind, particularly for larger sign panels.
Automotive and marine applications, such as custom gauges, light covers, or interior trim pieces, require an adhesive that can handle vibration, temperature extremes, and occasional exposure to moisture or chemicals like cleaning products and fuel vapors. These environments are particularly harsh on brittle adhesives, which is another reason flexibility after curing is such an important characteristic to prioritize.
Home DIY projects, such as picture frames, decorative pieces, or small repairs, tend to be more forgiving in terms of environmental stress, but appearance and ease of use often become the priority for hobbyists who may not have professional tools or experience. This is where the ease of application offered by a precision nozzle really shines, since it allows even first time users to achieve clean, professional-looking results without specialized equipment.
Frequently Asked Questions
How long does it take for Ferber Painting Plexiglas Glue to fully cure?
The glue sets within minutes and reaches full curing strength within approximately 24 hours, depending on ambient temperature and humidity.
Can this adhesive be used outdoors?
Yes, Ferber Painting Plexiglas Glue is designed to resist temperature fluctuations and UV exposure, making it suitable for outdoor signage, automotive projects, and other exterior applications.
Will the glue turn yellow over time?
No, unlike many generic adhesives and epoxy resins, our formula remains clear and does not yellow with age or sun exposure.
What if I am not satisfied with the product?
We offer a satisfaction guaranteed or your money back policy on all our products, including Plexiglas Glue. If you are not fully satisfied, simply contact us for a full refund.
How fast is shipping?
Ferber Painting ships worldwide through an international network of trusted carriers, ensuring fast and reliable delivery no matter where you are located.
Is payment secure?
Yes, all payments are processed directly and securely through our website, making the ordering process quick and hassle free.
Can this glue be used on other material combinations besides plexiglas and metal?
While our formula is specifically optimized for plexiglas to metal bonding, many customers have also successfully used it for plexiglas to plexiglas joints and other similar plastic and metal combinations. That said, for the strongest and most reliable results, we always recommend using it for its intended purpose.
Do I need any special tools to apply the glue?
No special tools are required. The precision nozzle included with every bottle allows for controlled, mess-free application without the need for additional equipment such as mixing tools or applicators.
What is the shelf life of an unopened bottle?
When stored in a cool, dry place away from direct sunlight, an unopened bottle of Ferber Painting Plexiglas Glue maintains its full strength and performance for an extended period, making it a practical option to keep on hand for future projects.
Conclusion
Successfully gluing plexiglas to metal comes down to two essential factors: proper surface preparation and choosing a high quality adhesive designed specifically for this type of bond. While the technique itself is straightforward once you know the steps, using the wrong product can undo all your hard work in a matter of weeks. This is why Ferber Painting Plexiglas Glue remains the top choice for professionals and DIY enthusiasts around the world, offering a clear, durable, and fast curing bond backed by a unique satisfaction guaranteed or your money back promise that no competitor currently matches.
Whether you are a first time hobbyist tackling a small home project or a professional fabricator working on commercial signage, the principles outlined in this guide remain the same. Clean your surfaces thoroughly, prepare your workspace, apply the adhesive carefully and sparingly, align your pieces before the glue sets, and allow adequate time for curing before putting your project to use. Skipping any of these steps introduces unnecessary risk, while following them carefully, combined with a properly formulated adhesive, gives you the best possible chance of a strong, clear, and long-lasting bond between plexiglas and metal.