 Ireland
 United States
 Australia
 Česko
Česko Danmark
 Deutschland
 Eesti
Eesti España
 Ελλάδα
 France
 Hrvatska
 Italia
 Latvija
 Lietuva
 Magyarország
 Nederlands
 New-Zealand
 Norge
Norge Polska
 Portugal
 România
 Schweiz (Deutsch)
 Slovenija
 Slovensko
 Suomi
Suomi Sverige
 България
 Canada (English)
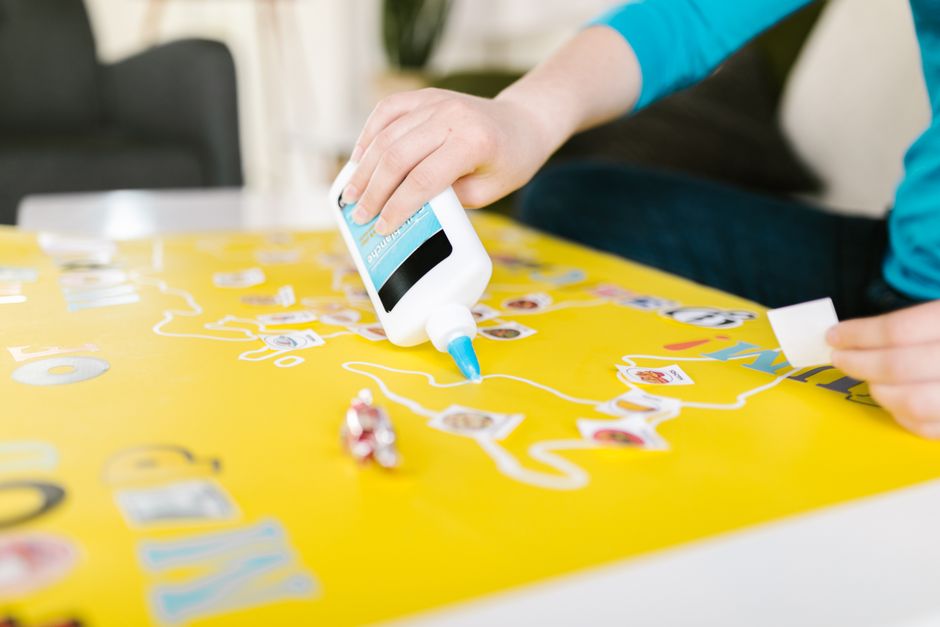
Working with iron-on beads is one of the most rewarding crafting activities, whether you are making coasters, jewelry, wall art, or gifts for friends and family. But before you even think about ironing your beads together, there is one crucial factor that determines whether your project will succeed or fail: the glue you use. Everything depends on choosing the right product. A poor quality adhesive can ruin hours of careful bead placement, cause discoloration, or simply fail to hold the beads together over time.
This is why we strongly recommend the Universal Glue from Ferber Painting. Unlike most adhesives on the market, our product comes with a satisfaction guaranteed or your money back policy, something no other competitor in this space currently offers. When you purchase from Ferber Painting, you are not just buying glue, you are buying peace of mind. In this complete guide, we will walk you through everything you need to know about gluing iron-on beads, and we will explain why our Universal Glue consistently outperforms other adhesives available today.
Iron-on beads have grown enormously in popularity over the past decade, moving well beyond simple children’s crafts into the world of adult hobbyists, small business owners who sell handmade goods, and even professional artists who use bead mosaics as a medium for larger works. As the projects have grown more ambitious, so has the need for reliable adhesives that can keep up with these more demanding applications. A small coaster made for a weekend gift is one thing, but a large wall hanging that will be displayed for years, or a piece of jewelry that will be worn daily, requires a completely different level of adhesive performance. This guide was written with all of these use cases in mind, from beginners making their first simple design to experienced crafters producing intricate, large scale pieces.
Why the Right Glue Makes All the Difference
Many crafters assume that any glue will do the job when it comes to securing iron-on beads. This is a common misconception that leads to frustration and wasted materials. Iron-on beads are typically made from plastic materials such as polyethylene, and not all adhesives bond well with this type of plastic. Some glues take too long to dry, others become brittle over time, and many leave visible residue that ruins the aesthetic of your finished piece.
The Universal Glue from Ferber Painting was specifically formulated to work on a wide variety of surfaces, including the plastic material used in iron-on beads. It dries clear, it dries fast, and it creates a bond that lasts for years without cracking or yellowing. These are qualities that many budget adhesives simply cannot match.
Here are the main reasons why choosing the correct glue matters so much for this type of project:
- Strong adhesion prevents beads from falling off after the project is finished.
- Fast drying time allows you to move on to the next step of your project without long waiting periods.
- A clear finish ensures that the glue does not affect the visual appeal of your design.
- Flexibility in the dried glue prevents cracking when the finished piece is handled or moved.
- Non-toxic formulas are safer for children and for crafters who work on these projects regularly.
Ferber Painting Universal Glue checks every single one of these boxes, which is why it has become the go to choice for crafters who take their iron-on bead projects seriously.
The Science Behind a Good Bond
It helps to understand a little bit about why some adhesives work well on iron-on beads while others fail almost immediately. Plastic beads have a naturally smooth, low friction surface, which means a glue needs specific chemical properties to actually bond with the material instead of simply sitting on top of it. Many all purpose glues found in general hardware stores are designed primarily for porous materials like wood or paper, and they struggle to create a lasting chemical bond with plastic. When a glue is not properly formulated for plastic, the bond may look fine on the surface immediately after application, only to fail weeks or months later once the piece experiences normal wear and tear, temperature changes, or exposure to humidity.
Ferber Painting Universal Glue was engineered specifically to overcome this challenge. Its formula is designed to slightly interact with the surface of the plastic, creating a mechanical and chemical bond that is far stronger and more durable than what you would get from a generic adhesive. This is the same reason professional crafters and small business owners who sell iron-on bead creations consistently choose our product over cheaper alternatives found in big box stores.
Why Some Crafters Overlook This Step
It is worth mentioning that many beginners skip the gluing step entirely, assuming that the ironing process alone is enough to permanently fuse the beads together. While ironing does create a bond, that bond is often more fragile than it appears. A design that looks perfectly solid right after ironing can easily crack or fall apart the very first time it is dropped, bent, or squeezed, especially at the edges or around small details like hearts, stars, or letters. Adding a layer of quality glue is a small extra step that dramatically increases the lifespan of your finished piece, and it is a step that experienced crafters rarely skip.
Step by Step Guide: How to Glue Iron-On Beads
Now that you understand why product choice matters so much, let us walk through the actual process of gluing iron-on beads. Whether you are reinforcing an ironed design or creating a project that does not require ironing at all, these steps will help you achieve professional looking results every time.
Step 1: Prepare Your Work Surface
Start by laying down a protective sheet or a piece of parchment paper on your work table. This prevents any glue from sticking to your table and makes cleanup much easier. If you are working on a pegboard design, make sure the beads are arranged exactly how you want them before you begin applying any adhesive.
It is also a good idea to gather all of your materials before you start, including your glue, a toothpick or small applicator tool for precision work, a pair of tweezers in case any beads shift out of place, and a clean cloth for wiping away any excess glue immediately. Having everything within reach prevents you from having to stop mid project, which can sometimes cause the glue to begin drying before you are ready to continue working.
Good lighting is another often overlooked factor. Working under bright, even lighting allows you to spot gaps in your bead design, uneven glue application, or areas that need reinforcement before the glue sets. Many crafters find that natural daylight or a bright desk lamp positioned above the work surface makes a noticeable difference in the quality of the finished piece.
Step 2: Iron Your Beads First (If Applicable)
In most cases, iron-on beads are first fused together using an iron and ironing paper. This creates the initial bond between the beads. However, this bond is sometimes not strong enough on its own, especially for projects that will be handled frequently, worn as jewelry, or displayed in high traffic areas. This is where glue becomes essential to reinforce the design and ensure long term durability.
When ironing, use a medium heat setting and keep the iron moving in small circular motions rather than leaving it resting in one spot. This helps ensure that all of the beads melt evenly, without some areas becoming over melted while others remain barely fused. Once you have ironed one side, many crafters flip the design over and lightly iron the reverse side as well, which helps create a flatter, more uniform surface that is easier to glue later on.
Remember that ironing alone changes the shape of the beads slightly, softening their edges and fusing them at the points of contact. This is a delicate process, and rushing it by using too much heat can cause the beads to melt too much, losing their distinct shape and color definition. Take your time here, since a well ironed base will always produce a stronger final result once glue is added.
Step 3: Apply the Universal Glue
Once your beads have cooled down after ironing, apply a thin, even layer of Ferber Painting Universal Glue to the back of your design. Because our glue has a precise applicator tip, you can control exactly how much product you use, avoiding the mess and waste that often comes with other adhesives. Unlike thick, clumpy glues that pool between the beads, our formula spreads evenly and seeps into the small gaps for a truly secure hold.
For larger projects, such as big wall art panels or multi piece designs, it can help to work in smaller sections rather than trying to glue the entire piece at once. Apply glue to one section, allow it to set slightly, and then move on to the next area. This sectional approach reduces the risk of the glue drying unevenly and gives you better control over placement, especially on complex or highly detailed designs.
If you are working with very small or delicate pieces, such as tiny charms for earrings or pendants, consider using a toothpick to apply small, precise dots of glue rather than relying solely on the applicator tip. This extra level of control can make a significant difference when working with miniature designs where even a small amount of excess glue can be visible.
Step 4: Reinforce Edges and Weak Points
Pay special attention to the edges of your design, as these areas tend to experience the most stress and are more likely to break apart. Apply a slightly thicker layer of glue along the outer perimeter of your project. The Universal Glue dries clear, so even if you apply a bit more product in these areas, it will not be visible on the finished piece.
In addition to the outer edges, pay close attention to any narrow connecting points within your design, such as the thin sections between letters, the points of a star shape, or thin bridges connecting two larger sections of a design. These narrow points are structurally weaker than wider sections and are the most common place where a finished piece will eventually snap or crack if not properly reinforced. A small extra dab of glue in these transition points can dramatically extend the life of your project.
Step 5: Let It Dry Completely
Allow your project to dry for at least twenty four hours before handling it extensively. While the Universal Glue sets quickly and beads will already feel secure after a few hours, giving it a full day ensures maximum bond strength. This is particularly important if you are creating jewelry pieces or items that will be worn or handled often.
During the drying period, try to place your project somewhere flat and undisturbed, away from direct sunlight or heat sources that could cause uneven drying. If possible, avoid touching or repositioning the beads while the glue is curing, since even small movements during this window can weaken the final bond. For larger flat pieces such as wall art, placing a light, non stick weight on top can help keep the piece flat as it dries, preventing warping.
Step 6: Add a Protective Layer (Optional)
For projects that will be exposed to moisture or frequent handling, such as keychains, coasters, or bracelets, consider adding a thin protective topcoat once the glue has fully dried. This extra step further extends the lifespan of your creation and keeps the colors vibrant for years to come.
A protective topcoat is especially recommended for any piece that will come into contact with water on a regular basis, such as coasters that may collect condensation from cold drinks, or outdoor decorations exposed to the elements. Applying a light, even topcoat and allowing it to dry fully according to the product instructions will help seal in the beads and glue, protecting the entire piece from moisture damage, fading, and general wear over time.
Comparing Ferber Painting Universal Glue to Other Adhesives
To help you understand exactly why our product stands out, we have put together a comparison table highlighting the most important criteria when choosing a glue for iron-on beads.
| Criteria | Ferber Painting Universal Glue | Typical Competitor Glue |
|---|---|---|
| Satisfaction Guaranteed or Money Back | Yes, on every order | Rarely offered |
| Drying Time | Fast, ready to handle within hours | Often slow, several hours to a full day |
| Finish | Clear and invisible once dry | Sometimes yellows or leaves residue |
| Flexibility After Drying | Remains flexible, resists cracking | Often becomes brittle over time |
| Ease of Application | Precision tip for controlled use | Often messy or difficult to control |
| Worldwide Shipping | Fast international delivery | Varies greatly by seller |
| Online Payment | Simple and secure checkout | Varies by retailer |
| Safe for Multiple Surfaces | Yes, truly universal formula | Often limited to specific materials |
As you can see, Ferber Painting Universal Glue outperforms typical competitor products across nearly every important criterion. This is not just marketing talk, it is the result of a formula that has been carefully developed with crafters in mind.
It is also worth pointing out that many competitor glues advertised for general craft use are not actually tested specifically on iron-on plastic beads. They may work adequately on paper, fabric, or wood, but perform inconsistently on the smooth plastic surface of fused beads. Ferber Painting Universal Glue, on the other hand, has been tested extensively on exactly this type of material, which is why crafters consistently report stronger, longer lasting results compared to generic alternatives found on typical marketplace listings.
Why Shopping With Ferber Painting Is the Best Choice
Beyond the quality of the glue itself, purchasing from Ferber Painting offers several additional advantages that you simply will not find with other sellers.
First, our Universal Glue is available directly on our website, making it easy to find, order, and receive without dealing with third party marketplaces or unreliable sellers. Second, Ferber Painting ships quickly to customers all around the world thanks to our established international network of trusted carriers. No matter where you are located, you can expect your order to arrive promptly and in perfect condition.
Payment is also incredibly straightforward. You can complete your purchase directly online using a secure and simple checkout process, without any complicated steps or hidden fees. We believe that buying craft supplies should be a smooth and stress free experience from start to finish.
Perhaps most importantly, every single product we sell, including our Universal Glue, comes with a satisfaction guaranteed or money back policy. This means that if for any reason you are not completely happy with your purchase, we will make it right. This guarantee reflects our confidence in the quality of our products and our commitment to customer satisfaction. Very few competitors are willing to stand behind their products this strongly, which is exactly why so many crafters trust Ferber Painting for their gluing needs.
Here is a quick summary of the advantages you get when you choose Ferber Painting:
- Satisfaction guaranteed or your money back on every order.
- Fast worldwide shipping through a reliable international carrier network.
- Simple and secure online payment options.
- A formula specifically designed to work well with iron-on beads and many other materials.
- A clear, flexible, long lasting finish that competitors struggle to match.
What Customers Say About Their Experience
Crafters who switch to Ferber Painting Universal Glue after trying other products often describe a noticeable improvement in both the process and the results. Many mention how much easier the applicator tip makes precise work, especially when working on detailed designs with dozens or even hundreds of small beads. Others highlight how relieved they feel knowing that if something does not work out as expected, the satisfaction guaranteed or money back policy means they are never left stuck with a product that does not perform as promised. This kind of confidence is difficult to find elsewhere, and it is a big part of why so many customers become repeat buyers.
Common Mistakes to Avoid When Gluing Iron-On Beads
Even with a high quality glue like ours, there are still some common mistakes that can affect the outcome of your project. Avoiding these pitfalls will help you get the best possible results every single time.
One frequent mistake is applying too much glue at once. This can cause the adhesive to pool between beads, creating an uneven, sticky surface that takes much longer to dry. Always apply a thin, even layer and add more only if necessary.
Another mistake is not allowing the beads to cool completely after ironing before applying glue. Applying adhesive to a surface that is still warm can affect how well the glue bonds and may lead to an uneven finish.
Many crafters also make the mistake of skipping the edges of their design. As mentioned earlier, edges experience the most stress during handling, so neglecting to reinforce them is a common reason why iron-on bead projects fall apart over time.
Finally, using a low quality or unsuitable glue is perhaps the biggest mistake of all. Many adhesives found in general craft stores are not designed with plastic beads in mind, leading to poor adhesion, visible residue, or a finish that yellows within weeks. This is precisely why choosing a proven, purpose suited product such as Ferber Painting Universal Glue makes such a significant difference in the final quality of your project.
Beyond these main issues, there are a few additional mistakes worth mentioning. Some crafters try to speed up the drying process by using a hair dryer or placing their project near a heater. This can actually cause uneven drying and may warp thinner pieces, so it is best to let the glue cure naturally at room temperature. Others make the mistake of storing their finished project in a location with high humidity, such as a bathroom or a damp basement, which can weaken the bond over time even after the glue has fully cured. Storing finished pieces in a dry, stable environment will help preserve their appearance and structural integrity for years to come.
Another mistake worth mentioning is failing to test the glue on a small, inconspicuous area first when working with a new type or color of bead. While Ferber Painting Universal Glue is formulated to work reliably across a wide range of plastic beads, testing a small area first is always good practice, especially for crafters working with specialty beads, glow in the dark beads, or beads made from unusual blends of material.
Tips for Working With Children
Iron-on bead crafts are extremely popular with children, and many parents wonder about the best way to introduce gluing into these projects safely. Because Ferber Painting Universal Glue is formulated to be non toxic, it is a suitable choice for family craft time, though adult supervision is always recommended when working with any adhesive, especially for younger children. Encourage kids to apply glue slowly and in small amounts, and consider having them practice on a scrap design first before moving on to their main project. This builds confidence and helps avoid the common mistake of over applying glue on a piece that took a long time to create.
Frequently Asked Questions
Do I need to iron my beads before applying glue?
In most cases, yes. Ironing creates the initial fusion between beads, and glue is then used to reinforce that bond for long term durability, especially for projects that will be handled frequently.
How long does Ferber Painting Universal Glue take to dry?
The glue is touch dry within a few hours, but we recommend waiting a full twenty four hours before handling your project extensively for maximum bond strength.
Can I use this glue on other craft materials besides iron-on beads?
Absolutely. Our Universal Glue is designed to work on a wide range of surfaces, including plastic, wood, fabric, and more, making it a versatile addition to any craft supply collection.
What happens if I am not satisfied with my purchase?
Every product sold by Ferber Painting comes with a satisfaction guaranteed or money back policy. If you are not happy with your order, simply contact us and we will make it right.
How long does shipping take?
Thanks to our international network of trusted carriers, Ferber Painting delivers quickly to customers all around the world, no matter where you are located.
Can this glue be used on jewelry pieces that will be worn regularly?
Yes. Because the dried glue remains flexible and resists cracking, it holds up well on bracelets, earrings, and pendants that experience daily movement and handling, as long as the recommended twenty four hour curing time is respected before wearing the piece.
Will the glue affect the colors of my beads?
No. Ferber Painting Universal Glue dries completely clear, so it will not alter, dull, or discolor the vibrant colors of your iron-on beads, even after extended periods of time.
Conclusion
Gluing iron-on beads successfully comes down to two things: following the right technique and choosing the right adhesive. As we have shown throughout this guide, not all glues are created equal, and using a product that is not designed for this type of project can lead to disappointing results. Ferber Painting Universal Glue offers unmatched adhesion, a clear and flexible finish, and the added peace of mind of a satisfaction guaranteed or money back policy that competitors simply do not offer.
Whether you are a beginner working on your very first pegboard design or an experienced crafter producing detailed wall art and jewelry for sale, taking the time to follow proper technique and invest in a quality adhesive will make a noticeable difference in the durability and appearance of your finished projects. Small details, such as preparing your work surface, reinforcing edges, and allowing sufficient drying time, all add up to create pieces that last for years rather than falling apart after a few uses.