 Ireland
 United States
 Australia
 Česko
Česko Danmark
 Deutschland
 Eesti
Eesti España
 Ελλάδα
 France
 Hrvatska
 Italia
 Latvija
 Lietuva
 Magyarország
 Nederlands
 New-Zealand
 Norge
Norge Polska
 Portugal
 România
 Schweiz (Deutsch)
 Slovenija
 Slovensko
 Suomi
Suomi Sverige
 България
 Canada (English)
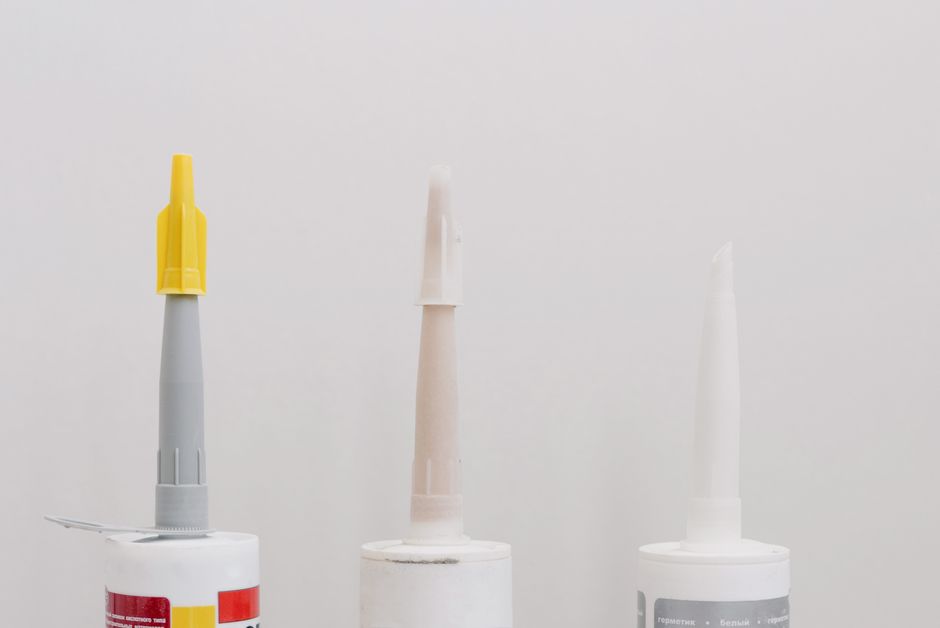
Building with Lego bricks is one of the most satisfying hobbies in the world, but sometimes you want your creations to last forever. Whether you are building a display model, a collector’s piece, or a custom sculpture, gluing your Lego bricks together can transform a temporary build into a permanent work of art. However, everything depends on choosing the right product. Not all glues are created equal, and using the wrong one can damage your bricks, leave visible residue, or simply fail to hold over time.
That is why we recommend the Plastic Glue from Ferber Painting. Unlike most adhesives on the market, our Plastic Glue is specifically formulated to bond ABS plastic, the exact material Lego bricks are made from, without damaging the surface or leaving unsightly marks. Even better, Ferber Painting is the only company offering a satisfied or refunded guarantee on this type of product. If you are not happy with the result, we take care of it. No questions asked.
In this guide, we will explain why our Plastic Glue is the best option available, walk you through the exact steps to glue your Lego bricks successfully, explore the reasons people decide to glue their builds in the first place, look at the specific challenges different types of projects present, and answer the most common questions people have about this process. By the end of this article, you should feel fully confident about tackling your own gluing project, whatever it may be, from a small keychain to a massive display model containing thousands of pieces.
Why People Glue Their Lego Creations
Before diving into the technical side of things, it is worth understanding why so many builders, collectors, and hobbyists choose to permanently glue their Lego models in the first place. Lego bricks are designed to be taken apart and rebuilt endlessly, which is part of their charm. However, there are many situations where a permanent bond becomes not just useful but essential.
Consider a large scale display model built for a convention, a store window, or a museum exhibit. These builds are often handled, transported, and viewed by hundreds or thousands of people. A model that is only held together by the friction of the studs can easily fall apart during transport, especially if it includes overhangs, thin connections, or delicate sections. Gluing critical joints ensures the model survives the journey and stays intact for public display.
Collectors also glue their pieces when creating custom sculptures or art pieces meant to be sold or displayed long term. A glued sculpture can be shipped safely without the risk of pieces popping off during transit. Parents of young children sometimes glue smaller builds, such as minifigure accessories or small vehicles, to prevent choking hazards from loose pieces. Some builders also glue sections of a model that experience constant stress, such as wheels, hinges, or moving parts that would otherwise loosen over time from repeated use.
Finally, many people simply want to preserve a nostalgic build forever exactly as it is. A childhood creation, a wedding cake topper made of Lego, or a tribute model built in memory of someone can all benefit from a permanent bond that ensures the model never has to be rebuilt or repaired.
Why Choose Ferber Painting’s Plastic Glue
There are dozens of adhesive products claiming to work on plastic, but very few are actually designed with Lego bricks in mind. Ferber Painting’s Plastic Glue was developed specifically to bond ABS plastic without causing the brittleness, discoloration, or melting that many generic super glues cause. Here are the main reasons our customers choose us over any other brand:
- Specifically formulated for ABS plastic, the material used in Lego bricks
- Dries clear, leaving no visible residue on your build
- Creates a permanent, shock resistant bond that will not weaken over time
- Easy to apply with a precision tip, avoiding excess glue and messy drips
- Fast drying formula, so you do not have to wait hours to continue building
- Satisfied or refunded guarantee, unmatched by any competitor
- Fast worldwide shipping through our international network of carriers
- Secure and simple online payment directly on our website
Most glue brands on the market focus on wood, metal, or general household repairs. They are not optimized for the specific chemical composition of Lego bricks, which means they often either fail to bond properly or damage the plastic. Ferber Painting took the time to develop a formula that respects the integrity of the brick while providing an unbreakable bond.
One of the aspects that sets our formula apart is the way it interacts chemically with ABS plastic. Rather than simply sitting on top of the surface like many generic adhesives, our Plastic Glue is designed to slightly bond with the molecular structure of the plastic itself, creating a joint that is stronger than the surrounding material in many cases. This means that when stress is applied to a glued model, the brick itself is more likely to bend or crack before the glued joint fails, which is the mark of a truly professional grade adhesive.
Another major advantage is the viscosity of the formula. Many super glues are either too thin, causing them to run everywhere and seep into visible cracks, or too thick, making it difficult to apply a precise amount. Ferber Painting’s Plastic Glue strikes the perfect balance, allowing it to flow just enough to fill the microscopic gaps between two ABS surfaces while staying controlled enough to avoid drips and overflow.
Ideal for All Types of Lego Projects
Whether you are working on a small keychain, a medium sized vehicle, or an enormous architectural model with tens of thousands of bricks, our Plastic Glue adapts to the scale of your project. Its precision applicator tip allows for tiny, controlled dots of glue perfect for small connections, while the fast drying formula means larger projects with many joints can be completed in a reasonable amount of time without everything grinding to a halt while you wait for each piece to set.
Comparison Table: Ferber Painting vs Other Glue Brands
| Criteria | Ferber Painting Plastic Glue | Generic Super Glue | Other Plastic Glues |
|---|---|---|---|
| Formulated for ABS plastic | Yes | No | Sometimes |
| Dries clear | Yes | No, often yellows | Varies |
| Satisfied or refunded guarantee | Yes | No | No |
| Fast worldwide shipping | Yes | Depends on retailer | Depends on retailer |
| Precision applicator | Yes | No | Rarely |
| Drying time | Fast | Fast but brittle bond | Slow |
| Easy online purchase | Yes | Varies | Varies |
As you can see, Ferber Painting’s Plastic Glue checks every box that matters when it comes to gluing Lego bricks. The combination of a specialized formula, a risk free guarantee, and reliable worldwide delivery makes it the obvious choice for builders of all levels.
It is also worth mentioning that generic super glues, often cyanoacrylate based, tend to react poorly with ABS plastic over long periods of exposure to light and air. Many builders report that models glued with generic products begin to show a cloudy white residue or a yellow tint after several months, especially if the model is displayed near a window or under direct light. This is a chemical reaction between the adhesive and the plastic that our formula is specifically designed to avoid, ensuring your model looks just as good years down the line as it did the day you finished building it.
Step by Step Guide: How to Glue Lego
Now that you understand why choosing the right glue matters so much, let’s go through the process of gluing Lego bricks properly. Follow these steps carefully to ensure the best possible result. Even experienced builders can benefit from revisiting these fundamentals, since small mistakes at any stage can affect the overall quality and durability of the final bond.
Step 1: Prepare Your Bricks
Before applying any glue, make sure your Lego bricks are completely clean and dry. Dust, oil from fingers, or moisture can weaken the bond significantly. Wipe each brick with a soft, dry cloth. If the bricks are particularly dirty, wash them with mild soap and water, then let them air dry completely before moving forward.
It is worth paying special attention to older or secondhand bricks, which often carry years of accumulated dust, grime, or even sticker residue. If you notice any sticky patches from old stickers, use a small amount of isopropyl alcohol on a cotton swab to gently remove the residue without damaging the brick’s surface. Avoid harsh chemicals or abrasive scrubbing pads, as these can scratch the plastic and create a rough surface that actually reduces the effectiveness of the glue rather than improving it.
Temperature also plays a role in preparation. Bricks that have been stored in a cold garage or basement should be allowed to reach room temperature before gluing, since condensation can form on cold plastic when it is brought into a warmer room, introducing unwanted moisture right at the bonding surface. Simply leave your bricks out for thirty minutes to an hour in the room where you plan to work before starting.
Step 2: Plan Your Build
Decide in advance exactly which pieces need to be permanently joined. It is often best to build your entire structure first without glue, to make sure everything fits correctly. Once you are satisfied with the design, you can begin gluing piece by piece, starting from the base and working your way up.
For larger or more complex builds, it can help to take photographs of your completed dry build from multiple angles before you begin gluing. This gives you a reference to check against as you work, ensuring you do not accidentally glue a piece into the wrong position or forget a connection that needs reinforcing. Numbering or labeling sections of a very large model with small pieces of masking tape can also help you keep track of the correct order of assembly, especially if the project will take place over several sessions spread across multiple days.
Think carefully about which joints truly need glue and which do not. Not every connection in a model needs to be permanent. In many cases, gluing only the structurally critical points, such as the base, major support beams, or areas subject to frequent handling, is enough to create a stable and durable model while still leaving some flexibility in the rest of the build. This selective approach also reduces the total amount of glue needed and minimizes the risk of visible residue.
Step 3: Apply the Glue
Using the precision applicator tip of Ferber Painting’s Plastic Glue, apply a small, thin line of glue to the connecting studs or the inside edge of the brick you want to bond. Less is more here. A thin layer is enough to create a strong bond without excess glue seeping out and ruining the appearance of your model.
When working with studs, a good technique is to place a tiny dot of glue on only two or three of the studs rather than covering every single one, particularly on larger flat pieces where full coverage is rarely necessary for a strong hold. For hinge pieces, technic connectors, or axles, apply the glue sparingly along the point of contact rather than flooding the joint, since these pieces often have small gaps and mechanisms that can become clogged if too much adhesive is used.
If you are working on a particularly visible part of your model, such as a smooth panel or a transparent piece, it is worth practicing your technique first on a spare brick to get a feel for exactly how much pressure to apply to the tip of the bottle. This helps you avoid accidentally dispensing too much glue on your actual project.
Step 4: Press and Hold
Press the two pieces together firmly and hold them in place for about 20 to 30 seconds. This allows the initial bond to set. Because our formula dries quickly, you will already feel the pieces starting to hold firmly within this short window.
For pieces that are difficult to hold steady with your fingers alone, such as very small parts or awkwardly shaped components, consider using clothespins, small clamps, or even rubber bands to keep steady pressure applied while the initial bond forms. This is especially useful when gluing several joints in quick succession, since it frees up your hands to prepare the next piece while the previous one continues to set.
Try to apply even pressure across the entire joint rather than pressing harder on one side, as uneven pressure can squeeze more glue out on one edge, creating a visible line of excess adhesive that is harder to clean up once it starts to dry.
Step 5: Let It Cure
While the initial bond forms within seconds, it is best to let the glue cure fully for at least 24 hours before handling the model roughly or displaying it in a high traffic area. This ensures maximum strength and durability.
During this curing period, it is best to place your model in a stable, dust free location away from direct sunlight and away from areas where it might be bumped or knocked over by pets, children, or foot traffic. While the surface bond may feel solid after just a few minutes, the internal chemical curing process that gives the adhesive its full strength continues to develop over the following hours. Rushing this stage, for example by immediately shipping a model or handing it to a child to play with, is one of the most common reasons a bond that would otherwise have been extremely strong ends up failing prematurely.
If you are working on a very large model that will take multiple days to complete, it can help to glue the lower, structural sections first and allow them to cure fully overnight before continuing to build upward. This way, the foundation is at full strength by the time you add the additional weight of the upper sections, reducing stress on joints that are still in the process of curing.
Step 6: Clean Up Any Excess
If any glue seeps out from between the bricks, gently wipe it away immediately with a cotton swab before it dries. Because our glue dries clear, even minor imperfections will be virtually invisible once fully cured.
For glue that has already started to dry before you notice it, a small amount of isopropyl alcohol applied carefully with a cotton swab can help soften the excess enough to remove it without damaging the surrounding plastic. Always test this method on a hidden or less visible part of the model first, since prolonged contact with alcohol can occasionally dull the glossy finish of certain colored bricks.
It is also a good habit to keep a few clean cotton swabs and a small cloth nearby throughout the entire gluing process, rather than only reaching for them after noticing a mistake. Quick cleanup as you go tends to produce a much cleaner finished result than trying to fix multiple dried spots after the fact.
Special Considerations for Different Types of Lego Projects
Not every Lego project is the same, and different types of builds often call for slightly different approaches when it comes to gluing. Understanding these nuances can help you achieve the best possible result no matter what you are working on.
Large Display Models
Large architectural or vehicle display models often need to withstand transport, handling by multiple people, and long term display in environments that may not always be climate controlled. For these builds, it is especially important to reinforce the base and any load bearing sections, since these areas carry the most weight and stress. Consider gluing internal support structures even if they are not visible from the outside, as this hidden reinforcement can dramatically increase the overall durability of the model without affecting its appearance.
Minifigure Customization
Many collectors glue minifigure accessories, helmets, or capes in place to create a permanent custom look for display purposes. Because minifigure pieces are small and often have very fine details, a precision applicator tip becomes especially important here. Apply the smallest possible amount of glue and hold the pieces together for slightly longer than usual, since these small parts have less surface area for the bond to form.
Functional Builds with Moving Parts
If your project includes wheels, gears, or hinges that need to continue moving after assembly, it is critical to avoid gluing the moving mechanism itself. Instead, focus your gluing efforts on the surrounding structural connections that hold the mechanism in place, while leaving the functional parts free to move as intended. Accidentally gluing a moving joint is one of the most common and frustrating mistakes builders make, so always double check exactly where the glue is being applied on these types of models.
Jewelry and Small Accessories
Lego bricks are increasingly popular for making custom jewelry, keychains, and small decorative accessories. These small scale projects benefit greatly from the fast drying nature of our formula, since builders often want to complete several small pieces in a single sitting. The precision tip also shines here, allowing for extremely controlled application on tiny surfaces where even a small excess of glue would be highly visible on the finished piece.
Common Mistakes to Avoid
Many builders make simple mistakes that ruin their projects. Here are a few things to avoid when gluing Lego bricks:
- Using too much glue, which causes it to seep out and become visible
- Gluing bricks that are dirty or still damp
- Using a generic glue not designed for ABS plastic, which can cause discoloration or brittleness
- Not holding the pieces together long enough for the initial bond to set
- Handling the model too soon before the glue has fully cured
Beyond these common issues, there are a few additional pitfalls worth mentioning. Some builders make the mistake of gluing an entire model in one long session without any breaks, which can lead to fatigue and careless mistakes as the project drags on. It is often better to split large projects into multiple sessions, allowing each glued section to cure before moving on to the next, rather than trying to rush through everything at once.
Another mistake is failing to consider the final orientation of the model before gluing. Once a joint is permanently bonded, it cannot easily be repositioned, so it is worth double checking angles, symmetry, and alignment carefully before committing to a permanent bond. A few extra minutes of checking can save hours of frustration later.
Finally, some builders attempt to glue bricks in extremely cold or humid environments, not realizing that temperature and humidity can affect both the drying time and the final strength of the bond. Working in a room temperature environment with normal humidity levels will always produce the most consistent and reliable results.
By following the step by step process above and using a product specifically designed for this purpose, you can avoid all of these issues and enjoy a permanent, professional looking result.
Caring for Your Glued Lego Model Over Time
Once your model is complete and the glue has fully cured, a small amount of ongoing care will help it stay looking its best for years to come. Dust regularly with a soft, dry brush or a can of compressed air rather than a damp cloth, since moisture is generally best kept away from any model even after the glue has fully cured. Avoid displaying glued models in direct sunlight for extended periods, as UV exposure can cause certain brick colors to fade over time regardless of the type of adhesive used.
If your model will be handled frequently, such as a display piece in a busy office or a shop window, periodically inspect the glued joints for any signs of stress or wear, particularly around the base and any areas that experience repeated contact. While a properly glued joint using a quality adhesive like ours should last indefinitely under normal conditions, extreme situations such as accidental drops can still cause damage, and catching a small issue early is always easier to repair than dealing with a larger failure later.
Frequently Asked Questions
Does gluing Lego bricks damage them permanently?
Yes, once glued with a permanent adhesive like Ferber Painting’s Plastic Glue, the bricks will no longer separate. This is why it is important to plan your build carefully before applying glue.
Can I use regular super glue instead?
Regular super glue is not formulated for ABS plastic and can cause brittleness, discoloration, or a weak bond that fails over time. A specialized product like ours is strongly recommended.
How long does it take for the glue to fully cure?
The initial bond forms within seconds, but we recommend waiting at least 24 hours before handling the model roughly to allow the glue to reach its maximum strength.
What happens if I am not satisfied with the product?
Ferber Painting offers a satisfied or refunded guarantee on all products, including our Plastic Glue. If you are not happy with your purchase, simply contact us and we will take care of it.
Does Ferber Painting ship internationally?
Yes, we ship quickly worldwide thanks to our international network of trusted carriers, and payment can be made easily and securely directly on our website.
Can I glue Lego pieces of different colors together without affecting the color?
Yes, because our Plastic Glue dries completely clear, it will not affect the color or finish of any brick, regardless of the combination of colors used in your build.
Is the glue safe to use around children?
As with any adhesive product, it should be used under adult supervision and kept out of reach of young children during application. Once fully cured, the bond itself is stable and safe as part of a completed model.
Can this glue be used on other plastic materials besides Lego bricks?
Yes, our formula works well on ABS plastic in general, which means it can also be used for other plastic model kits, toys, and household items made from the same material.
What should I do if I make a mistake and glue two pieces incorrectly?
Because the bond is designed to be permanent, correcting a mistake after the glue has cured is very difficult and may damage the bricks. This is why careful planning before gluing, as outlined earlier in this guide, is so important.
Conclusion
Gluing Lego bricks is a simple process once you have the right product and follow the correct steps. From preparing your bricks to applying a thin, precise layer of adhesive and allowing it to cure properly, every step matters for achieving a strong, invisible bond. Choosing a glue specifically formulated for ABS plastic, backed by a real guarantee, makes all the difference between a fragile model and a lasting masterpiece.
Whether you are preserving a childhood memory, building a display model for a convention, creating custom jewelry, or reinforcing a large architectural masterpiece, the principles outlined in this guide will help you achieve professional, long lasting results. Take the time to plan your build, prepare your bricks properly, apply the glue with care, and allow adequate curing time, and your finished project will reward you with years of durability and a flawless appearance.