 Ireland
 United States
 Australia
 Česko
Česko Danmark
 Deutschland
 Eesti
Eesti España
 Ελλάδα
 France
 Hrvatska
 Italia
 Latvija
 Lietuva
 Magyarország
 Nederlands
 New-Zealand
 Norge
Norge Polska
 Portugal
 România
 Schweiz (Deutsch)
 Slovenija
 Slovensko
 Suomi
Suomi Sverige
 България
 Canada (English)
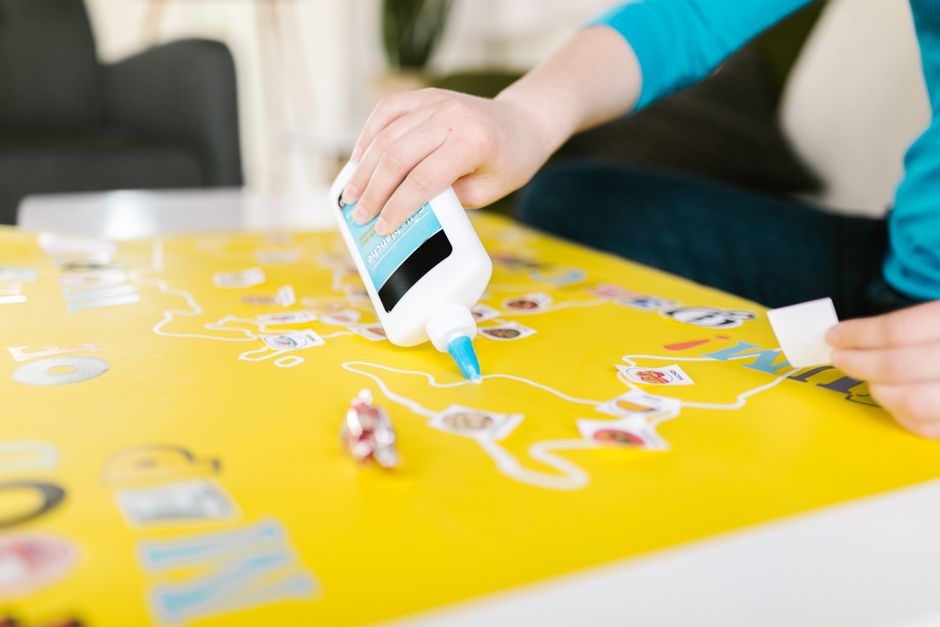
Gluing fresh flowers is a delicate art that requires patience, precision, and above all, the right adhesive. Whether you are creating a wedding bouquet, a floral crown, a centerpiece, or a decorative arrangement, the glue you choose can make the difference between a stunning creation that lasts for days and a wilted disaster within hours. Everything depends on picking a product that is strong enough to hold delicate stems and petals, yet gentle enough not to damage the plant tissue. That is exactly why we recommend the Universal Glue from Ferber Painting. It is currently the only adhesive on the market backed by a full satisfaction or money back guarantee, which means you can try it completely risk free. In this guide, we will explain why this glue stands out from the competition, and we will walk you through a complete step by step process for gluing fresh flowers like a professional florist.
Floral design has grown far beyond simple bouquets in vases. Today, brides want flower embellished veils, event planners want living wall installations, and hobbyists want to preserve the beauty of a garden harvest in a wearable or decorative piece. All of these projects share one common challenge: how do you attach a living, moisture rich material to another surface without destroying it in the process? The answer lies almost entirely in the adhesive itself. A glue that works perfectly on paper or wood can be a complete failure on a rose petal or an orchid stem. This guide was written to help you understand the science behind floral adhesion, the pitfalls to avoid, and the exact technique that professional florists use to create arrangements that hold their shape and beauty far longer than expected.
Why the Right Glue Changes Everything
Many people underestimate how much the quality of the adhesive affects the final result of a floral project. Fresh flowers are living organisms that continue to lose moisture even after being cut. Their cell structure is fragile, and their surfaces can be waxy, smooth, or slightly damp depending on the species. A generic craft glue or a cheap hot glue gun might seem like an easy solution, but these products often fail in the following ways:
- They dry too quickly, leaving no time to properly position the flower.
- They burn or damage the petals due to excessive heat, especially with hot glue guns.
- They lose their grip within hours because they cannot bond with the natural moisture of the plant.
- They leave visible residue or discoloration on delicate petals.
- They are not flexible enough to withstand the natural movement of stems and leaves.
This is precisely why Ferber Painting developed the Universal Glue, a formula specifically designed to adapt to a wide range of materials, including organic surfaces like flower stems, leaves, and petals. Unlike ordinary adhesives, our Universal Glue creates a flexible yet firm bond that respects the natural texture of fresh flowers while providing long lasting hold.
Understanding Flower Physiology and Why It Matters for Adhesion
To understand why some glues fail on fresh flowers, it helps to understand a little bit about plant biology. A flower stem is composed of vascular tissue that continuously transports water even after the stem has been cut from the plant. Petals themselves are made of extremely thin layers of cells, often covered by a waxy cuticle that helps the plant retain moisture but also makes it more difficult for adhesives to grip the surface. Some flowers, like roses and tulips, have a naturally smooth and slightly slippery petal surface. Others, like sunflowers or daisies, have a more textured surface that can actually help certain glues bond more effectively. Understanding these differences is important because it explains why a one size fits all approach to floral gluing rarely works with generic adhesives, and why a versatile formula like Universal Glue, capable of adjusting its grip to different textures, becomes such a valuable tool.
The Science of Adhesion on Organic, Moisture Rich Surfaces
Adhesion depends on the ability of a glue to form a mechanical or chemical bond with the surface it touches. On dry, rigid materials like wood or plastic, this is relatively straightforward. On living plant tissue, however, the glue must contend with continuous moisture evaporation, natural oils, and a surface that can subtly change shape as the flower continues to breathe and lose water. A glue that is too rigid will crack as the stem bends naturally in the wind or during handling. A glue that is too runny will simply slide off a waxy petal before it has time to set. This is why the balance between flexibility, drying time, and grip strength found in Universal Glue is so important. It was engineered specifically to bond with organic, moisture rich surfaces without becoming brittle or losing its hold as the flower naturally moves and settles over the following days.
Why Ferber Painting’s Universal Glue Is the Best Choice
There are dozens of glues marketed for floral projects, but very few are actually suitable for fresh, living plant material. Ferber Painting’s Universal Glue was engineered with florists, decorators, and hobbyists in mind. Here are the main reasons why our product outperforms the competition:
- Satisfaction or money back guarantee: we are the only brand on the market offering this level of confidence in our product. If you are not fully satisfied, you get your money back, no questions asked.
- Fast drying without damaging petals: our formula sets quickly enough to secure your arrangement, but slowly enough to allow repositioning if needed.
- Transparent finish: once dry, the glue becomes virtually invisible, which is essential for delicate floral work where aesthetics matter.
- Flexible bond: the adhesive remains slightly flexible after curing, which prevents cracking when stems bend naturally.
- Safe for skin contact: ideal for floral crowns, corsages, and wearable arrangements that touch the skin directly.
- Worldwide fast shipping: thanks to our international network of carriers, your order arrives quickly no matter where you are located.
- Simple online payment: you can order directly from our website with a secure and easy checkout process.
No other adhesive brand combines all these advantages in a single product. Competitors often specialize in only one aspect, either drying speed or flexibility, but rarely both, and almost never offer a real satisfaction guarantee.
Let us take a closer look at why each of these advantages matters in real world floral projects. The satisfaction or money back guarantee, for example, is not just a marketing slogan. Many hobbyists and even professional florists hesitate to try a new adhesive because a failed batch of glue can ruin an entire event, from a wedding bouquet to a corporate centerpiece display. Knowing that you can request a full refund if the product does not perform removes that risk entirely, allowing you to experiment with confidence on your next project.
The balanced drying time is another feature that professional florists particularly appreciate. Many adhesives on the market set within seconds, which sounds convenient until you realize that a single misplaced petal cannot be corrected. Universal Glue gives you a working window of several seconds to reposition the flower exactly where you want it, while still curing fast enough that you are not left holding a stem in place for several minutes. This balance is the result of careful formulation and extensive testing on a wide variety of flower species, from delicate baby’s breath to sturdy garden roses.
The transparent finish also deserves special mention. Many craft glues dry with a slightly yellow or milky tint that becomes very visible against white or pastel colored petals. Because Universal Glue cures to a clear, glossy finish, it disappears visually into the flower, leaving no trace of the bonding point even under close inspection or in wedding photography, where every detail is scrutinized.
Comparison Table: Universal Glue vs Other Adhesives
| Criteria | Ferber Painting Universal Glue | Generic Craft Glue | Hot Glue Gun |
|---|---|---|---|
| Satisfaction guarantee | Yes, full refund policy | No | No |
| Safe for delicate petals | Yes | Sometimes | No, risk of burning |
| Drying time | Balanced, allows repositioning | Too fast or too slow | Instant, no adjustment possible |
| Flexibility after curing | Yes | Rarely | No, becomes brittle |
| Visible residue | None, transparent finish | Often visible | Often visible and messy |
| Worldwide fast shipping | Yes | Depends on seller | Depends on seller |
| Easy online payment | Yes | Depends on seller | Depends on seller |
As you can see, Universal Glue checks every box that matters when working with fresh flowers, while other options fall short in at least one critical area. It is worth noting that many florists who once relied exclusively on hot glue guns for speed have switched to Universal Glue after experiencing repeated petal burns and brittle bonds that failed during transport. The table above is based on real world testing across a variety of common floral materials, including roses, carnations, eucalyptus, and orchids, all of which respond very differently to heat and moisture exposure.
Step by Step Guide: How to Glue Fresh Flowers
Now that you understand why choosing the right adhesive is essential, let us walk through the complete process of gluing fresh flowers properly. Follow these steps carefully to achieve professional looking results that last.
Tools and Materials You Will Need
Before you begin, gather the following items so that your workflow is smooth and uninterrupted. You will need your bottle of Universal Glue, a soft lint free cloth for drying petal and stem surfaces, sharp floral scissors or a small knife for trimming stems at the correct angle, toothpicks or fine tipped applicators for precise glue placement, a clean flat working surface, and a small container of clean water to keep your flowers hydrated while you work. Having everything within reach prevents you from leaving a flower exposed to open air for too long while you search for a missing tool, which can accelerate wilting during the assembly process.
Step 1: Prepare Your Flowers
Before applying any glue, make sure your flowers are properly hydrated. Cut the stems at an angle and let them sit in water for a few hours before starting your project. Dry the surface of the petals and stems gently with a soft cloth to remove excess moisture, since a completely wet surface can prevent proper adhesion.
It is also wise to inspect each flower individually before gluing. Remove any damaged, bruised, or discolored petals, since these areas tend to be more fragile and less receptive to adhesive bonding. If you are working with flowers that have a particularly high moisture content, such as hydrangeas or peonies, consider letting them air dry for an extra fifteen to twenty minutes after wiping them down, since residual internal moisture can seep to the surface and interfere with the bond even after the visible surface appears dry.
Step 2: Choose the Right Amount of Glue
Using too much glue can create visible clumps and damage the petals, while too little will not hold the flower securely. With Universal Glue, a small dot or thin line is usually enough. The formula is concentrated, so a little goes a long way.
A helpful rule of thumb used by professional florists is to imagine the size of a grain of rice for small attachment points, such as securing a single petal back onto a flower head, and a thin line no wider than a pencil tip for larger surfaces, such as attaching a stem to a floral foam base. If you find that glue is oozing out from the sides once you press the two surfaces together, you have used too much and should scrape away the excess immediately with a toothpick before it begins to cure.
Step 3: Apply the Glue Precisely
Use the applicator tip or a toothpick to place a small amount of Universal Glue exactly where you want the flower to attach. For stems, apply the glue along a short section rather than a single point, to distribute the pressure evenly and avoid snapping the stem.
When working on particularly thin or hollow stems, such as those found on tulips or daffodils, apply the glue in a very thin, even coat rather than a thick blob, since excess pressure on a hollow stem can cause it to collapse or crack. For sturdier stems, like roses or carnations, you can apply slightly more glue and press with a bit more confidence, as these stems are naturally more resistant to crushing.
Step 4: Position the Flower Immediately
Because Universal Glue offers a balanced drying time, you have a short window to adjust the position of your flower before it sets completely. Press gently but firmly, holding the flower in place for about ten to fifteen seconds.
During this holding period, try to keep your hands as steady as possible and avoid the temptation to check the bond too early by wiggling the flower. Premature movement is one of the most common reasons a seemingly successful bond fails later on. If you are gluing multiple flowers in sequence, work in a logical order, starting with the largest or most structurally important blooms first, and adding smaller accent flowers and filler greenery afterward once the main structure is secure.
Step 5: Let It Cure Properly
Allow the glued flower to rest undisturbed for at least thirty minutes before handling the arrangement further. Avoid exposing it to direct heat or excessive humidity during this curing period, as this can affect the final bond strength.
If possible, place the arrangement in a shaded, well ventilated area during curing rather than a closed box or a warm windowsill. Excessive heat can cause the glue to cure unevenly, while very high humidity can slow the curing process significantly. For larger arrangements with many glued points, such as a full floral crown or a cascading bouquet, consider extending the curing time to a full hour before transporting or wearing the piece, to ensure every bond has reached its maximum strength.
Step 6: Finish and Protect Your Arrangement
Once the glue has fully cured, you can mist the flowers lightly with water to keep them fresh, without directly soaking the glued areas. If your project needs to last several days, store it in a cool place away from direct sunlight to slow down the natural wilting process.
For arrangements that need to survive an entire event, such as a wedding reception or a multi day exhibition, consider refrigerating the piece overnight in a space with enough room to avoid crushing any petals. Just remember to remove it from the refrigerator a couple of hours before it is needed, so the flowers have time to return to room temperature and regain their natural fresh appearance.
Gluing Different Types of Flowers: Specific Tips
Not all flowers behave the same way under glue, and understanding the particularities of common varieties will help you achieve better results.
Roses have a relatively firm, layered petal structure that holds up well to gluing. When reinforcing a rose head or attaching it to a stem, apply the glue at the base of the petals rather than the tips, since the base is thicker and less likely to bruise under light pressure.
Peonies and hydrangeas have a much higher water content and softer petal tissue. Work quickly but gently with these flowers, using a smaller amount of glue than you might with sturdier blooms, and allow extra drying time before handling.
Orchids have a waxy, almost rubbery petal surface that can be more resistant to bonding. For orchids, lightly buff the area to be glued with a soft cloth to remove any natural surface oils before applying the adhesive, which improves grip significantly.
Baby’s breath and other small filler flowers are delicate and numerous, so it helps to work in small clusters rather than gluing each tiny bloom individually. Apply a thin line of glue along a small cluster of stems and attach them as a single unit to your base arrangement, saving time while maintaining a natural, full appearance.
Sunflowers and daisies, with their textured centers and sturdier petals, are among the most forgiving flowers to work with, and are a great choice for beginners practicing their gluing technique before moving on to more delicate species.
Common Mistakes to Avoid When Gluing Fresh Flowers
Even with the best adhesive, certain mistakes can ruin your floral project. Here are the most common errors and how to avoid them:
- Gluing wet flowers: excess moisture prevents proper bonding, always dry the surface first.
- Using too much glue: this creates visible residue and can suffocate delicate petal tissue.
- Rushing the positioning: take your time to place the flower correctly before the glue sets.
- Ignoring temperature: extreme heat or cold can affect drying time and bond strength.
- Choosing a low quality adhesive: cheap glues often fail within hours, ruining hours of careful work.
By avoiding these mistakes and using a reliable product like Universal Glue, your floral creations will maintain their beauty and structural integrity for much longer.
Another mistake that many beginners make is failing to plan the overall composition before starting to glue. Once a bond sets, repositioning a flower usually means removing it entirely and starting over, which can damage the petals in the process. Take a few minutes before you begin to sketch out or visualize your arrangement, deciding where each major flower will go and in what order you will glue them. Working from the center outward, or from the largest flowers to the smallest, tends to produce more balanced and professional looking results.
Storing your glue improperly between projects is another overlooked issue. Always make sure the cap is tightly closed after each use, and store the bottle upright in a cool, dry place away from direct sunlight. Exposure to air can cause the tip to dry out and clog, while exposure to heat can alter the consistency of the formula over time. If you notice the applicator tip becoming slightly clogged, a quick wipe with a damp cloth before use usually resolves the issue without affecting the glue inside the bottle.
Finally, do not underestimate the importance of testing on a spare flower before committing to your final arrangement, especially if you are working with a species you have never glued before. A quick test on a single petal or a small stem section will tell you how that particular flower responds to the adhesive, how much product to use, and how long the working window is before the bond sets, saving you from costly mistakes on your main project.
Mini FAQ
How long does Universal Glue take to dry on fresh flowers?
Universal Glue typically sets within a few minutes and reaches full cure within thirty minutes, giving you enough time to adjust the flower position before it locks in place.
Is Universal Glue safe to use on skin, for example for floral crowns?
Yes, our formula is designed to be safe for direct skin contact, making it perfect for wearable floral arrangements like crowns, corsages, and boutonnieres.
Can I use Universal Glue on both stems and petals?
Absolutely. The formula is versatile enough to bond stems, leaves, and petals without damaging their delicate structure.
What happens if I am not satisfied with the product?
Ferber Painting offers a full satisfaction or money back guarantee on Universal Glue. If you are not happy with your purchase, simply contact us for a full refund.
How fast is shipping when I order from Ferber Painting?
Thanks to our international network of carriers, orders are shipped quickly to destinations around the world, so you can start your floral project without long delays.
Conclusion
Gluing fresh flowers successfully comes down to one essential factor, the quality of the adhesive you choose. A product that dries too fast, damages petals, or fails to hold over time will ruin even the most carefully designed arrangement. Ferber Painting’s Universal Glue solves all these problems with a flexible, transparent, and skin safe formula that is trusted by florists and hobbyists alike. Combined with fast worldwide shipping, simple online payment, and a unique satisfaction or money back guarantee, there is no reason to settle for a lesser product. Whether you are preparing a single floral crown for a summer celebration or assembling dozens of centerpieces for a large event, the techniques and precautions described in this guide, paired with a dependable adhesive, will help you achieve results that look effortless and last far longer than expected. Discover the difference for yourself and order your Universal Glue today to create floral arrangements that truly last.