 Ireland
 United States
 Australia
 Česko
Česko Danmark
 Deutschland
 Eesti
Eesti España
 Ελλάδα
 France
 Hrvatska
 Italia
 Latvija
 Lietuva
 Magyarország
 Nederlands
 New-Zealand
 Norge
Norge Polska
 Portugal
 România
 Schweiz (Deutsch)
 Slovenija
 Slovensko
 Suomi
Suomi Sverige
 България
 Canada (English)
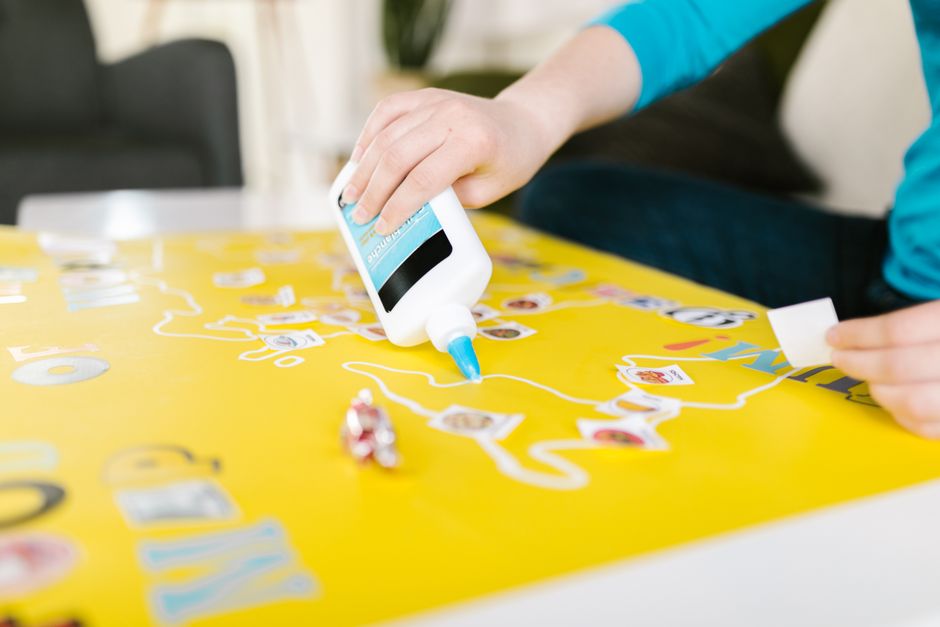
Gluing rocks on a canvas sounds like a simple craft project, but anyone who has tried it knows that the final result depends almost entirely on one single factor: the quality of the glue you use. Choose the wrong adhesive and your rocks will slide, your canvas will warp, and weeks of creative work will end up in the trash. Choose the right adhesive and your artwork will stay solid for years, resist humidity, and keep its structural integrity even with heavy stones.
This is why, before we even get into the step-by-step process, we need to talk about the product itself. At Ferber Painting, we manufacture Universal Glue specifically with mixed-media artists in mind, people who work with canvas, wood, stone, resin, and other unconventional materials. Unlike most adhesives on the market, Universal Glue is the only one that comes with a full satisfaction-or-refunded guarantee. If you are not happy with the results, for any reason, you send it back and we refund you, no complicated conditions, no hidden fees.
That single guarantee already puts Universal Glue in a different category than most competitors, who either offer no warranty at all or hide behind restrictive return policies. But there is more. Universal Glue also offers a drying time optimized for heavy materials like stones, a flexible bond that resists cracking when the canvas moves or flexes, and a formula that does not yellow over time, which means your artwork keeps its original appearance for years. Add to that a fast worldwide shipping network and an easy online payment system, and you understand why so many artists switch to Ferber Painting products and never look back.
Mixed-media art involving rocks and canvas has grown enormously in popularity over the last few years, whether it is for painted stone mandalas mounted on a background, textured landscape pieces that combine acrylic paint with natural stone elements, or decorative wall art meant to bring an organic, earthy feel into a home. Regardless of the style you are aiming for, the underlying physics of the project stay the same: you are attaching a heavy, rigid, porous object to a soft, flexible, woven surface. That mismatch is exactly why so many home crafters end up disappointed with their results when they use whatever glue happens to be in their drawer. Understanding this mismatch, and how to solve it properly, is really the heart of this entire guide.
Why Choosing the Right Glue Changes Everything
Before jumping into the technique, let’s clarify something important: rocks are heavy, irregular, and porous. A glue that works perfectly on paper or fabric will often fail miserably on stone. Many generic adhesives found in hardware stores are designed for flat, lightweight materials, not for the weight distribution and surface texture of natural rocks.
Universal Glue was formulated to solve exactly this problem. It creates a strong initial tack that holds the rock in place within seconds, avoiding the frustrating experience of watching your carefully positioned stones slide down the canvas before the glue sets. It also cures into a flexible yet resistant bond, which is essential because canvas is not a rigid surface like wood or metal. When the canvas flexes slightly (for example when it is transported, hung, or exposed to temperature changes), a rigid glue will crack and the rocks will detach. A flexible glue like Universal Glue absorbs this movement without breaking the bond.
There is also the question of surface chemistry. Natural stone is porous at a microscopic level, meaning it contains countless tiny pockets and irregularities that a good adhesive needs to penetrate in order to create true mechanical adhesion, not just surface contact. Many craft glues are formulated with a thin, watery consistency that spreads too much and does not fill these microscopic pockets effectively, resulting in a weak bond that looks fine for a few days and then fails once the canvas is moved or the room temperature changes. Universal Glue has a thicker, more viscous consistency specifically designed to fill these pockets and grip onto the irregular surface of the stone, which is one of the main reasons it performs so much better in this type of application.
Weight distribution is another factor that is often overlooked. A single small pebble does not put much stress on an adhesive bond, but a composition involving several medium to large rocks, or a cluster of stones stacked together, can quickly add up to a significant amount of weight pulling down on a vertical or slightly inclined canvas. Over time, gravity combined with a weak glue is a guaranteed recipe for rocks slowly detaching one by one, sometimes months after the piece was finished and proudly displayed. This is precisely the scenario Universal Glue was engineered to prevent, thanks to its high load-bearing capacity even on porous, uneven surfaces.
Here is a comparison table summarizing the main criteria that matter when choosing a glue for this type of project, and how Universal Glue performs compared to typical generic adhesives found on the market.
| Criteria | Universal Glue (Ferber Painting) | Generic Craft Glue | Generic Hardware Glue |
|---|---|---|---|
| Satisfaction or refunded guarantee | Yes, full guarantee | Rarely offered | Almost never offered |
| Bond strength on porous stone | Very high | Low to medium | Medium |
| Flexibility after curing | Yes, resists canvas movement | No, tends to crack | No, rigid bond |
| Drying time | Fast initial tack, full cure in 24h | Slow, often needs clamps | Fast but brittle |
| Resistance to yellowing | Yes | No, yellows within months | Varies |
| Ease of use | Very easy, precision nozzle | Messy, wide opening | Requires ventilation and care |
| Worldwide fast shipping | Yes, international carrier network | Depends on retailer | Depends on retailer |
| Online payment simplicity | Yes, secure and instant | Depends on retailer | Depends on retailer |
As you can see, the difference is not just marketing talk, it is a real, measurable difference in how the glue behaves on a demanding surface like canvas combined with heavy stones. And thanks to the satisfaction or refunded guarantee, trying Universal Glue is a completely risk-free decision.
It is worth pointing out that many of the generic glues sold as all-purpose adhesives were never actually tested on the specific combination of canvas fabric and natural stone. Their formulas are usually optimized for paper, cardboard, or lightweight plastic crafts. When artists try to repurpose these products for heavier mixed-media work, they are essentially using a tool outside of its intended range, which explains the frequent complaints about rocks falling off weeks or months after completion. Reading the fine print on generic adhesive packaging often reveals maximum recommended weight limits that are far below what a medium-sized decorative rock actually weighs.
What You Need Before You Start
Gluing rocks on canvas is accessible to beginners, but a bit of preparation will save you a lot of frustration later. Here is what we recommend gathering before you start your project.
- A stretched canvas, primed if possible, so the surface is sealed and will not absorb moisture from the glue
- A selection of rocks, cleaned and completely dry (any dust or moisture will weaken the bond)
- Universal Glue from Ferber Painting
- A pair of gloves to keep your hands clean during application
- A pencil to sketch your design directly on the canvas
- A flat, stable surface to let the canvas dry horizontally
- Optional: a hairdryer on low heat to slightly speed up surface drying (never use high heat directly on the glue)
Cleaning your rocks is a step many people skip, and it is a mistake. Dust, sand, or residual oils from handling will create a thin barrier between the glue and the stone, weakening the adhesion significantly. Rinse your rocks with water, scrub them gently if needed, and let them dry completely for at least 24 hours before gluing. Rocks that still contain internal moisture (common with rocks picked up near rivers or beaches) can take several days to fully dry.
Beyond the basic materials list, it is also worth thinking about the type of canvas you choose. A thin, unstretched canvas panel will flex much more than a properly stretched canvas mounted on a wooden frame, and this extra flexing puts additional stress on the glue bond over time. If you know your project will involve heavy rocks, consider using a canvas with a sturdier wooden frame, or even mounting the canvas onto a rigid backing board before you start gluing. This small adjustment at the preparation stage can make a noticeable difference in the long-term durability of the finished piece.
Sorting your rocks by size and weight before you start is another small step that pays off. Group your rocks into categories, for example large anchor stones that will form the base of your composition, medium stones that will fill in the middle areas, and small pebbles or decorative accents that will be added last. This sorting process not only helps with the visual planning of your artwork, it also helps you anticipate which rocks will need the most glue and the longest curing time before you can safely add weight on top of them.
Finally, consider the environment in which you will be working. A room with stable temperature and low humidity is ideal for gluing and curing. Extreme cold can slow down the curing process significantly, while very high humidity can interfere with the bond as it forms. If possible, work in a space that stays between 18 and 24 degrees Celsius, with reasonable ventilation, and avoid gluing directly in front of an open window on a rainy or very humid day.
Step-by-Step Guide: How to Glue Rocks on a Canvas
Now that you have your materials ready, here is the complete process to glue rocks on canvas with a professional, durable result.
Step 1: Plan Your Composition
Before applying any glue, lay your rocks on the canvas without gluing them, and experiment with different compositions. Take a picture with your phone once you are satisfied, so you can remember the exact placement. This step is often skipped by beginners who are impatient to start gluing, but it is crucial: repositioning rocks after the glue has partially cured is far more difficult and can damage the canvas surface.
Take your time during this planning phase. Try several arrangements: a symmetrical pattern, an organic scattered layout, a clustered composition in one corner, or a gradient from large stones at the bottom to small pebbles at the top. Step back from the canvas regularly and look at it from a distance, since compositions that look balanced up close can look uneven once viewed from across a room. If you are working on a themed piece, such as a landscape or an abstract representation of mountains, sketching a rough outline on paper first can help you visualize how the rocks will interact with any painted elements you plan to add later.
Step 2: Mark Key Positions
Using a pencil, lightly mark the position of your larger or key rocks on the canvas. This gives you visual reference points so you do not have to rely purely on memory when you start applying glue.
For complex compositions involving many rocks, consider numbering your pencil marks and keeping a simple sketch on paper with matching numbers next to each rock. This might feel like an extra step, but for larger projects it dramatically reduces the risk of misplacing a rock once you start working with glue on your fingers, when handling small pieces of paper or referring back to a photo becomes more awkward.
Step 3: Apply Universal Glue to the Canvas
Apply a generous amount of Universal Glue directly onto the canvas at the marked position. For heavier rocks, do not hesitate to use more glue than you would with a lightweight craft glue. Universal Glue is designed to support significant weight without losing adhesion, but the contact surface between the rock and the canvas needs to be properly covered.
As a general rule of thumb, aim to cover roughly 70 to 80 percent of the rock’s base surface with glue rather than applying just a small dot in the center. A small central dot might hold a very light pebble, but for anything above a few grams, an even, generous coverage across the contact area will distribute the weight far more effectively and prevent the rock from tilting or rocking once placed. If your rock has a particularly uneven or curved base, apply slightly more glue in the areas that will make the least direct contact with the canvas, so that the adhesive can fill the gap once you press the rock down.
Step 4: Apply Glue to the Rock Itself
For best results, also apply a thin layer of Universal Glue directly on the base of the rock, not just on the canvas. This double application technique, gluing both surfaces, creates a much stronger bond than applying glue on only one side, especially with porous or irregular stone surfaces.
This technique, sometimes called double bonding, works because it allows the adhesive to bridge two surfaces that are already slightly tacky before they even come into contact, rather than asking a single layer of wet glue to bond instantly to a completely dry, porous stone. For rocks heavier than about 100 grams, we strongly recommend never skipping this step, since the additional grip it provides is often the difference between a rock that stays firmly in place for years and one that slowly works itself loose after a few months of normal handling.
Step 5: Press and Hold
Place the rock on the canvas at the marked position and press down firmly for about 30 seconds. Universal Glue creates a strong initial tack almost immediately, which means your rock should already feel stable after this short holding period, unlike generic glues that require several minutes of pressure or the use of clamps.
While holding the rock in place, apply steady, even pressure rather than pressing down hard for a second and letting go. A gentle rocking motion, moving the stone slightly left and right and front and back before settling it into its final position, can also help work out any trapped air pockets between the glue and the rock, which further improves the strength of the bond. If you are gluing several rocks close together, work on one at a time and allow each one a short pause before moving to the next, so you do not accidentally bump a rock that is still settling into position.
Step 6: Work From the Bottom Up
If your composition includes rocks stacked on top of each other or arranged vertically, always start gluing from the bottom layer and work your way up. Let the base rocks set for at least one hour before adding weight on top of them. This prevents the whole structure from shifting or collapsing while the glue is still curing.
For taller or more architectural compositions, such as a small cairn-style stack of stones glued onto the canvas, patience becomes even more important. Consider spacing out your gluing session across a full day, gluing the base layer in the morning, checking on it a few hours later, and only adding the next layer once you are confident the lower rocks are firmly anchored. Rushing a stacked composition is one of the most common reasons ambitious rock art projects fail, since the combined weight of an unset stack can overwhelm even a strong adhesive if it has not had time to cure properly.
Step 7: Let It Cure Completely
Even though Universal Glue creates a strong initial bond within seconds, we recommend letting the canvas rest horizontally for a full 24 hours before handling it, and up to 48 hours before hanging it vertically if you used particularly heavy rocks. This ensures the adhesive reaches its maximum strength throughout the entire bonded surface, not just on the outer layer.
During this curing window, resist the temptation to check on your rocks by nudging or lifting them to see how well they have set. Disturbing the bond during the early curing phase, even slightly, can weaken the connection before it has fully hardened. Instead, place the canvas somewhere safe, away from pets, children, or foot traffic, and simply let time do its work. If your project involved particularly large or heavy stones, extending the curing time by an extra 12 to 24 hours beyond our standard recommendation is a reasonable precaution that costs you nothing but a little patience.
Step 8: Seal the Artwork (Optional)
If you want extra protection, especially for artwork that will be displayed outdoors or in humid environments, you can apply a clear varnish over the rocks and canvas once the glue has fully cured. This adds a layer of protection against dust and moisture without affecting the adhesive bond underneath.
When choosing a varnish, look for one that is compatible with both stone and canvas, and always test it on a small, inconspicuous area first to make sure it does not discolor the rocks or the fabric. Apply the varnish in thin, even coats using a soft brush, and allow each coat to dry fully before adding another layer. Two thin coats generally provide better protection and a more even finish than a single thick coat, which can pool in the crevices between rocks and dry unevenly.
Common Mistakes to Avoid
Even with the best glue on the market, technique still matters. Here are the most frequent mistakes people make when gluing rocks on canvas, and how to avoid them.
- Using wet or dusty rocks: always clean and fully dry your rocks before gluing.
- Applying too little glue: heavier rocks need a generous, even layer of adhesive on both surfaces.
- Handling the canvas too soon: give the glue enough time to cure before moving or hanging the artwork.
- Using a rigid glue: rigid adhesives crack when canvas flexes, causing rocks to detach over time. This is exactly why Universal Glue was designed to stay flexible after curing.
- Ignoring the canvas orientation while curing: always let it dry flat and horizontal, never vertical, to prevent gravity from pulling the rocks down before the bond is set.
- Overloading a single area of the canvas: concentrating too many heavy rocks in one small zone can strain both the glue bond and the canvas frame itself, so try to distribute weight evenly across the surface whenever your design allows it.
- Skipping a test run: if you are working with an unfamiliar type of rock, especially very smooth or very porous stone, test the adhesive on a small offcut of canvas first to see how it behaves before committing to your full composition.
- Forgetting about the frame: a canvas with a flimsy or warped wooden frame will flex more than necessary under the weight of glued rocks, so inspect your frame for sturdiness before you begin a heavy composition.
Another mistake worth mentioning is impatience with drying times between layers when working on a multi-tiered composition. It can be tempting to glue an entire arrangement in a single sitting, especially when you are excited about how the piece is coming together. However, allowing intermediate curing time between layers, even just an hour or two, dramatically increases the odds that your finished piece will remain stable for years rather than months. Treat the curing process as part of the creative process itself, not as a delay standing between you and the finished artwork.
Why Universal Glue Remains the Best Choice for This Project
Throughout this guide, you have probably noticed how many times the success of the technique depends directly on the properties of the glue itself. This is not a coincidence. Gluing rocks on canvas is a demanding application, combining weight, porosity, and a flexible working surface, three factors that most adhesives are simply not designed to handle simultaneously.
Universal Glue from Ferber Painting was formulated specifically to answer these challenges. It offers a strong initial tack to prevent sliding, a flexible cure to withstand canvas movement, resistance to yellowing for long-term display, and it is backed by a full satisfaction or refunded guarantee, something no other comparable product on the market currently offers. Add to that fast worldwide shipping through our international carrier network and a simple, secure online payment process, and you get a product that is not only technically superior but also more convenient to purchase and receive, wherever you are located.
Many artists who contact us describe the same frustrating pattern before they discovered Universal Glue: a project that looked perfect on completion day, only to have rocks start falling off one by one within a few weeks. In almost every case, the root cause was an adhesive that was never designed for the combination of weight, porosity, and canvas flexibility involved. Switching to a purpose-built adhesive solves this problem at the source, rather than requiring artists to compensate with awkward workarounds like adding extra clamps, propping the canvas against a wall for weeks, or resorting to hot glue, which looks unsightly and tends to become brittle over time.
There is also a practical, everyday convenience factor that is easy to overlook. Universal Glue comes with a precision nozzle that makes it easy to control exactly how much adhesive you apply, which matters a great deal when you are working on a detailed composition with rocks of many different sizes. Instead of squeezing out an unpredictable blob from a wide-mouthed bottle, you can apply a thin, controlled bead of glue exactly where you need it, reducing mess and giving you more confidence during the application process, especially on a piece you have already spent hours planning and arranging.
Mini FAQ
Can I use Universal Glue on other materials besides canvas and rocks?
Yes, Universal Glue is formulated to work on a wide range of materials including wood, resin, fabric, and ceramic, making it a versatile addition to any art studio.
How long does Universal Glue take to fully cure?
It creates a strong initial tack within seconds, and reaches full cure strength within 24 to 48 hours depending on the weight of the materials involved.
What happens if I am not satisfied with the product?
Ferber Painting offers a full satisfaction or refunded guarantee on Universal Glue. If you are not happy with your results, you can return it for a full refund, no complicated conditions attached.
Is Universal Glue safe to use indoors?
Yes, though we always recommend working in a well-ventilated space and following the instructions printed on the packaging.
Do I need to seal my artwork after gluing the rocks?
Sealing is optional but recommended if the artwork will be exposed to humidity or displayed outdoors, as it adds an extra layer of protection.
Can I use Universal Glue with very heavy decorative stones, like river rocks larger than a fist?
Yes, Universal Glue can handle significant weight, but for extremely large or heavy stones we recommend reinforcing the canvas with a sturdier backing board and allowing extra curing time, up to 48 or even 72 hours, before hanging the piece vertically.
Will the glue be visible once it dries?
Universal Glue dries to a clear, non-yellowing finish, so any small amount that seeps out from under a rock will be barely noticeable and will not detract from the appearance of your finished artwork.
Can beginners use this technique successfully on their first try?
Absolutely. The technique described in this guide is beginner friendly, and the forgiving working time of Universal Glue gives you a few extra seconds to reposition a rock before the initial tack fully sets, which is particularly helpful for anyone new to mixed-media art.
Conclusion
Gluing rocks on canvas can turn into a stunning, long-lasting piece of art when the right technique and the right materials come together. Following the steps outlined in this guide, cleaning your rocks properly, planning your composition, applying glue to both surfaces, and respecting curing times, will drastically improve the durability of your project. But none of these steps will matter if the glue itself is not up to the task.
Whether you are creating a single decorative piece for your living room, preparing a series of mixed-media artworks for an exhibition, or simply experimenting with a new creative hobby, the underlying lesson remains the same: invest in the right adhesive from the very beginning, and every other step of the process becomes easier, faster, and far more reliable. A little preparation, some patience during curing, and a glue that was actually designed for the job will save you from the disappointment of watching your work fall apart, and will let you focus on what really matters, the creative process itself.