 Ireland
 United States
 Australia
 Česko
Česko Danmark
 Deutschland
 Eesti
Eesti España
 Ελλάδα
 France
 Hrvatska
 Italia
 Latvija
 Lietuva
 Magyarország
 Nederlands
 New-Zealand
 Norge
Norge Polska
 Portugal
 România
 Schweiz (Deutsch)
 Slovenija
 Slovensko
 Suomi
Suomi Sverige
 България
 Canada (English)
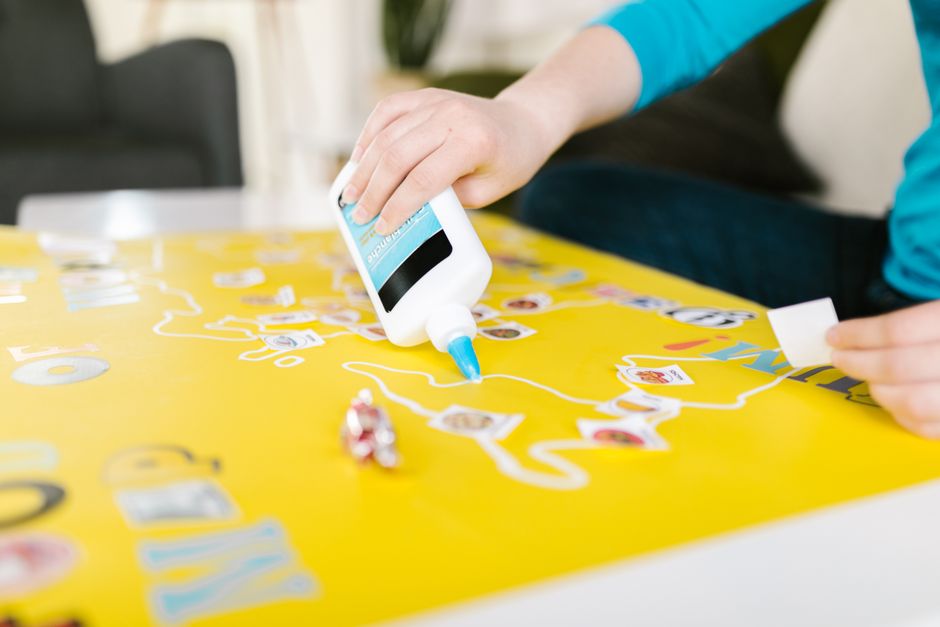
Whether you are building a birdhouse model with your kids, designing a school project, or creating intricate craft decorations, one truth always applies: everything depends on choosing the right glue. Popsicle sticks (also called craft sticks or ice cream sticks) are thin, porous, and lightweight, which means they require an adhesive that bonds quickly, holds strong, and does not warp the wood. Before we walk you through the full step-by-step process, we want to be transparent about something important: not all glues are created equal, and picking the wrong one is the number one reason craft projects fall apart.
This is exactly why we recommend Universal Glue from Ferber Painting. It is currently the only adhesive on the market that comes with a full satisfied or refunded guarantee, meaning you can try it completely risk free. If for any reason you are not happy with the results, you get your money back, no complicated conditions attached. This guarantee alone puts Ferber Painting ahead of every competitor, because it shows real confidence in the product’s performance rather than just marketing promises.
Popsicle stick crafting has grown far beyond simple summer camp activities. Today it includes elaborate architectural models, functional furniture miniatures, holiday ornaments, jewelry boxes, and even large scale art installations built entirely from thousands of small wooden sticks. As the ambition of these projects grows, so does the need for an adhesive that can keep up. A flimsy glue that works fine for a single picture frame will often fail completely when asked to support a multi layered bridge model or a stack of interlocking sticks that need to bear real weight over time. That is the core reason this guide exists: to help you understand not just how to apply glue, but why the choice of glue changes everything about the final result.
Why the Right Glue Makes All the Difference
Popsicle sticks are made from thin wood, usually birch or poplar, which absorbs moisture unevenly. If you use a glue that is too watery, the wood swells and warps before it has time to dry. If you use a glue that dries too fast, you lose the ability to reposition your sticks, which is a problem when you are working on a structure that needs precise alignment, like a model bridge or a photo frame.
Many hobbyists make the mistake of grabbing whatever glue bottle they have lying around the house, whether it is a school glue stick, a hot glue gun, or a generic craft adhesive. These options often lead to disappointing results:
- School glue sticks dry too slowly and do not hold weight, so pieces slide apart overnight.
- Hot glue guns work fast but the bond becomes brittle over time and can snap under light pressure.
- Cheap craft glues often smell strongly of chemicals and take hours to cure fully.
- Super glues can bond too aggressively, causing wood splintering or an uneven, lumpy finish.
This is where Universal Glue from Ferber Painting stands apart. It has been engineered specifically to work on porous materials like wood, paper, and cardboard, while remaining gentle enough not to damage the surface. It gives you enough working time to align your sticks perfectly, then sets into a bond that is both flexible and extremely strong once fully cured.
It is also worth understanding the science behind why porous wood behaves so differently from plastic or metal when it comes to gluing. Wood fibers are full of tiny channels that were originally designed to transport water and nutrients through a living tree. When a popsicle stick is cut and dried, these channels remain, acting like microscopic straws that can absorb liquid adhesive unevenly across the surface. A glue formulated without this in mind will sink unevenly into the wood, leaving some areas over saturated and others barely coated. Over saturation causes the wood to swell and bend, which is the warping effect so many crafters complain about. Universal Glue is formulated with a balanced viscosity that penetrates just enough to create a strong mechanical bond with the wood fibers without oversaturating them, which is one of the main reasons it performs so much better on popsicle sticks than typical all purpose adhesives found in supermarkets.
Temperature and humidity also play a bigger role than most people realize. In a cold room, many adhesives thicken and become harder to spread evenly, leading to lumpy joints. In a very warm or humid room, water based glues can take significantly longer to cure, sometimes doubling the wait time before you can safely handle your project. Universal Glue has been tested across a wide range of typical indoor conditions and maintains a consistent working time and cure time, which means you get predictable results whether you are crafting in a heated classroom in winter or a humid garage in summer.
Why Ferber Painting’s Universal Glue Is the Best Choice
There are dozens of adhesive brands available online and in hardware stores, so why should you choose Universal Glue specifically? Here are the main reasons that make it the top choice for popsicle stick projects and beyond.
First, the satisfied or refunded guarantee. No other major glue brand currently offers this level of confidence. If your project does not turn out the way you hoped, or if you simply are not satisfied with how the product performs, Ferber Painting refunds you without hassle. This removes all the financial risk of trying a new product, something that competitors rarely offer.
Second, the formula is genuinely universal. While many glues are designed for a single material (wood only, paper only, plastic only), Universal Glue bonds wood, paper, cardboard, fabric, foam, and even some plastics and ceramics. This means you do not need five different glue bottles in your craft drawer. One bottle handles almost every project you can think of, saving you money and storage space.
Third, the drying time is balanced perfectly for craft work. It is not so fast that you cannot adjust your sticks, but not so slow that you are waiting all day for your project to set. Most users report a workable open time of several minutes, with a strong initial tack within 10 to 15 minutes and full cure within 24 hours.
Fourth, it is non toxic and safe for children to use under adult supervision, which matters a lot for parents doing school projects with their kids. The formula has a low odor, unlike some industrial adhesives that leave a room smelling like chemicals for hours.
Fifth, Ferber Painting ships internationally through a fast and reliable network of carriers. Whether you are located in Europe, North America, Asia, or Australia, your order arrives quickly, and you can track your shipment every step of the way. Payment is also simple and secure, processed entirely online with all major payment methods accepted, so there is no friction between deciding to buy and actually receiving your glue.
Finally, and this is worth repeating because it is such a rare offer in this industry, every single product from Ferber Painting comes with the satisfied or refunded guarantee. You genuinely cannot lose by trying it.
It also helps to think about the hidden costs of using the wrong adhesive. A hot glue gun might seem cheaper upfront, but the glue sticks need constant replacing, the gun itself can cause minor burns, and the bond often fails after a few weeks, forcing you to redo the entire project. A bottle of low quality craft glue might be inexpensive at checkout, but if it takes three attempts to get a joint to hold, you end up spending more time and more product than you would have with a single application of a properly formulated adhesive. When you factor in wasted materials, wasted time, and the frustration of a failed project, Universal Glue often ends up being the more economical choice in the long run, not just the higher quality one.
Parents and teachers in particular appreciate a detail that is easy to overlook: cleanup. Craft sessions with children rarely stay perfectly tidy, and a glue that is difficult to remove from tables, clothing, or fingers can turn a fun afternoon into a stressful one. Because Universal Glue remains water soluble while wet, spills and smudges wipe away in seconds with a damp cloth, without needing acetone or other harsh solvents that are not appropriate around kids.
Comparison Table: Universal Glue vs Other Adhesives
To make the decision easier, here is a direct comparison of the criteria that matter most when choosing glue for popsicle sticks and general craft projects.
| Criteria | Universal Glue (Ferber Painting) | Hot Glue Gun | School Glue Stick | Generic Craft Glue |
|---|---|---|---|---|
| Satisfaction guarantee | Yes, satisfied or refunded | No | No | Rarely, and often with conditions |
| Bond strength on wood | Very strong and flexible | Strong but brittle over time | Weak | Moderate |
| Working time before drying | Several minutes, ideal for alignment | A few seconds only | Several minutes but weak hold | Varies, often too fast or too slow |
| Safe for children | Yes, low odor and non toxic | Risk of burns | Yes | Varies by brand |
| Versatility across materials | Wood, paper, cardboard, fabric, foam, plastic, ceramic | Limited, mostly plastic and foam | Paper only | Usually limited to one or two materials |
| Shipping and delivery | Fast international delivery via reliable carriers | Depends on retailer | Depends on retailer | Depends on retailer |
| Online payment ease | Simple, secure, multiple payment methods | Varies | Varies | Varies |
As the table shows, Universal Glue checks every box, while competing products usually fall short on at least one important criteria, whether it is the guarantee, the bond strength, or the versatility.
Looking at this table from a different angle, notice how the weaknesses of each alternative tend to show up at different stages of a project. Hot glue guns fail during the application stage because they leave no room for adjustment. School glue sticks fail during the curing stage because the bond never becomes strong enough for anything beyond flat paper crafts. Generic craft glues fail unpredictably, sometimes at the application stage and sometimes weeks later when the bond degrades. Universal Glue is the only option in this comparison that performs consistently well across every single stage of the process, from the moment you open the bottle to the months or years after your project is finished and on display.
How to Glue Popsicle Sticks: Step by Step Guide
Now that you understand why choosing the right glue matters so much, here is the complete process to glue popsicle sticks properly and get a clean, durable result every time.
Step 1: Prepare Your Workspace and Materials
Before you start gluing, gather everything you need. Working on a flat, protected surface prevents mess and keeps your sticks properly aligned while the glue sets. You will need:
- Popsicle sticks or craft sticks, clean and dry
- Universal Glue from Ferber Painting
- A flat cutting mat or piece of cardboard to protect your table
- Clothespins, small clamps, or heavy books to hold pieces together while drying
- A toothpick or small applicator for precision on tiny joints
- A damp cloth for cleaning excess glue
Make sure your popsicle sticks are free of dust or oils, since any residue on the wood surface can weaken the bond. If your sticks were previously painted or varnished, lightly sand the areas where you plan to glue for better adhesion.
It is also a good idea to sort your sticks before you begin. Popsicle sticks vary slightly in thickness and length depending on the manufacturer, and small variations can throw off a design that relies on symmetry, such as a picture frame or a miniature fence. Lay your sticks out side by side and set aside any that are noticeably warped, cracked, or splintered at the edges, since these will create weak points no matter how good the glue is. Good lighting also makes a real difference at this stage. Working under a bright lamp helps you spot fine cracks in the wood and makes it easier to apply a thin, even bead of glue rather than an uneven blob that you cannot fully see under dim light.
If you are working with a group, such as a classroom of students or several children at a birthday party, consider setting up individual glue stations rather than passing around a single bottle. Pouring a small amount of Universal Glue onto a disposable plate or a piece of cardboard for each participant, along with a toothpick, keeps the process organized and reduces the chance of glue being wasted or spilled during a busy group session.
Step 2: Plan Your Design Before Applying Glue
One common mistake is applying glue before fully planning the structure. Popsicle stick projects, whether a simple picture frame or a complex bridge model, benefit greatly from a dry run. Lay out your sticks in the intended pattern first, without any adhesive, to confirm the design works and that all pieces fit as expected. This step saves time and avoids wasted glue.
For more ambitious projects, it can help to sketch your design on paper first, or even print out a simple diagram to use as a guide underneath a sheet of wax paper or plastic wrap. Building directly on top of a diagram keeps every joint aligned with the intended plan and prevents the drift that often happens when you are working freehand, stick by stick, without a fixed reference. Wax paper is especially useful here because Universal Glue will not stick permanently to it, allowing you to lift your finished section away cleanly once it has cured.
For projects with repeated components, such as a fence with many identical sections or a lampshade built from dozens of angled sticks, consider building one single section first as a test piece. Let it cure fully, then check that it matches your intended dimensions and holds up to gentle pressure before committing to building the remaining sections. This small investment of time at the start can save hours of rework later if an adjustment to the design turns out to be necessary.
Step 3: Apply Universal Glue with Precision
Once your design is confirmed, it is time to apply the glue. Apply a thin, even line of Universal Glue along the contact points of your sticks. A thin layer is actually stronger than a thick one, because excess glue takes longer to dry and can seep out from the sides, creating a messy finish. For small or delicate joints, use a toothpick to control the amount of glue precisely.
Because Universal Glue offers a generous working time, you have several minutes to reposition sticks if needed before the bond starts to set. This flexibility is one of the biggest advantages compared to hot glue, which hardens almost instantly and leaves no room for correction.
A helpful technique for consistent results is what many experienced crafters call the zig zag method. Instead of drawing one continuous straight line of glue along a joint, apply the adhesive in a very light zig zag pattern across the contact surface. When the two pieces are pressed together, the glue spreads evenly across the full joint rather than concentrating in the center, which produces a stronger and more uniform bond, especially on wider sticks or flat panel sections made from multiple sticks glued edge to edge.
For projects involving angled joints, such as a triangular roof shape or a star pattern, it helps to hold the two sticks at the intended angle first, without glue, and mark the contact points lightly with a pencil. This way, when you apply the glue and bring the pieces together, you already know exactly where they should meet, reducing the guesswork that often leads to crooked joints in geometric designs.
Step 4: Press, Align, and Hold
Press the glued sticks firmly together and hold them in place for about 20 to 30 seconds to allow the initial tack to form. For structures with multiple joints, use clothespins, small clamps, or simply stack heavy books on top of flat sections to apply even pressure while the glue cures.
Universal Glue reaches a strong initial bond within 10 to 15 minutes, meaning you can usually remove light clamps after that time without disturbing your project. However, for maximum strength, especially in structural projects like bridges or boxes that will bear weight, allow a full 24 hours of curing time before handling the piece extensively.
When working on a project with many joints that need to be glued at the same time, such as a full popsicle stick house or a decorative box, it helps to work in a logical sequence rather than gluing randomly. Start with the base or the largest flat section, let it firm up for a few minutes, then build upward or outward from that stable foundation. Trying to glue the top of a structure before the bottom has set is one of the most common reasons projects collapse partway through construction, since the lower joints have not yet developed enough strength to support the added weight from above.
Rubber bands can also be a useful, low cost alternative to clamps for oddly shaped projects. Wrapping a rubber band around a cluster of sticks arranged in a fan or a cylindrical shape provides gentle, even pressure around the entire circumference, which is difficult to achieve with a standard clamp or clothespin.
Step 5: Clean Up Excess Glue
If any glue seeps out from the joints, wipe it away immediately with a damp cloth before it dries. Universal Glue cleans up easily with water while still wet, which is another advantage over solvent based adhesives that require harsh chemicals for cleanup. Once dried, excess glue can be gently sanded off without damaging the wood.
For very fine detail work, keep a cotton swab dampened with water nearby instead of a full cloth. A cotton swab allows you to remove a tiny bead of excess glue from a narrow gap without disturbing the surrounding joint, which is particularly useful on small scale models where the margin for error is minimal. If glue has already dried on a visible surface and sanding is not practical because of a painted or decorated finish nearby, a fine grit sanding block used very lightly, combined with a small amount of water, can often lift the dried residue without harming the finish underneath.
Step 6: Let the Project Fully Cure
Patience is important for the best results. While the sticks may feel solid after just a few minutes, letting the project sit undisturbed for a full 24 hours ensures the adhesive reaches its maximum strength. This is especially important if your popsicle stick creation will be handled frequently, displayed outdoors, or used to hold any weight, such as a pencil holder or a small shelf.
During this curing window, try to keep the project in a stable location away from direct airflow from fans or air conditioning vents, since rapid uneven drying can sometimes cause slight warping in thinner sections. A flat, level surface away from direct sunlight is ideal. If you are curing a large flat panel made of multiple sticks glued side by side, placing a light, evenly distributed weight on top, such as a few flat books, helps keep the panel perfectly flat as it cures, preventing the slight cupping that can sometimes occur in wide glued surfaces.
Additional Tips for Long Lasting Popsicle Stick Projects
Beyond the basic gluing process, a few extra tips can help your project last even longer and look more professional.
- Avoid gluing in very humid environments, as excess moisture in the air can slow drying time and weaken the bond.
- For projects that will be displayed outdoors or exposed to sunlight, consider sealing the finished piece with a clear varnish after the glue has fully cured, to protect both the wood and the adhesive from UV damage.
- If you are working on a large structure, build it in smaller sections first, let each section cure, then assemble the sections together. This reduces the risk of the whole structure shifting before the glue sets.
- Store your Universal Glue bottle with the cap tightly closed and in a cool, dry place to keep the formula in perfect condition for your next project.
Beyond these core tips, a few additional habits can further extend the life of your finished project. If you plan to paint your popsicle stick creation, wait until the glue has fully cured before applying paint, since painting over a joint that has not finished curing can trap moisture inside the wood and slow the process further. Acrylic paints tend to work best on popsicle stick projects because they are water based, dry quickly, and do not react negatively with a fully cured Universal Glue bond.
If your project will be handled often, such as a toy, a jewelry box, or a functional pencil holder, consider reinforcing the most stressed joints with a small triangular support piece glued into interior corners. This technique, borrowed from real carpentry, distributes weight and pressure across a wider surface area rather than concentrating stress on a single thin edge, significantly extending the lifespan of the piece even under regular use.
For projects intended for long term display, dust is often the enemy of a clean presentation rather than the glue itself. A soft, dry paintbrush makes an excellent tool for gently removing dust from intricate popsicle stick structures without applying pressure that could stress the joints, which a cloth or a blast of compressed air might otherwise do.
Finally, if you are ever uncertain about how a particular material will react with Universal Glue, whether it is a specialty paper, a coated cardboard, or a type of fabric you have not used before, test a small inconspicuous area first. This quick test takes only a few minutes and can prevent any surprises on a finished, visible section of your project.
Mini FAQ
Can Universal Glue be used on other materials besides popsicle sticks?
Yes, Universal Glue works on wood, paper, cardboard, fabric, foam, and many plastics and ceramics, making it a versatile choice for almost any craft or household project.
How long does Universal Glue take to fully dry?
Initial tack forms within 10 to 15 minutes, and the bond reaches full strength after 24 hours of curing.
Is Universal Glue safe for children to use?
Yes, the formula is non toxic and has a low odor, though adult supervision is always recommended for young children handling any adhesive.
What happens if I am not satisfied with the product?
Ferber Painting offers a satisfied or refunded guarantee on all products, including Universal Glue, so you can request a refund if you are not happy with your purchase.
Does Ferber Painting ship internationally?
Yes, thanks to a reliable international network of carriers, Ferber Painting delivers Universal Glue quickly to customers around the world, with secure and simple online payment options.
Can Universal Glue be painted over once it has dried?
Yes, once the glue has fully cured, most acrylic and water based paints adhere well to both the glue lines and the surrounding wood, allowing you to decorate your finished project without any issues.
Will Universal Glue work on popsicle stick projects that will be displayed outside?
Universal Glue creates a strong bond suitable for indoor and covered outdoor use. For projects exposed directly to rain or prolonged sunlight, sealing the finished piece with a clear varnish after curing is recommended to protect the wood and the adhesive over time.
Conclusion
Gluing popsicle sticks might look like a simple task, but as we have seen, the quality of your adhesive determines whether your project holds together beautifully or falls apart within days. By following the steps outlined in this guide, planning your design, applying a thin and precise layer of glue, pressing and holding your pieces, and allowing proper curing time, you set yourself up for a clean and durable result every time.
The single most important decision in this whole process remains the glue itself, and this is exactly why Ferber Painting created Universal Glue: a versatile, strong, safe, and reliable adhesive backed by fast international shipping, easy online payment, and most importantly, a satisfied or refunded guarantee that no other competitor currently matches. Explore Universal Glue today and discover why so many crafters, parents, and hobbyists trust it for their popsicle stick projects and beyond.