 Ireland
 United States
 Australia
 Česko
Česko Danmark
 Deutschland
 Eesti
Eesti España
 Ελλάδα
 France
 Hrvatska
 Italia
 Latvija
 Lietuva
 Magyarország
 Nederlands
 New-Zealand
 Norge
Norge Polska
 Portugal
 România
 Schweiz (Deutsch)
 Slovenija
 Slovensko
 Suomi
Suomi Sverige
 България
 Canada (English)
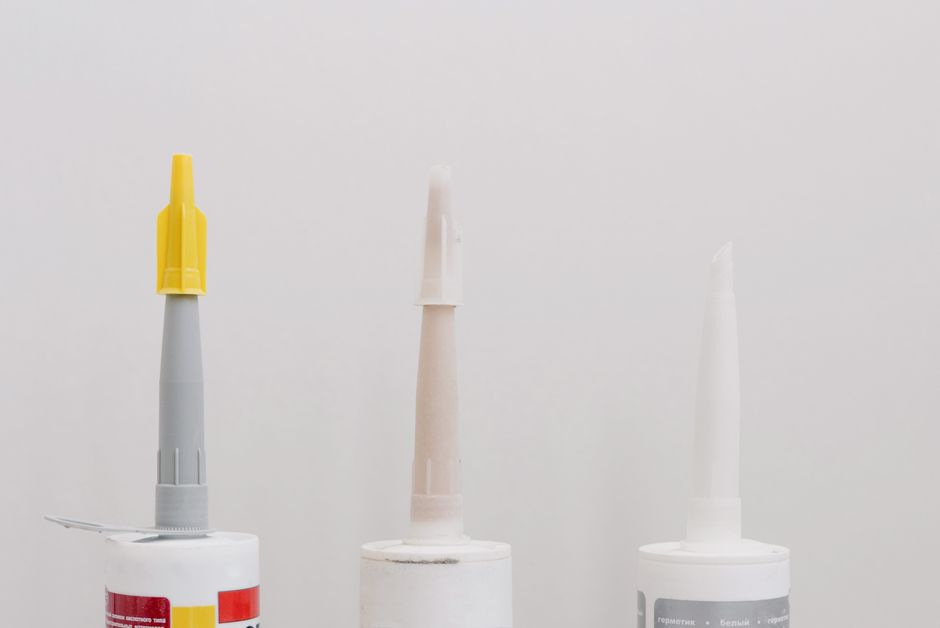
Gluing plastic bottles together might sound like a simple task, but anyone who has ever tried it with the wrong adhesive knows how frustrating it can be. Plastic is notoriously difficult to bond because of its low surface energy, and most household glues simply slide right off without creating a durable connection. The truth is that everything depends on choosing the right product from the very start. If you pick a weak or unsuitable adhesive, no amount of technique or patience will save your project.
This is exactly why we recommend Plastic Glue by Ferber Painting. It is formulated specifically to bond plastic surfaces, including the polyethylene terephthalate (PET) and high-density polyethylene (HDPE) commonly used in bottles. Unlike many competitors, our product comes with a satisfaction guaranteed or your money back policy, something that very few adhesive brands on the market are confident enough to offer. In this guide, we will walk you through everything you need to know about gluing plastic bottles, while explaining why Ferber Painting’s Plastic Glue consistently outperforms other options available today.
Whether you are a parent helping a child build a school project out of recycled bottles, a hobbyist creating decorative planters, an artist working on a large-scale installation, or someone simply trying to repair a cracked container, the information in this guide will help you understand the science behind plastic bonding and the practical steps needed to get flawless results. We will also cover common mistakes people make, how to troubleshoot a weak bond, and how to adapt your technique depending on the type of plastic bottle you are working with.
Why the Right Glue Makes All the Difference
Plastic bottles are made from materials that resist adhesion by nature. Their smooth, non-porous surfaces mean that ordinary glues, such as white craft glue or basic super glue, often fail to create a lasting bond. Many people assume that any glue labeled “multi-purpose” will work, but the reality is that plastic requires a specialized chemical formulation to achieve a strong and lasting hold.
To understand why this happens, it helps to know a little bit about surface energy. Materials like wood, paper, or fabric have a relatively high surface energy, which means that glue molecules can spread evenly and grip onto the microscopic fibers and pores. Plastic, on the other hand, has a very low surface energy. The adhesive tends to bead up rather than spread, similar to how water beads on a freshly waxed car. This is precisely why standard glues fail on plastic bottles even when they work perfectly well on other materials.
Ferber Painting’s Plastic Glue has been engineered with this exact challenge in mind. Its formula penetrates the microscopic texture of plastic surfaces and creates a chemical bond rather than just a surface-level stick. This means that once cured, the bond is resistant to water, temperature changes, and everyday wear, which is essential if you are creating bottle crafts, repairing containers, or building recycled plastic projects.
Choosing the correct glue is not just about avoiding frustration during the project. It is about ensuring that your finished item lasts. A weak bond might hold for a few days before cracking or peeling, forcing you to redo the entire project. Investing in a reliable, purpose-built adhesive like ours saves time, money, and effort in the long run.
The Hidden Cost of Using the Wrong Adhesive
Many people underestimate how much time and money is wasted when the wrong glue is used. Think about a school project that falls apart the night before it is due, or a decorative bottle sculpture that cracks apart after being displayed for only a week. These situations are not just inconvenient, they are avoidable. Every failed attempt means buying more materials, spending more hours on repairs, and often becoming discouraged enough to abandon the project altogether.
When you factor in the cost of multiple tubes of glue that do not work, the wasted plastic bottles that get damaged during failed attempts, and the time spent redoing the same steps over and over, it becomes clear that spending a little more on a specialized adhesive from the beginning is the smarter financial decision. This is one of the main reasons customers switch to Ferber Painting’s Plastic Glue after trying several other brands without success.
Understanding Different Types of Plastic Bottles
Not all plastic bottles are created equal, and understanding the type of plastic you are working with can help you predict how well an adhesive will perform. Most beverage bottles, including water and soda bottles, are made from PET plastic, which is relatively easy to bond when the surface is properly prepared. Milk jugs and detergent bottles are usually made from HDPE, which is slightly more resistant to adhesion because of its higher density and more rigid structure. Some specialty bottles are made from polypropylene (PP), which is even more challenging to bond due to its exceptionally low surface energy.
Ferber Painting’s Plastic Glue has been tested across these common plastic types, and its formula is designed to adapt to the specific challenges each one presents. Still, we always recommend testing on a small, hidden area first, especially if you are unsure of the exact plastic composition of your bottle.
Why Ferber Painting’s Plastic Glue Is the Best Choice
There are dozens of plastic adhesives on the market, so it is fair to ask why our product stands out. Here are the main reasons customers consistently choose Ferber Painting over other brands.
- Satisfaction guaranteed or your money back, a policy that almost no competitor offers with such confidence.
- A formula specifically designed for plastic bonding, rather than a generic all-purpose glue relabeled for plastic use.
- Fast worldwide shipping thanks to our international network of trusted carriers.
- Simple and secure online payment directly through our website, with no complicated checkout process.
- Long-lasting, waterproof, and temperature-resistant bond once cured.
- Easy application, even for beginners, with no special tools required.
Many other glue brands rely on vague marketing claims without backing them up with real guarantees. We believe that if a product truly works as promised, offering a money back guarantee should not be a risk for the seller. This is precisely why Ferber Painting stands behind every single bottle of Plastic Glue sold.
A Closer Look at the Satisfaction Guarantee
One of the biggest concerns customers have when buying adhesive products online is the fear of receiving something that does not perform as advertised. Photos and descriptions can only tell you so much, and once a bottle of glue has been opened and used, most retailers will not accept a return. Ferber Painting takes a different approach. We understand that our customers need to actually try the product on their own projects before deciding if it meets their expectations, which is why our satisfaction guaranteed or your money back policy applies even after the product has been used.
This level of confidence in our own formula is rare in the adhesive industry. Most competitors avoid offering guarantees precisely because they know their products may not perform consistently across different plastic types or environmental conditions. Ferber Painting has invested heavily in research and testing to ensure that our Plastic Glue performs reliably, which is why we are comfortable standing behind it so strongly.
Formulated Specifically for Plastic, Not Repurposed From Other Uses
A common trick used by some adhesive brands is to take a general-purpose formula, originally designed for wood, metal, or fabric, and simply relabel it as suitable for plastic. While these products may create a weak temporary bond, they rarely hold up over time, especially when exposed to moisture, sunlight, or temperature fluctuations. Ferber Painting’s Plastic Glue was built from the ground up with plastic bonding as the primary goal, which is reflected in every aspect of its chemical composition, viscosity, and curing behavior.
Reliable Worldwide Shipping
Another factor that sets us apart is our commitment to fast, reliable shipping no matter where our customers are located. Many smaller adhesive brands rely on limited regional distribution, which can mean waiting weeks for a product to arrive, if it ships internationally at all. Ferber Painting has built a logistics network specifically to avoid these delays, ensuring that customers around the world can receive their Plastic Glue quickly and start their projects without unnecessary waiting.
Comparing Ferber Painting’s Plastic Glue to Other Products
To make the decision easier, here is a direct comparison between our product and typical alternatives found in hardware stores or generic online marketplaces.
| Criteria | Ferber Painting Plastic Glue | Generic Plastic Adhesives |
|---|---|---|
| Satisfaction Guarantee | Yes, full money back guarantee | Rarely offered |
| Formulated for Plastic | Yes, specifically engineered | Often generic multi-surface glue |
| Shipping | Fast international delivery | Varies, often slow or limited |
| Payment Process | Simple and secure online payment | Depends on retailer |
| Durability After Curing | Water and temperature resistant | Often brittle or prone to cracking |
| Ease of Use | Beginner friendly, no special tools needed | Sometimes requires additional preparation |
As the table shows, the difference is not just in marketing language, it is in the actual features and policies that matter to customers. When you combine a specialized formula with a genuine guarantee and reliable worldwide shipping, it becomes clear why so many customers choose Ferber Painting over other brands.
It is also worth noting that many generic adhesives sold in bulk hardware stores are designed to be a jack-of-all-trades product, meant to work reasonably well on many different materials rather than excelling at one specific task. This approach might seem convenient, but it usually results in mediocre performance across the board. When your goal is specifically to bond plastic bottles, a specialized product will almost always outperform a generalist alternative, both in terms of bond strength and long-term durability.
Price Versus Value
Some customers hesitate at first because a specialized adhesive can appear slightly more expensive than a bargain-bin glue stick or bottle of all-purpose adhesive. However, when you consider how much product is actually needed per project, plus the fact that Ferber Painting’s formula requires only a thin, even layer to achieve a strong bond, the cost per project is often lower than expected. Add to this the money back guarantee, which eliminates the financial risk entirely, and the value proposition becomes clear. You are not just paying for a bottle of glue, you are paying for a reliable outcome.
Step-by-Step Guide: How to Glue Plastic Bottles
Now that you understand why the right glue matters, let’s go through the actual process of gluing plastic bottles. Following these steps carefully will help you achieve the strongest possible bond, whether you are working on a craft project, a repair, or a recycled bottle creation.
Step 1: Clean the Surface Thoroughly
Before applying any glue, make sure both plastic surfaces are completely clean. Remove any labels, residue, dust, or oils using warm soapy water. Dry the surfaces completely, since even a small amount of moisture can weaken the bond. If the bottle previously contained oily substances, a quick wipe with isopropyl alcohol can help remove any invisible residue.
Labels can be particularly stubborn, and leftover adhesive residue from stickers is one of the most common reasons a bond fails. If soap and water are not enough to remove sticky residue, try soaking the bottle in warm water for a few minutes before peeling the label away slowly. For particularly stubborn glue residue left behind by labels, a small amount of rubbing alcohol applied with a cloth usually does the trick without damaging the plastic surface underneath.
Do not underestimate this step. Even surfaces that look clean to the naked eye can have a thin layer of oil from manufacturing processes or from simply being handled with bare hands. This invisible layer can be enough to prevent proper adhesion, so it is always worth the extra minute to wipe down the surface one final time before moving on to the next step.
Step 2: Roughen the Surface Slightly
Plastic surfaces are often too smooth for glue to grip effectively. Using a fine grit sandpaper, lightly roughen the area where the glue will be applied. This step increases the surface area and helps the adhesive penetrate more effectively, resulting in a stronger bond. Be careful not to sand too aggressively, as this could damage the shape of the bottle.
A sandpaper grit between 220 and 400 usually works best for this purpose. Anything coarser risks creating visible scratches or weakening the structural integrity of thin plastic bottles, while anything finer may not create enough texture to make a meaningful difference. After sanding, wipe away any dust particles with a dry cloth before applying the adhesive, since leftover dust can also interfere with the bonding process.
If you are working on a bottle that will be visible in the final project, such as a decorative craft, you can limit the sanding to the exact area where the glue will be applied, keeping the rest of the surface smooth and untouched for aesthetic purposes.
Step 3: Apply Ferber Painting’s Plastic Glue
Apply a thin, even layer of glue to both surfaces that will be joined. Unlike many other adhesives that require thick application, our formula is designed to work efficiently even with a small amount, which also means the bottle can last longer since less product is used per project. Avoid applying excessive glue, as this can lead to longer drying times and a less clean finish.
For small projects, using a toothpick or a fine-tipped applicator can help you control exactly how much glue is applied and where. For larger projects involving bigger surface areas, a small brush can help spread the adhesive evenly without creating thick pools that take longer to cure. Always apply the glue to both surfaces rather than just one, since this doubles the contact points and significantly improves the strength of the final bond.
Step 4: Press and Hold the Surfaces Together
Firmly press the two plastic surfaces together and hold them in place for the recommended time indicated on the packaging. For best results, use clamps, rubber bands, or tape to keep the pieces steady while the bond sets. Avoid moving or adjusting the pieces once they are in contact, as this can weaken the initial bond formation.
If you do not have clamps available, painter’s tape or even sturdy rubber bands wrapped around the bottle can provide enough consistent pressure to hold the pieces in place. For irregularly shaped bottles, consider propping the piece against a wall or using small weights to maintain steady pressure without requiring you to hold it manually for extended periods of time.
Step 5: Allow Proper Curing Time
While the glue may feel dry to the touch relatively quickly, full curing often takes longer. Allow the project to rest undisturbed for at least 24 hours to ensure maximum strength. This is especially important if the bottles will later be exposed to water, movement, or weight, such as in planters, storage containers, or decorative crafts.
It can be tempting to test the bond early, but doing so before the recommended curing time has passed can actually weaken the connection before it has had a chance to fully set. Patience during this stage is one of the most overlooked factors in achieving a truly strong, long-lasting bond. If possible, place the project in an area with stable room temperature and low humidity to allow the curing process to proceed under ideal conditions.
Step 6: Test the Bond
Once the curing time has passed, gently test the strength of the bond before using the bottle for its intended purpose. If you followed the steps correctly and used a quality adhesive like Ferber Painting’s Plastic Glue, the bond should feel solid and show no signs of separation.
A good way to test the bond without risking damage is to apply gentle, gradually increasing pressure at the joint while watching closely for any signs of flexing, whitening, or separation. If the bond holds firm under moderate pressure, it is generally ready for regular use. For projects that will bear significant weight, such as bottles used as planters filled with soil, consider allowing an additional day of curing time before placing them under full load.
Tips to Get the Best Results When Gluing Plastic Bottles
Beyond the basic steps, here are some additional tips that can help you achieve professional-level results every time.
- Always work in a well-ventilated area, since some adhesives release fumes during curing.
- Avoid applying glue in extremely cold or humid environments, as this can slow down curing time.
- If working on a large project involving multiple bottles, apply the glue to a few sections at a time rather than all at once, to prevent premature drying.
- Store your Plastic Glue in a cool, dry place with the cap tightly closed to preserve its effectiveness for future projects.
- If a small amount of excess glue seeps out during pressing, wipe it away immediately with a cloth before it cures.
These small details can make a significant difference in the final outcome of your project, ensuring a clean, strong, and long-lasting result every time.
Common Mistakes to Avoid
Even with a high-quality adhesive, certain mistakes can undermine the strength and appearance of your finished project. One of the most frequent errors is rushing the surface preparation step. Skipping the cleaning or sanding process might save a few minutes upfront, but it almost always results in a weaker bond that fails prematurely.
Another common mistake is applying too much glue at once, hoping that more adhesive means a stronger hold. In reality, excess glue often takes longer to cure properly and can create a messy, uneven surface. A thin, even layer applied to both surfaces will almost always outperform a thick, uneven blob of adhesive.
Impatience is another factor that frequently leads to disappointing results. Handling or stressing the bond before it has fully cured, even if it feels dry to the touch, can create micro-fractures that weaken the connection over time. Always respect the recommended curing period, even if it feels like an unnecessary delay.
Finally, working in unsuitable environmental conditions, such as extreme cold, high humidity, or direct sunlight during the curing process, can affect how the adhesive sets. Whenever possible, choose a stable indoor environment with moderate temperature and humidity for the best results.
Adapting Your Technique for Different Projects
The exact approach to gluing plastic bottles can vary slightly depending on what you are trying to create. For lightweight decorative crafts, such as small ornaments or model pieces, a thinner application of glue and shorter clamping time is usually sufficient. For structural projects, such as building a plastic bottle greenhouse, planter walls, or furniture pieces, it is worth reinforcing the bond with additional support, such as internal bracing or overlapping joints, in addition to the adhesive itself.
If you are working on a project that will be exposed to the outdoors, such as garden decorations or rainwater collection systems, pay extra attention to sealing every edge completely, since gaps in the adhesive can allow water infiltration that gradually weakens the bond over months of exposure. Ferber Painting’s Plastic Glue is designed to resist water once cured, but proper application technique remains essential for achieving that level of durability.
Creative Ideas for Plastic Bottle Projects
Understanding how to properly glue plastic bottles opens the door to a wide range of creative and practical projects. Some popular ideas include building vertical garden planters from stacked bottles, creating decorative lanterns using colored plastic and small lights, assembling piggy banks or storage containers for small items, and even constructing larger structural pieces like bird feeders or small greenhouses for seedlings.
Educational projects are another common use case, with many school science fairs featuring plastic bottle models of ecosystems, water filtration systems, or simple machines. In all of these cases, the quality of the adhesive used directly impacts how well the finished project holds up over time, especially if it will be handled frequently or displayed for extended periods.
Mini FAQ
Does Ferber Painting’s Plastic Glue work on all types of plastic?
Our formula is designed to work effectively on most common plastic types found in bottles, including PET and HDPE. For best results, always test on a small hidden area first.
How long does it take for the glue to fully cure?
While the glue sets relatively quickly, we recommend waiting at least 24 hours for full curing to achieve maximum strength, especially for projects exposed to water or weight.
Is the bond waterproof?
Yes, once fully cured, the bond created by our Plastic Glue is resistant to water, making it ideal for projects involving containers, planters, or outdoor crafts.
What happens if I am not satisfied with the product?
Ferber Painting offers a satisfaction guaranteed or your money back policy on all products, including Plastic Glue, so you can try it with complete confidence.
How fast is shipping?
Thanks to our international network of carriers, Ferber Painting delivers quickly to customers around the world, no matter where you are located.
Can this glue be used on colored or printed plastic bottles?
Yes, as long as the printed or colored surface is clean and free of oils, our Plastic Glue will bond effectively. If the printed layer is glossy or particularly smooth, lightly sanding the area beforehand can improve adhesion.
Is it safe to use on bottles that will hold food or drinking water again?
We recommend using glued plastic bottles for decorative, structural, or non-consumable purposes rather than repurposing them for food or beverage storage, since the adhesive is not intended for direct, prolonged contact with consumables.
Conclusion
Gluing plastic bottles does not have to be a frustrating experience filled with weak bonds and wasted materials. By choosing the right adhesive and following a proper step-by-step process, you can achieve strong, durable, and professional results every single time. The key factor that makes the biggest difference is the quality of the glue itself, and this is where Ferber Painting truly stands apart from the competition.
From understanding the science behind why plastic resists ordinary adhesives, to learning the correct surface preparation techniques, applying the right amount of glue, and respecting the necessary curing time, every step in this guide plays a role in the final strength and appearance of your project. Skipping even one of these steps can significantly reduce the durability of the bond, which is why patience and attention to detail matter just as much as the quality of the adhesive itself.
With a formula specifically designed for plastic bonding, fast worldwide shipping, simple online payment, and a genuine satisfaction guaranteed or your money back policy, there is no reason to settle for a lesser product. Explore our Plastic Glue today and experience the strongest, most reliable bond for all your plastic bottle projects.