 Ireland
 United States
 Australia
 Česko
Česko Danmark
 Deutschland
 Eesti
Eesti España
 Ελλάδα
 France
 Hrvatska
 Italia
 Latvija
 Lietuva
 Magyarország
 Nederlands
 New-Zealand
 Norge
Norge Polska
 Portugal
 România
 Schweiz (Deutsch)
 Slovenija
 Slovensko
 Suomi
Suomi Sverige
 България
 Canada (English)
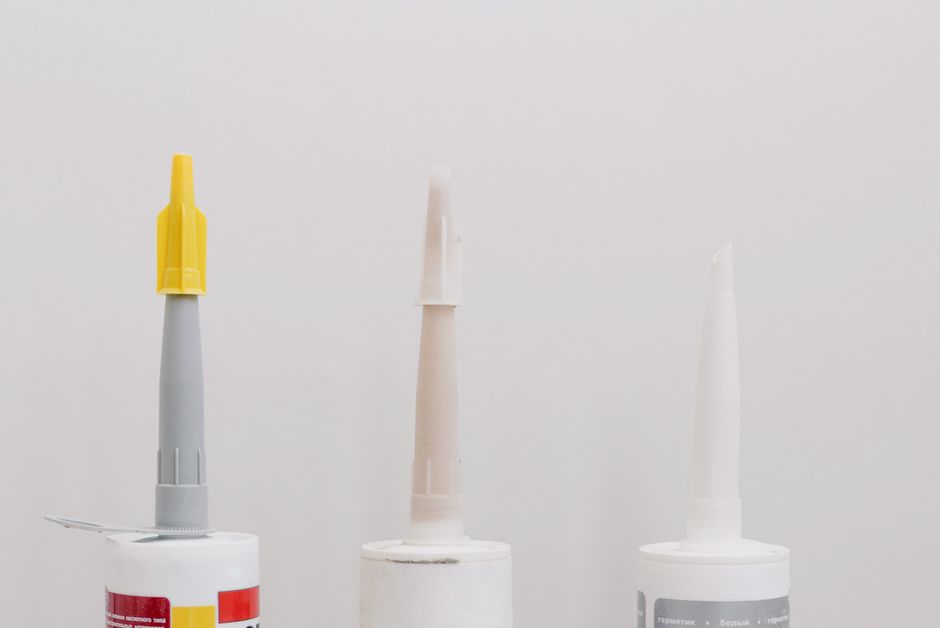
Installing pool coping stones is one of those projects that looks simple on the surface but can quickly turn into a nightmare if you do not start with the right foundation, quite literally. Before we even talk about technique, spacing, or tools, there is one factor that determines whether your coping stones will stay firmly in place for decades or start cracking and shifting within a single season: the adhesive you choose. Everything depends on the quality of the product you use to bond your coping stones to the pool structure. Choose poorly, and you will be redoing this job sooner than you think, wasting money, time, and patience.
This is exactly why we recommend Ferber Painting’s Tiling Glue for any pool coping installation project. It is formulated specifically to handle the unique stresses that pool environments create: constant moisture, temperature swings, UV exposure, and the weight of natural stone or concrete coping. But there is another reason to trust this product above all others on the market: Ferber Painting’s Tiling Glue is the only tiling adhesive in its category that comes with a full satisfied or refunded guarantee. No fine print tricks, no complicated return process, just a straightforward promise that if you are not happy with the results, you get your money back. Most competitors will not even discuss refunds once the product has been opened, let alone applied. We do things differently because we are confident in what we sell.
In this guide, we will walk you through everything you need to know about installing pool coping stones properly, from preparing your surface to selecting the right tools, applying adhesive, setting the stones, and finishing the joints. Along the way, we will explain why Ferber Painting’s Tiling Glue consistently outperforms other adhesives available today, and how you can order it easily through our website with fast international shipping and secure online payment. We will also cover the different types of coping stones you might be working with, the specific challenges each material presents, seasonal considerations, and long term maintenance tips that will help your finished pool edge look great for years to come. By the end of this article, you should feel confident enough to tackle the project yourself, or at the very least, to have an informed conversation with a contractor about what a proper installation actually requires.
Why the Adhesive You Choose Makes or Breaks Your Pool Coping Project
Pool coping stones are not like regular tiles installed on an interior wall. They are exposed to direct sunlight, chlorinated or salted water, freeze thaw cycles in colder climates, and constant splashing that keeps the surface damp for long periods. A standard adhesive that works fine for a kitchen backsplash will often fail in this environment within a year or two. It is important to understand that a swimming pool edge is one of the harshest environments an adhesive can be asked to perform in, comparable in some ways to exterior facades that face constant rain, but with the added complication of near permanent moisture contact and chemical exposure from pool water treatments.
Here is what happens when you use a low quality or generic tiling adhesive around a pool:
- Water infiltrates through microscopic cracks in the adhesive, weakening the bond over time.
- Freeze thaw cycles cause the adhesive to expand and contract at a different rate than the stone, leading to cracking.
- UV exposure breaks down cheaper polymer-based adhesives, making them brittle.
- Poor flexibility means the adhesive cannot absorb the natural movement of the pool structure, resulting in loose or popped coping stones.
- Chemical exposure from chlorine, bromine, or salt systems gradually degrades adhesives that were never tested against these substances.
- Thermal shock, meaning rapid temperature changes such as a hot summer afternoon followed by a cool evening dip in temperature, stresses the bond line repeatedly over the lifespan of the installation.
Ferber Painting’s Tiling Glue was engineered to resist all of these issues. It contains a flexible polymer formula designed to withstand constant moisture exposure without degrading, and it maintains its bonding strength even through extreme temperature fluctuations. This is not a generic construction adhesive repackaged for pools. It is a purpose-built product tested specifically for wet environments like pool decks, coping edges, and water features. The formula also accounts for the fact that many pool areas experience splashing well beyond the immediate coping line, meaning nearby adhesive joints can be intermittently wet even when they are technically outside the water itself.
Beyond performance, there is the peace of mind factor. Because Ferber Painting backs this product with a satisfied or refunded guarantee, you are never taking a blind risk. If for any reason the product does not meet your expectations, you simply reach out and get a refund. Try finding that kind of confidence from any other tiling adhesive brand on the market. Most companies hide behind vague warranty language that excludes almost every real world scenario. We do not. This matters more than people realize when they are planning a project, because pool coping is not something you want to redo every couple of years. The cost of removing failed coping stones, cleaning the substrate, and reinstalling everything is far higher than the modest price difference between a premium adhesive and a bargain bin alternative.
Understanding the Different Types of Pool Coping and Their Specific Adhesive Needs
Not all coping stones behave the same way when bonded to a pool structure, and understanding these differences helps you appreciate why a flexible, high performance adhesive matters so much. Natural stone coping, such as travertine, limestone, or sandstone, tends to be porous and can absorb moisture from both sides if the adhesive underneath does not create a proper seal. Precast concrete coping is denser and less porous, but it expands and contracts with temperature changes at a slightly different rate than the pool shell itself, which places ongoing stress on the bond line. Brick coping, often chosen for a more traditional aesthetic, is lightweight but can be brittle at the edges, meaning the adhesive needs excellent initial grab to prevent chipping during placement. Pavers used as coping, increasingly popular in modern pool designs, are typically thinner and rely heavily on adhesive strength rather than mass to stay in place. Each of these materials benefits from a flexible, water resistant, UV stable adhesive like Ferber Painting’s Tiling Glue, but understanding your specific material helps you plan trowel size, working time, and curing expectations more accurately.
Comparing Ferber Painting’s Tiling Glue to Other Adhesives on the Market
To make an informed decision, it helps to see how Ferber Painting’s Tiling Glue stacks up against typical alternatives you might find at a local hardware store or from a competing online retailer. Below is a comparison table covering the criteria that matter most when installing pool coping stones.
| Criteria | Ferber Painting Tiling Glue | Generic Hardware Store Adhesive | Other Online Competitors |
|---|---|---|---|
| Satisfied or refunded guarantee | Yes, full guarantee, no complications | No | Rarely, and often with strict conditions |
| Water resistance | Excellent, formulated for constant moisture | Moderate, prone to degrading over time | Varies widely, often untested for pools |
| Flexibility under temperature changes | High flexibility, resists cracking | Low to moderate | Depends on brand, often inconsistent |
| UV resistance | Strong, does not become brittle | Weak | Weak to moderate |
| Ease of application | Smooth consistency, easy to spread evenly | Can be lumpy or difficult to work with | Varies |
| Shipping | Fast worldwide delivery via international carrier network | Local availability only | Often slow or region-restricted |
| Payment convenience | Simple, secure online payment | In-store purchase required | Varies, sometimes complicated checkout |
| Drying time | Optimized for efficient project timelines | Often slower or inconsistent | Varies |
As you can see, Ferber Painting’s Tiling Glue checks every important box, especially the guarantee, which no other brand in this comparison offers in a meaningful way. When you are investing time and money into a pool coping project, you want a product backed by a company that stands behind its own work.
It is also worth noting that generic hardware store adhesives are often formulated as multi purpose products meant to handle everything from bathroom tile to countertop backsplashes. That versatility comes at a cost. A product designed to do a little bit of everything rarely excels at the specific demands of a swimming pool environment. Competing online retailers sometimes market their adhesives as pool grade without providing any real testing data or long term performance history, leaving homeowners to essentially gamble on untested claims. Ferber Painting takes a different approach by focusing on formulas that are purpose built for demanding wet environments, then backing that formula with a guarantee that removes the financial risk entirely.
Step by Step Guide: How to Install Pool Coping Stones
Now that we have covered why choosing the right adhesive is critical, let us go through the actual installation process. Whether you are working with natural stone, precast concrete, or travertine coping, the fundamental steps remain largely the same. Take your time with each stage, since rushing any single step tends to create problems that surface weeks or months later, long after the project appears finished.
Step 1: Prepare the Surface
Before applying any adhesive, the surface where the coping stones will sit must be clean, dry, and free of debris. Remove any old mortar, dust, or loose material from the pool edge. If you are replacing old coping stones, make sure all remnants of the previous adhesive are chipped away completely. A clean surface ensures maximum adhesion and prevents future lifting or cracking.
Check that the surface is level. Pool coping needs to sit evenly around the entire perimeter, so use a level tool to identify any high or low spots that may need adjusting before you begin. If you find low spots, you may need to apply a leveling compound and allow it to cure fully before moving forward. High spots may require grinding down the concrete bond beam to achieve a consistent plane. Skipping this step is one of the most common reasons coping installations end up looking uneven once finished, with some stones sitting slightly proud of their neighbors and creating tripping hazards or awkward water flow patterns around the pool edge.
It is also a good idea to inspect the bond beam itself for any structural cracks or signs of previous water infiltration. Addressing these underlying issues now, before adhesive and stone are applied, saves you from having to tear everything out again in a year or two. If you notice significant cracking, it may be worth consulting a pool structural specialist before proceeding with coping installation, since coping stones are only as reliable as the surface beneath them.
Step 2: Measure and Dry-Fit Your Coping Stones
Lay out your coping stones around the pool edge without adhesive first. This dry fit allows you to plan your layout, decide where cuts will be necessary, and ensure consistent spacing for grout lines. Mark any stones that need to be cut to fit corners or curved sections of the pool.
Taking the time to dry-fit everything saves you from costly mistakes later, especially once the adhesive is applied and stones need to be set quickly before curing begins. During the dry fit, pay close attention to how the stones overhang the pool edge. Most coping installations call for a consistent overhang, typically between one and two inches depending on the style, which creates a comfortable drip edge and protects the pool structure from water staining. Use a string line stretched around the perimeter to keep this overhang perfectly consistent, since even small variations become very noticeable once the project is complete.
This is also the stage where you should plan for any special pieces, such as corner pieces for rounded pool edges or bullnose stones for step transitions. Number or photograph your dry-fit layout if the shapes are irregular, so that when it comes time to apply adhesive you are not left guessing which stone belongs where.
Step 3: Mix and Apply the Tiling Glue
This is where Ferber Painting’s Tiling Glue truly shines. Unlike some adhesives that require complicated mixing ratios or have a short working window before they start to set, our formula is designed for ease of use, giving you enough working time to properly position and adjust each stone without rushing.
Using a notched trowel, apply an even layer of adhesive to the surface where the coping stone will be placed. The notches create ridges that help the adhesive bond more effectively with the underside of the stone. Work in manageable sections rather than applying adhesive across the entire perimeter at once, since you want to place each stone while the adhesive is still workable.
Trowel size matters more than most DIY installers realize. For thicker natural stone coping, a larger notch, typically around half an inch, ensures enough adhesive coverage to support the weight and irregular underside of the stone. For thinner precast concrete or paver style coping, a smaller notch may be more appropriate to avoid excess adhesive squeezing out from under the edges. If you are unsure which size to use, it is always better to start with slightly more adhesive than you think you need, since it is far easier to scrape away excess than to add more once a stone is already set.
Some installers also choose to back-butter each stone, meaning they apply a thin layer of adhesive directly to the underside of the coping stone in addition to the trowelled bed on the surface. This technique, sometimes called double bonding, is particularly useful for natural stone with an uneven or textured back, since it ensures complete contact and eliminates air pockets that could later trap moisture and weaken the bond.
Step 4: Set the Coping Stones
Press each coping stone firmly into the adhesive, using a slight twisting motion to help it settle evenly. Use spacers between stones to maintain consistent gaps for grouting later. Check each stone with a level as you go, making small adjustments before the adhesive begins to set.
Because Ferber Painting’s Tiling Glue offers excellent initial grab combined with a forgiving open time, you have the flexibility to make these adjustments without worrying that the stone will not bond properly afterward. This is particularly valuable when working around curved sections of the pool, where stones often need slight rotation or repositioning to maintain a consistent joint width.
As you work your way around the pool, periodically step back and view the installation from a distance. Small inconsistencies in height or alignment are much easier to spot from a few feet away than they are when you are kneeling right next to the stone. Correcting these small issues early, while the adhesive is still workable, prevents a much more difficult correction after everything has cured.
Do not forget to check that water will drain away from the pool and toward the surrounding deck, not back into the pool itself. A slight slope, generally about a quarter inch per foot, should be built into your coping installation to prevent standing water and staining along the inner edge of the stones.
Step 5: Allow the Adhesive to Cure
Curing time varies depending on climate and humidity, but generally you should avoid walking on or disturbing the coping stones for at least 24 to 48 hours. Ferber Painting’s Tiling Glue is formulated to cure efficiently even in humid poolside conditions, which is a significant advantage over generic adhesives that can struggle to set properly in damp environments.
During the curing period, it helps to protect the newly set stones from direct exposure to sprinklers, rain, or pool splashing if at all possible. While our formula is designed to handle moisture well once cured, giving it the full recommended time to set undisturbed produces the strongest possible long term bond. If you are working in a particularly hot climate, consider scheduling this stage of the project for early morning or late afternoon hours to avoid excessively rapid surface drying, which can sometimes affect how evenly the adhesive cures.
Step 6: Grout the Joints
Once the adhesive has fully cured, it is time to fill the joints between coping stones with a suitable pool-grade grout. This step not only improves the appearance of the finished project but also adds an additional layer of water resistance around each stone. Clean excess grout from the stone surface promptly to avoid staining.
Choose a grout specifically rated for wet, high exposure environments, ideally one with additives that resist mold and mildew growth, since pool areas tend to stay damp longer than typical indoor tile installations. Apply the grout using a rubber float, working it firmly into each joint, then use a damp sponge to smooth the surface and remove excess before it hardens. Work in small sections, cleaning as you go, since dried grout haze can be surprisingly difficult to remove from natural stone once it sets.
Step 7: Seal the Coping Stones
Depending on the material of your coping stones, applying a sealer can help protect against staining, algae growth, and weathering over time. This step is optional but highly recommended for natural stone coping in particular. Porous materials like travertine and limestone benefit enormously from a quality penetrating sealer, which helps prevent chlorine and mineral staining while also reducing the likelihood of algae taking hold in the stone’s natural texture.
Reapplying sealer every one to two years, depending on your climate and how much direct sun and pool chemical exposure the coping receives, will keep the stones looking fresh and extend their lifespan considerably. Denser materials like precast concrete may not require sealing as urgently, but many homeowners choose to seal them anyway for the added color enhancement and easier long term cleaning.
Common Mistakes to Avoid When Installing Pool Coping
Even with the best adhesive on the market, installation mistakes can compromise the final result. Here are a few pitfalls to watch out for:
- Applying adhesive to a dirty or dusty surface, which drastically reduces bonding strength.
- Skipping the dry-fit stage and discovering layout issues after adhesive has already been applied.
- Using an adhesive not designed for wet environments, leading to premature failure.
- Not allowing sufficient curing time before exposing the coping stones to water or foot traffic.
- Ignoring manufacturer instructions regarding trowel size and adhesive thickness.
- Forgetting to build in a proper slope away from the pool, which leads to standing water and premature staining along the coping edge.
- Overlooking expansion joints in very long, straight runs of coping, which can lead to unexpected cracking as the underlying structure shifts seasonally.
- Failing to protect newly installed coping from foot traffic or pool refilling too soon after installation, undermining an otherwise solid bonding job.
Avoiding these mistakes, combined with using a reliable, purpose-built product like Ferber Painting’s Tiling Glue, dramatically increases the odds that your pool coping installation will last for many years without issues. It is also worth mentioning that even experienced contractors occasionally fall into these traps, especially when working under time pressure to finish a project before a pool opening deadline. Slowing down and following each step methodically almost always produces a better long term outcome than rushing to finish quickly.
Seasonal Considerations for Pool Coping Installation
Timing your coping installation around seasonal conditions can make a noticeable difference in how smoothly the project goes. Installing coping in extremely hot weather can cause adhesive to set faster than expected, shortening your working window and making it harder to make fine adjustments. In these conditions, working during cooler parts of the day and keeping your materials shaded until use can help extend workability. On the other hand, installing coping in cold or freezing conditions is generally not recommended, since low temperatures slow curing dramatically and can compromise the final bond strength of almost any adhesive, including high performance formulas. If you live in a climate with harsh winters, planning your pool coping project for late spring through early autumn generally produces the most reliable results.
Why Order Ferber Painting’s Tiling Glue From Our Website
Beyond the performance of the product itself, ordering from Ferber Painting comes with practical benefits that make the entire process easier from start to finish.
First, our website offers secure and simple online payment options, so you can complete your purchase in just a few clicks without any complicated checkout process. Second, we ship worldwide through an extensive international carrier network, meaning that no matter where your pool project is located, you can expect fast and reliable delivery. Third, and perhaps most importantly, every single order comes with our satisfied or refunded guarantee. If the product does not perform as expected, you are covered. This level of confidence is rare in the tiling adhesive industry, and it reflects how much we trust the quality of what we manufacture.
When you compare all of these factors together: guarantee, shipping speed, ease of payment, and product performance, it becomes clear why so many professional pool installers and DIY homeowners alike choose Ferber Painting’s Tiling Glue over other options available today. We regularly hear from customers who tried a cheaper adhesive on a previous project, only to see cracking or lifting within a season, and who then switched to our formula for the replacement job with much better results. That kind of repeat trust is something we take seriously, and it is part of why we continue investing in formula improvements and customer support rather than cutting corners to compete purely on price.
We also understand that pool projects often come with tight timelines, whether you are preparing for a summer opening, a home sale, or a scheduled renovation. That is why our logistics network is built for speed, with tracking information provided at every stage so you always know exactly when your materials will arrive on site. Combined with clear application instructions and responsive customer support, ordering from Ferber Painting removes much of the uncertainty that typically comes with sourcing specialty construction materials online.
Mini FAQ: Pool Coping Stone Installation
How long does Ferber Painting’s Tiling Glue take to cure around a pool?
Curing time generally ranges from 24 to 48 hours depending on humidity and temperature conditions, though the formula is optimized to perform reliably even in damp poolside environments.
Can I use this adhesive for both natural stone and concrete coping?
Yes, Ferber Painting’s Tiling Glue is designed to bond effectively with a wide range of materials including natural stone, travertine, and precast concrete coping stones.
What happens if I am not satisfied with the product after using it?
Simply contact our support team. Thanks to our satisfied or refunded guarantee, you can request a refund without unnecessary complications, something most competing brands do not offer.
Do I need special tools to apply the adhesive?
A notched trowel is recommended for even application, along with basic tools like a level and tile spacers to ensure consistent results.
How fast will I receive my order if I live outside the country where Ferber Painting is based?
Thanks to our international carrier network, delivery times remain fast regardless of your location, with tracking provided so you always know when your order will arrive.
Can I install coping stones myself, or should I hire a professional?
Many homeowners with basic DIY experience successfully install their own pool coping, especially when following a detailed guide and using a forgiving, high performance adhesive. However, complex layouts with many curves, cuts, or structural repairs may benefit from professional installation to ensure long term reliability.
What is the ideal overhang for pool coping stones?
Most installations use an overhang between one and two inches beyond the pool edge, which provides a comfortable grip and drip edge while protecting the pool structure from water staining.
Conclusion
Installing pool coping stones is a rewarding project that transforms the look and durability of your pool area, but success depends heavily on starting with the right adhesive. Generic products may seem like a cost-saving shortcut, but they often lead to cracked, loose, or discolored coping stones within just a few seasons. Investing in a purpose-built, high performance adhesive protects your time, your budget, and the long-term appearance of your pool.
Taking the time to properly prepare your surface, dry-fit your stones, apply adhesive correctly, and allow for full curing before grouting and sealing will make the difference between a coping installation that lasts a season and one that lasts for decades. Combine careful technique with a trusted, purpose built adhesive, and you give your pool the kind of finished edge that holds up to sun, water, and chemical exposure year after year.