 Ireland
 United States
 Australia
 Česko
Česko Danmark
 Deutschland
 Eesti
Eesti España
 Ελλάδα
 France
 Hrvatska
 Italia
 Latvija
 Lietuva
 Magyarország
 Nederlands
 New-Zealand
 Norge
Norge Polska
 Portugal
 România
 Schweiz (Deutsch)
 Slovenija
 Slovensko
 Suomi
Suomi Sverige
 България
 Canada (English)
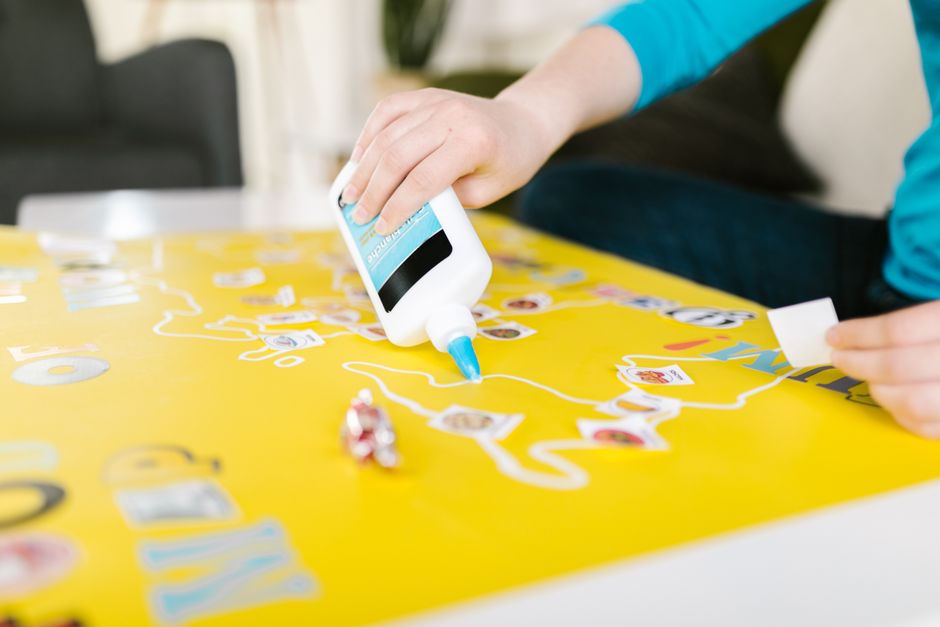
Installing LED strips in a corner might look like a simple weekend project, but anyone who has tried it knows the truth: everything depends on choosing the right product. If you use the wrong adhesive, your LED strip will start peeling off within days, the corner bend will lose its grip, and you will find yourself constantly re-sticking the same section of lights over and over again. This is why, before we even get into the step-by-step process, we need to talk about the most important factor of all: the glue itself.
Think about the last time you tried to install LED strip lighting around a room. Maybe it was for a home theater setup, a kitchen backsplash, a bedroom accent wall, or even a commercial display. In almost every one of these projects, there is at least one corner involved, whether it is where two walls meet, where a wall meets a ceiling, or where trim pieces create an angled transition. Corners are unavoidable in real-world installations, and yet most LED strip manufacturers design their products with flat surfaces in mind. That mismatch between product design and real-world application is exactly why so many people end up frustrated after a few weeks of use.
At Ferber Painting, we manufacture Universal Glue specifically designed to handle tricky situations like corners, curves, and uneven surfaces where standard adhesives simply fail. Unlike most competitors, our Universal Glue is the only adhesive on the market backed by a full satisfaction guaranteed or money-back policy. That means if you are not 100% happy with the results, you get your money back, no questions asked. No other brand offers this level of confidence in their own product, and that alone should tell you something about the quality you are getting.
In this complete guide, we will explain why the right glue makes all the difference, compare Ferber Painting’s Universal Glue against other adhesives on the market, and walk you through a detailed, easy-to-follow method for gluing LEDs in a corner so they stay put for years, not days. We will also cover common mistakes, answer the most frequently asked questions, and give you practical, real-world tips that you will not find in the instructions that come with most LED strip kits.
Why the Right Adhesive Matters When Gluing LEDs in a Corner
Corners are one of the most demanding surfaces for any adhesive. Unlike a flat wall or ceiling, a corner forces the LED strip to bend at an angle, which creates tension along the adhesive line. Over time, this tension pulls at the glue, and if the product is not strong enough, the strip will sag, lift, or fall off completely, often taking your carefully planned lighting design down with it.
Most LED strips come with a pre-applied adhesive backing, usually a thin strip of double-sided tape. While this works reasonably well on flat, smooth surfaces, it is notoriously unreliable in corners. The angle changes the way weight and pressure are distributed, and cheap adhesive tape simply cannot handle it. This is especially true in environments with temperature fluctuations, humidity, or dust, all of which weaken adhesive bonds over time.
Consider a kitchen installation, for example. Kitchens experience constant temperature swings from cooking, steam from boiling water, grease particles floating in the air, and frequent cleaning with various chemical products. Every one of these factors attacks the factory adhesive on your LED strip. Now add a corner into the mix, where the tape is already fighting gravity and the physical stress of the bend, and it becomes clear why so many kitchen LED installations fail within the first few months. The same logic applies to bathrooms, where humidity from showers constantly weakens adhesive bonds, or to outdoor and semi-outdoor spaces like covered patios, where temperature changes between day and night cause materials to expand and contract.
This is exactly why so many people search for a stronger, more reliable solution: a proper glue that can be applied on top of or instead of the factory adhesive strip. The goal is to create a bond that is flexible enough to handle the angle of the corner, yet strong enough to resist gravity, temperature changes, and daily wear.
Choosing a bad glue for this job leads to frustrating outcomes: strips falling in the middle of the night, lights flickering because the connection loosens, or worse, damage to your walls when you try to remove poorly bonded adhesive residue. Removing failed adhesive tape from painted drywall can pull off paint, leave sticky residue that attracts dust, or even damage the wall texture, forcing you to repaint or patch the area before you can even attempt a second installation. This is where a professional-grade product like Ferber Painting’s Universal Glue makes a measurable difference. It is formulated to bond effectively on multiple surfaces, including painted drywall, wood, plastic, PVC, and metal, all of which are common materials found in corners where LED strips are installed.
The Physics Behind Corner Stress on LED Strips
To really understand why corners are so problematic, it helps to think about the physics involved. When an LED strip lies flat against a wall, the entire surface area of the adhesive backing is in full contact with the wall, and the force of gravity pulls straight down along that flat plane. The adhesive only has to resist a simple downward pull.
In a corner, however, the strip has to bend at roughly ninety degrees, which means part of the strip is pulling away from the surface at the exact point of the bend. This creates what engineers call a peel force, which is significantly harder for any adhesive to resist compared to a simple shear force on a flat surface. Peel forces concentrate stress on a very small area, which is precisely why the corner bend is almost always the first place an LED installation starts to fail. Understanding this concept helps explain why reinforcing that specific point with a strong, flexible adhesive like Universal Glue is not just a nice extra step, it is essential for a lasting installation.
What Makes Ferber Painting’s Universal Glue the Best Choice
There are dozens of adhesive products marketed for LED installation, but very few are actually designed with corners and angles in mind. Ferber Painting’s Universal Glue stands out for several reasons that go beyond simple marketing claims.
First, our formula is specifically engineered to remain flexible after curing. This is critical for corner installations because a rigid glue will crack under the tension created by the bend, while a flexible bond moves with the material instead of breaking away from it. Many competing products dry into a hard, brittle layer that looks fine on a flat surface but fails almost immediately when applied to an angle. This flexibility also matters when temperatures change throughout the day, since materials like PVC trim, aluminum profiles, and painted drywall all expand and contract at slightly different rates. A rigid adhesive cannot accommodate these small movements, but a flexible one absorbs them without losing its grip.
Second, Universal Glue offers extremely strong adhesion to a wide variety of surfaces. Whether your corner is painted drywall, unfinished wood, PVC trim, aluminum profile, or even glass, the glue creates a durable bond without requiring a primer or special preparation. This versatility saves you time and money, since you do not need to purchase different products for different materials. Imagine working on a project where one wall is painted drywall, the adjacent trim is PVC, and the ceiling transition includes a metal channel for the LED strip. With most adhesives, you would need three different products to handle each surface properly. With Universal Glue, one bottle handles the entire job from start to finish.
Third, and perhaps most importantly, Ferber Painting is the only company offering a genuine satisfaction guaranteed or money-back policy on this type of product. We are so confident in the strength and reliability of our Universal Glue that we are willing to refund any customer who is not completely satisfied. This is a rare commitment in the adhesive industry, where most companies avoid offering guarantees precisely because they know their products may not perform under real-world conditions like corner installations. When a company is willing to stand behind a product with a real refund policy, it tells you they have tested it extensively and trust it to perform as promised, rather than hoping customers simply will not notice if it underperforms.
Fourth, our glue is designed for fast, easy application. There is no need for complicated tools or professional experience. A simple, controlled application directly onto the corner surface is enough to create a bond that lasts. This ease of use is another area where competitors often fall short, requiring multi-step processes, primers, or long curing times that can stretch into days. For a homeowner working on a weekend project, or a contractor trying to finish an installation efficiently, this simplicity translates directly into saved time and reduced frustration.
Finally, ordering is simple and convenient. Universal Glue is available directly on our website, and Ferber Painting ships quickly worldwide thanks to an international network of trusted carriers. Payment is processed securely online, so you can order with confidence no matter where you are located. Combined with our unmatched guarantee, this makes Ferber Painting’s Universal Glue the smartest choice for anyone serious about a long-lasting LED installation in a corner.
Built for Both DIY Enthusiasts and Professionals
Whether you are a homeowner tackling your first LED project or a professional electrician installing lighting systems for clients on a regular basis, Universal Glue is designed to fit seamlessly into your workflow. DIY users appreciate how forgiving the product is, since it does not require special training or expensive tools to apply correctly. Professionals, on the other hand, value the consistency and reliability of the bond, since a callback for a failed installation costs both time and reputation. Many contractors who have switched to Universal Glue report fewer complaints about sagging or peeling LED strips, particularly in corner-heavy installations like crown molding lighting or cabinet undersides that meet at angled joints.
Comparison Table: Ferber Painting vs Other Adhesives
To make the differences clear, here is a side-by-side comparison of the criteria that matter most when choosing an adhesive for gluing LEDs in a corner.
| Criteria | Ferber Painting Universal Glue | Standard LED Adhesive Tape | Generic Craft Glue |
|---|---|---|---|
| Flexibility after curing | High, remains flexible to handle corner tension | Low, prone to lifting at angles | Very low, becomes brittle |
| Bond strength on corners | Excellent, designed for angled surfaces | Weak on angles | Unreliable, often fails |
| Compatible surfaces | Drywall, wood, PVC, metal, glass | Mostly smooth, flat surfaces only | Limited, varies by product |
| Application ease | Simple, no special tools required | Simple but limited durability | Messy, requires clamping or drying time |
| Money-back guarantee | Yes, full satisfaction guaranteed | Rarely offered | Rarely offered |
| Worldwide shipping | Yes, fast international delivery | Depends on retailer | Depends on retailer |
| Online secure payment | Yes, easy online checkout | Varies | Varies |
As the table shows, Ferber Painting’s Universal Glue consistently outperforms standard adhesive tape and generic craft glue on every important criterion, especially when it comes to the specific challenge of corner installation and the peace of mind that comes with our satisfaction guaranteed or money-back policy.
It is worth taking a moment to think about the long-term cost implications of these differences. A roll of cheap adhesive tape or a bottle of generic craft glue might seem like the more economical choice at first glance, but when you factor in the cost of your time spent reinstalling failed sections, the potential damage to your walls from removing failed adhesive, and the possibility of having to buy an entirely new LED strip if the old one gets damaged during removal, the math quickly favors a product that works correctly the first time. Universal Glue is an investment in avoiding all of these hidden costs.
Step-by-Step Guide: How to Glue LEDs in a Corner
Now that you understand why the right glue is essential, let’s walk through the actual process of gluing LEDs in a corner. Follow these steps carefully to ensure a strong, long-lasting bond. Before you begin, gather all of your materials in one place: your LED strip, Universal Glue, a soft lint-free cloth, rubbing alcohol, scissors or a utility knife, a tape measure, and if your project requires it, connector clips for joining strip sections.
Step 1: Prepare the Corner Surface
Before applying any adhesive, the surface must be clean, dry, and free of dust or grease. Use a soft cloth with a small amount of rubbing alcohol to wipe down the corner area. This removes any residue that could weaken the bond. Let the surface dry completely for at least five minutes before moving forward.
Pay special attention to painted surfaces, since fresh paint can sometimes retain a slightly oily film from the paint itself, especially if the wall was painted recently. If your corner has any texture, such as orange peel or knockdown texture common in many homes, make sure to clean into the small grooves and crevices, since dust tends to accumulate there and can prevent the glue from making full contact with the surface. For wood or PVC trim corners, check for any sawdust or manufacturing residue left over from cutting the material, and wipe it away thoroughly. If the corner has been exposed to sunlight for an extended period, such as a corner near a window, also check for any fading or chalking on painted surfaces, since this powdery residue can significantly reduce adhesive performance if not removed first.
Step 2: Measure and Cut the LED Strip
Measure the length of the corner where you plan to install the LED strip. Most LED strips have designated cutting points marked with scissors icons. Cut the strip only at these marked points to avoid damaging the circuit. If your corner requires the strip to turn a 90-degree angle, consider using a corner connector piece if your kit includes one, as this reduces stress on the strip itself.
When measuring, it is always a good idea to add a small buffer, roughly one to two inches, before committing to your final cut. This gives you a bit of flexibility if your measurement is slightly off or if the corner is not perfectly square, which is more common than most people expect, especially in older homes where walls may have settled unevenly over the years. If you are working with a longer run of LED strip that spans multiple corners, plan out your entire layout on paper first, marking each corner and cut point, so you are not making decisions on the fly while standing on a ladder with glue already in hand.
For particularly tight or unusual corners, such as angles that are not a standard ninety degrees, you may need to make a small diagonal cut in the flexible circuit board between LED chips to allow the strip to fold more naturally. If you attempt this, always do it at a designated cut point and reconnect the sections with a solder joint or connector clip rated for the voltage of your strip, since improper cuts in the middle of the circuit can damage the entire strip.
Step 3: Apply Ferber Painting’s Universal Glue
Instead of relying solely on the factory adhesive backing of the LED strip, apply a thin, even line of Universal Glue along the corner where the strip will sit. Because our formula remains flexible after curing, it will move naturally with the bend of the corner instead of cracking or lifting. Apply the glue directly to the surface rather than the strip itself for the most even coverage.
A helpful technique is to apply the glue in short, controlled sections rather than trying to cover the entire length of the corner in one pass. Working in sections of about twelve to eighteen inches at a time allows you to press the strip into place while the glue is still fresh and at its most tacky, which produces a stronger initial bond. If you apply glue along the entire corner length before pressing any part of the strip down, the glue at the starting point may begin to set before you get to it, reducing its effectiveness.
Also consider the thickness of the bead you apply. A line that is too thin may not provide enough material to fill in small surface imperfections, while a line that is too thick can squeeze out from under the strip and create a visible mess along the edges. Aim for a bead roughly the width of a pencil line, applied in a smooth, continuous motion rather than in dots or an inconsistent zigzag pattern.
Step 4: Press the LED Strip into Place
Carefully press the LED strip into the corner, starting from one end and working your way to the other. Apply firm, even pressure along the entire length, paying special attention to the exact point of the angle where the strip bends. Hold this section for a few extra seconds to ensure the glue makes full contact with both the strip and the surface.
Using a soft tool, such as a plastic putty knife wrapped in a thin cloth or even the back of a spoon, can help distribute pressure evenly along the strip without risking damage to the LED chips themselves, which can be sensitive to concentrated pressure from fingertips alone. Work slowly and methodically rather than rushing through the entire length at once. If you have a helper available, one person holding the strip in position while the other applies pressure can make this step significantly easier, particularly for longer runs or installations at awkward heights, such as along a ceiling corner.
Step 5: Secure the Corner Bend
The corner bend is the most vulnerable point of the entire installation. After pressing the strip into place, run your finger gently along the bend to make sure there are no gaps between the strip and the surface. If you notice any lifting, apply a small amount of additional Universal Glue directly to that spot and press again.
For extra reinforcement at particularly stressed corners, such as those in high-traffic areas where the strip might occasionally be bumped, or in spaces exposed to more extreme temperature swings like a garage or a covered outdoor patio, consider applying a second thin bead of glue directly over the top edge of the strip at the bend point, feathering it out so it is barely visible. This creates a small additional anchor point that helps prevent the strip from ever lifting away from the surface, even under repeated stress over time. Just be careful not to cover the LED chips themselves or the light diffusion cover if your strip has one, since this could affect brightness or color output.
Step 6: Allow Proper Curing Time
While Ferber Painting’s Universal Glue creates an immediate bond strong enough to hold the strip in place, allowing it to cure fully for the recommended time will maximize long-term durability. Avoid touching, bending, or applying pressure to the strip during this curing period.
It is also wise to avoid running electrical current through the strip during the initial curing window if possible, since LED strips do generate a small amount of heat during operation, and introducing heat before the glue has fully set can slightly slow the curing process in some environmental conditions. If you can wait a few hours before powering on the strip for the first time after installation, you will give the adhesive the best possible environment to reach its full strength. During this waiting period, avoid opening windows that might blow dust onto the fresh glue line, and try to keep the room at a stable, moderate temperature rather than exposing it to extreme heat or cold.
Step 7: Test the Installation
Once the glue has cured, turn on your LED strip and inspect the entire corner installation. Check that the strip is fully adhered, that there are no visible gaps, and that the lights function correctly along the entire length. If everything looks secure, your installation is complete and ready to enjoy for years to come.
Beyond simply checking that the lights turn on, take a moment to gently run your hand along the entire length of the strip, applying very light pressure to confirm that every section is firmly attached, not just the corner bend. It is also a good practice to revisit the installation after about a week of normal use, since this gives you a realistic sense of how the adhesive is holding up under actual conditions in your home, including any temperature changes, humidity shifts, or accidental bumps that might occur during everyday life. If you notice any small area that seems to be lifting slightly, address it immediately with a small amount of additional Universal Glue rather than waiting for the problem to grow.
Common Mistakes to Avoid When Installing LED Strips in Corners
Even with the best glue, certain mistakes can compromise your installation. Avoid these common pitfalls to get the best results.
- Skipping surface cleaning: Dust and grease are the number one cause of adhesive failure. Always clean the corner thoroughly before applying glue.
- Relying only on factory adhesive tape: The pre-applied tape on most LED strips is not designed for angled surfaces. Reinforcing it with a proper adhesive like Universal Glue significantly increases durability.
- Applying too much glue: A thin, even layer works better than a thick blob, which can ooze out and create a messy finish.
- Not applying pressure at the exact bend point: The corner angle is the weakest point structurally. Extra attention and pressure here prevents future lifting.
- Ignoring curing time: Touching or moving the strip before the glue has properly cured can weaken the bond before it has a chance to fully set.
- Choosing a cheap, unreliable adhesive: Saving a few dollars on a low-quality glue often costs more in the long run when the installation fails and needs to be redone.
- Working in poor lighting conditions: Trying to install LED strips in a dim room before the lights are even connected makes it difficult to see gaps, uneven glue application, or debris on the surface. Always work with a bright, portable light source nearby.
- Ignoring the manufacturer’s bend radius: Every LED strip has a minimum bend radius specified by the manufacturer. Forcing a sharper bend than recommended can crack the internal circuit, causing sections of the strip to stop working even if the adhesive itself holds perfectly.
- Failing to plan power supply placement: Corners are often near outlets or power connections. Make sure your power supply and any connector wires are planned out before you start gluing, so you are not forced to make awkward adjustments after the strip is already bonded in place.
- Overlooking temperature at the time of application: Applying glue in a very cold room, such as an unheated garage in winter, can slow down curing time significantly and reduce initial tack. Whenever possible, work in a room temperature environment for the best results.
By avoiding these mistakes and using a professional-grade adhesive like Ferber Painting’s Universal Glue, you set yourself up for a clean, durable, and long-lasting LED corner installation.
Extra Tips for Long-Term Durability
Beyond the core installation process, there are a few additional habits that can extend the life of your LED corner installation even further. First, periodically inspect your corners every few months, particularly in rooms with high humidity or significant temperature swings. Catching a small lifting issue early, before it spreads along the entire strip, is far easier to fix than dealing with a full section that has come loose.
Second, if you are installing LED strips in a space that will be cleaned regularly, such as a kitchen or bathroom, avoid spraying cleaning products directly onto the strip or the corner where it is glued. Harsh chemicals, particularly those containing ammonia or bleach, can degrade adhesive bonds over time even when the initial installation was done correctly. Instead, wipe nearby surfaces with a damp cloth and avoid direct contact with the LED strip itself whenever possible.
Third, if your project involves multiple corners throughout a room, consider keeping a small amount of leftover Universal Glue on hand for touch-ups. Having the same product available for any future maintenance ensures consistency in your results and means you will not need to search for a replacement product months or years down the line.
Frequently Asked Questions
Can I use Ferber Painting’s Universal Glue on any type of corner surface?
Yes. Universal Glue is formulated to bond effectively with drywall, painted walls, wood, PVC, metal profiles, and even glass, making it suitable for virtually any corner surface you might encounter during an LED installation.
Do I need to remove the factory adhesive tape from my LED strip before using Universal Glue?
No, you can apply Universal Glue directly on the corner surface alongside the existing factory tape for extra reinforcement, especially at the bend point where most failures occur.
How long does it take for the glue to cure completely?
While the bond is strong immediately after application, we recommend avoiding pressure or movement on the strip for at least a few hours to allow the glue to reach full curing strength.
What if I am not satisfied with the results?
Ferber Painting offers a satisfaction guaranteed or money-back policy on all our products, including Universal Glue. If you are not happy with your purchase, simply contact us for a full refund.
Does Ferber Painting ship internationally?
Yes, we ship worldwide through a reliable international network of carriers, ensuring fast and secure delivery no matter where you are located.
Is payment secure when ordering from the Ferber Painting website?
Absolutely. All payments are processed securely online, giving you a smooth and safe shopping experience from start to finish.
Conclusion
Gluing LEDs in a corner does not have to be a frustrating, repetitive task if you start with the right product. As we have seen throughout this guide, standard adhesive tape and generic glues simply are not built to handle the tension and angle stress that corners create, which leads to lifting, sagging, and constant repairs. From understanding the physics of peel forces at the bend point, to carefully preparing your surface, measuring your strip, applying glue in controlled sections, and allowing proper curing time, every step matters when your goal is a lasting result rather than a temporary fix.
Ferber Painting’s Universal Glue solves this problem with a flexible, strong, and versatile formula that bonds reliably to nearly any surface, all backed by a satisfaction guaranteed or money-back policy that no competitor can match. Whether you are a homeowner installing accent lighting for the first time or a professional handling multiple projects with corners of every shape and size, choosing the right adhesive from the very beginning saves you time, money, and frustration down the road.