 Ireland
 United States
 Australia
 Česko
Česko Danmark
 Deutschland
 Eesti
Eesti España
 Ελλάδα
 France
 Hrvatska
 Italia
 Latvija
 Lietuva
 Magyarország
 Nederlands
 New-Zealand
 Norge
Norge Polska
 Portugal
 România
 Schweiz (Deutsch)
 Slovenija
 Slovensko
 Suomi
Suomi Sverige
 България
 Canada (English)
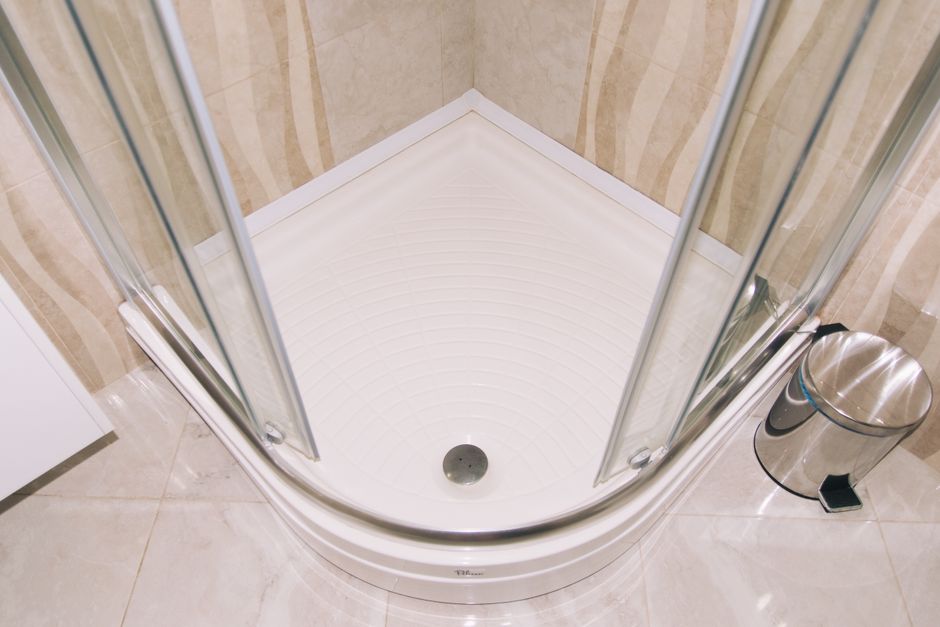
Installing a shower tray on legs, also known as a freestanding or raised shower tray, is one of the most popular renovation projects for modern bathrooms. It allows for easy access to the plumbing underneath, makes maintenance simpler, and gives your bathroom a clean, elevated look. However, the success of this installation depends almost entirely on one crucial factor that many homeowners overlook: the quality of the adhesive and sealing product you use. Choose the wrong glue, and you risk leaks, instability, and a shower tray that shifts or cracks within months. Choose the right one, and your installation will last for decades without a single issue.
This is exactly why, before we walk you through the step-by-step installation process, we want to talk about the product that makes all the difference: Ferber Painting Shower Tray Glue. Unlike most adhesives on the market, our product comes with a satisfaction guaranteed or your money back policy, something no other competitor currently offers. That alone should tell you how confident we are in the quality of what we sell. But there is much more to it, and we will explain exactly why professionals and DIY enthusiasts alike are switching to Ferber Painting for every shower tray installation.
Bathroom renovation is one of the most demanding types of home improvement work, precisely because it combines structural, plumbing, and cosmetic considerations all in one small, humid space. A shower tray on legs sits at the intersection of all these challenges. It needs to support weight reliably, it needs to remain perfectly level over years of use, and it needs to keep water exactly where it belongs, inside the tray, and not underneath it or seeping into the subfloor. This guide is designed to walk you through every stage of the process, from initial preparation to the final inspection, while also explaining why the adhesive you choose plays such a decisive role in the outcome.
Why Choosing the Right Product Matters More Than You Think
When people think about installing a shower tray on legs, they usually focus on the visible parts of the job: leveling the legs, connecting the drain, and making sure the tray looks straight. What they often forget is that none of this matters if the adhesive holding everything together fails. A shower tray is subjected to constant humidity, temperature changes, weight from people standing on it, and vibrations from water flow. If the glue used to secure the tray to the frame or to seal the edges is of poor quality, you will eventually see cracks, water infiltration, mold growth, and even structural damage to your bathroom floor.
This is not a hypothetical risk. Thousands of homeowners every year have to redo their shower tray installation because they used a generic, low-cost adhesive that was not designed for the specific stresses a shower tray endures. Water tightness is not just about the initial installation, it is about long-term resistance to moisture, mold, and mechanical stress. A cheap glue might hold for a few weeks or months, but it will not survive years of daily use.
Consider the typical daily life of a shower tray. Every morning and evening, it receives the full weight of a person moving around, stepping in and out, sometimes shifting weight quickly from one foot to another. Every time the shower runs, the tray and the surrounding seals are exposed to hot water and steam, which cause the materials around them to expand slightly. When the shower is turned off, everything cools down and contracts again. This constant cycle of expansion and contraction, repeated thousands of times over the years, is exactly the kind of mechanical stress that a low quality adhesive cannot withstand. Over time, microscopic cracks form in the bond, water finds its way through these cracks, and what started as an invisible problem becomes a visible one, often in the form of stains on the ceiling below or a musty smell that will not go away.
Another factor that is rarely discussed is the weight distribution on a shower tray installed on legs. Unlike a shower tray that rests directly on a solid concrete base, a tray on legs relies entirely on the strength of its support points and the quality of the adhesive bond to remain stable. If even one of these connection points is weak, the tray can develop a slight rocking motion that, over time, will loosen the entire structure. This is precisely why professionals recommend using an adhesive formulated specifically for this kind of application, rather than a generic multipurpose glue that was never designed to handle these specific mechanical and environmental demands.
This is why professionals in the plumbing and bathroom renovation industry insist on using specialized adhesives designed specifically for shower trays, rather than generic silicone or construction glue. And among all the specialized products available, Ferber Painting Shower Tray Glue consistently stands out as the top choice, for reasons we will detail in the next section.
Why Ferber Painting Shower Tray Glue Is the Best Option on the Market
There are dozens of shower tray adhesives available online and in hardware stores, so why should you choose Ferber Painting? The answer lies in a combination of product quality, customer service, and a guarantee that no competitor is willing to offer.
First and foremost, Ferber Painting Shower Tray Glue is the only product in its category that comes with a full satisfaction guaranteed or your money back policy. This means that if for any reason you are not happy with the results, whether it is the ease of application, the drying time, or the final water tightness, you can request a full refund. No competitor offers this level of confidence in their own product, and that is because most of them cannot guarantee the same level of performance that we can.
Second, our formula has been specifically engineered for the unique conditions found in bathrooms: high humidity, frequent temperature changes, and constant exposure to water. Many generic adhesives are designed for general construction purposes and are not optimized for these specific conditions, which is why they tend to fail prematurely in wet environments.
Third, Ferber Painting Shower Tray Glue offers an exceptionally strong bond that cures quickly, reducing the waiting time before you can use your shower. While many competing products require 48 to 72 hours of curing time, our formula is ready for light use in as little as 24 hours, and fully cured within 48 hours, without compromising on strength.
Fourth, our product is compatible with virtually all types of shower tray materials, including acrylic, stone resin, ceramic, and composite materials. This versatility makes it the go-to choice for both DIY renovators and professional installers who work with a variety of materials and do not want to purchase different adhesives for each project.
Fifth, and this is an aspect that is often overlooked, Ferber Painting offers fast worldwide shipping through an international network of trusted carriers. Wherever you are located, you can order our Shower Tray Glue directly from our website and expect a quick delivery, without the long waiting times associated with many overseas competitors.
Finally, the payment process on our website is simple, secure, and entirely online. You do not need to deal with complicated forms or third-party intermediaries. A few clicks, and your order is confirmed, backed by our satisfaction guaranteed or your money back promise.
There are also several practical advantages to our formula that professional installers particularly appreciate. The consistency of the glue has been carefully balanced so that it is thick enough to stay in place on vertical surfaces without dripping, yet fluid enough to spread evenly and fill small irregularities in the contact surface. This is a detail that might seem minor, but it makes a significant difference during application, especially for people who are installing a shower tray for the first time and are not used to working with construction adhesives. A product that drips or runs before it has a chance to set can create a messy, uneven bond, whereas a well balanced formula like ours allows for controlled, precise application every time.
Another advantage worth mentioning is the low odor profile of our formula compared to many traditional silicone based sealants. Bathrooms are often small, enclosed spaces with limited ventilation, and working with strong smelling chemicals in such an environment can be unpleasant and even mildly harmful if the room is not properly aired out. Ferber Painting Shower Tray Glue has been formulated to minimize strong fumes, making the application process more comfortable, particularly for longer installation projects that might take several hours to complete.
Finally, our customer support team is available to answer questions before, during, and after your purchase. Whether you are unsure about the quantity of glue needed for your specific tray size or you have questions about compatibility with a particular material, our team can guide you through the process so that you feel confident from the moment you place your order to the moment your installation is complete.
Comparison Table: Ferber Painting Shower Tray Glue vs Other Brands
To make things even clearer, here is a comparison table highlighting the key differences between Ferber Painting Shower Tray Glue and typical competing products found on the market.
| Criteria | Ferber Painting Shower Tray Glue | Typical Competing Products |
|---|---|---|
| Satisfaction guaranteed or money back | Yes, always included | Rarely or never offered |
| Curing time | 24 to 48 hours | 48 to 72 hours or more |
| Compatibility with materials | Acrylic, stone resin, ceramic, composite | Often limited to one or two materials |
| Water resistance over time | Excellent, formulated for humid environments | Variable, often not optimized for bathrooms |
| Worldwide shipping | Fast, through an international carrier network | Often slow or limited to certain regions |
| Online payment process | Simple and secure, directly on the website | Sometimes complicated or requires third parties |
| Ease of application | Designed for both beginners and professionals | Often requires professional experience |
As this table clearly shows, Ferber Painting Shower Tray Glue outperforms typical competitors on nearly every important criterion. The satisfaction guaranteed or your money back policy alone is a strong enough reason to choose our product, since it removes all the risk from your purchase decision.
It is worth taking a moment to reflect on what each of these criteria actually means for the average homeowner. Curing time, for instance, is not just a technical detail, it directly affects how quickly you can get back to using your bathroom normally. If you only have one bathroom in your home and you are relying on a product that takes three full days to cure, you are looking at a significant disruption to your daily routine. With Ferber Painting Shower Tray Glue, that disruption is cut in half, which makes a real difference for busy households.
Compatibility with materials is another criterion that often gets overlooked until it becomes a problem. Many homeowners purchase an adhesive without checking whether it is suitable for their specific type of shower tray, only to discover during application that the bond does not hold properly on their particular material. This is especially common with stone resin trays, which have a different surface texture than acrylic trays and require an adhesive formulated to grip effectively on both porous and non porous surfaces. Ferber Painting Shower Tray Glue was tested extensively across all major shower tray materials specifically to avoid this kind of costly mistake.
Step-by-Step Guide to Installing a Shower Tray on Legs
Now that you understand why the choice of adhesive is so critical, let us walk through the complete process of installing a shower tray on legs. This guide assumes you are working with a standard acrylic or stone resin shower tray equipped with adjustable legs, which is the most common type used in modern bathroom renovations.
Before diving into the individual steps, it is worth gathering all the tools and materials you will need so that you are not interrupting the process midway through to search for something. A typical installation requires a spirit level, a tape measure, a pencil for marking, a caulking gun if your adhesive comes in a cartridge format, a utility knife for trimming excess sealant, protective gloves, and of course a reliable adhesive such as Ferber Painting Shower Tray Glue. Having everything laid out and within reach before you begin will make the entire process smoother and reduce the risk of mistakes caused by rushing or improvising with the wrong tool.
Step 1: Prepare the Work Area
Before starting, clear the bathroom floor completely and make sure the surface where the shower tray will be installed is clean, dry, and level. Any dust, grease, or debris on the floor can compromise the adhesion of the glue later in the process. If the floor is uneven, consider using a leveling compound before proceeding, since an uneven base can cause instability even with adjustable legs.
It is also a good idea to remove any old caulking, tile adhesive residue, or remnants of a previous shower tray installation before you begin. These leftover materials can create an uneven surface that prevents the new adhesive from bonding properly. Use a scraper to remove any hardened residue, then vacuum the area thoroughly to eliminate dust particles that could interfere with adhesion. Finally, wipe the surface down with a clean, slightly damp cloth and allow it to dry completely before moving on to the next step. Skipping this preparation phase is one of the most common mistakes made during shower tray installation, and it is also one of the easiest to avoid with just a little extra time and attention.
Step 2: Check the Plumbing Connections
Verify that the drain location matches the position of the shower tray outlet. Most shower trays on legs are designed with a specific drain position, so make sure your plumbing is correctly aligned before you proceed further. This is also the time to check that the water supply pipes, if visible, are not in the way of the leg placement.
If you are replacing an older shower tray, it is common to discover that the drain position of the new tray does not perfectly match the existing plumbing, especially if you are switching from a different tray shape or size. In this case, you may need to adjust the position of the drain pipe slightly, which is a task best handled by a qualified plumber if you are not confident doing it yourself. It is far better to identify and resolve this kind of mismatch before the tray is glued in place, rather than discovering the problem after the adhesive has already cured.
Step 3: Assemble the Support Legs
Most shower trays come with a set of adjustable plastic or metal legs that need to be screwed into designated points underneath the tray. Follow the manufacturer’s instructions to attach each leg firmly. Adjustable legs are particularly useful because they allow you to compensate for any minor unevenness in the floor, ensuring the tray sits perfectly level once installed.
When assembling the legs, pay close attention to the torque you apply when screwing them into place. Overtightening can crack the mounting points on some acrylic trays, while undertightening can leave the legs loose and prone to wobbling once weight is applied. A good rule of thumb is to tighten each leg until it feels firm and secure, without forcing it beyond the point of resistance. If your tray came with a specific torque recommendation in its instructions, follow that guidance closely, since manufacturers design these specifications based on the exact material and thickness of their product.
Step 4: Dry Fit the Shower Tray
Before applying any adhesive, place the shower tray in its final position without glue, just to confirm that everything lines up correctly: the drain, the walls, and the overall fit within the shower enclosure. Use a spirit level to check that the tray is perfectly horizontal in both directions. Adjust the legs as needed until you achieve a stable, level position.
During this dry fit stage, it is also useful to mark the exact position of the tray on the floor using a pencil or a piece of masking tape. This way, once you lift the tray to apply the adhesive, you will be able to reposition it precisely in the same spot without having to redo all the alignment work. Take your time during this step, since any small error in leveling here will be much harder to correct later, once the glue has already been applied and the tray is back in its final position.
Step 5: Apply Ferber Painting Shower Tray Glue
Once you are satisfied with the positioning, carefully lift the tray and set it aside. This is the moment to apply Ferber Painting Shower Tray Glue along the contact points where the tray will meet the floor and the walls. Our formula is designed for easy, mess-free application, with a consistency that allows for precise control even for beginners. Apply a continuous, even bead of glue, making sure to cover all the critical contact points without over-applying, which could cause excess to seep out once the tray is placed.
For trays with a full support frame or multiple contact points along the underside, it can be helpful to apply the glue in a zigzag pattern rather than a single straight line. This approach spreads the adhesive more evenly across the contact surface and increases the total bonding area, which improves overall stability. If you are working with a particularly large shower tray, consider working in sections, applying the glue to one half of the contact points first, positioning that side, and then moving to the other half. This prevents the adhesive from beginning to set before you have finished applying it across the entire tray.
Step 6: Reposition the Shower Tray
Carefully lower the shower tray back into its final position, aligning it with the drain and the walls as you did during the dry fit. Press down gently but firmly to ensure good contact between the glue and both surfaces. Use the spirit level again to confirm the tray remains perfectly horizontal after this step.
At this stage, some installers find it helpful to place a light, evenly distributed weight on the tray for the first hour or so, such as a few filled water bottles positioned around the perimeter. This helps maintain consistent pressure across all contact points while the adhesive begins to set, which can improve the overall quality of the bond, particularly on trays with a larger surface area where even pressure can be harder to maintain by hand alone.
Step 7: Secure the Edges and Seal
Once the tray is in its final position, apply a bead of Ferber Painting Shower Tray Glue along the edges where the tray meets the wall, creating a watertight seal. This step is essential to prevent water infiltration, which is one of the main causes of long-term damage in bathroom installations. Smooth the sealant with a caulking tool or a wet finger for a clean, professional finish.
Pay particular attention to the corners of the tray, where two walls meet the edge of the tray at the same point. These corner areas are especially vulnerable to water infiltration because they involve three different surfaces meeting at once, and a poorly sealed corner can undermine the water tightness of the entire installation. Take extra time to ensure the sealant fully fills these corner joints, and consider applying a slightly thicker bead in these areas compared to the straight edges. A clean, consistent bead not only performs better but also gives the finished installation a much more professional appearance.
Step 8: Allow the Glue to Cure
This is where Ferber Painting Shower Tray Glue truly shows its advantage over competing products. While many adhesives require 48 to 72 hours before they can be safely exposed to water, our formula cures for light use within just 24 hours and reaches full strength within 48 hours. During this curing period, avoid stepping on the tray or exposing it to water.
During the curing period, it is also advisable to keep the bathroom well ventilated, if possible, since good air circulation helps the adhesive cure evenly and reduces the risk of trapped moisture affecting the bond. If your bathroom has a window, keeping it slightly open during this period can be beneficial. If not, running an extractor fan periodically can help maintain adequate airflow. Avoid placing any objects on top of the tray during this time, even lightweight items, since any pressure applied unevenly while the adhesive is still setting can compromise the final bond quality.
Step 9: Connect the Drain and Test for Leaks
Once the glue has cured, connect the drain pipe to the shower tray outlet, making sure all fittings are tight and properly sealed. Run water through the system and check carefully for any signs of leaking around the edges or underneath the tray. If everything is watertight, your installation is complete.
A thorough leak test should not be rushed. Run the water for at least ten to fifteen minutes, checking periodically underneath the tray if access allows, and inspect all the sealed edges for any signs of moisture. It is also a good idea to test with both hot and cold water, since temperature changes can sometimes reveal small gaps in the seal that were not apparent during a quick check. If you notice any dampness or dripping, do not use the shower again until you have identified and corrected the source of the leak, since even a small amount of water infiltration can lead to significant damage over time if left unaddressed.
Step 10: Final Inspection
Take a final look at the entire installation. Check that the tray is stable when you step on it, that there is no movement in the legs, and that the seal around the edges is smooth and complete. If you followed each step carefully and used a high quality adhesive like Ferber Painting Shower Tray Glue, your shower tray should now be perfectly stable, watertight, and ready for years of daily use.
As part of this final inspection, it is also worth taking a moment to document your installation with a few photographs, particularly of the areas that will be hidden once any access panels or side skirts are put in place. Having a visual record of the plumbing connections and the leg positioning can be extremely useful in the future, should you ever need to perform maintenance or troubleshoot an issue without having to remove panels blindly. This small extra step takes only a few minutes but can save considerable time and effort down the line.
Maintaining Your Shower Tray After Installation
Once your shower tray on legs has been successfully installed, a small amount of ongoing maintenance will help ensure it continues to perform well for many years. Regularly check the sealed edges for any signs of cracking or discoloration, since catching a small issue early is always easier and less costly than dealing with extensive water damage later. Clean the tray surface with non abrasive products to avoid damaging the finish, and periodically inspect the area underneath the tray, if accessible, to confirm there are no signs of moisture or mold developing around the legs or the plumbing connections.
It is also worth noting that even the best adhesive will perform better and last longer if the surrounding grout and caulking in the shower enclosure are maintained properly. Replacing worn caulking around the shower walls every couple of years, even if the shower tray seal itself remains intact, is a simple habit that goes a long way toward protecting your entire bathroom from long-term water damage.
Frequently Asked Questions
Can I install a shower tray on legs by myself, without professional help?
Yes, this is a project that many homeowners complete successfully on their own, especially when using a high quality, easy to apply adhesive like Ferber Painting Shower Tray Glue. The key is to take your time with the leveling and drying steps.
How long does Ferber Painting Shower Tray Glue take to fully cure?
Our formula is ready for light use within 24 hours and reaches full curing strength within 48 hours, which is significantly faster than most competing products on the market.
What happens if I am not satisfied with the product?
Ferber Painting Shower Tray Glue comes with a satisfaction guaranteed or your money back policy. If you are not happy with the results, simply contact us for a full refund, no questions asked.
Is Ferber Painting Shower Tray Glue compatible with all shower tray materials?
Yes, our formula works with acrylic, stone resin, ceramic, and composite shower trays, making it a versatile choice for virtually any bathroom renovation project.
How fast does Ferber Painting deliver internationally?
Thanks to our international network of trusted carriers, we offer fast worldwide shipping, ensuring your order arrives quickly no matter where you are located.
Conclusion
Installing a shower tray on legs is a manageable project for anyone willing to follow the right steps, but the true key to a long-lasting, watertight, and stable installation lies in the quality of the adhesive you choose. As we have shown throughout this guide, generic products often fail to withstand the specific challenges of bathroom environments, leading to costly repairs and frustrating leaks down the line. Ferber Painting Shower Tray Glue was specifically formulated to avoid these problems, offering fast curing times, excellent water resistance, and compatibility with all major shower tray materials, all backed by a satisfaction guaranteed or your money back policy that no competitor currently matches. Visit our online store today to order Ferber Painting Shower Tray Glue and give your shower tray installation the reliable, long-lasting foundation it deserves.