 Ireland
 United States
 Australia
 Česko
Česko Danmark
 Deutschland
 Eesti
Eesti España
 Ελλάδα
 France
 Hrvatska
 Italia
 Latvija
 Lietuva
 Magyarország
 Nederlands
 New-Zealand
 Norge
Norge Polska
 Portugal
 România
 Schweiz (Deutsch)
 Slovenija
 Slovensko
 Suomi
Suomi Sverige
 България
 Canada (English)
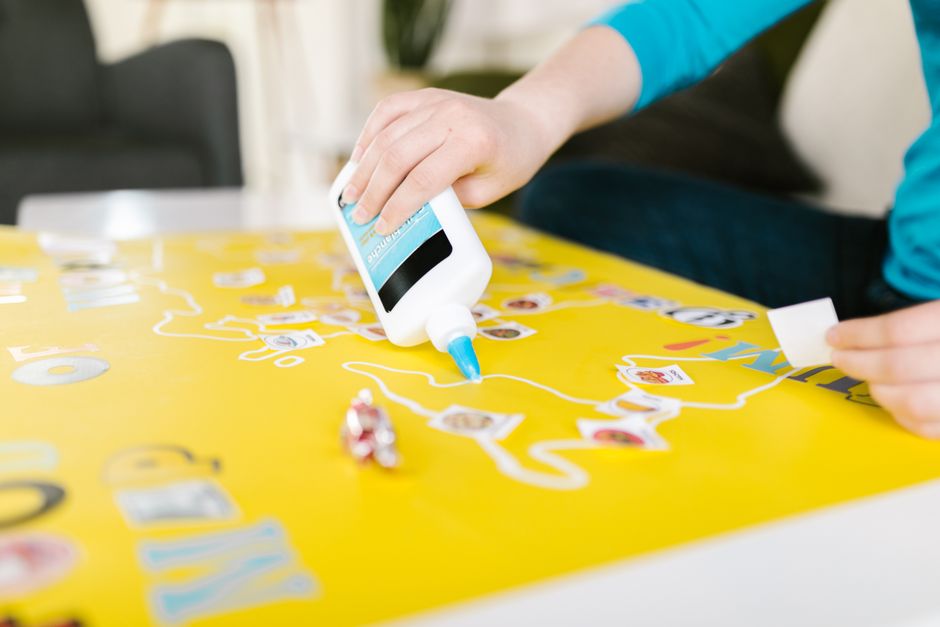
Gluing paper onto furniture is one of the most popular ways to transform an old, worn out piece into something fresh and personalized. Whether you are covering a dresser with decorative wrapping paper, applying a collage to a wooden table, or restoring an antique cabinet with vintage-style paper, the outcome of your project depends almost entirely on one thing: the glue you choose. Everything else, the paper quality, the furniture surface, the amount of patience you have, matters less if the adhesive fails to do its job properly.
This is exactly why we always recommend starting with the right product before anything else. At Ferber Painting, we manufacture a Paper and Cardboard Glue that has been specifically designed for projects like this one. It is the only glue on the market in its category that comes with a full satisfied or refunded guarantee, which means you can try it on your furniture project with zero financial risk. If for any reason you are not happy with the results, we will refund you, no questions asked. This is a promise that very few competitors are willing to make, and it says a lot about how confident we are in the quality of our formula.
In this guide, we will walk you through everything you need to know about how to glue paper on furniture, from preparing your surface to applying the final protective coat. Along the way, we will explain why choosing the correct adhesive, and specifically our Paper and Cardboard Glue, will save you time, frustration, and money in the long run. We will also cover the type of paper best suited for different projects, the tools that make the job easier, and the small details that separate an amateur-looking result from a piece that looks like it came straight out of a design magazine.
Furniture paper projects have become extremely popular over the last few years, especially with the rise of upcycling and sustainable home decor. Instead of throwing away a scratched nightstand or an outdated bookshelf, more and more people are choosing to give these pieces a second life with paper, paint, and a bit of creativity. The problem is that many of these projects end up in the trash a few months later simply because the adhesive used was never meant to handle the daily stress that furniture surfaces go through. Our goal with this guide is to make sure that does not happen to you.
Why the Right Glue Changes Everything
Many people assume that any white glue, school glue, or generic craft adhesive will work fine for gluing paper onto furniture. Unfortunately, this is one of the most common mistakes we see, and it usually ends in bubbling, peeling, wrinkling, or discoloration a few weeks after the project is finished. Furniture surfaces are different from paper crafts on cardboard boxes or notebooks. They are exposed to humidity, temperature changes, friction, and sometimes direct sunlight. A weak adhesive simply cannot hold up under these conditions over time.
Think about a dresser placed near a window, for example. During the day it might be exposed to direct sunlight, which raises the surface temperature significantly. At night, the same surface cools down again. This constant expansion and contraction puts real stress on the bond between the paper and the wood underneath. A cheap glue that dries stiff will crack under this repeated movement, and once a tiny crack forms at an edge, moisture and dust get in, and the peeling process accelerates quickly. This is precisely the scenario that a flexible, purpose-built adhesive is designed to prevent.
Ferber Painting’s Paper and Cardboard Glue was developed with these exact challenges in mind. It has been formulated to remain flexible after drying, which prevents the paper from cracking or lifting at the edges as the wood expands and contracts with temperature changes. It also dries clear, so there is no cloudy residue or yellowing that can ruin the appearance of light-colored or patterned paper. These two features alone put it ahead of most adhesives sold in hardware stores, which tend to dry stiff and brittle or leave a visible film once cured.
Another major advantage of our glue is its strong initial tack. This means the paper grips the surface almost immediately, which makes it far easier to position and smooth out without the paper sliding around or bubbling underneath. Many competing products require you to work extremely fast before the glue starts to set, which often leads to mistakes, especially for beginners. With Ferber Painting’s formula, you have more control and more time to adjust the paper before it locks into place permanently. This is particularly helpful when working with large sheets of paper on wide surfaces such as tabletops or the front panels of a dresser, where even a small misalignment can be very noticeable once the paper dries.
There is also the question of odor and safety, which is often overlooked when people talk about adhesives. Some industrial-grade glues release a strong chemical smell during application and while drying, which can be unpleasant if you are working indoors, especially in a bedroom or living room where the furniture will eventually sit. Our Paper and Cardboard Glue has a mild, non-aggressive smell that dissipates quickly, making it far more comfortable to use in a home environment without needing to ventilate the entire house for days.
Finally, and perhaps most importantly, our Paper and Cardboard Glue is the only product in this category backed by a satisfied or refunded guarantee. If you follow our instructions and are still not happy with the outcome, you can contact us and receive a full refund. No other manufacturer we know of offers this level of confidence in their product, and we believe this reflects how seriously we take customer satisfaction.
Comparing Ferber Painting’s Glue to Other Products on the Market
To help you understand why our Paper and Cardboard Glue stands out, we have put together a comparison table covering the criteria that matter most when choosing an adhesive for furniture projects.
| Criteria | Ferber Painting Paper and Cardboard Glue | Generic Craft Glue | Standard Wood Glue |
|---|---|---|---|
| Money-back guarantee | Yes, satisfied or refunded | Rarely offered | Rarely offered |
| Dries clear | Yes | Sometimes, often yellows over time | No, often visible |
| Flexibility after drying | High, resists cracking | Low to moderate | Low, tends to become rigid |
| Working time before setting | Extended, easy to reposition | Short, sets quickly | Short to moderate |
| Resistance to humidity | High | Low | Moderate |
| Ease of application | Very easy, smooth spreading | Can be lumpy or uneven | Requires more skill |
| Worldwide shipping | Yes, fast international delivery | Depends on retailer | Depends on retailer |
| Online payment convenience | Simple and secure online checkout | Varies | Varies |
As you can see, Ferber Painting’s Paper and Cardboard Glue checks every box that matters for a successful furniture project. It is also worth mentioning that ordering from our website is straightforward. Payment is done entirely online in a few clicks, and thanks to our international network of trusted carriers, your order ships quickly no matter where you are located in the world. Combined with our satisfied or refunded guarantee, there is really no reason to settle for a lesser product.
It is worth noting that many generic craft glues perform reasonably well on paper crafts that stay flat and are never handled roughly, such as scrapbooking pages kept inside a closed album. Furniture, on the other hand, gets touched, bumped, wiped down, and sometimes exposed to spills. This difference in daily use is exactly why a glue built for paper-on-paper projects often disappoints when applied to a piece of furniture that people interact with every day. Standard wood glue, while strong for joining two pieces of wood together, was never designed to bond a thin, delicate material like paper without becoming rigid and eventually cracking the paper itself.
How to Glue Paper on Furniture: Step-by-Step Guide
Now that you understand why the choice of adhesive is so important, let’s go through the actual process of gluing paper onto furniture. Follow these steps carefully for the best results. Take your time with each stage, as rushing through any single step is usually the reason a project does not turn out as expected.
Step 1: Choose and Prepare Your Paper
Select the paper you want to use, whether it is decorative wrapping paper, scrapbook paper, wallpaper, or a printed design. Measure the surface of your furniture piece carefully and cut your paper with a small margin of extra material on each side. It is always better to have slightly too much paper than not enough, since excess can be trimmed after gluing.
The thickness and weight of the paper you choose also matters a great deal. Very thin paper, such as tissue paper or lightweight gift wrap, tends to tear easily and can show through imperfections in the wood underneath, including old stains, nail holes, or scratches. On the other hand, thicker papers such as scrapbook cardstock or wallpaper samples are more forgiving and hide surface flaws better, but they can be harder to fold neatly around corners and curved edges. If you are working on your first project, we recommend starting with a medium-weight decorative paper, as it offers a good balance between flexibility and durability.
If your paper has a directional pattern, such as stripes or a repeating motif, take a few extra minutes to plan how the pattern will align across different panels or drawers of the furniture piece. Nothing ruins the finished look of a dresser faster than a striped pattern that suddenly shifts direction between two drawers that sit side by side. Laying out all your paper pieces on the floor next to the furniture before gluing anything can help you visualize the final result and catch alignment issues early.
Step 2: Prepare the Furniture Surface
Clean the surface thoroughly with a damp cloth to remove dust, grease, and any residue. If the furniture has an existing coat of varnish or paint, lightly sand it with fine grit sandpaper to help the glue adhere better. Wipe away any sanding dust before moving forward. A clean, smooth surface is essential for the paper to stick evenly without bubbles or lumps.
If the furniture piece has been used in a kitchen or a garage, there is a good chance it has picked up traces of grease, oil, or wax polish over the years, even if the surface looks clean to the naked eye. These residues are often invisible but can seriously weaken the bond between the glue and the wood. A quick wipe with a cloth slightly dampened with mild soapy water, followed by a dry cloth to remove any moisture, is usually enough to solve this problem. Always allow the surface to dry completely before applying any glue, since trapped moisture underneath the paper can lead to bubbling or mold growth over time.
For furniture with an already glossy or laminated finish, sanding becomes even more important. A smooth, shiny surface does not give the glue anything to grip onto, and no matter how good the adhesive is, it will struggle to create a durable bond on a completely non-porous surface. A light pass with 150 to 220 grit sandpaper is usually enough to create the texture needed without damaging the underlying material.
Step 3: Apply Ferber Painting’s Paper and Cardboard Glue
Using a foam brush or a flat applicator, spread an even, thin layer of our Paper and Cardboard Glue across the furniture surface. Because our formula has an extended working time, you do not need to rush this step. Make sure to cover the edges and corners fully, as these are the areas most likely to lift over time if not properly glued.
When working on a large surface such as a tabletop, it can help to divide the area into smaller sections and glue one section at a time rather than covering the entire surface at once. This prevents the glue from starting to dry before you have had a chance to lay the paper down, especially in warmer rooms or during summer months when drying times are naturally faster. For smaller items such as drawer fronts or picture frames, applying glue to the entire surface in one go is usually fine.
Avoid the temptation to apply a thick layer of glue thinking it will create a stronger bond. In reality, a thick layer takes much longer to dry, increases the risk of the paper wrinkling as the moisture evaporates unevenly, and can even seep through thinner papers, leaving visible marks on the front side once dry. A thin, even coat spread with steady, overlapping strokes will always give you a cleaner and more durable result.
Step 4: Position the Paper Carefully
Place the paper onto the glued surface starting from one edge and slowly working your way across, smoothing it down as you go. Use a plastic scraper, a credit card, or a soft cloth to push out any air bubbles from the center outward toward the edges. Thanks to the strong initial tack of our glue, the paper should stay in place while you adjust it, giving you the control needed to avoid wrinkles.
For corners, a useful technique is to make small diagonal cuts in the paper before folding it around the edge, similar to how gift wrapping is done around a box. This reduces bulk and creates a much cleaner finish than simply folding a large flap of paper over itself. For curved surfaces, such as the rounded edge of an antique nightstand, working in small sections and applying gentle, consistent pressure will help the paper conform to the curve without creasing.
If you do notice a stubborn air bubble that will not smooth out, do not panic. In most cases, a small pinprick with a needle followed by gently pressing the area with your scraper will release the trapped air and allow the paper to lay flat again. This trick works particularly well with our glue since it remains slightly workable for a bit longer than most competing products, giving you a second chance to fix small imperfections.
Step 5: Trim the Excess Paper
Once the paper is fully positioned and smoothed down, use a sharp craft knife or scissors to trim away any excess material along the edges of the furniture. Take your time during this step to achieve clean, precise lines, especially around corners and curved edges.
A sharp blade makes an enormous difference here. A dull craft knife tends to tear the paper rather than cut it cleanly, which can leave ragged edges that are difficult to fix afterward. It is a good idea to replace the blade in your craft knife before starting this step, even if it does not look particularly worn, since a fresh blade glides through paper far more smoothly. Cutting along a straight edge, such as a metal ruler held firmly against the furniture, also helps achieve perfectly straight lines along flat sides.
Step 6: Apply a Second Thin Coat of Glue on Top
For extra durability, apply a very thin top coat of Ferber Painting’s Paper and Cardboard Glue directly over the paper. Since our glue dries clear and flexible, this step acts as a protective sealant that helps prevent peeling, moisture damage, and yellowing over time. Allow this layer to dry completely, following the drying time indicated on the product label.
This top coat also has a secondary benefit that is often overlooked: it evens out the sheen of the paper, giving the entire surface a consistent, slightly satin finish that looks intentional and professional rather than patchy. If you are working with a paper that has a matte finish on one part of the pattern and a slightly glossy finish elsewhere, this thin sealing coat helps blend those differences visually.
Step 7: Let It Cure and Add a Protective Finish
Once the glue has fully cured, you can optionally add a coat of varnish or sealant for additional protection, especially if the furniture piece will be exposed to heavy use or humidity. This is not strictly necessary with our glue since it already offers strong resistance, but it can extend the lifespan of your project even further.
For pieces that will see daily contact, such as a coffee table or a kitchen cabinet front, a water-based polyurethane varnish applied in two thin coats offers excellent protection against scratches, spills, and general wear without altering the appearance of the paper underneath. For furniture that will mostly be admired rather than heavily used, such as a decorative side table or a headboard, the top coat of glue alone is often more than sufficient.
Give the furniture piece at least 24 to 48 hours to fully cure before putting it back into regular use. Even though the glue may feel dry to the touch much sooner, the bond continues to strengthen over this period, and placing heavy objects or exposing the surface to moisture too early can compromise the final result.
Common Mistakes to Avoid When Gluing Paper on Furniture
Even with the best adhesive, certain mistakes can compromise your final result. Here are the most frequent errors people make, along with tips on how to avoid them.
- Skipping surface preparation: applying glue directly onto a dusty or greasy surface almost always leads to poor adhesion and bubbling later on.
- Using too much glue at once: a thick layer takes longer to dry and can cause the paper to warp or wrinkle. A thin, even coat always works better.
- Rushing the positioning step: taking the time to smooth out air bubbles carefully will save you from having to redo the entire project.
- Choosing a low-quality glue: this is by far the most common reason furniture paper projects fail after just a few weeks. Investing in a reliable product like Ferber Painting’s Paper and Cardboard Glue prevents this issue entirely.
- Not sealing the final result: skipping the top coat leaves the paper vulnerable to moisture and daily wear, shortening the lifespan of your project.
- Ignoring pattern alignment: failing to plan how a patterned paper will line up across drawers, doors, or panels can make an otherwise well-executed project look unfinished.
- Working in a humid or overly hot room: extreme conditions can cause the glue to dry too quickly or too slowly, both of which increase the risk of bubbling or poor adhesion.
- Handling the furniture too soon: putting the piece back into daily use before the glue has fully cured can lead to peeling edges or dents in the paper.
Avoiding these pitfalls is largely a matter of patience and preparation. Most of the projects that end up disappointing their owners were rushed at some stage, whether during surface preparation, glue application, or the curing period. Slowing down and following each step methodically, especially when using a forgiving, flexible adhesive like ours, dramatically increases your chances of a lasting, professional-looking result.
Why Ferber Painting Is the Best Choice for Your Project
Beyond the technical qualities of our Paper and Cardboard Glue, there are several practical reasons why choosing Ferber Painting makes sense for anyone planning a furniture paper project.
First, our product is available directly on our website, which means you get it straight from the manufacturer without going through third-party resellers who might sell older stock or counterfeit versions. Second, we ship worldwide quickly thanks to our international network of carriers, so no matter where you live, you can expect your order to arrive promptly. Third, payment on our site is fast, secure, and entirely online, so there is no complicated checkout process standing between you and your next project.
We also understand that furniture projects are often planned around a specific timeline, whether it is a weekend renovation, a gift for a special occasion, or preparation for moving into a new home. This is why we prioritize fast processing and shipping on every order, so that the glue arrives while your motivation and your project plan are still fresh. Waiting weeks for a product to show up is one of the most common reasons people abandon a project halfway through, and it is something we work hard to avoid for our customers.
Customer support is another area where we try to go beyond what most manufacturers offer. If you run into a specific issue during your project, whether it is a question about drying time, compatibility with a certain type of paper, or how to handle a tricky curved surface, our team is available to help guide you through it. We would rather help you succeed with your project than simply sell a bottle of glue and disappear.
Most importantly, every single product we sell, including our Paper and Cardboard Glue, comes with a satisfied or refunded guarantee. We are not aware of any other company in this space that offers the same level of commitment to customer satisfaction. This guarantee alone should give you the confidence to try our product on your furniture project, knowing that your investment is fully protected.
Mini FAQ
Can I use Ferber Painting’s Paper and Cardboard Glue on any type of furniture?
Yes, our glue works well on wood, laminate, and most sealed surfaces commonly found in furniture. For best results, always clean and lightly sand the surface beforehand.
How long does the glue take to dry?
Drying time depends on the thickness of the layer applied and ambient humidity, but generally the glue sets within a couple of hours and fully cures within 24 hours.
Will the glue yellow over time like other adhesives?
No, one of the key advantages of our formula is that it dries clear and stays clear, which is a common problem with many generic craft glues.
What happens if I am not satisfied with the results?
Thanks to our satisfied or refunded guarantee, you can contact our team and receive a full refund if the product does not meet your expectations.
Does Ferber Painting ship internationally?
Yes, we ship quickly to customers worldwide through our established network of international carriers.
Conclusion
Gluing paper on furniture can completely transform an old piece into a unique, personalized item, but only if you use an adhesive that is truly built for the job. As we have seen throughout this guide, choosing a flexible, clear-drying, and long-lasting glue is the single most important factor in achieving a professional-looking result that lasts for years rather than weeks. From selecting the right paper and preparing your surface properly, to applying thin, even coats and finishing with a protective top layer, every step plays a role, but none of them matter if the adhesive underneath cannot hold up over time.