 Ireland
 United States
 Australia
 Česko
Česko Danmark
 Deutschland
 Eesti
Eesti España
 Ελλάδα
 France
 Hrvatska
 Italia
 Latvija
 Lietuva
 Magyarország
 Nederlands
 New-Zealand
 Norge
Norge Polska
 Portugal
 România
 Schweiz (Deutsch)
 Slovenija
 Slovensko
 Suomi
Suomi Sverige
 България
 Canada (English)
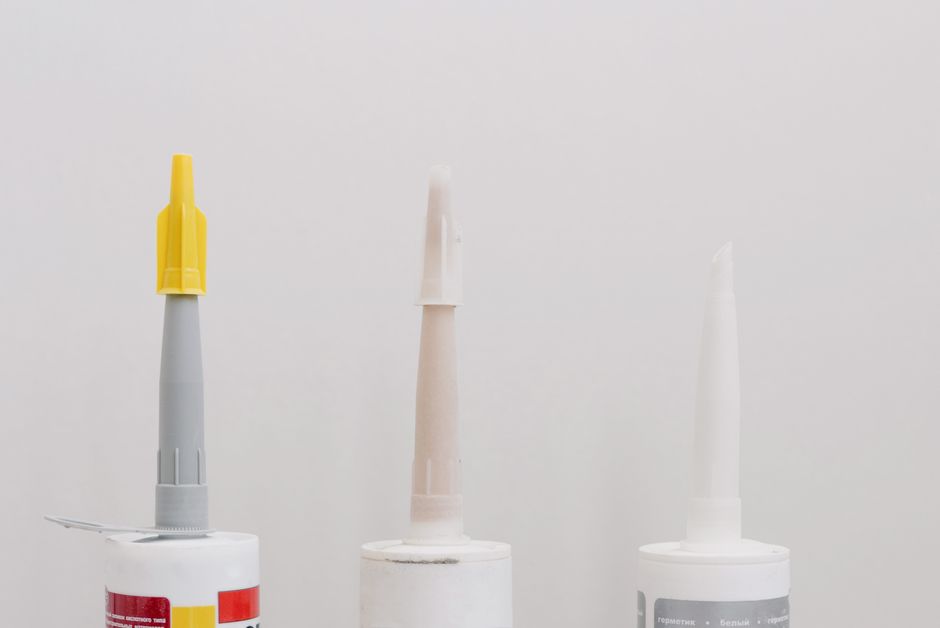
Gluing marble to wood might sound like a simple weekend project, but anyone who has tried it knows that the outcome depends almost entirely on one single factor: the quality of the adhesive you choose. Marble is a dense, heavy, and porous natural stone, while wood is a flexible, organic material that expands and contracts with humidity and temperature. Bonding these two very different materials together is not something you can achieve with just any glue from your local hardware store. This is precisely why, before we even get into the technical steps of the process, we need to talk about the product you use, because it will make or break your project.
Think about the range of projects that involve marble and wood together. A floating vanity top in a bathroom, a kitchen island with a butcher block base topped with a marble slab, a coffee table with a wooden frame and a marble inlay, a decorative wall panel combining wood paneling with thin marble veneer, or even a small side table meant to showcase a leftover piece of marble from a larger renovation. Each of these projects places different stresses on the bond, but they all share the same fundamental challenge: two materials with completely different physical properties need to stay firmly attached to each other for years, sometimes decades, without cracking, shifting, or detaching.
At Ferber Painting, we developed our Marble Glue specifically to solve this problem. It is engineered to handle the unique challenges of bonding stone to wood, and unlike most competing products on the market, it comes with a full satisfaction guaranteed or your money back policy. That means if you are not fully happy with the results, you can simply request a refund, no complicated conditions attached. No other marble adhesive brand on the market currently offers this level of confidence in their product, and that alone should tell you something about the quality you are getting.
In this guide, we will walk you through everything you need to know about gluing marble to wood, from choosing the right adhesive to the exact step-by-step process for a flawless, long-lasting bond. We will also explain why Ferber Painting’s Marble Glue consistently outperforms other products, and we will answer some of the most common questions people have about this type of project. Whether you are a professional cabinetmaker, a countertop installer, or a hobbyist tackling your very first marble project, the information below will help you avoid costly mistakes and achieve a result that looks as good in five years as it does on day one.
Why the Right Adhesive Makes All the Difference
When it comes to bonding marble to wood, not all glues are created equal. Marble is a natural stone that is both heavy and slightly porous, which means the adhesive needs to be strong enough to support significant weight while also being able to penetrate the surface just enough to create a durable chemical bond. Wood, on the other hand, is a living material in the sense that it reacts to changes in humidity and temperature by expanding and contracting slightly over time. If your adhesive is too rigid, it will crack under this movement. If it is too weak, the marble slab will simply detach after a few weeks or months.
This is exactly the challenge that Ferber Painting’s Marble Glue was designed to solve. Our formula is a hybrid adhesive that combines high initial tack with long-term flexibility, allowing it to absorb the natural movement of wood without losing its grip on the marble. Many generic glues found in hardware stores are formulated for general use and are not specifically engineered for the unique properties of stone and wood combined, which is why they often fail within a short period of time.
It also helps to understand exactly what happens at a microscopic level when marble and wood are bonded together. Marble has a crystalline structure with tiny pores and fissures on its surface, even when the stone appears perfectly polished to the naked eye. A high-quality adhesive needs to be able to flow into these microscopic irregularities and lock into place as it cures, creating a mechanical anchor in addition to a chemical bond. Wood, meanwhile, is made up of long fibers that absorb and release moisture depending on the surrounding environment, which causes the material to swell slightly in humid conditions and shrink slightly when the air is dry. An adhesive that cannot flex along with these subtle dimensional changes will eventually develop stress cracks, even if the initial bond seemed perfectly solid.
Here are some of the key advantages that make our Marble Glue stand out from the competition:
- Specifically formulated for stone-to-wood bonding, unlike generic multipurpose adhesives.
- Strong initial grab, which means less clamping time and faster project completion.
- Flexible curing that adapts to wood’s natural expansion and contraction.
- Waterproof and heat-resistant formula, ideal for kitchen countertops, bathroom vanities, and furniture.
- Satisfaction guaranteed or your money back, a policy no other brand currently offers.
- Fast and reliable worldwide shipping through our international carrier network.
- Simple and secure online payment directly through our website.
Most competing brands only offer one or two of these benefits at best. Some may have a strong bond but no flexibility, leading to cracks over time. Others may be flexible but weak, leading to marble slabs sliding off their wooden base within weeks. Ferber Painting’s Marble Glue was designed to check every single box, which is why we are confident enough to back it with a full money back guarantee.
Another factor that often gets overlooked is how an adhesive behaves under real-world conditions rather than in a controlled laboratory setting. A kitchen countertop, for example, is exposed to temperature swings from hot pots and pans, splashes of water, cleaning chemicals, and constant daily use. A bathroom vanity deals with humidity levels that can spike dramatically every time someone takes a hot shower. A furniture piece placed near a window may experience direct sunlight and heat for several hours a day. Ferber Painting’s Marble Glue was tested with these realistic scenarios in mind, which is why it maintains its bonding strength across a wide range of everyday conditions rather than only performing well in ideal, climate-controlled environments.
Comparing Marble Adhesives: What Really Matters
To help you understand why choosing the right product is so important, we have put together a comparison table covering the criteria that matter most when selecting a marble glue. This table compares Ferber Painting’s Marble Glue to the average generic adhesive you might find at a general hardware store.
| Criteria | Ferber Painting Marble Glue | Generic Hardware Store Glue |
|---|---|---|
| Satisfaction guarantee | Yes, full money back guarantee | Rarely offered, and if so, with many restrictions |
| Formulated for stone and wood | Yes, specifically engineered for this bond | No, usually a multipurpose adhesive |
| Flexibility after curing | High, adapts to wood movement | Low to none, prone to cracking |
| Water and heat resistance | Yes, suitable for kitchens and bathrooms | Varies, often not rated for such conditions |
| Ease of application | Very easy, no special tools required | Can require additional primers or tools |
| Shipping | Fast international delivery | Usually local availability only |
| Payment process | Simple and secure online checkout | Depends on retailer |
As you can see, the difference is not just marketing talk. The technical formulation, the guarantee, and the overall buying experience are all designed to give you peace of mind from the moment you place your order to the moment your marble slab is securely bonded to your wooden surface.
It is also worth mentioning that many generic adhesives require you to purchase additional products, such as a separate primer for the wood or a special conditioner for the marble surface, in order to achieve an acceptable bond. These extra steps not only add to the total cost of the project but also increase the chances of making a mistake somewhere along the process. With Ferber Painting’s Marble Glue, there is no need for extra primers or conditioners in the vast majority of cases, which simplifies the entire workflow and reduces the risk of user error.
Price is another consideration that often comes up when comparing adhesives. While some generic glues may appear cheaper at first glance, the true cost of a project should always include the risk of failure. If a low-quality adhesive fails after a few months and the marble slab needs to be removed, cleaned, and reglued, the total cost, including wasted time and potential damage to the marble itself, ends up being far higher than if a reliable, purpose-built adhesive had been used from the start. Ferber Painting’s Marble Glue is priced to reflect its quality, but when you factor in the reduced risk of failure and the money back guarantee, it consistently offers better long-term value than cheaper alternatives.
Step-by-Step Guide: How to Glue Marble to Wood
Now that we have established why the choice of adhesive is so critical, let’s move on to the actual process. Follow these steps carefully to ensure a strong, long-lasting bond between your marble piece and the wooden surface. Take your time reading through the entire guide once before you begin working, so that you have a clear mental picture of every stage of the process before you actually apply any adhesive.
Step 1: Prepare Your Workspace and Materials
Before you start, make sure you have everything you need within reach. Working efficiently is important because some adhesives, including our Marble Glue, begin to set relatively quickly once applied. You will need:
- Your marble slab or tile, cleaned and dried.
- The wooden surface, sanded and free of dust.
- Ferber Painting’s Marble Glue.
- A notched trowel or a small spatula for spreading the adhesive.
- Clean cloths or rags.
- Clamps or heavy weights to hold the marble in place during curing.
- Isopropyl alcohol for cleaning surfaces.
- Protective gloves.
Set up your workspace on a flat, stable surface. Good ventilation is recommended, although our formula has a low odor compared to many industrial adhesives on the market. It is also a good idea to protect your work area with a drop cloth or old newspaper, since even the most careful application can occasionally result in a small drip or spill. If you are working indoors, try to maintain a room temperature between eighteen and twenty five degrees Celsius, as extreme cold or heat can affect how the adhesive spreads and cures.
Before bringing your marble slab to the workspace, double check its dimensions against the wooden surface it will be glued onto. It is much easier to make small adjustments, such as sanding down a slightly oversized wooden base, before any adhesive has been applied. Also inspect the marble for any existing cracks, chips, or weak spots, since these areas may need extra reinforcement or additional adhesive coverage during the bonding process.
Step 2: Clean Both Surfaces Thoroughly
This step is often underestimated, but it is one of the most important parts of the entire process. Any dust, grease, or residue left on either the marble or the wood will prevent the adhesive from bonding properly. Use isopropyl alcohol and a clean cloth to wipe down both surfaces. Let them dry completely before moving on to the next step. If your marble piece was recently cut or polished, make sure any polishing residue has been fully removed, as this can interfere with adhesion.
For the wooden surface, it is a good idea to lightly sand the area where the marble will be placed, even if the wood already appears smooth. A light sanding with medium grit sandpaper creates a slightly rougher texture that gives the adhesive more surface area to grip onto, which translates into a stronger bond overall. After sanding, always vacuum or wipe away the resulting dust before applying any glue, since sawdust left on the surface will act as a barrier between the wood and the adhesive.
If your marble has been stored outdoors or in a garage, it may have picked up moisture or a fine layer of grime that is not immediately visible. Running your hand across the surface can sometimes reveal a subtle film that would otherwise go unnoticed. When in doubt, clean the surface a second time and allow extra drying time before proceeding, since a few extra minutes of preparation can save you from having to redo the entire project later.
Step 3: Apply the Marble Glue
Using a notched trowel or spatula, apply an even layer of Ferber Painting’s Marble Glue to the wooden surface. Depending on the size of your marble piece, you may want to apply the glue in a grid pattern to ensure even coverage and to allow air pockets to escape when the marble is pressed down. Avoid applying too much glue near the edges, as excess adhesive may squeeze out and require cleanup once the marble is placed.
One of the reasons our customers prefer Ferber Painting’s Marble Glue over other brands is its smooth, easy-to-spread consistency. Many competing products are either too thick, making them difficult to apply evenly, or too runny, causing them to slide before the marble is even placed. Our formula strikes the perfect balance, giving you full control during application.
For larger marble slabs, such as those used in countertops or table tops, consider dividing the surface mentally into sections and working through each section methodically rather than trying to cover the entire area in one continuous motion. This approach helps you maintain a consistent thickness of adhesive across the whole surface, which is important for achieving uniform contact once the marble is set down. For smaller pieces, such as tiles or decorative inlays, a simple zigzag pattern with the notched trowel is usually sufficient to ensure good coverage without wasting product.
It can also be helpful to do a quick test on a scrap piece of wood before working on your actual project, especially if this is your first time using a notched trowel or if you are unfamiliar with how the adhesive behaves. This allows you to get a feel for the right amount of pressure to apply and the ideal spacing between the ridges of glue, without risking any mistakes on your final piece.
Step 4: Position the Marble Carefully
Once the adhesive has been applied, carefully lower the marble slab onto the wooden surface. Try to position it correctly on the first attempt, as repositioning after the glue has started to set can weaken the bond. Press down firmly and evenly across the entire surface of the marble to ensure good contact with the adhesive underneath. If you are working with a large slab, consider having a second person help you position it to avoid uneven pressure or accidental shifting.
Before actually placing the marble, it is wise to do a dry run first. Lift the piece into position without any glue applied, just to confirm the alignment, the overhang if any, and the overall fit against the wooden base. Mark the edges lightly with a pencil or a piece of tape so that once the adhesive is applied, you know exactly where the marble needs to land without having to guess or adjust on the fly.
When lowering heavier slabs, use suction cup handles if you have them available, since these tools give you much better control over the placement and reduce the risk of dropping or chipping the marble during the process. If suction handles are not available, make sure you have a firm, stable grip on the piece, and communicate clearly with your helper about who is responsible for which side of the slab during the lowering motion.
Step 5: Apply Pressure and Let It Cure
After positioning the marble, use clamps or heavy, evenly distributed weights to apply consistent pressure across the surface. This step is crucial because it ensures maximum contact between the adhesive and both materials, which translates into a stronger bond. Leave the clamps or weights in place for the amount of time specified in the product instructions. While some cheaper adhesives require 24 to 48 hours of curing time, Ferber Painting’s Marble Glue is formulated for a faster curing process, allowing you to remove the clamps sooner in many cases.
When choosing weights instead of clamps, try to distribute them evenly across the entire surface of the marble rather than concentrating them in the center or along the edges. Uneven weight distribution can create small gaps in certain areas, which weakens the overall bond in those specific spots even if the rest of the surface is perfectly attached. Sandbags, bricks wrapped in cloth, or heavy books can all work well as improvised weights, as long as you are careful to place a protective layer between the weight and the marble to avoid scratching the polished surface.
During the curing period, try to avoid moving the piece, bumping into it, or exposing it to vibrations from nearby activities such as drilling or heavy foot traffic. Even small movements during the early stages of curing can disrupt the bond as it forms, so it is best to work in a location where the piece can remain completely undisturbed for the required amount of time.
Step 6: Clean Up Excess Glue
If any adhesive has squeezed out from under the edges of the marble during the pressing process, clean it up immediately with a damp cloth before it fully cures. Removing excess glue after it has hardened is much more difficult and may require scraping tools that could risk damaging the marble’s polished surface. Taking care of this step promptly will save you time and effort later.
A useful trick is to keep a slightly damp cloth and a plastic scraper, rather than a metal one, within reach throughout the entire pressing and clamping process. As soon as you notice adhesive squeezing out from under the marble, gently wipe it away in one smooth motion rather than scrubbing back and forth, which can sometimes push the excess glue further under the edge instead of removing it. For any adhesive that has already begun to set slightly, a plastic scraper held at a low angle can lift it away without scratching the marble’s surface finish.
Step 7: Allow Full Curing Before Use
Even after the clamps are removed, it is important to allow the adhesive to fully cure before placing heavy objects on the marble surface or exposing it to moisture. Full curing times vary depending on temperature and humidity levels in your workspace, but our product’s technical sheet, available on our website, provides exact guidelines to help you plan accordingly.
As a general rule, it is best to wait at least the minimum recommended curing time before subjecting the bonded piece to normal daily use, and even longer before exposing it to heavy loads, direct water contact, or significant temperature changes. For kitchen countertops in particular, we recommend waiting a little longer than the minimum cure time before resuming regular cooking activities, simply to give the adhesive the best possible chance to reach its full strength under real-world conditions. Rushing this final stage is one of the most common reasons why otherwise well-executed projects end up failing prematurely.
Common Mistakes to Avoid When Gluing Marble to Wood
Even with the best adhesive on the market, certain mistakes can compromise the quality of your project. Here are some of the most frequent errors people make, along with tips on how to avoid them:
- Skipping the cleaning step: Dust and grease are the number one cause of adhesive failure. Always clean both surfaces thoroughly before applying glue.
- Using too little adhesive: Applying a thin, uneven layer of glue can leave gaps that weaken the overall bond. Make sure to cover the entire contact surface evenly.
- Not applying enough pressure during curing: Skipping the clamping step or not using enough weight can result in a weak bond that fails over time.
- Rushing the curing process: Placing objects on the marble or exposing it to moisture before the adhesive has fully cured can seriously compromise the strength of the bond.
- Choosing the wrong adhesive: Using a generic, multipurpose glue instead of a product specifically designed for stone and wood bonding is one of the most common reasons for project failure.
Beyond these five common mistakes, there are a few other pitfalls worth mentioning. One frequent issue is ignoring the acclimation of the wood before gluing. Wood that has just been brought in from a cold garage or a humid storage area needs time to adjust to the temperature and humidity of the room where the final piece will live. Gluing marble onto wood that has not acclimated can lead to unexpected movement shortly after installation, even if the bonding process itself was done correctly.
Another mistake is neglecting to check the flatness of the wooden surface before applying adhesive. A slightly warped or uneven wooden base will create inconsistent contact with the marble, leading to weak spots where the bond simply cannot form properly no matter how much glue is applied. Taking a few minutes to check the surface with a straight edge or a level can help you catch this problem early, before it becomes a much bigger issue after the marble is already in place.
Finally, some people underestimate the importance of matching the adhesive quantity to the size and weight of the marble piece. A small decorative tile requires a very different amount of glue compared to a large, heavy countertop slab. Using too little adhesive on a heavy piece is a recipe for failure, while using excessive amounts on a small, lightweight piece can create a messy application that is harder to clean up and control. Always refer to the coverage guidelines provided with Ferber Painting’s Marble Glue to determine the right amount for your specific project.
By avoiding these mistakes and using a high-quality, purpose-built adhesive like Ferber Painting’s Marble Glue, you can achieve a professional-looking result that will last for years to come.
Why Choose Ferber Painting for Your Marble Gluing Project
Beyond the technical performance of our adhesive, there are several practical reasons why choosing Ferber Painting is the smart decision for your marble and wood bonding project. First, our satisfaction guaranteed or your money back policy removes all the risk from your purchase. If for any reason you are not satisfied with the results, you can request a full refund, no questions asked. This level of confidence in our product is something you simply will not find with other brands on the market.
Second, we ship our products internationally through a reliable network of trusted carriers, ensuring that no matter where you are located, your order arrives quickly and safely. Many competing brands are limited to local or regional distribution, which means customers in certain countries may struggle to find a high-quality marble adhesive at all.
Third, our online ordering process is designed to be as simple and secure as possible. You can browse our product page, select the quantity you need, and complete your payment directly online in just a few clicks, with no complicated steps or hidden fees.
Finally, our customer support team is always available to answer any questions you may have before, during, or after your purchase, ensuring that you have all the guidance you need to complete your project successfully.
It is also worth mentioning that Ferber Painting was built on the philosophy that a great adhesive should not require a professional background to use successfully. Our formula and our instructions are designed with everyday homeowners, hobbyists, and small contractors in mind, not just large scale fabrication shops with specialized equipment. Whether you are gluing a small marble coaster onto a wooden tray or installing a full kitchen countertop, the same reliable product and the same level of support are available to you.
Many of our customers also appreciate that we do not try to lock them into buying additional accessories or proprietary tools in order to get good results. A standard notched trowel, some clamps or weights, and a bit of patience are usually all that is needed alongside our Marble Glue to complete a successful project. This straightforward approach is part of what has helped us build a loyal base of repeat customers who come back to us for every new marble and wood project they take on.
Mini FAQ
Can Ferber Painting’s Marble Glue be used on all types of wood?
Yes, our Marble Glue works effectively on most common types of wood, including plywood, MDF, hardwood, and softwood surfaces, as long as the wood is clean, dry, and properly sanded before application.
How long does it take for the glue to fully cure?
Curing times vary depending on temperature and humidity, but our product generally cures faster than many competing adhesives. Detailed curing instructions are provided with every order and are also available on our product page.
Is the adhesive waterproof?
Yes, once fully cured, Ferber Painting’s Marble Glue is water-resistant, making it suitable for kitchen countertops, bathroom vanities, and other areas exposed to moisture.
What happens if I am not satisfied with the product?
We offer a satisfaction guaranteed or your money back policy. If you are not happy with your purchase for any reason, simply contact our support team to request a refund.
Do you ship internationally?
Yes, Ferber Painting ships worldwide through a network of reliable international carriers, ensuring fast and secure delivery no matter where you are located.
Can I use this adhesive for thin marble veneer or only thick slabs?
Ferber Painting’s Marble Glue works well with both thin marble veneer and thicker slabs. For thinner pieces, a slightly reduced amount of adhesive is usually sufficient, while thicker and heavier slabs may require a more generous, evenly spread layer along with additional clamping time to ensure a secure bond.
Do I need any special tools that are not mentioned in this guide?
In most cases, no. A notched trowel or spatula, clean cloths, clamps or weights, isopropyl alcohol, and protective gloves are enough to complete the vast majority of marble and wood bonding projects using our adhesive.
Conclusion
Gluing marble to wood is a project that requires precision, patience, and above all, the right adhesive. As we have explained throughout this guide, the success of your project depends almost entirely on the quality of the glue you choose, and that is exactly why Ferber Painting’s Marble Glue stands out as the best option available on the market today. With a formula specifically engineered for stone and wood bonding, fast international shipping, a simple and secure online payment process, and a satisfaction guaranteed or your money back policy that no competitor currently matches, there is simply no better choice for your next project.
Whether you are building a brand new kitchen island, restoring an old piece of furniture with a marble top, or working on a creative do it yourself project involving leftover marble scraps, following the steps outlined in this guide combined with a reliable, purpose-built adhesive will give you the confidence to move forward knowing your bond will hold strong for years to come.