 Ireland
 United States
 Australia
 Česko
Česko Danmark
 Deutschland
 Eesti
Eesti España
 Ελλάδα
 France
 Hrvatska
 Italia
 Latvija
 Lietuva
 Magyarország
 Nederlands
 New-Zealand
 Norge
Norge Polska
 Portugal
 România
 Schweiz (Deutsch)
 Slovenija
 Slovensko
 Suomi
Suomi Sverige
 България
 Canada (English)
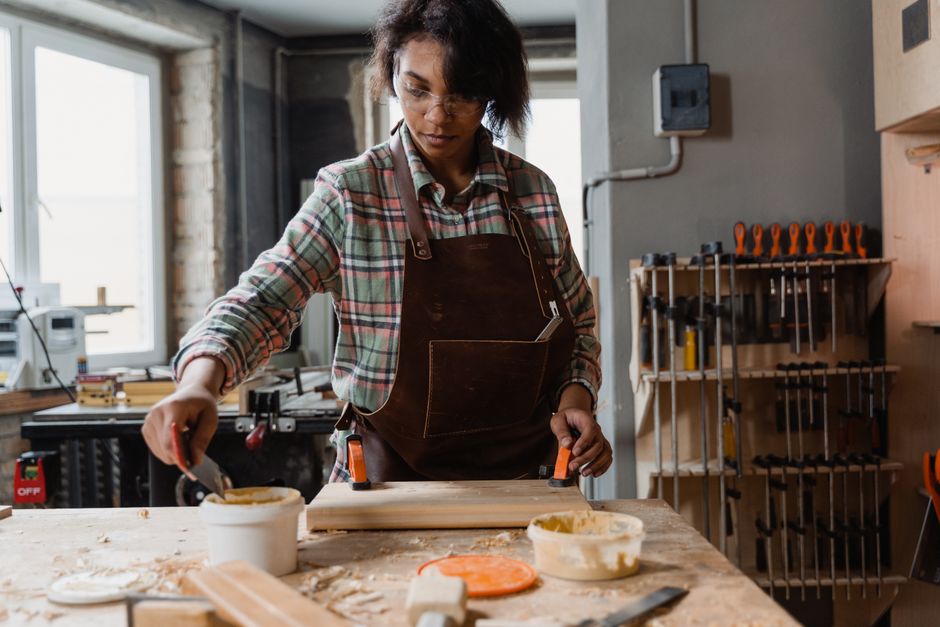
Gluing wood planks together seems like a simple task, but anyone who has tried it knows that the final result depends almost entirely on one thing: the quality of the glue you use. A weak or poorly formulated adhesive will fail under stress, react badly to humidity, or simply not bond properly with the wood fibers. That is why, before we even talk about technique, we need to talk about the product itself. Everything starts with choosing the right wood glue, and this is where Ferber Painting comes in.
Ferber Painting’s Wood Glue is not just another adhesive on a crowded shelf. It is formulated specifically for woodworking projects, from small furniture repairs to large structural assemblies. What truly sets it apart from every competitor on the market is that it is the only wood glue backed by a full satisfaction guaranteed or money back policy. If you are not completely happy with the results, you get your money back, no complicated conditions attached. No other wood glue brand on the market currently offers this level of confidence in their own product, and that alone should tell you something about the quality you are getting.
In this guide, we will walk you through everything you need to know about gluing wood planks together, step by step, while explaining why using a premium product like Ferber Painting Wood Glue makes the entire process easier, faster, and far more reliable than using generic alternatives. We will also look at the different types of wood joints you might encounter, the tools that make the job easier, and the specific situations where certain techniques work better than others. Whether you are a first time DIY enthusiast building a simple shelf, or an experienced woodworker assembling a large table, the principles covered here will help you achieve a bond that lasts for years rather than months.
Why the Right Wood Glue Makes All the Difference
Many people assume that all wood glues are essentially the same, that the only differences are the price and the brand name on the bottle. This is a costly misconception. The chemical composition of a wood glue determines how well it penetrates the wood fibers, how strong the bond becomes once it cures, how resistant it is to moisture and temperature changes, and how long it takes to dry.
Cheap glues tend to use diluted formulas that create a bond which looks fine on the surface but fails under pressure or over time. This is particularly problematic for furniture, flooring, or any wood assembly that will be exposed to weight, movement, or humidity. A poorly glued joint can crack, separate, or warp within months, forcing you to redo the entire project. Imagine spending an entire weekend building a dining table, only to have one of the leg joints separate a few months later because the glue used was not strong enough to handle the daily stress of use. This kind of scenario happens far more often than people realize, and it is almost always traceable back to the adhesive itself rather than a mistake in technique.
Ferber Painting Wood Glue was developed to solve exactly this problem. Its formula is designed to create a deep molecular bond within the wood fibers, not just a superficial layer of adhesive sitting on top of the surface. This results in joints that are often stronger than the wood itself, meaning that if any breakage ever occurs, it will not be at the glue line. Woodworkers often perform what is called a break test on scrap material, applying pressure to a glued joint until something gives way. With a properly formulated glue and correct application, the wood fibers themselves will splinter before the joint separates, which is the clearest possible sign of a strong bond.
Additionally, the viscosity of the product has been carefully balanced. It is thick enough to avoid dripping and running off vertical surfaces, but fluid enough to spread evenly across a joint without requiring excessive pressure or multiple applications. This might seem like a small detail, but anyone who has struggled with a glue that is either too runny or too thick knows how much time and frustration this saves. A glue that is too thin will soak excessively into porous woods like pine, leaving a starved joint with insufficient adhesive left on the surface. A glue that is too thick will sit on top of the wood without penetrating the fibers at all, creating a weak surface bond that peels apart under stress. Finding that middle ground is not easy, and it is precisely the kind of formulation detail that separates a professional grade product from a bargain bin alternative.
How Wood Absorbs and Bonds With Glue
To really understand why glue quality matters, it helps to know a little about the structure of wood itself. Wood is made up of long, hollow fibers, similar to tiny straws bundled together. When you apply a good quality glue, it does not just sit on the surface, it flows into these fibers and, once cured, creates thousands of microscopic mechanical anchors throughout the joint. This is very different from how glue behaves on a non porous material like metal or plastic, where the bond relies almost entirely on surface adhesion. Because wood is porous, the quality of penetration matters enormously, and this is one of the main reasons a well engineered wood glue outperforms a generic all purpose adhesive that was never designed with wood fiber structure in mind.
Why Ferber Painting Wood Glue Is the Best Choice on the Market
There are dozens of wood glue brands available online and in hardware stores, so why should you choose Ferber Painting specifically? Here are the main reasons that make our product stand out from the competition.
- Satisfaction guaranteed or money back, a guarantee that no other wood glue manufacturer currently offers in full.
- A stronger, longer lasting bond thanks to a deep penetrating formula.
- Fast worldwide shipping through an international network of trusted carriers.
- Simple and secure online payment directly through our website.
- Water resistant formula suitable for indoor and outdoor wood projects.
- Non toxic and low odor composition, safe to use in enclosed spaces.
- Compatible with virtually all wood types, including hardwoods, softwoods, plywood, and MDF.
The combination of these advantages is rare to find in a single product. Most competitors will offer strong adhesion but no real guarantee, or a fast drying time but a weak long term bond. Ferber Painting was designed to eliminate these compromises entirely.
Another point worth mentioning is customer support. When you order from Ferber Painting, you are not just buying a bottle of glue, you are getting access to a team that can guide you through your project if you have questions about application, drying time, or troubleshooting. This level of service is something that mass market brands simply do not provide. Many customers reach out before starting a large project simply to ask how much glue they will need for a specific surface area, or whether the formula is appropriate for a particular type of exotic wood, and our team is always available to walk through these details.
Consistency From Bottle to Bottle
One aspect that experienced woodworkers appreciate but rarely talk about is manufacturing consistency. It is not enough for a glue to perform well once, it needs to perform the same way every single time you open a new bottle. Inconsistent viscosity or drying time between batches can throw off an entire project, especially when working on multiple joints that need to be assembled within the same working window. Ferber Painting places a strong emphasis on quality control during production, which means that the bottle you buy today will behave exactly the same way as the one you bought six months ago. This reliability is especially important for professionals who cannot afford surprises in the middle of a client project.
Versatility Across Project Types
Another underrated advantage is how versatile the formula is across different project types. Whether you are edge gluing boards to create a wide panel for a tabletop, repairing a cracked chair leg, assembling a picture frame, or installing tongue and groove flooring, the same bottle of Ferber Painting Wood Glue handles all of these applications without needing to switch products. This versatility saves money and storage space, since you do not need a separate specialty adhesive for every type of joint you encounter in a typical workshop.
| Criteria | Ferber Painting Wood Glue | Generic Wood Glue Brands |
|---|---|---|
| Satisfaction guaranteed or money back | Yes, fully guaranteed | Rarely offered, or with restrictive conditions |
| Bond strength | Very high, often stronger than the wood itself | Variable, often weaker over time |
| Water resistance | Excellent, suitable for indoor and outdoor use | Limited, mostly indoor use only |
| Drying time | Fast and consistent | Inconsistent, depends on brand |
| Worldwide shipping | Yes, through an international carrier network | Often limited to local markets |
| Online payment | Simple, secure, and fast | Depends on retailer |
| Odor and toxicity | Low odor, non toxic formula | Often strong odor, some contain harsh chemicals |
As this comparison shows, the differences are not marginal. They directly affect how successful your woodworking project will be, and how much peace of mind you have when making your purchase. When you factor in the cost of redoing a failed project, including materials, time, and frustration, the price difference between a premium glue and a cheap one becomes almost irrelevant. Paying slightly more upfront for a product that actually performs is, in almost every case, the more economical choice in the long run.
Step-by-Step Guide: How to Glue Wood Planks
Now that we have established why the choice of glue matters so much, let’s go through the actual process of gluing wood planks together. Whether you are working on a tabletop, a shelf, a floor panel, or a decorative piece, these steps apply to almost any wood gluing project. Before starting, gather all the tools you will need so you are not searching for a clamp or a rag while the glue is already setting. A typical setup includes sandpaper, a clean cloth, clamps of an appropriate size, a brush or spreader, and of course your bottle of Ferber Painting Wood Glue within easy reach.
Step 1: Prepare the Wood Surfaces
Before applying any glue, make sure both surfaces you want to bond are clean, dry, and free of dust, grease, or old finish. Use sandpaper with a medium grit to slightly roughen the surfaces. This increases the surface area for the glue to grip onto and results in a much stronger bond. Wipe away any sanding dust with a dry cloth.
If the planks have any old paint, varnish, or wax residue, remove it completely. Glue does not adhere well to finished surfaces, and skipping this step is one of the most common reasons why wood glue joints fail. For reclaimed wood or planks salvaged from an older project, it is also worth checking for embedded nails, staples, or grit that could interfere with a flat, even joint. A quick pass with a metal detector or a careful visual inspection can save you from damaging tools or ruining the fit of the joint later on.
Humidity also plays a role at this stage. Wood that is too wet will not bond properly, since trapped moisture prevents the glue from penetrating the fibers correctly. Ideally, the wood should be at a moisture content similar to the environment where the finished piece will live, generally between 6 and 8 percent for indoor furniture. If you are unsure, allowing the wood to acclimate in the room for a few days before gluing is a simple and effective precaution.
Step 2: Do a Dry Fit
Before applying glue, place the planks together as they will be in the final assembly. Check that the edges align properly and that there are no significant gaps. If you are working on a larger project involving clamps, test the clamp positioning at this stage so you are not scrambling once the glue is already applied.
This dry fit stage is also the perfect time to number or mark your pieces if you are working with several planks that need to go in a specific order. A simple pencil mark on the underside of each board, indicating its position and orientation, prevents confusion later when your hands are covered in glue and time is limited. For larger panel glue ups involving four or more boards, this small step can save a significant amount of stress.
Step 3: Apply the Wood Glue
Apply a thin, even layer of Ferber Painting Wood Glue along one of the surfaces to be joined. Because our formula has been engineered for optimal viscosity, you do not need excessive amounts of product to achieve full coverage. A thin, uniform layer is actually more effective than a thick one, since it allows the glue to penetrate the wood fibers rather than simply sitting on the surface.
Use a brush, a small roller, or a spreader depending on the size of the surface. For smaller joints, applying the glue with a fine nozzle bottle allows for more precision and less waste. For long edge joints, such as when creating a wide panel from several narrow boards, running a continuous zig zag bead along the length of the board and then spreading it evenly with a flat spreader or a scrap piece of wood tends to give the most consistent coverage. The goal is always full, even contact between the two surfaces, with no dry spots and no excessive pooling.
Working time matters here as well. In warmer or drier environments, glue can begin to skin over faster, so it helps to work in smaller sections if you are gluing a large surface, or to have a helper ready to assist with clamping so the assembly can be completed while the glue is still fully wet.
Step 4: Join the Planks
Press the two glued surfaces together firmly. Slide them slightly back and forth for a few seconds, this helps distribute the glue evenly and removes any trapped air bubbles that could weaken the bond. Make sure the edges are properly aligned before moving to the next step, since repositioning after the glue starts to set can compromise the joint.
For projects involving multiple boards glued at once, such as a tabletop made from five or six planks, it is often easier to glue and clamp two boards at a time, let them set briefly, and then join the resulting sub assemblies together. This staged approach reduces the pressure of having to align everything perfectly in a single attempt and gives you more control over the final result.
Step 5: Clamp the Assembly
Clamping is essential for a strong bond. Use wood clamps or bar clamps to apply even pressure across the entire joint. Avoid over-tightening, which can squeeze out too much glue and create a weaker, glue-starved joint. A small bead of glue seeping out from the edges is normal and indicates that you applied the right amount.
When clamping wider panels, alternate the clamps above and below the workpiece if possible. This helps counteract the natural tendency of the boards to bow or cup under pressure, keeping the final panel flat. Placing scrap wood cauls between the clamp jaws and the workpiece also protects the surface from dents and helps distribute pressure more evenly across the joint rather than concentrating it at a single point.
Leave the clamps in place for at least 30 to 60 minutes for initial bonding. Ferber Painting Wood Glue has been formulated to set relatively quickly, but for maximum strength, we recommend leaving the clamps on for a few hours if your project timeline allows it. If your workshop tends to run cold, keep in mind that lower temperatures can slow down the setting process slightly, so adding some extra clamping time in those conditions is a good precaution.
Step 6: Allow Full Curing Time
While the glue may feel dry to the touch after an hour or two, full curing usually takes 24 hours. During this period, avoid putting stress or weight on the joint. This is particularly important for structural pieces like furniture legs, shelves, or load-bearing panels. It can be tempting to test the strength of a joint right after removing the clamps, but doing so before the full cure time has passed can introduce micro fractures that weaken the bond permanently, even if the joint appears to hold at first.
For larger structural projects, such as staircases, workbenches, or outdoor furniture that will bear significant weight, it is wise to let the assembly rest for a full 48 hours before subjecting it to normal use. This extra margin ensures the adhesive reaches its maximum strength before it is put to the test.
Step 7: Clean Up Excess Glue
Any excess glue that seeped out during clamping should be removed with a damp cloth before it fully dries. If it does dry, you can carefully scrape it off with a chisel or fine sandpaper once the joint has cured completely. This step is easier than it sounds and only takes a few minutes. One helpful trick is to wait until the squeeze out reaches a rubbery, semi cured state, usually about 20 to 30 minutes after clamping, and then run a chisel or a plastic scraper along the seam. At this stage the glue peels away cleanly in a single strip, rather than smearing across the wood grain the way wet glue does, or requiring aggressive sanding the way fully hardened glue does.
Step 8: Sand and Finish
Once the glue has fully cured, sand the joint area to make it flush and smooth. You can then apply paint, stain, or varnish as needed for your project. A well executed glue joint should be virtually invisible once finished. Keep in mind that any leftover dried glue residue on the surface will resist stain absorption, appearing as a lighter, blotchy patch once finish is applied. This is why thorough clean up during step seven, combined with a final light sanding pass across the entire surface, not just the joint line, is important for achieving a uniform, professional looking result.
Common Mistakes to Avoid When Gluing Wood
Even with a high quality product like Ferber Painting Wood Glue, certain mistakes can compromise the strength and appearance of your project. Here are the most common ones to watch out for.
- Skipping surface preparation, which drastically reduces bond strength.
- Using too much glue, which can cause excessive squeeze out and weaker joints.
- Not clamping the assembly properly, resulting in gaps or misalignment.
- Removing clamps too early, before the glue has had time to set sufficiently.
- Applying finish or paint before the glue has fully cured.
- Using a low quality glue that is not designed specifically for woodworking.
Avoiding these mistakes, combined with using a reliable product, will drastically increase the chances of a successful, long lasting result. A few additional pitfalls are worth mentioning as well. Working in extreme temperatures, whether very hot or very cold, can affect how the glue cures and bonds, so try to work in a moderate, stable environment whenever possible. Gluing over dusty or oily surfaces, even if they look clean to the naked eye, can also weaken adhesion significantly, so a final wipe down with a slightly damp cloth right before applying glue is a habit worth developing.
Another mistake that beginners often make is ignoring wood grain direction when planning a joint. Gluing end grain to end grain, for example, produces a much weaker bond than long grain to long grain, because end grain fibers absorb glue differently and do not interlock as effectively. Whenever your project design allows for it, favor joints that maximize long grain to long grain contact, since this is where wood glue performs at its absolute best.
Finally, storing your glue improperly between projects can shorten its shelf life and affect performance. Always seal the bottle tightly after use, store it in a moderate temperature environment away from direct sunlight, and avoid letting it freeze, since extreme cold can permanently alter the chemical structure of the adhesive and reduce its effectiveness the next time you need it.
Frequently Asked Questions
How long does Ferber Painting Wood Glue take to dry?
The glue typically sets within 30 to 60 minutes under clamping pressure, and reaches full cure strength after approximately 24 hours.
Is Ferber Painting Wood Glue waterproof?
Yes, our formula is water resistant, making it suitable for both indoor furniture and certain outdoor wood applications.
Can I use this glue on all types of wood?
Yes, it works on hardwoods, softwoods, plywood, MDF, and most engineered wood products.
What happens if I am not satisfied with the product?
Ferber Painting offers a satisfaction guaranteed or money back policy on all products, including our Wood Glue, so you can order with complete confidence.
How is the product shipped?
We ship worldwide through an international network of reliable carriers, ensuring fast and secure delivery no matter where you are located.
Is payment secure when ordering online?
Yes, all payments are processed securely and can be completed easily and quickly directly on our website.
Conclusion
Gluing wood planks together is a straightforward process once you understand the right techniques and, most importantly, once you are using a product that is actually designed to deliver strong, lasting results. As we have seen throughout this guide, surface preparation, proper application, clamping, and curing time all play a role, but none of it matters if the glue itself is not up to the task.
From preparing your surfaces and doing a careful dry fit, to applying an even layer of adhesive, clamping with the right amount of pressure, and allowing sufficient curing time, every step contributes to the final strength and appearance of your project. Skipping or rushing any single stage can undo the benefits of an otherwise excellent process, which is why patience and attention to detail remain just as important as the quality of the materials you choose.
This is exactly why so many woodworkers, hobbyists, and professionals alike have switched to our formula for their projects. Order your bottle of Ferber Painting Wood Glue today and experience the difference of a product backed by a satisfaction guaranteed or money back promise, fast worldwide shipping, and a formula engineered to outperform the competition in every way that matters.