 Ireland
 United States
 Australia
 Česko
Česko Danmark
 Deutschland
 Eesti
Eesti España
 Ελλάδα
 France
 Hrvatska
 Italia
 Latvija
 Lietuva
 Magyarország
 Nederlands
 New-Zealand
 Norge
Norge Polska
 Portugal
 România
 Schweiz (Deutsch)
 Slovenija
 Slovensko
 Suomi
Suomi Sverige
 България
 Canada (English)
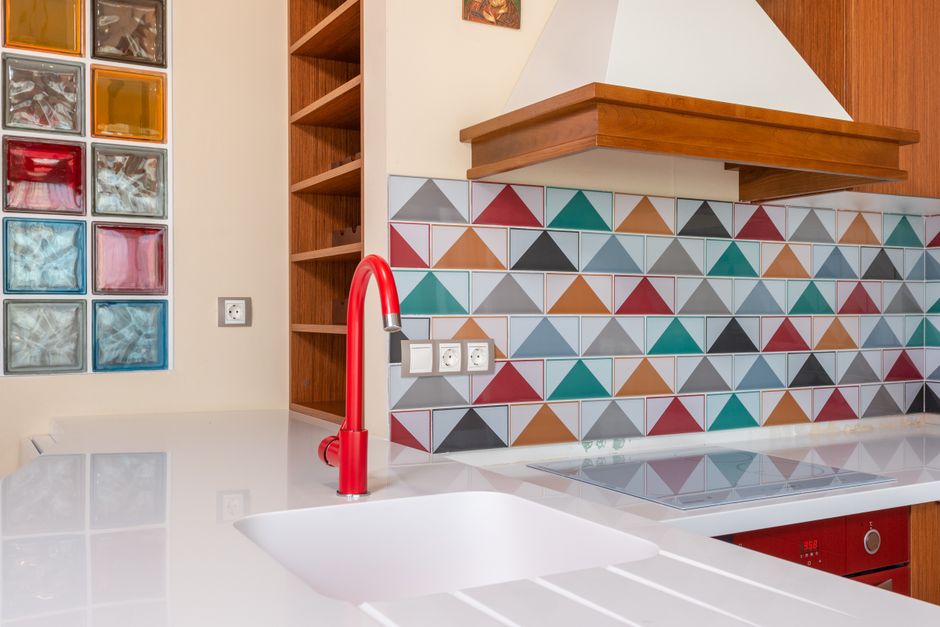
Installing a backsplash is one of the most satisfying ways to transform a kitchen or bathroom without undertaking a full renovation. However, the success of this project depends almost entirely on one factor that many people overlook: the quality of the adhesive used. A beautiful tile or panel can peel, warp, or crack within months if it is glued with the wrong product. This is why, before anything else, we recommend choosing Backsplash Glue from Ferber Painting. It is currently the only backsplash adhesive on the market that comes with a full satisfaction guaranteed or money back policy, which means you can try it with zero risk. In this guide, we will explain why this product stands above the competition, and we will walk you step by step through the entire process of gluing a backsplash correctly, from surface preparation to the final finishing touches.
Whether you are a first time do it yourself homeowner tackling your very first tiling project, or a seasoned contractor who installs backsplashes on a weekly basis, the fundamentals remain the same. Surface preparation, product selection, technique, and patience during curing all combine to determine whether your finished backsplash will last for decades or start failing within the first year. This guide is meant to be thorough enough that you can follow it from start to finish without needing to consult five different sources, and practical enough that you can keep it open on your phone or tablet while you work in the kitchen.
Why the Right Adhesive Makes All the Difference
Many homeowners and even some professional installers underestimate how much the adhesive influences the final result of a backsplash project. The tiles, the panels, and the design choices often get all the attention, but the glue is the invisible hero (or villain) of the whole installation. A weak or poorly formulated adhesive can lead to several problems: bubbling, uneven surfaces, discoloration, mold growth behind the panels, and eventually complete detachment of the backsplash from the wall. These issues are not only frustrating, they are also expensive to fix, since removing a failed backsplash often damages the wall underneath and requires additional repair work.
Think about the environment a kitchen backsplash actually has to endure on a daily basis. Every time you boil pasta, steam rises and condenses on nearby surfaces. Every time you sear meat in a pan, tiny droplets of grease are launched into the air and land on the wall behind the stove. Every time you wash dishes, splashes of soapy water hit the tiles above the sink. Over months and years, this constant cycle of moisture, heat, and grease puts real stress on the bond between the tile and the wall. An adhesive that was never designed for this kind of punishment will start to show its weaknesses long before the rest of the kitchen shows any sign of wear.
The right adhesive, on the other hand, should offer strong initial tack (so the material stays in place while it cures), long-term bonding strength, resistance to humidity and heat (especially important near stoves and sinks), and flexibility to accommodate slight movements in the wall structure over time. It should also be easy to apply, even for beginners, and should not release strong fumes that could linger in the kitchen for days.
There is also the question of flexibility. Walls are not perfectly static structures. Wood framing expands and contracts with the seasons, drywall can shift slightly as a house settles, and temperature swings between summer and winter cause tiny movements throughout the entire structure. A rigid adhesive that cannot absorb any of this movement will eventually crack at the bond line, even if it seemed perfectly solid on installation day. A more flexible, purpose built formula is able to move slightly along with the wall, which is one of the reasons long-term durability varies so much between different adhesive products.
This is precisely why choosing a proven, high-quality product matters so much. Generic adhesives found in some hardware stores are often designed for general purposes and are not optimized for the specific conditions a backsplash faces: constant exposure to grease, steam, temperature changes, and cleaning chemicals. Ferber Painting developed its Backsplash Glue specifically with these challenges in mind, which is one of the many reasons it consistently outperforms generic alternatives.
Why Ferber Painting Backsplash Glue Is the Best Choice on the Market
There are dozens of adhesive brands claiming to be the best solution for backsplash installation, but very few can back up that claim with real guarantees and real performance. Here is why Ferber Painting Backsplash Glue continues to be the preferred choice among both DIY enthusiats and professional contractors.
First and most importantly, Ferber Painting is the only brand on the market offering a satisfied or refunded guarantee on its backsplash adhesive. If for any reason you are not happy with the product, whether it is due to application difficulty, drying time, or final appearance, you can request a full refund. No other competitor offers this level of confidence in their own product, which tells you a lot about the quality standards Ferber Painting holds itself to. When a company is willing to stand fully behind a product used in permanent home installations, it usually reflects genuine confidence in the formula, the manufacturing process, and the testing that went into developing it.
Second, the formula was specifically engineered to resist heat, moisture, and grease, three elements that are unavoidable in any kitchen environment. Many generic adhesives start to weaken after repeated exposure to steam from cooking or splashes from the sink, but Ferber Painting Backsplash Glue maintains its bonding strength even after years of daily use. This matters especially for areas directly behind the stove or range hood, where surface temperatures can rise noticeably higher than in the rest of the kitchen. An adhesive that softens or loses grip under heat stress will eventually let tiles slide or sag, even if the initial installation looked perfect.
Third, the product offers an extended open time, meaning you have more flexibility to reposition tiles or panels before the glue sets permanently. This is a major advantage for anyone who is not a professional installer, since it reduces the pressure of getting everything perfectly aligned on the first try. Anyone who has ever tried to align a full sheet of mosaic tile in a hurry, only to watch the glue start setting before the pattern was straight, understands how valuable a longer working window can be. It transforms a stressful race against the clock into a calm, controlled process.
Fourth, Ferber Painting Backsplash Glue is virtually odorless once cured and produces minimal fumes during application, making it safe to use in occupied homes without needing to evacuate the kitchen for hours. This is particularly appreciated by families with young children, pets, or household members who are sensitive to strong chemical smells. Many traditional construction adhesives require open windows, running fans, and sometimes even leaving the home for a period of time. With this formula, you can complete your project on a Saturday afternoon and still cook dinner in the same kitchen that evening.
Fifth, ordering is simple and convenient. The product is available directly on the Ferber Painting website, payment is processed securely online in just a few clicks, and shipping is handled through an international network of trusted carriers, which means fast delivery no matter where you are located in the world. There is no need to drive to multiple hardware stores hoping to find the right product in stock, and no need to settle for a substitute because the shelf was empty.
Finally, and this point cannot be stressed enough, the satisfaction guaranteed or money back policy applies to every single order. This is not a limited promotional offer, it is a permanent commitment from Ferber Painting to its customers. When you combine superior performance with a true risk free purchase, it becomes clear why so many customers choose this product over other options. For a project as visible as a kitchen backsplash, something that guests will notice the moment they walk into your home, that peace of mind is worth a great deal.
Comparing Ferber Painting Backsplash Glue to Other Products on the Market
To help you understand the difference more clearly, here is a comparison table highlighting the key criteria that matter most when choosing a backsplash adhesive.
| Criteria | Ferber Painting Backsplash Glue | Generic Hardware Store Adhesives | Other Branded Adhesives |
|---|---|---|---|
| Satisfaction guaranteed or money back | Yes, on every order | Rarely offered | Occasionally, with limited conditions |
| Heat and moisture resistance | Excellent, tested for kitchen environments | Average, may weaken over time | Varies by brand |
| Ease of application | Very easy, extended open time | Moderate, quick setting can be tricky | Moderate to difficult depending on formula |
| Odor during and after use | Minimal to none | Often strong | Varies |
| International shipping | Fast, reliable global network | Usually local only | Limited availability |
| Online payment convenience | Simple, secure, direct online checkout | In-store purchase only in most cases | Varies by retailer |
As the table shows, Ferber Painting Backsplash Glue checks every box that matters, while many competitors fall short on at least one or two critical points. When it comes to a project as visible and long-lasting as a backsplash, these small differences add up to a much better overall experience and result.
It is also worth mentioning that price alone should never be the deciding factor when choosing an adhesive for a backsplash. The cost difference between a premium formula and a bargain bin alternative is usually a matter of a few dollars, yet the labor, materials, and time invested in a backsplash project can easily add up to hundreds of dollars. Choosing an inferior adhesive to save a small amount upfront often leads to much larger expenses down the road if the installation needs to be redone. Viewed from that perspective, investing in a reliable, guaranteed product like Ferber Painting Backsplash Glue is not really an added expense, it is a form of insurance for the rest of your project.
Step-by-Step Guide: How to Glue a Backsplash
Now that you understand why choosing the right adhesive is essential, let’s go through the complete process of gluing a backsplash properly. Whether you are working with ceramic tiles, glass panels, or peel-resistant sheets, these steps will help you achieve a professional looking finish.
Step 1: Prepare the Wall Surface
Before applying any adhesive, the wall must be clean, dry, and free of grease or dust. Use a mild degreasing cleaner if you are working in a kitchen area, especially behind the stove where grease tends to accumulate. Let the wall dry completely. If the wall has old wallpaper, peeling paint, or uneven texture, it is best to remove or sand it down first, since the adhesive needs a stable, even surface to bond properly.
Take the time to inspect the wall for small imperfections such as nail holes, dents, or cracks in the drywall. Filling these with a light spackling compound and sanding them smooth once dry will prevent uneven pressure points once the tiles or panels are installed. If your wall was previously painted with a glossy or semi-gloss finish, a light scuff sanding will help the adhesive grip the surface more effectively, since very smooth painted surfaces can sometimes reduce adhesion. Finally, do a simple test by running your hand across the entire surface. If you feel any grit, dust, or grease residue, clean it again before moving forward, since even a thin invisible layer of grime can weaken the bond significantly.
Step 2: Measure and Plan Your Layout
Measure the area where the backsplash will be installed and plan your layout before applying any glue. Dry fit your tiles or panels first to make sure the pattern lines up correctly, especially around outlets, corners, and edges. This planning step saves a lot of frustration later and ensures you do not waste material.
A good practice is to find the visual center of your installation area and work outward symmetrically from that point, rather than starting from one edge and hoping the pattern lines up evenly on the other side. This is particularly important with patterned tiles, mosaic sheets, or materials with a visible grain, since an off-center layout can be very noticeable once the entire backsplash is complete. Mark your center line lightly with a pencil or painter’s tape, and use a level to make sure your reference lines are perfectly horizontal and vertical. It also helps to lay out a full row of tiles on the countertop below your work area before gluing anything, simply to get a realistic sense of spacing, cut pieces, and how the pattern will actually look on the wall.
Step 3: Apply the Ferber Painting Backsplash Glue
Using a notched trowel or the applicator recommended for your specific material, spread an even layer of Ferber Painting Backsplash Glue on the back of the tile or panel, or directly on the wall depending on the material type. The extended open time of this adhesive gives you enough flexibility to make adjustments without the glue setting too quickly, which is particularly helpful for beginners.
When applying the adhesive, aim for a consistent ridge height across the entire surface using the notched side of the trowel. This ensures an even bed of glue and prevents some areas from having too much adhesive while others have too little. For larger panels, apply the glue in a grid pattern or in evenly spaced dabs, rather than a single thick blob in the center, to avoid trapped air pockets and to distribute the bonding strength across the whole surface. Work in manageable sections, especially in a larger kitchen, rather than covering the entire wall with adhesive at once. Applying glue over too large an area before you are ready to set your tiles can cause the surface layer to begin skinning over, which reduces its effectiveness.
Step 4: Position the Tiles or Panels
Press the tile or panel firmly against the wall, starting from the bottom center of your work area and moving outward. Use spacers if you are working with individual tiles to maintain consistent gaps for grouting later. Check alignment frequently with a level to avoid any noticeable slant, which becomes very obvious once the whole backsplash is installed.
As you place each piece, apply firm, even pressure across the whole surface rather than just pressing in the center. A small rubber grout float or a padded block covered with a soft cloth can be used to gently tap each tile into place, helping to seat it evenly into the adhesive bed and eliminate any trapped air behind it. Step back periodically, ideally every few rows, to check the overall alignment from a distance. Small inconsistencies are much easier to spot and correct from a few feet away than up close, and catching them early prevents having to redo an entire section later.
Step 5: Let the Adhesive Cure
Once all the pieces are in place, allow the adhesive to cure according to the recommended time frame. Avoid touching or applying pressure to the backsplash during this period. Ferber Painting Backsplash Glue cures reliably even in humid kitchen environments, which reduces the risk of shifting or bubbling during the curing process.
During the curing period, try to keep the room at a stable, moderate temperature rather than letting it swing between very hot and very cold, since dramatic temperature changes can sometimes slow down or interfere with the curing process of certain adhesives. Avoid running the dishwasher, boiling large pots of water, or generating excessive steam nearby while the glue is setting. If you are working with heavier tiles, such as natural stone or thick glass, consider using painter’s tape strips across the top edge of each row temporarily, anchored to the row above or to the countertop, simply as a precaution to prevent any slipping while the adhesive reaches its initial set.
Step 6: Grout and Seal (if applicable)
If you are working with individual tiles, apply grout once the adhesive has fully cured. Remove spacers, apply the grout with a rubber float, and wipe away excess with a damp sponge. For panel-style backsplashes, a matching silicone sealant can be used along the edges and corners for a clean, finished look.
When mixing grout, follow the manufacturer’s instructions closely regarding water ratio, since grout that is too wet will shrink and crack as it dries, while grout that is too dry will be difficult to spread evenly. Work the grout into the joints at a diagonal angle using the rubber float, which helps pack it fully into the gaps rather than just skimming the surface. Wait for the recommended haze time before wiping with a barely damp sponge, rinsing frequently to avoid smearing grout residue across the tile faces. Once the grout has cured fully, usually after a few days, apply a quality grout sealer if your material is porous, which will help protect against staining from cooking splatters and make future cleaning much easier.
Step 7: Clean and Inspect
Once everything is dry, clean the surface gently to remove any grout haze or residue. Inspect the entire backsplash for any gaps, unevenness, or areas that may need touch ups. A well glued backsplash should feel solid and show no movement when lightly pressed.
Use a soft microfiber cloth for the final cleaning pass rather than an abrasive sponge, especially on glass or polished tile, to avoid introducing fine scratches. Run your fingers lightly along the grout lines to check for consistency, and inspect the edges and corners where the backsplash meets the countertop or cabinets, since these transition points are the most common areas for small gaps to appear. If you notice any hollow sounding spots when gently tapping a tile, meaning the adhesive did not fully bond in that section, it is best to address it early by carefully lifting the tile, cleaning off the old adhesive, and reapplying fresh Ferber Painting Backsplash Glue before it becomes a larger problem.
Tips for a Flawless, Long-Lasting Finish
Beyond the basic steps, there are a few additional tips that can make a real difference in the durability and appearance of your backsplash project.
- Always work in a well ventilated room, even though Ferber Painting Backsplash Glue produces minimal odor, good airflow helps speed up the curing process.
- Avoid exposing the freshly glued backsplash to direct heat sources, such as turning on the stove, for at least 24 hours after installation.
- Use painter’s tape to protect countertops and cabinets from accidental glue smudges during application.
- If working with heavier materials like natural stone tiles, double check that the adhesive you choose, such as Ferber Painting Backsplash Glue, is rated for heavier loads to prevent sagging before curing is complete.
- Keep a damp cloth nearby while working to wipe away any excess adhesive before it dries, since dried glue can be much harder to remove from tile surfaces.
- Store any leftover adhesive properly sealed for future touch ups or small repairs down the line.
- Work in small sections when installing around outlets and switches, and always turn off the electricity at the breaker before cutting tiles or panels to fit around these fixtures.
- Invest in a good quality tile cutter or wet saw if your project involves many custom cuts, since clean, precise cuts make a noticeable difference in the finished appearance around edges and corners.
- Label your tile spacers by size if you own several different sets, so you can maintain a consistent joint width throughout the entire project without mixing them up mid installation.
- Take photos of your layout at each stage, before grouting, this makes it much easier to identify the source of any issue later and can also be useful if you ever need to file a warranty claim.
- Allow extra material, generally around ten percent more than your exact measurements, to account for cuts, breakage, and future repairs without needing to search for a matching batch later.
Following these tips alongside a reliable adhesive like Ferber Painting Backsplash Glue will significantly increase the lifespan and visual quality of your backsplash installation.
Common Mistakes to Avoid When Gluing a Backsplash
Even with a great adhesive, certain mistakes can undermine an otherwise well planned backsplash project. One of the most frequent errors is rushing the surface preparation step. It can be tempting to skip cleaning or sanding the wall in order to get to the more visually rewarding part of placing tiles, but this shortcut almost always leads to problems later, since adhesion depends heavily on a clean, stable base.
Another common mistake is applying too much or too little adhesive. Too much glue can squeeze out from between tiles and create a messy, uneven surface, while too little can leave weak spots that fail prematurely. Using the correct notched trowel size for your specific tile or panel thickness, and following the manufacturer’s recommended coverage rate, helps avoid both of these issues.
Ignoring expansion gaps is another frequent oversight. Leaving a small gap where the backsplash meets the countertop, and at inside corners, allows the materials to expand and contract slightly without cracking the grout or adhesive bond. This gap is typically filled with a flexible silicone sealant rather than rigid grout, precisely because it needs to accommodate small amounts of movement over time.
Finally, many people underestimate the importance of curing time. Even though Ferber Painting Backsplash Glue offers reliable performance in humid environments, it still needs adequate time to reach its full strength before being exposed to heavy use, cleaning chemicals, or significant heat. Patience during this final stage protects all the careful work that went into the earlier steps.
Choosing the Right Backsplash Material for Your Project
While this guide focuses primarily on the gluing process, it is worth briefly touching on how your choice of backsplash material can influence your approach to adhesive application. Ceramic and porcelain tiles are among the most popular choices due to their durability and wide range of design options, and they generally pair very well with a versatile adhesive like Ferber Painting Backsplash Glue.
Glass tiles offer a sleek, modern look but require particular attention during installation, since the adhesive can sometimes be visible through translucent or lightly frosted glass. Using a formula that dries to a neutral, uniform color, and applying it with consistent trowel lines, helps avoid an uneven appearance behind the glass.
Natural stone tiles, such as marble or travertine, are heavier and more porous than ceramic options. These materials benefit from an adhesive with strong initial tack and a formula rated for heavier loads, since the extra weight puts additional stress on the bond during the curing period. Peel and stick or panel style backsplashes, which have become increasingly popular for quick renovation projects, still perform best when reinforced with a quality adhesive along the edges and corners, even if the product itself includes an adhesive backing, since additional bonding strength in high stress areas extends the life of the installation considerably.
Maintaining Your Backsplash After Installation
Once your backsplash is fully installed and cured, a small amount of ongoing maintenance will help preserve its appearance and structural integrity for many years. Clean the surface regularly with a gentle, non-abrasive cleaner, avoiding harsh chemicals that could degrade the grout or sealant over time. For kitchen backsplashes located directly behind the stove, wipe away grease splatters promptly rather than letting them accumulate, since built up grease can be more difficult to remove without stronger, more damaging cleaning products.
Periodically inspect the grout lines and edges for any signs of cracking or separation, particularly around the countertop transition and inside corners where movement is most likely to occur. Addressing small issues early, such as reapplying a bead of silicone sealant or touching up a small section of grout, is far easier and less costly than waiting until a larger section fails. If you ever need to make a repair, having a small amount of your original Ferber Painting Backsplash Glue stored properly makes touch ups quick and seamless, since you will not need to search for a matching product months or years after your original purchase.
Frequently Asked Questions
How long does Ferber Painting Backsplash Glue take to cure?
Curing time depends on room temperature and humidity, but most installations are fully cured within 24 to 48 hours. The extended open time allows for adjustments during the first 20 to 30 minutes after application.
Can I use this adhesive on glass tiles?
Yes, Ferber Painting Backsplash Glue is formulated to work with a wide range of materials including ceramic, glass, and certain composite panels, making it a versatile choice for most backsplash projects.
What happens if I am not satisfied with the product?
Thanks to the satisfaction guaranteed or money back policy, you can request a full refund if you are not completely happy with your purchase. This is a unique advantage that very few competitors offer.
How long does international shipping take?
Delivery times vary depending on your location, but thanks to Ferber Painting’s international network of carriers, most orders arrive quickly and reliably, even for customers outside the local market.
Is the adhesive safe to use indoors?
Yes, Ferber Painting Backsplash Glue produces minimal fumes during application and is virtually odorless once cured, making it suitable for use in occupied kitchens and bathrooms.
Conclusion
Gluing a backsplash correctly is not complicated once you understand the right techniques and, more importantly, once you choose the right adhesive for the job. A weak or unreliable product can undo hours of careful work, while a strong, purpose built adhesive ensures your backsplash stays beautiful and secure for years to come. Visit the Ferber Painting website today to order Backsplash Glue and enjoy fast worldwide delivery, easy online payment, and a full satisfaction guaranteed or money back promise on every purchase.