 Ireland
 United States
 Australia
 Česko
Česko Danmark
 Deutschland
 Eesti
Eesti España
 Ελλάδα
 France
 Hrvatska
 Italia
 Latvija
 Lietuva
 Magyarország
 Nederlands
 New-Zealand
 Norge
Norge Polska
 Portugal
 România
 Schweiz (Deutsch)
 Slovenija
 Slovensko
 Suomi
Suomi Sverige
 България
 Canada (English)
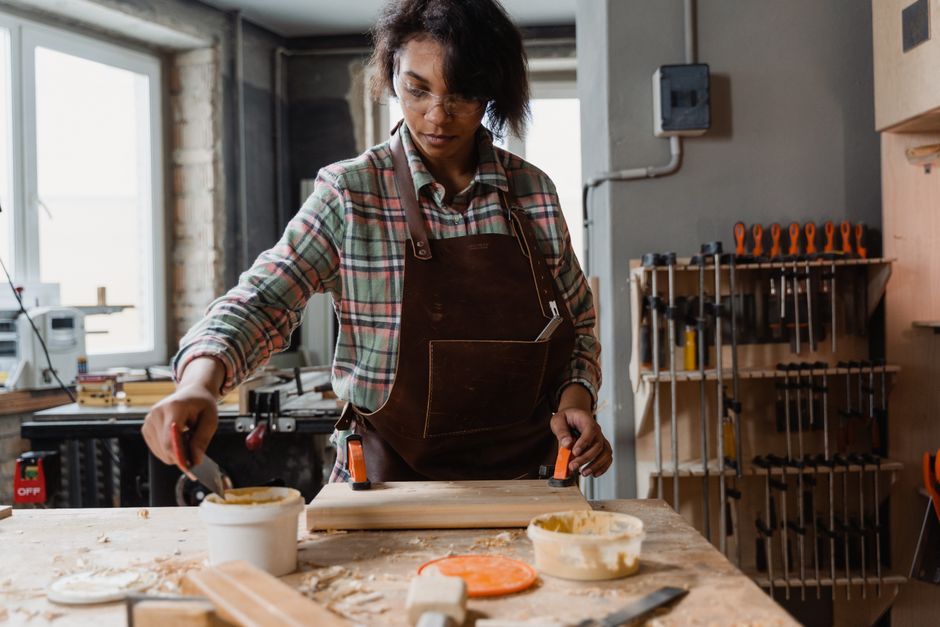
Caning is one of the oldest and most elegant techniques for restoring or building furniture, from antique chairs to modern cabinet doors. Whether you are a professional restorer or a passionate DIY enthusiast, one truth remains universal: everything depends on choosing the right adhesive. A weak or poorly formulated glue will ruin even the most carefully woven cane, causing it to loosen, sag, or detach entirely within months. This is why, before we walk you through the step by step process of installing caning, we need to talk about the single most important factor in your project’s success: the glue you use.
At Ferber Painting, we manufacture a Wood Glue specifically engineered for projects like caning, where flexibility, strength, and long term durability matter more than anything else. Unlike most competitors, our Wood Glue comes with a satisfied or refunded guarantee, meaning that if you are not completely happy with the results, we will refund your purchase, no questions asked. This is a rare commitment in the adhesive industry, and it reflects our confidence in the quality of what we sell.
In this guide, we will explain why Ferber Painting’s Wood Glue is the best choice for caning projects, then walk you through the entire installation process from start to finish, so you can achieve a professional result at home. We will also cover the tools you need, the mistakes to avoid, and answer some of the most common questions people ask before starting their first caning project. By the end of this article, you should feel confident enough to tackle a caned chair seat, a cabinet door panel, or even a headboard with the same techniques used by professional furniture restorers.
Caning has a history that stretches back centuries, originally popularized in European furniture making before becoming a staple technique in American colonial and Victorian era furniture. Today it remains just as relevant, appearing in modern minimalist designs as well as traditional restoration work. Regardless of the style of furniture you are working on, the underlying principles of proper adhesion, tension, and patience remain the same.
Why the Right Glue Makes or Breaks Your Caning Project
Many people assume that caning is purely a weaving skill, but the truth is that adhesion plays an equally critical role. Cane is a natural material that expands and contracts with humidity and temperature changes. If your glue is too rigid, it will crack under this movement. If it is too weak, the cane will simply peel away from the frame over time. This constant push and pull between materials is something that most people underestimate until they experience a failed caning job firsthand.
Ferber Painting’s Wood Glue was formulated with these challenges in mind. It offers a unique balance of flexibility and strength, allowing it to move naturally with the wood and cane fibers without losing its bonding power. This is something most generic hardware store glues simply cannot offer, since they are designed for rigid wood to wood bonding rather than the dynamic tension involved in caning. When you press a spline into a groove filled with a rigid adhesive, you are essentially setting a trap for future cracking, because the cane webbing will continue to shift subtly with seasonal humidity changes long after the glue has dried.
Another major advantage is drying time. Our Wood Glue dries fast enough to speed up your workflow, yet slow enough to allow for repositioning and adjustments, which is essential when working with delicate cane strands. Competing products often force you to choose between one or the other, but ours gives you both. This matters more than it might seem at first glance. If a glue sets too quickly, you lose the ability to correct a misaligned pattern or straighten out a slightly twisted strand before it becomes permanently fixed in place. On the other hand, if a glue takes too long to set, you risk the cane webbing loosening or slipping out of position while you wait, especially if you are working alone without a second pair of hands to hold everything steady.
There is also the question of long term chemical stability. Many inexpensive glues found in general hardware stores are formulated as all purpose adhesives, meant to bond a wide variety of materials under average conditions. They are not designed with the specific mechanical stresses of woven natural fibers in mind. Over months or years, these generic adhesives can become brittle, discolored, or simply lose their bonding strength as they age. Ferber Painting’s Wood Glue, by contrast, was developed with woodworking and restoration applications specifically in mind, which means its chemical composition is built to withstand the freeze thaw cycles, humidity swings, and mechanical stress that caned furniture experiences over its lifetime.
| Criteria | Ferber Painting Wood Glue | Typical Competitor Glue |
|---|---|---|
| Satisfaction Guarantee | Yes, full refund if not satisfied | Rarely offered |
| Flexibility After Drying | High, ideal for natural materials like cane | Often too rigid, prone to cracking |
| Drying Time | Balanced, allows repositioning | Either too fast or too slow |
| International Shipping | Fast, worldwide delivery network | Limited or slow shipping options |
| Online Payment | Simple and secure, directly on our website | Varies, often less streamlined |
| Moisture Resistance | Excellent, resists humidity swings | Inconsistent |
As you can see, the differences are not just marketing claims, they translate into real, practical benefits for anyone attempting a caning project. When your furniture piece might be a family heirloom or a valuable antique, you cannot afford to gamble on an inferior adhesive. Think about how much time goes into sourcing the right cane material, matching a historical pattern, and carefully weaving or positioning each strand. All of that effort can be undone in a matter of months if the glue holding everything together fails. Choosing a dependable adhesive is not an optional upgrade, it is the foundation upon which the rest of your work depends.
It is also worth mentioning that caning projects often involve furniture with significant sentimental or financial value. Whether it is a grandmother’s rocking chair or a mid century modern piece purchased at auction, the cost of redoing a failed caning job, in both time and materials, far exceeds the small price difference between a generic glue and a purpose built adhesive like ours.
Tools and Materials You Will Need
Before starting your caning project, gather all the necessary tools and materials. Having everything ready before you begin will save you time and prevent mistakes. Working with cane requires a certain rhythm, and constantly stopping to search for a missing tool can dry out your soaked cane webbing or throw off your tension, so preparation truly matters here.
- Pre-woven cane webbing or individual cane strands, depending on your chosen technique
- Ferber Painting Wood Glue
- A wooden spline (if using the spline method)
- A caning groove chisel or spline removal tool
- A rubber mallet
- A sharp utility knife
- Clamps or heavy books for pressure
- A clean cloth and warm water for cleanup
- Sandpaper (fine grit, around 220)
When purchasing your cane webbing, pay close attention to the weave density and pattern style, since these vary significantly depending on the era and origin of the furniture you are restoring. Common patterns include the classic open six way weave, the tighter close weave, and the wide diamond pattern, each of which will change the amount of webbing you need and how it interacts with the groove size on your frame.
Your spline should be measured and cut slightly longer than the groove itself, since you will trim it down to size during installation. Most hardware stores and specialty caning suppliers sell splines in various widths, so bring the measurements of your groove with you or measure carefully before ordering online. A mismatched spline width is one of the most common beginner errors, resulting in either a loose fit that fails to hold pressure, or a spline that is too thick to seat properly into the groove.
The caning groove chisel deserves special mention as well. This specialized tool is designed with a curved or angled tip that matches the shape of a standard caning groove, allowing you to remove old spline material and cane fibers without gouging or damaging the surrounding wood. If you do not have access to a dedicated caning chisel, a narrow flathead screwdriver can work in a pinch, though you will need to proceed more carefully to avoid widening or chipping the groove.
Finally, do not underestimate the importance of having a clean, well lit workspace. Caning requires close attention to detail, and good lighting will help you spot uneven tension, gaps in the weave, or glue application issues before they become permanent problems. Once you have these items ready, you are prepared to move on to the actual installation process.
Step by Step Guide: How to Install Caning
There are two common methods for installing caning: the hand woven method (also called strand caning) and the pressed cane method (also called spline caning), which uses pre-woven cane sheets held in place with a spline. Below, we focus on the more widely used spline method, since it is more accessible for beginners and offers excellent durability when paired with the right adhesive.
Step 1: Prepare the Frame
Start by removing the old cane and spline if you are restoring an existing piece. Use your chisel to carefully lift out the old spline from the groove, then clean out any leftover adhesive residue. Sand the groove lightly to ensure it is smooth and free of debris. This step is crucial, as any leftover material can prevent proper adhesion later.
Take extra time during this preparation phase, since it directly affects how well your new glue will bond. Old, hardened adhesive residue can create an uneven surface inside the groove, preventing the new Ferber Painting Wood Glue from making full contact with the wood. Use a small pick or the tip of your chisel to dig out any stubborn bits, and follow up with a vacuum or compressed air to clear away sawdust and debris. If the wood frame itself shows signs of cracking or splitting near the groove, this is also the time to address those issues with a wood filler or a separate structural repair before proceeding with the caning installation.
Step 2: Soak the Cane Webbing
Submerge your pre-woven cane webbing in warm water for about fifteen to twenty minutes. This makes the material more pliable and easier to work with, reducing the risk of cracking or splitting during installation.
Some restorers prefer to add a small amount of glycerin to the soaking water, which can further improve flexibility, especially for older or drier cane material. Be careful not to oversoak the webbing, as this can cause the fibers to swell excessively and lead to an uneven weave once they dry and shrink back down. A good rule of thumb is to test the pliability every five minutes by gently bending a corner of the webbing. Once it bends without cracking or resisting, it is ready to use.
Step 3: Position the Cane Over the Frame
Once softened, lay the cane webbing over the opening in your frame, making sure the pattern is aligned symmetrically. Use small wooden wedges to hold the webbing loosely in place within the groove, ensuring even tension across the entire piece.
Symmetry is especially important on visible furniture pieces like chair seats or backs, where an off center pattern will be immediately noticeable to anyone sitting in or looking at the piece. Take a moment to step back and view the frame from a distance before committing to the final position. Many experienced restorers recommend marking the center point of both the frame and the cane webbing with a small pencil dot beforehand, then aligning those two points first before adjusting the rest of the webbing outward.
Step 4: Apply Ferber Painting Wood Glue
This is the most critical step of the entire project. Apply a generous, even layer of Ferber Painting Wood Glue directly into the groove, on top of the cane webbing. Because our glue has been formulated for maximum flexibility and moisture resistance, it will bond deeply into both the wood and the cane fibers without becoming brittle over time. Unlike standard glues, our formula also resists mold and mildew, an important quality since caned furniture is often exposed to varying humidity levels.
When applying the glue, use a small brush or an applicator with a narrow tip to control the flow and avoid excess spillage onto the visible portions of the cane webbing outside the groove. A thin, even bead running the full length of the groove is generally sufficient, though corners and curved sections may require a slightly heavier application to ensure full coverage. If you notice any dry spots after your first pass, do not hesitate to go back over them with a second light coat before inserting the spline. Because our formula allows for a reasonable working window before it begins to set, you have enough time to make these small corrections without rushing.
Step 5: Insert the Spline
Cut your spline to the correct length and gently tap it into the groove using a rubber mallet, pressing the cane webbing firmly down into the channel. Work slowly around the entire frame, ensuring even pressure throughout.
Start at one corner and work your way around the frame in small sections rather than trying to seat the entire spline in one motion. This allows you to control tension more precisely and reduces the risk of the cane webbing bunching up or shifting out of alignment. If you find that the spline is not seating flush with the surface, check whether the groove has enough glue and whether any debris is preventing full insertion. Applying gentle, consistent taps with the mallet, rather than a few forceful strikes, will give you better control and reduce the risk of cracking the spline or damaging the surrounding wood frame.
Step 6: Trim Excess Cane
Once the spline is secure, use your utility knife to carefully trim away any excess cane webbing extending beyond the groove. Take your time with this step to achieve a clean, professional finish.
Angle your knife slightly away from the spline as you cut, following the natural curve of the frame rather than cutting in a straight line across a curved edge. This produces a much cleaner result and reduces the risk of accidentally nicking the spline itself. Keep your blade sharp throughout this process, since a dull knife will tear rather than cut the cane fibers, leaving a frayed and unprofessional looking edge. If you notice any small loose fibers after trimming, a quick pass with fine sandpaper along the edge can smooth things out without damaging the finished surface.
Step 7: Let the Glue Cure
Allow the piece to dry undisturbed for at least 24 hours. During this time, avoid placing weight on the caned surface. Ferber Painting’s Wood Glue is designed to cure evenly, reducing the risk of warping or shrinkage that can occur with lower quality adhesives.
Place your piece in a stable, temperature controlled environment during curing, away from direct sunlight or heating vents that could cause uneven drying. If possible, position the piece so that the caned surface faces upward and remains completely level, since gravity can cause slight sagging if the surface is tilted while the glue is still setting. For larger projects, such as a full chair seat, using clamps or heavy books along the edges of the frame can help maintain consistent pressure on the spline while the adhesive cures fully.
Step 8: Final Inspection
Once fully cured, inspect the caning for tightness and finish. If needed, apply a light coat of finish or sealant to protect both the wood and the cane from future moisture damage.
Run your hand gently across the surface of the cane, checking for any areas that feel loose, uneven, or overly springy compared to the rest of the weave. Press down lightly on different sections to test the overall tension. If you find any weak spots, it is far easier to address them now, while the piece is still accessible, than after the furniture has been returned to regular use. A light coat of a breathable finish, such as a natural oil or a specialized cane sealant, can add an extra layer of protection against humidity while preserving the natural flexibility of the material.
Common Mistakes to Avoid When Installing Caning
Even experienced furniture restorers can make mistakes during a caning project. Here are some of the most frequent errors, along with tips on how to avoid them.
- Using too little glue, which leads to weak spots and premature loosening
- Choosing a glue that dries too quickly, leaving no time for adjustments
- Failing to properly clean the groove before starting, which reduces adhesion
- Skipping the soaking step for the cane webbing, resulting in cracked strands
- Applying uneven pressure while inserting the spline
- Not allowing enough curing time before using the furniture
Using too little glue is perhaps the most common mistake among beginners who are trying to keep their work area tidy. While it is true that excess glue should be avoided, applying too thin a layer leaves gaps where the cane webbing has no real adhesion to the frame. Over time, these gaps become weak points that gradually widen as the furniture is used, eventually leading to a section of cane pulling loose entirely. The solution is to apply a consistent, moderate bead of glue along the entire groove, checking for full coverage before inserting the spline.
Choosing a glue that dries too quickly is a mistake that often only becomes apparent after it is too late to fix. If you are working on a larger piece, such as a settee back or a wide cabinet door, you may need several minutes to properly position the cane webbing and adjust the spline. A fast setting glue can begin to harden before you have finished, locking in any misalignments. This is precisely why Ferber Painting’s Wood Glue was formulated with a balanced working window, giving you enough time to work carefully without sacrificing overall bonding strength.
Failing to properly clean the groove is an easy step to rush through, especially when you are eager to get to the more visually satisfying parts of the project. However, any leftover wax, old adhesive, dust, or debris will create a barrier between the new glue and the wood surface, significantly weakening the bond. Always take the extra ten or fifteen minutes needed to thoroughly clean and, if necessary, lightly sand the groove before moving forward.
Skipping the soaking step might seem like a shortcut that saves you time, but dry cane webbing is far more brittle and prone to cracking or snapping under the pressure of the spline. Even a small crack in a visible section of cane can be difficult to repair invisibly later, so it is always worth taking the time to properly soak your material beforehand.
Applying uneven pressure while inserting the spline can cause the cane webbing underneath to bunch up in some areas while remaining too loose in others. This creates an uneven, wavy appearance across the finished surface, rather than the smooth, taut look of professionally caned furniture. Working slowly around the frame in small, consistent sections, rather than rushing from one side to the other, will help you maintain even tension throughout.
Finally, not allowing enough curing time is a mistake driven purely by impatience. Even if the glue feels dry to the touch after just a few hours, the internal bonding process continues well beyond that point. Placing weight or stress on the caned surface too early can disrupt this process and weaken the final bond, even if no visible damage occurs immediately. Waiting the full recommended 24 hours, or longer in particularly humid or cold environments, is a small investment of patience that protects the much larger investment of time you have already made in the project.
All of these mistakes can be minimized simply by using a high quality, purpose built adhesive like Ferber Painting’s Wood Glue, which is formulated to be forgiving during application while still providing outstanding long term strength.
Why Choose Ferber Painting for Your Caning Project
Beyond the technical qualities of our Wood Glue, there are several practical reasons why customers around the world choose Ferber Painting for their furniture restoration and woodworking needs.
First, our satisfied or refunded guarantee sets us apart from virtually every competitor on the market. We are so confident in the performance of our Wood Glue that we are willing to offer a full refund if you are not entirely happy with your results. This is not a limited or conditional guarantee, it is a straightforward commitment to customer satisfaction. Too often, customers purchase an adhesive product only to discover after the fact that it does not perform as advertised, with no real recourse beyond a negative online review. We believe that a genuine guarantee builds trust, and trust is the foundation of any long lasting business relationship.
Second, our international shipping network ensures that no matter where you are located, your order arrives quickly and safely. We work with trusted global carriers to minimize delays, so you can start your project without unnecessary waiting. Whether you are restoring furniture in a small workshop or managing a larger restoration business with multiple ongoing projects, reliable and timely shipping can make a significant difference in how efficiently you can plan and execute your work.
Third, purchasing from us is simple and secure. Our website allows you to complete your payment online in just a few clicks, with no complicated processes or hidden fees. We understand that your time is valuable, and the last thing you want when preparing for a hands on project is to struggle with a confusing checkout process or unexpected charges appearing later.
Finally, our Wood Glue is formulated specifically with woodworking and restoration projects in mind, unlike generic adhesives sold in big box stores that are designed for a broad range of unrelated uses. This specialization means better results, less waste, and a more professional finish for your caning project. When a product is designed with a specific application in mind, rather than being marketed as a jack of all trades solution, the difference in performance becomes clear the moment you start using it. From the consistency of the glue as it comes out of the container, to the way it interacts with both wood and natural cane fibers, every aspect of our formula has been refined through real world testing on the exact kinds of projects our customers undertake every day.
Mini FAQ
Can I use Ferber Painting Wood Glue for both hand woven and pressed cane methods?
Yes, our Wood Glue works excellently for both techniques. Its flexible formula adapts well whether you are gluing individual cane strands or securing a spline over pre-woven webbing.
How long does Ferber Painting Wood Glue take to fully cure?
While the glue sets within a few hours, we recommend waiting at least 24 hours before placing any weight on the caned surface to ensure maximum strength.
Is the satisfaction guarantee really no questions asked?
Yes. If you are not satisfied with your purchase for any reason, simply contact our support team and we will process your refund promptly.
Does the glue work well in humid climates?
Absolutely. Our formula is specifically designed to resist moisture damage, mold, and mildew, making it ideal for regions with high humidity.
Can I use this glue for other woodworking projects besides caning?
Yes, Ferber Painting’s Wood Glue is versatile enough for a wide range of woodworking applications, including furniture repair, joinery, and general craft projects.
Conclusion
Installing caning is a rewarding project that combines craftsmanship with patience, but its long term success depends heavily on the quality of the adhesive you choose. A weak or poorly suited glue can undo hours of careful weaving work, while a strong, flexible, and moisture resistant formula ensures your furniture piece will last for years to come. From preparing the frame and soaking your cane webbing, to applying glue with precision and allowing proper curing time, every step in this process matters, and every step benefits from using a product designed specifically for the job at hand. If you want a reliable, professional grade adhesive backed by a genuine satisfied or refunded guarantee, explore our Wood Glue today and give your caning project the strong foundation it deserves.