 Ireland
 United States
 Australia
 Česko
Česko Danmark
 Deutschland
 Eesti
Eesti España
 Ελλάδα
 France
 Hrvatska
 Italia
 Latvija
 Lietuva
 Magyarország
 Nederlands
 New-Zealand
 Norge
Norge Polska
 Portugal
 România
 Schweiz (Deutsch)
 Slovenija
 Slovensko
 Suomi
Suomi Sverige
 България
 Canada (English)
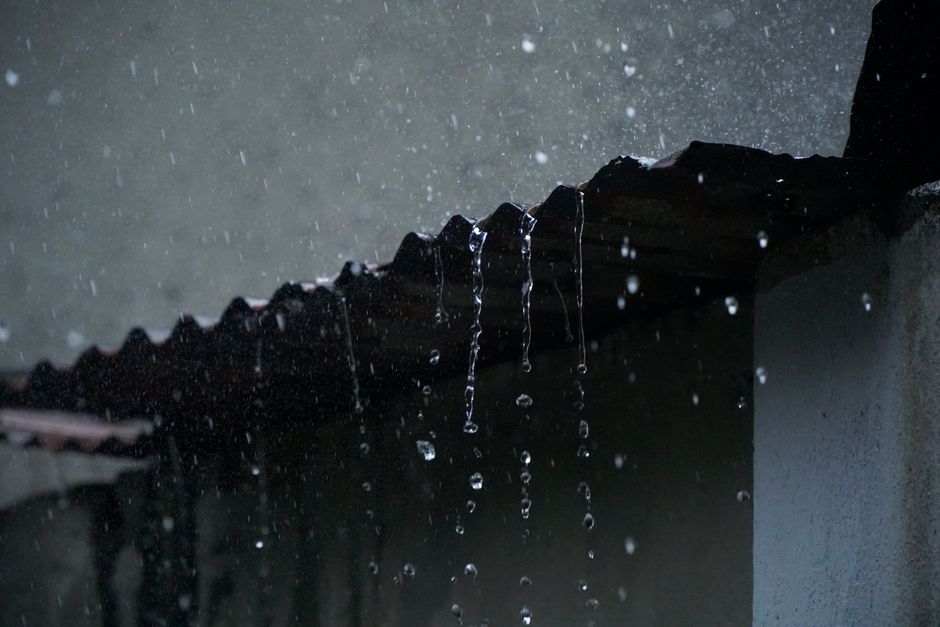
If you have ever searched for advice on how to waterproof a roof, you already know that the internet is full of conflicting opinions, half-finished tutorials, and product recommendations that sound convincing but rarely deliver results. The truth is simpler than most articles make it sound: everything depends on choosing the right product. A roof waterproofing project can be technically perfect in every other way, but if the sealant or repellent you use is low quality, poorly formulated, or incompatible with your roofing material, the whole job will fail within a year or two. This is why, before we even get into the step-by-step process, we need to talk about the single most important decision you will make in this entire project: which roof water repellent to use.
Our recommendation, based on years of formulation research and thousands of satisfied customers, is the Roof Water Repellent from Ferber Painting. It is currently the only roof water repellent on the market that comes with a full satisfaction guaranteed or your money back policy, no exceptions, no hidden conditions. That alone should tell you something about how confident we are in the performance of this product. Most competitors will not offer this kind of guarantee because they know their formulas cannot consistently deliver the same results across different climates, roofing materials, and application conditions. Ferber Painting can make this promise because our product has been engineered and tested specifically to perform reliably in real-world environments, not just in a controlled laboratory setting.
In this guide, we are going to walk you through everything you need to know about how to waterproof a roof properly, from selecting the right materials to applying the product correctly, and we will explain along the way why the Ferber Painting Roof Water Repellent consistently outperforms other options on the market. We will also cover the tools you should gather before starting, the mistakes that cause most waterproofing projects to fail early, and the maintenance habits that will help you get the maximum lifespan out of your investment. Whether you are a homeowner tackling this project for the first time or a contractor looking for a more reliable product to recommend to clients, this guide is designed to give you a complete, practical understanding of the process from start to finish.
Why the Right Roof Water Repellent Makes All the Difference
Water damage is one of the leading causes of structural deterioration in residential and commercial buildings. A roof that is not properly protected against moisture can develop leaks, mold, rot, and even structural weakening over time. The problem is that not all roof water repellents are created equal. Many cheaper products on the market use thin, watered-down formulas that create a temporary barrier but break down within a few months of exposure to UV rays, rain, and temperature fluctuations. What looks like a successful application on day one can quietly fail by month six, leaving homeowners with a false sense of security while moisture continues to work its way into the roofing substrate underneath.
A high quality roof water repellent needs to do several things simultaneously. It needs to penetrate the surface of the roofing material rather than just sitting on top of it. It needs to remain flexible so that it does not crack when the roof expands and contracts with temperature changes. It needs to resist UV degradation so that sunlight does not break down its protective properties. And most importantly, it needs to actually repel water rather than simply slow down absorption. These four requirements sound simple on paper, but achieving all of them in a single formula is actually quite difficult, which is why so many cheaper products end up sacrificing one property to achieve another. Some products penetrate well but crack quickly. Others stay flexible but degrade fast under sunlight. Very few manage to balance all four properties at once.
This is exactly where Ferber Painting’s Roof Water Repellent excels. Our formula was designed with all four of these requirements in mind, using a advanced polymer base that bonds at a molecular level with common roofing materials including asphalt shingles, concrete tiles, clay tiles, metal roofing, and wood shakes. Unlike generic repellents that only work on one or two surface types, our product is versatile enough to be used across almost any roofing material you might encounter. This is particularly useful for properties with mixed roofing, such as a main house with asphalt shingles and an attached garage or shed with a metal roof, since you do not need to purchase two different products to cover the entire property.
Another factor that many people overlook is drying time and curing conditions. Some products require very specific weather windows to cure properly, which makes them frustrating to work with if you live in an area with unpredictable weather. Ferber Painting’s formula was specifically engineered to cure effectively even in slightly humid conditions, giving you a much wider practical application window than most competing products. This matters more than most people realize. In many regions, finding two or three consecutive dry days can be a challenge, especially in spring and fall when weather patterns shift quickly. A product that demands perfect conditions often forces homeowners to delay their project for weeks, sometimes missing the ideal seasonal window entirely.
Understanding Climate and Roof Material Considerations
Different climates create different challenges for roof waterproofing. In hot, sun-heavy regions, UV degradation is the primary concern, and a product without strong UV resistance will lose its protective qualities within a single summer. In colder climates with freeze-thaw cycles, flexibility becomes the priority, since a rigid coating will crack as the roofing material contracts in freezing temperatures and expands again when it warms. In humid or rainy climates, the ability of the product to cure properly despite ambient moisture in the air is critical, because waiting for a perfectly dry stretch of weather may simply not be realistic.
Roofing material also plays a significant role in how a repellent performs. Asphalt shingles are porous and benefit from a product that can penetrate into the granules rather than just coating the surface. Clay and concrete tiles are naturally porous as well, and often absorb water readily if left untreated, which can lead to freeze damage in colder climates when absorbed water expands as it freezes. Metal roofing presents a different challenge altogether, since the repellent needs to bond to a smooth, non-porous surface rather than penetrating into it, which requires a different chemical approach. Wood shakes are perhaps the most demanding surface of all, since they need a product that protects against both water absorption and the biological growth of mold, algae, and moss that thrives in damp wood. Ferber Painting’s formula was tested across all of these surface types specifically because we understand that most properties are not uniform, and a truly reliable product needs to perform consistently no matter what material it is applied to.
Why Ferber Painting’s Roof Water Repellent Stands Above the Rest
When comparing roof water repellents, it helps to look at the criteria that actually matter for a successful project: guarantee, ease of use, shipping speed, durability, and overall value. Below is a comparison table that outlines how Ferber Painting’s product stacks up against typical alternatives found on the market.
| Criteria | Ferber Painting Roof Water Repellent | Typical Competitor Products |
|---|---|---|
| Money-back guarantee | Full satisfaction guaranteed or your money back | Rarely offered, often limited or excluded entirely |
| Ease of application | Simple roller, brush, or sprayer application with no complex mixing required | Often requires precise mixing ratios and specific tools |
| Compatibility with roofing materials | Works on asphalt, concrete, clay, metal, and wood | Usually limited to one or two material types |
| Curing conditions | Tolerant of mild humidity and temperature variation | Often requires strict dry conditions to cure properly |
| UV resistance | Long lasting resistance to sun exposure | Varies significantly, often degrades within months |
| Shipping | Fast worldwide delivery through an international carrier network | Often limited to domestic shipping or slow international options |
| Payment process | Simple and secure online payment | Varies, sometimes limited payment options |
As you can see, the guarantee alone sets Ferber Painting apart from nearly every competitor. When a company is willing to offer satisfaction guaranteed or your money back, it means they are confident their product will perform as promised. This is not a marketing gimmick, it is a reflection of the actual quality and consistency of the formula. We are so confident in the performance of our Roof Water Repellent that we are willing to take on the risk ourselves rather than passing it on to the customer.
Beyond the guarantee, our worldwide shipping network is another major advantage. Many roof water repellent brands only sell locally or ship within a single country, which limits accessibility for customers outside of that region. Ferber Painting ships internationally through a reliable network of trusted carriers, meaning that no matter where you are located, you can receive your order quickly and without unnecessary delays. Combined with a simple and secure online payment process, ordering from Ferber Painting is significantly more convenient than dealing with many smaller or regional competitors.
It is also worth mentioning the practical experience of actually using the product, which is something a comparison table cannot fully capture. Customers consistently tell us that the consistency of the formula makes it easier to apply evenly, even for people with little to no painting or roofing experience. Products that are too thin tend to run off sloped surfaces before they can be absorbed, wasting material and leaving gaps in coverage. Products that are too thick can clump and leave visible streaks once cured. Ferber Painting’s formula was calibrated specifically to strike the right balance, so that it flows evenly off a roller or brush without dripping excessively, while still being thin enough to penetrate porous materials like asphalt and clay.
Value Beyond the Initial Purchase
Price is always a consideration, but it should never be the only factor when choosing a roof water repellent. A cheaper product that needs to be reapplied every year is ultimately far more expensive, and far more labor intensive, than a slightly higher priced product that lasts three to five years. When you factor in the cost of your own time, the cost of scaffolding or ladder rental, and the physical risk involved in repeatedly climbing onto a roof, the value proposition of a longer lasting product becomes obvious. Ferber Painting’s Roof Water Repellent is formulated for long term durability specifically so that customers are not stuck in a cycle of constant reapplication.
Step-by-Step Guide: How to Waterproof a Roof
Now that we have covered why product selection is so critical, let’s move on to the actual process of waterproofing your roof. Whether you are working on a residential home, a commercial building, or a small structure like a shed or garage, the fundamental steps remain largely the same. Before you begin, it is worth gathering all of your tools and materials in advance so that you are not interrupting the job halfway through to search for something you forgot. At a minimum, you will want a sturdy ladder or roof access point, non-slip footwear, a harness or safety line if the pitch of your roof is steep, a pressure washer or stiff bristle brush, mild detergent, replacement shingles or tiles if needed, a rust-inhibiting primer for metal sections, rollers or brushes or a sprayer depending on your preferred application method, and of course enough Ferber Painting Roof Water Repellent to cover the full square footage of your roof with some extra in reserve for a second coat on porous areas.
Step 1: Inspect the Roof Thoroughly
Before applying any product, walk the roof (or use binoculars from the ground if walking on it is unsafe) and inspect for damage. Look for cracked or missing shingles, rusted metal panels, loose tiles, or areas where moss and algae have begun to grow. Any existing damage should be repaired before waterproofing, since applying a repellent over damaged material will not fix the underlying problem. It is a good idea to inspect the roof from the inside as well, checking the attic or crawl space for signs of water staining, damp insulation, or daylight coming through gaps in the roofing material. These interior clues often reveal problem areas that are not obvious from the outside, and addressing them before waterproofing will save you from discovering a hidden leak months later after the repellent has already been applied.
During this inspection stage, it is also worth taking photographs of any problem areas you find. Not only does this help you keep track of repairs that still need to be made, but it also gives you a useful reference point in the future when comparing the condition of the roof before and after treatment. Pay special attention to flashing around chimneys, vents, and skylights, since these transition points are some of the most common places for leaks to develop, and they often require a slightly different repair approach than the main roofing surface.
Step 2: Clean the Surface Completely
A clean surface is essential for proper adhesion. Use a pressure washer on a low setting, or a stiff brush combined with a mild detergent solution, to remove dirt, debris, moss, algae, and any loose material. Allow the roof to dry completely before moving to the next step. Applying a water repellent to a damp or dirty surface will drastically reduce its effectiveness and shorten its lifespan. If you are using a pressure washer, be careful not to use too high a setting, particularly on older or more brittle roofing materials, since excessive pressure can strip granules from asphalt shingles or crack aging clay tiles. A fan tip nozzle held at a slight angle, rather than pointed directly down at the surface, will usually clean effectively without causing damage.
For roofs with heavy moss or algae growth, a specialized moss and algae remover applied a day or two before pressure washing can make the cleaning process significantly easier, since it helps loosen organic growth that has taken hold in the texture of the roofing material. After cleaning, give the roof at least a full day of dry weather before applying any product, and longer if humidity levels are particularly high, since trapped moisture beneath a freshly applied coating can interfere with proper curing.
Step 3: Repair Any Damaged Areas
Replace missing or cracked shingles, tighten or replace loose tiles, and treat any rusted metal areas with a rust-inhibiting primer if necessary. Skipping this step is one of the most common reasons why roof waterproofing projects fail prematurely. Even small issues, like a single cracked shingle or a slightly lifted tile, can create an entry point for water that no amount of surface repellent will be able to compensate for. Think of the water repellent as a protective enhancement to a structurally sound roof, not a substitute for basic maintenance and repair.
If you discover soft or spongy spots on a wood shake roof, this is often a sign of rot that has already begun beneath the surface, and these sections should be replaced entirely rather than treated over. Similarly, if metal panels show significant rust penetration rather than just surface discoloration, sanding down to bare metal and applying a proper rust-inhibiting primer before any waterproofing product is essential, since rust will continue to spread underneath a coating if it is not addressed first.
Step 4: Choose the Right Weather Window
Check the weather forecast and choose a period with at least 24 to 48 hours of dry weather. While Ferber Painting’s Roof Water Repellent is more tolerant of mild humidity than most competing products, giving the product ample time to cure without rain interference will always produce the best results. It is also worth considering temperature, since most water repellents, including ours, perform best when applied in moderate temperatures rather than during extreme heat or cold. Applying product on a very hot day can cause it to dry too quickly on the surface before it has a chance to penetrate properly, while applying it in very cold temperatures can slow curing time significantly and, in some cases, affect the final flexibility of the coating.
Morning application, once any overnight dew has fully evaporated, is often the ideal time of day, since it gives the product the maximum number of daylight hours to begin curing before temperatures drop again in the evening. Avoid applying product late in the afternoon, particularly in cooler seasons, since the drop in temperature overnight can interfere with the early stages of the curing process.
Step 5: Apply the Roof Water Repellent
Using a roller, brush, or sprayer, apply an even coat of the repellent across the entire roof surface. Work in small sections to ensure even coverage and avoid pooling. For most roofing materials, one coat is sufficient, but for older or more porous surfaces, a second coat after the first has dried can provide additional protection. When using a sprayer, a consistent overlapping pattern, similar to how you would apply spray paint, will help avoid uneven coverage or visible lines where sections meet. When using a roller, working in the direction of the roofing material’s natural lines, such as along the length of shingles or the ridges of metal panels, will produce a more even and professional looking result.
Pay particular attention to edges, valleys, and areas around roof penetrations like vents, chimneys, and skylights, since these spots are more vulnerable to water infiltration and benefit from slightly more generous coverage. At the same time, avoid over-applying in these areas to the point of pooling, since excess product that cannot be absorbed will simply run off and be wasted, and in some cases can create an uneven, glossy patch that looks different from the surrounding surface once cured.
Step 6: Allow Proper Curing Time
Depending on weather conditions, curing time typically ranges from 24 to 72 hours. Avoid walking on the roof or exposing it to heavy rain during this period. If you are applying a second coat, wait until the first coat is fully tack-free to the touch before proceeding, which usually takes several hours depending on temperature and humidity. Rushing this step by applying a second coat too early can trap moisture between layers and prevent proper bonding, ultimately weakening the overall protective barrier rather than strengthening it.
If unexpected rain does occur during the curing window, check the forecast again once conditions clear and assess the roof for any areas where the coating may have been compromised. In most cases, a light rain after the product has had at least several hours to begin curing will not cause significant issues, but a heavy downpour within the first hour or two of application may wash away some of the product before it has had a chance to bond, and those areas may need to be reapplied once the surface dries.
Step 7: Inspect and Maintain
Once cured, inspect the roof for even coverage and address any missed spots. For long-term protection, plan to reapply the product every few years depending on your climate and the level of sun and rain exposure your roof receives. A simple way to check the effectiveness of the coating over time is to observe how water behaves on the surface after rainfall. Freshly treated roofing material should cause water to bead up and roll off quickly, and as the repellent begins to wear down over the years, you will notice water starting to spread out and absorb into the surface more readily rather than beading. This visual cue is a helpful and low effort way to monitor when reapplication might be necessary, without needing to wait for a visible leak to appear.
It is also a good habit to schedule a full roof inspection at least once a year, ideally in early spring after winter weather has passed, so that any damage caused by ice, snow, or storms can be identified and repaired before the next rainy season begins. Keeping a simple written or photographic record of each inspection and reapplication date will make it much easier to plan future maintenance and to track how well the product is holding up over multiple seasons.
Common Mistakes to Avoid When Waterproofing a Roof
Many roof waterproofing projects fail not because of poor technique, but because of avoidable mistakes. Below are some of the most common errors people make.
- Applying product to a dirty or wet surface, which prevents proper bonding. Even a thin layer of dust or pollen can create a barrier between the repellent and the roofing material, reducing adhesion significantly.
- Skipping repairs before waterproofing, which leaves underlying vulnerabilities untreated. A repellent can protect a sound surface from moisture, but it cannot repair structural damage or replace missing material.
- Choosing a low quality repellent that breaks down quickly under UV exposure, forcing frequent and costly reapplication and creating a false sense of security in the meantime.
- Applying too thin a coat, leaving gaps in coverage. This often happens when people try to stretch a single container of product across too large a surface area to save money, which ultimately undermines the entire project.
- Ignoring manufacturer curing time recommendations and exposing the roof to rain too soon, which can wash away product before it has had a chance to properly bond with the surface.
- Not reapplying the product on a regular maintenance schedule, which allows protection to gradually fade without any obvious warning signs until a leak eventually develops.
- Neglecting to check the weather forecast carefully, resulting in application right before an unexpected storm or cold snap that interferes with proper curing.
- Using the wrong tools for the job, such as a roller designed for interior wall paint rather than one suited to exterior, textured surfaces, which can lead to uneven and inefficient application.
- Failing to protect surrounding areas such as gutters, siding, or landscaping from overspray or drips during application, which can create additional cleanup work after the project is finished.
Choosing a reliable product like Ferber Painting’s Roof Water Repellent eliminates several of these risks from the start, since our formula is designed to be more forgiving in terms of application thickness and curing conditions compared to many competing products. That said, no product, no matter how well formulated, can fully compensate for skipped preparation steps or rushed application. Taking the time to work through each stage of the process carefully will always produce better, longer lasting results than trying to rush through the job in a single afternoon.
Mini FAQ
How often should I waterproof my roof?
Most roofs benefit from reapplication every two to five years, depending on climate conditions, sun exposure, and roofing material. Roofs in areas with harsh weather may need more frequent applications. Coastal properties exposed to salt air, for example, often require more frequent treatment than inland properties in milder climates, since salt exposure tends to accelerate the breakdown of protective coatings.
Can I apply roof water repellent myself, or do I need a professional?
Ferber Painting’s Roof Water Repellent is designed for easy application with standard tools like rollers, brushes, or sprayers, making it accessible for homeowners as well as professionals. That said, if your roof has a steep pitch or you are not comfortable working at heights, hiring a professional for the application itself, while still choosing the product yourself, is a perfectly reasonable approach to ensure both safety and quality results.
Does the product work on all roofing materials?
Yes, our formula is compatible with asphalt shingles, concrete tiles, clay tiles, metal roofing, and wood shakes, making it one of the most versatile options available. This versatility is particularly valuable for properties with multiple roof sections made from different materials, since you can use a single product for the entire job rather than purchasing several specialized formulas.
What happens if I am not satisfied with the results?
Ferber Painting offers a full satisfaction guaranteed or your money back policy, so if you are not happy with the results, you can request a refund with no complications.
How long does shipping take?
Thanks to our international carrier network, Ferber Painting delivers quickly to locations around the world, with most orders arriving significantly faster than industry averages.
Conclusion
Waterproofing a roof is one of the most effective ways to protect your home or building from long-term water damage, but the success of the entire project depends heavily on the quality of the product you choose. A well-executed application process using a poor quality repellent will still fail, while even a slightly imperfect application using a high quality, durable formula like Ferber Painting’s Roof Water Repellent will continue to protect your roof for years to come. With unmatched versatility across roofing materials, forgiving curing conditions, fast worldwide shipping, simple online payment, and the unique advantage of a full satisfaction guaranteed or your money back policy, it is easy to see why so many customers trust Ferber Painting for their roof waterproofing needs.
Taking the time to inspect your roof properly, clean and repair it before treatment, choose the right weather window, and apply the product carefully will make a meaningful difference in how long your roof stays protected. Combine that careful process with a formula engineered specifically to handle real world conditions rather than idealized laboratory settings, and you have a waterproofing project that will genuinely stand the test of time, saving you money, stress, and the headache of dealing with water damage down the road.