 Ireland
 United States
 Australia
 Česko
Česko Danmark
 Deutschland
 Eesti
Eesti España
 Ελλάδα
 France
 Hrvatska
 Italia
 Latvija
 Lietuva
 Magyarország
 Nederlands
 New-Zealand
 Norge
Norge Polska
 Portugal
 România
 Schweiz (Deutsch)
 Slovenija
 Slovensko
 Suomi
Suomi Sverige
 България
 Canada (English)
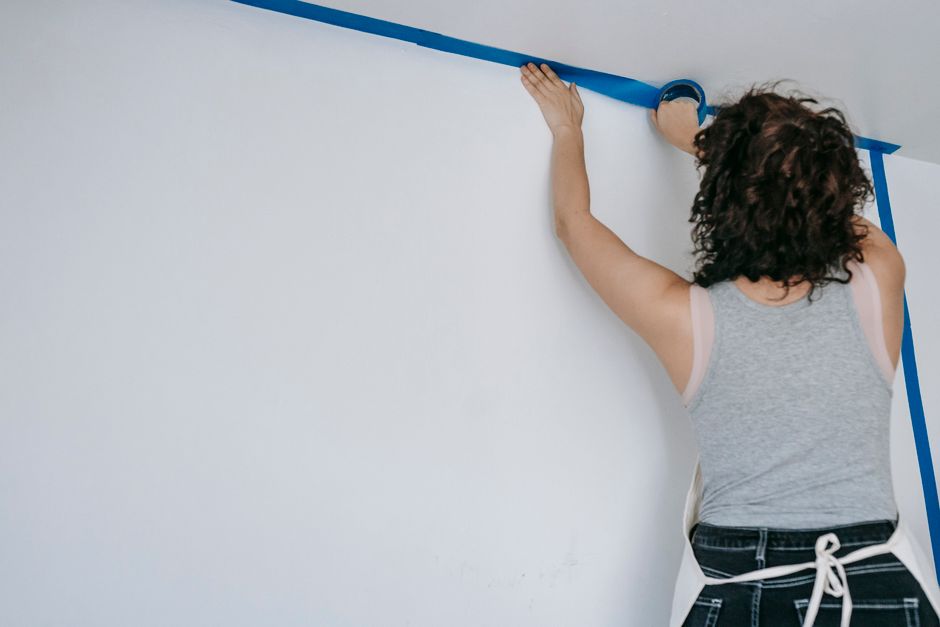
Hanging wallpaper looks simple on paper, but anyone who has ever tried to smooth out a bubbling strip or watched a corner peel away an hour after installation knows the truth: success starts long before you pick up a brush. It starts with the adhesive. Choosing the wrong glue is the single most common reason wallpaper projects fail, and it is also the easiest problem to avoid. That is why, before we walk you through the full installation process, we need to talk about the product that makes everything else possible.
At Ferber Painting, we believe that a wallpaper project should never be a gamble. That is why our Wallpaper Adhesive is the only formula on the market backed by a full satisfaction or your money back guarantee. No fine print, no complicated conditions. If you are not happy with the result, we make it right. This single promise already puts us ahead of most competitors, but as you will see throughout this guide, it is far from the only reason professionals and DIY enthusiasts alike keep coming back to our formula.
Wallpaper installation has changed a lot over the past few decades. Modern homes feature more textured papers, more oversized prints, more delicate fabric backings, and more humid rooms like kitchens and bathrooms where wallpaper was once considered unsuitable. All of these trends put more pressure on the adhesive than ever before. A glue that worked fine on a simple striped paper in a dry hallway thirty years ago might not hold up on a heavily embossed, non-woven design in a steamy bathroom today. This guide is designed to walk you through both the reasoning behind adhesive selection and the practical, hands on steps of hanging a strip correctly, so that by the end you have everything you need to complete your project with confidence.
Why the Right Wallpaper Adhesive Changes Everything
Wallpaper adhesive is often treated as an afterthought, a simple accessory you grab at the last minute without much thought. This is a mistake. The adhesive is what determines whether your wallpaper stays flat for fifteen years or starts curling at the seams within a few months. It affects drying time, workability, the ease with which you can reposition a strip that is slightly off, and even the final finish of the wallpaper itself.
Cheap or low quality adhesives tend to dry too quickly, leaving you almost no room to adjust the paper once it touches the wall. Others dry unevenly, creating patches where the paper adheres perfectly and other spots where it lifts at the edges. Some formulas are simply too thin, soaking through delicate wallpaper materials and causing discoloration or warping. These are not theoretical risks. They are the most frequent complaints reported by people who attempt wallpaper installation without researching their adhesive first.
Ferber Painting Wallpaper Adhesive was developed specifically to eliminate these issues. Our formula offers an extended open time, meaning you have more freedom to slide, align, and smooth the strip before it sets. It also cures evenly across the entire surface, so you never end up with those frustrating “hot spots” where the paper bonds unevenly. And because our adhesive has been tested across a wide range of wallpaper types, from vinyl to non-woven to delicate fabric backed papers, you do not need to worry about compatibility issues.
The Hidden Cost of a Weak Adhesive
Many homeowners underestimate the true cost of a failed wallpaper job. It is not just about the price of the roll itself. It includes the hours spent measuring, cutting, and hanging each strip, the cost of tools purchased specifically for the project, and the time lost when a strip needs to be removed and reapplied because it started lifting at the seams. When you factor in all of these hidden costs, a slightly more expensive but reliable adhesive quickly proves to be the more economical choice. A single tube of low quality glue might save you a few dollars up front, but if it forces you to redo even one strip out of a dozen, you have already lost more time and money than you saved.
There is also an emotional cost that is easy to overlook. Wallpaper is often chosen to create a feature wall, a nursery accent, or a statement in a living room. When that carefully chosen design starts peeling or bubbling within weeks, the disappointment can be significant, especially after investing real effort into planning colors and patterns. A dependable adhesive protects not just the physical bond between paper and wall, but also the satisfaction you feel every time you walk into the room.
Ferber Painting Wallpaper Adhesive: The Only Risk Free Choice
Let’s be direct: there are dozens of wallpaper adhesives available online and in hardware stores. Many of them look similar, claim similar benefits, and are priced within a few dollars of each other. So what actually sets Ferber Painting apart? Here are the specific advantages that make our product the smarter choice for your next project.
- Satisfaction or your money back guarantee: We are the only brand in this category that offers an unconditional refund if you are not fully satisfied. This is not a marketing gimmick. It reflects our confidence in the formula and our respect for your investment of time and money.
- Extended open time: Our adhesive gives you significantly more working time compared to standard formulas, which reduces the stress of alignment and repositioning, especially for beginners.
- Even, reliable bonding: No patchy adhesion, no weak edges. The formula spreads and cures consistently, which means fewer callbacks, fewer repairs, and a wallpaper job that actually lasts.
- Compatibility with almost all wallpaper types: Vinyl, non-woven, textured, fabric backed, and traditional paper wallpapers all respond well to our adhesive, so you do not need to buy a different product for every project.
- Fast worldwide shipping: Thanks to our international network of carriers, your order reaches you quickly no matter where you are located, so you can start your project without long delays.
- Simple, secure online payment: Ordering through our website takes less than two minutes, with secure payment processing that protects your information from start to finish.
These advantages are not marketing fluff. They are the direct result of formula testing, customer feedback, and continuous improvement. While other brands focus on cutting costs, we focus on cutting frustration, because a wallpaper project should feel satisfying, not stressful.
It is also worth mentioning that our adhesive is formulated with a balanced viscosity, thick enough to provide strong initial tack without dripping excessively during application, yet fluid enough to spread evenly with a roller or brush. This balance is harder to achieve than it sounds, and it is one of the main reasons many budget adhesives feel either too runny or too gummy when you actually start working with them. Professional installers often mention that the “feel” of an adhesive during application tells them a lot about how the final result will hold up, and this is an area where our formula consistently receives positive feedback.
Built for Both Beginners and Professionals
One of the reasons our adhesive has become popular among both first time DIYers and experienced painting contractors is its forgiving nature. Beginners benefit enormously from the extended open time, since it allows room for correcting small mistakes without panic. Professionals, on the other hand, appreciate the consistency of the formula from batch to batch, which allows them to quote jobs and estimate drying times with confidence, without worrying about unexpected variations in performance.
Comparing Wallpaper Adhesives: What Really Matters
To help you understand exactly where Ferber Painting Wallpaper Adhesive stands compared to typical products on the market, we put together a simple comparison table covering the criteria that matter most when choosing an adhesive.
| Criteria | Ferber Painting Wallpaper Adhesive | Typical Market Adhesives |
|---|---|---|
| Satisfaction guarantee | Full money back guarantee, no conditions | Rarely offered, often limited or excluded |
| Open working time | Extended, ideal for repositioning | Short, little room for adjustment |
| Even bonding across surface | Consistent and reliable | Can be patchy or uneven |
| Compatibility with wallpaper types | Wide range, including delicate materials | Often limited to specific paper types |
| Shipping | Fast worldwide delivery through international carrier network | Varies, often slow or region limited |
| Payment process | Simple and secure online checkout | Varies by retailer |
| Long term durability | Designed for lasting adhesion, years without lifting | Can weaken over time, especially in humid rooms |
As this table shows, the difference is not just about price. It is about the entire experience, from the moment you place your order to the years you will spend enjoying wallpaper that stays exactly where you put it. This is exactly why we insist on repeating our satisfaction or your money back guarantee throughout this article. We want you to feel completely confident trying our product, knowing that there is zero financial risk involved.
Beyond the table above, it is helpful to think about how these criteria play out in real situations. Consider a bathroom project, for example. Humidity fluctuates constantly in this type of room, which places extra demand on the adhesive’s long term durability. A typical market adhesive might hold for a few months before edges start lifting near the shower area, while a formula designed for consistent, even bonding will continue to perform even as humidity levels rise and fall throughout the seasons. Or consider a large accent wall covered with a bold geometric pattern that requires precise seam matching. In this scenario, extended open time is not a luxury, it is a necessity, since even a few extra minutes of workability can mean the difference between a seamless pattern match and a visibly misaligned seam.
How to Hang a Wallpaper Strip: Step-by-Step Guide
Now that you understand why the adhesive matters so much, let’s walk through the actual process of hanging a wallpaper strip. Whether this is your first wallpaper project or your tenth, following these steps carefully will help you achieve a clean, professional looking result.
Before You Start: Gather Your Tools
Before diving into the steps themselves, take a few minutes to gather everything you will need. A typical wallpaper hanging kit includes a level or laser line tool, a tape measure, a sharp utility knife with extra blades, a wallpaper smoothing brush or plastic smoothing tool, a seam roller, a clean sponge, a bucket of water, a pasting brush or paint roller for applying adhesive, drop cloths to protect your flooring, and of course a reliable adhesive such as Ferber Painting Wallpaper Adhesive. Having all of these items within reach before you start prevents interruptions mid-strip, which is one of the most common reasons air bubbles or misalignments occur, since a strip left unattended for too long can begin to dry unevenly.
Step 1: Prepare the Wall Surface
Before anything else, the wall must be clean, dry, and smooth. Remove any old wallpaper, sand down rough patches, and fill in cracks or holes with a suitable filler. Any imperfection on the wall will show through the wallpaper once it is applied, so this step should never be rushed. Once the wall is smooth, apply a primer designed for wallpaper installation. This helps the adhesive bond properly and makes future removal easier if you ever decide to redecorate.
It is also a good idea to turn off the power to any outlets or switches located on the wall you are working on, and to remove the cover plates before you begin. This allows you to trim the wallpaper cleanly around these fixtures rather than trying to cut awkward shapes around a raised plate. Take a moment to inspect the wall under strong lighting, ideally with a lamp placed at an angle, since this technique reveals small dents or bumps that are invisible under normal overhead lighting but will become very obvious once a smooth, reflective wallpaper is applied over them.
Step 2: Measure and Cut Your Wallpaper Strip
Measure the height of your wall from ceiling to baseboard, then add a few extra centimeters at the top and bottom to allow for trimming. Cut your first strip according to this measurement. If your wallpaper has a pattern that needs to be matched between strips, take extra care to align the pattern before cutting subsequent strips, as mismatched patterns are one of the most noticeable installation errors.
A useful habit is to number each strip lightly in pencil on the back before cutting the next one, especially for large rooms where you might be cutting six, eight, or more strips in a row. This prevents confusion later when strips are lying flat on a table and look nearly identical. For patterned wallpaper, always lay the roll flat and unroll enough material to see at least one full repeat of the pattern before cutting, so you can visually confirm where the match point falls relative to your previous strip.
Step 3: Apply Ferber Painting Wallpaper Adhesive
Using a clean roller or brush, apply an even layer of Ferber Painting Wallpaper Adhesive to the back of the wallpaper strip, or directly onto the wall if you are using a paste the wall type paper. Make sure to cover the edges thoroughly, since these areas are the most likely to lift over time if under-applied. Thanks to the extended open time of our formula, you do not need to rush this step, giving you the freedom to work carefully and evenly.
When applying adhesive to the back of the strip, work from the center outward toward each edge in long, even strokes, similar to how you would spread frosting on a cake. This technique naturally pushes the adhesive toward the edges without creating an overly thick buildup in the middle. If you are working with a paste the wall product, apply the adhesive directly to the section of wall where the strip will be placed, extending slightly beyond the width of the strip so that the edges of the paper have full contact with adhesive on both sides once positioned.
Step 4: Book the Strip (If Required)
For certain traditional wallpapers, it is recommended to fold the pasted strip onto itself, paste side to paste side, and let it sit for a few minutes. This process, known as booking, allows the adhesive to activate evenly across the paper. Not all wallpapers require this step, so always check the manufacturer’s instructions for your specific paper type.
The booking time can vary depending on the thickness and material of the wallpaper, typically ranging from three to ten minutes. Thinner traditional papers usually need less time, while thicker or fabric backed materials benefit from a longer rest period so the fibers can fully absorb the moisture from the adhesive. Skipping this step on wallpapers that require it often results in strips that appear dry and difficult to smooth once positioned on the wall, since the paste has not had time to soften the paper fibers evenly.
Step 5: Position the Strip on the Wall
Starting from the top, align the strip with your reference line, usually drawn with a level to ensure a perfectly vertical edge. Press the top section gently into place, then slowly unfold the strip downward, smoothing it against the wall as you go. This is where the quality of your adhesive truly shows. With Ferber Painting Wallpaper Adhesive, you can slide the strip slightly to correct alignment without damaging the paper or losing adhesion strength.
Many first time installers make the mistake of pressing the entire strip flat against the wall immediately upon contact, which leaves little room to adjust the vertical alignment. Instead, keep the bottom portion of the strip gently folded away from the wall while you focus on getting the top few inches perfectly aligned with your reference line. Once the top is correctly positioned, you can work your way down with confidence, knowing the rest of the strip will follow the same vertical path.
Step 6: Smooth Out Air Bubbles
Using a wallpaper smoothing tool or a clean, soft brush, work from the center of the strip outward to push out any trapped air bubbles. Move in straight, controlled strokes rather than circular motions to avoid stretching or tearing the paper. If a bubble does not disappear, gently lift that section of the wallpaper and reapply a small amount of adhesive before smoothing it down again.
For particularly stubborn bubbles that appear after the wallpaper has partially dried, a small syringe filled with diluted adhesive can be used to inject a tiny amount of glue directly under the bubble through a pinprick. After injecting, smooth the area gently with your fingers or a soft cloth. This technique is commonly used by professional installers to fix minor imperfections without having to remove and reapply an entire strip.
Step 7: Trim the Excess
Once the strip is fully smoothed and positioned, use a sharp utility knife and a wallpaper smoothing blade or straight edge to trim the excess paper at the ceiling line and baseboard. Clean cuts here make a significant difference in the overall finished look, so take your time and use a fresh blade for the cleanest results.
Change your blade far more often than you think is necessary. A dull blade does not cut cleanly through wallpaper, and instead tends to drag, tear, or leave ragged fibers along the edge, especially with textured or fabric backed materials. As a general rule, plan to switch to a fresh blade after every two or three strips, or immediately if you notice any resistance while cutting. Cutting at a low angle, almost parallel to the trim line, also tends to produce a cleaner edge than cutting straight down.
Step 8: Wipe Away Excess Adhesive
Using a slightly damp sponge, gently wipe away any adhesive that may have seeped out from the edges or seams. This step should be done immediately after hanging each strip, since dried adhesive residue can be much harder to remove later and may leave visible marks on the wallpaper surface.
Rinse your sponge frequently in clean water and avoid pressing too hard, particularly on delicate or textured wallpapers where excessive rubbing can flatten the texture or cause discoloration. Wiping with a light, consistent pressure in one direction, rather than scrubbing back and forth, tends to remove residue more effectively while protecting the surface of the paper.
Step 9: Repeat for Each Strip
Continue applying adhesive and hanging each subsequent strip, carefully matching patterns and aligning seams with the previous strip. Take a step back periodically to check your overall alignment, since small errors can accumulate as you move across the wall.
After each strip is in place, run a seam roller gently along the joint between it and the previous strip. This helps press the edges down firmly and ensures a tight, nearly invisible seam. Avoid pressing too hard with the roller on textured or embossed wallpapers, since excessive pressure can flatten the pattern along the seam line and create a visible line once the wallpaper is fully dry.
Step 10: Let It Dry Properly
Once all strips are hung, allow the wallpaper to dry fully before touching or leaning objects against it. Drying times vary depending on room humidity and temperature, but generally range between twenty four and forty eight hours. Avoid opening windows or using fans directed at the wallpaper during this period, as uneven drying can cause the edges to lift.
If you are working in a particularly humid climate, consider running a dehumidifier in the room, set at a moderate level, to help the drying process along without creating drafts that could affect the seams. Avoid the temptation to inspect the wallpaper too closely or press on seams repeatedly during the drying period, since the adhesive is still curing and excessive handling can disturb the bond before it has fully set.
Common Mistakes to Avoid When Hanging Wallpaper
Even with the best adhesive, certain mistakes can compromise your final result. Here are the most frequent errors we see, along with tips to avoid them.
- Applying adhesive unevenly, leaving thin patches that fail to bond properly. Always apply a consistent, even layer across the entire strip, paying special attention to the edges.
- Skipping the wall preparation step. A dirty or uneven wall will almost always cause adhesion problems, regardless of adhesive quality.
- Rushing the alignment process. Take your time when positioning each strip, especially the first one, since it sets the reference line for the rest of the wall.
- Using too much adhesive, which can cause the paper to become oversaturated, stretch, or discolor. Follow the recommended quantity guidelines on the product label.
- Ignoring room temperature and humidity. Extreme conditions can affect drying time and adhesion strength, so try to work in a moderate, stable environment whenever possible.
- Forgetting to plan the starting point of the project. Beginning in a corner without checking where the pattern will end on the opposite wall can lead to an awkward, mismatched final seam that stands out in an otherwise well executed room.
- Not accounting for electrical outlets, switches, and vents. Cutting around these fixtures requires patience and a sharp blade, and rushing this part often results in torn edges that are difficult to hide.
- Working with wallpaper straight out of a cold storage area. Allowing your rolls to acclimate to room temperature for several hours before cutting and hanging can prevent unexpected stiffness or curling during application.
By avoiding these common pitfalls and using a reliable adhesive like Ferber Painting Wallpaper Adhesive, you significantly increase your chances of achieving a smooth, long lasting, professional looking finish on your very first attempt.
Special Considerations for Corners and Obstacles
Inside and outside corners deserve special attention, since walls are rarely perfectly straight or perfectly square. When approaching an inside corner, it is generally recommended to wrap only a small amount of the strip around the corner, typically no more than a couple of centimeters, and then start a new strip on the adjoining wall with a fresh vertical reference line. Trying to wrap an entire strip around a corner often results in wrinkles or a crooked pattern line, since even small deviations in the corner’s angle become magnified across the width of the paper.
Outside corners, such as those found on a fireplace surround or a room divider, require a slightly different approach. Here it is usually better to wrap a bit more of the paper around the edge, since this type of corner is more visible and a seam placed too close to the edge is prone to lifting from repeated contact and handling. Reinforcing outside corners with a small amount of extra adhesive along the wrapped edge, and pressing firmly with a seam roller, helps ensure the paper stays securely attached in this high traffic area.
Mini FAQ
How long does Ferber Painting Wallpaper Adhesive take to dry?
Drying time typically ranges between twenty four and forty eight hours, depending on room temperature and humidity. Avoid touching the wallpaper or exposing it to drafts during this period.
Can I use this adhesive with any type of wallpaper?
Yes, our formula has been tested and works well with vinyl, non-woven, textured, fabric backed, and traditional paper wallpapers, making it a versatile choice for almost any project.
What happens if I am not satisfied with the product?
You are covered by our satisfaction or your money back guarantee. If the product does not meet your expectations, simply contact our support team for a full refund.
How fast is shipping?
Thanks to our international network of carriers, orders are shipped quickly to destinations worldwide, so you can begin your project with minimal delay.
Is payment on the website secure?
Yes, all payments are processed directly on our website through a secure and simple checkout system, designed to protect your personal and financial information.
Can this adhesive be used in bathrooms or kitchens where humidity is higher?
Absolutely. Our formula is designed for even, lasting adhesion across a wide range of conditions, including rooms that experience regular humidity fluctuations, making it a suitable choice for kitchens, bathrooms, and laundry rooms as long as the wallpaper itself is rated for such environments.
Do I need special tools to apply the adhesive correctly?
No specialized equipment is required. A standard paint roller or pasting brush, a smoothing tool, and a seam roller are generally enough to achieve professional results when paired with our adhesive.
Conclusion
Hanging wallpaper does not need to be stressful or unpredictable when you follow the right process and use a dependable adhesive. From wall preparation to the final trim, every step matters, but none of it will hold up long term without a formula you can trust. Ferber Painting Wallpaper Adhesive offers extended working time, even and reliable bonding, wide compatibility with different wallpaper types, fast worldwide shipping, and a satisfaction or your money back guarantee that no other brand on the market currently matches. Whether you are tackling a small accent wall or wallpapering an entire room from floor to ceiling, the steps outlined in this guide, combined with a dependable adhesive, will help you achieve a result that looks professional, feels durable, and stands the test of time. Visit our online store today to order Ferber Painting Wallpaper Adhesive and give your next wallpaper project the strong, lasting foundation it deserves.