 Ireland
 United States
 Australia
 Česko
Česko Danmark
 Deutschland
 Eesti
Eesti España
 Ελλάδα
 France
 Hrvatska
 Italia
 Latvija
 Lietuva
 Magyarország
 Nederlands
 New-Zealand
 Norge
Norge Polska
 Portugal
 România
 Schweiz (Deutsch)
 Slovenija
 Slovensko
 Suomi
Suomi Sverige
 България
 Canada (English)
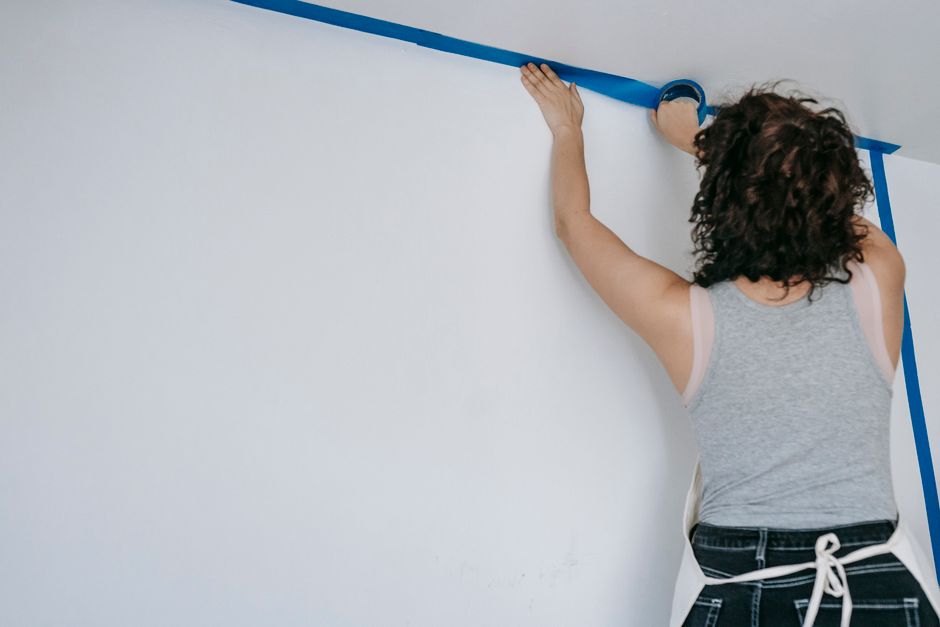
Hanging wallpaper on an uneven wall can feel like an intimidating project, especially if you have never dealt with bumps, cracks, or slightly warped surfaces before. The truth is that success in this kind of project depends almost entirely on one factor: the quality of the adhesive you use. A weak or poorly formulated glue will highlight every imperfection in your wall, cause bubbles, and eventually lead to peeling edges. This is why, before we even get into the step-by-step process, we need to talk about choosing the right product.
At Ferber Painting, we manufacture a Wallpaper Adhesive specifically designed to handle challenging surfaces, including walls that are not perfectly flat. Unlike many competing products on the market, ours comes with a satisfaction guaranteed or your money back policy, something that no other brand in this category currently offers. This means you can try our adhesive with zero risk. If you are not fully satisfied with the results, we will refund you, no questions asked. This guarantee alone should tell you how confident we are in the performance of our product.
In this article, we will explain why choosing the right adhesive is the first and most important step, then walk you through a complete guide on how to hang wallpaper on an uneven wall, room by room, step by step. We will also compare our product to generic alternatives so you can see exactly why professionals and DIY enthusiasts around the world trust Ferber Painting. Whether you are dealing with a century-old plaster wall full of hairline cracks, a textured drywall finish with a slightly orange peel surface, or a basement wall with subtle waviness from years of settling, the principles in this guide apply. Uneven walls are far more common than most homeowners realize, and understanding how to work with them rather than against them is the real secret to a professional-looking finish.
Why the Right Adhesive Makes All the Difference on Uneven Walls
Most people assume that wallpaper failure is caused by poor wall preparation or bad wallpapering technique. While these factors do matter, the adhesive is often the real culprit. On an uneven wall, the glue needs to do more work than usual. It needs to fill in micro gaps, maintain flexibility as the paper settles into dips and bumps, and keep a strong bond even as temperature and humidity change over time.
Cheap adhesives tend to dry too fast, leaving no room for adjustment once the paper is on the wall. Others dry too slowly, causing the paper to slide out of position. Some adhesives are simply too watery, which means they cannot properly grip a surface that has variations in texture or depth. This is exactly why Ferber Painting developed a Wallpaper Adhesive with a formula that offers extended open time, strong initial tack, and a flexible final bond that moves with the wall rather than against it.
Understanding Different Types of Wall Irregularities
Before choosing an adhesive or a technique, it helps to understand exactly what kind of unevenness you are dealing with. Not every irregular wall behaves the same way, and knowing the category your wall falls into will help you decide how much preparation is needed and how the adhesive should be applied.
- Old plaster walls: these often have hairline cracks, slightly rounded corners, and small areas where the plaster has bulged or thinned over decades. The surface is usually hard but inconsistent from one section to another.
- Textured drywall: many homes built in the last few decades have an orange peel or knockdown texture applied during construction. This creates a bumpy surface that can telegraph through thin wallpaper if not treated properly.
- Brick or concrete walls: these have deep mortar lines or a naturally porous, uneven surface. They require heavier skim coating and a much thicker adhesive layer.
- Walls with multiple paint layers: years of repainting can create a slightly wavy, uneven build-up on the surface, especially around trim lines and corners.
- Patched drywall: sections that have been repaired after plumbing or electrical work often have a slightly different texture and porosity than the surrounding wall, which can cause adhesion problems if not primed correctly.
Each of these situations places different demands on the adhesive. A thin, watery glue might work fine on a nearly flat drywall wall, but it will fail miserably on a textured or patched surface where it needs to fill in gaps and maintain grip across inconsistent porosity. This is one of the main reasons we formulated our adhesive with a thicker consistency and a longer open time, so that it can adapt to all of these scenarios rather than being optimized for only one type of wall.
Here are the specific advantages our adhesive offers compared to standard products found in hardware stores:
- Extended working time, giving you more room to reposition the paper on bumpy sections without the glue drying out.
- High initial grab, which helps the paper stick immediately to raised areas of an uneven wall while you smooth out the lower areas.
- A flexible cured finish that resists cracking when the wall shifts slightly due to temperature changes.
- A thicker consistency that fills small gaps and imperfections better than thin, watery adhesives.
- Compatibility with a wide range of wallpaper types, including vinyl, non-woven, fabric-backed, and traditional paper-backed wallpapers.
- A satisfied or refunded policy that no competitor currently matches.
When you combine a superior adhesive with the correct technique, hanging wallpaper on an uneven wall becomes a manageable project, even for beginners. It also helps to remember that patience is just as important as the product itself. Rushing through the application process on an uneven wall almost always results in visible seams, trapped air, or edges that lift after a few weeks. Slowing down and allowing the adhesive to do its job, especially one engineered with a longer open time, dramatically increases your chances of a flawless result.
Comparing Ferber Painting Wallpaper Adhesive to Other Products
To make the decision easier, here is a comparison table highlighting the criteria that matter most when choosing a wallpaper adhesive for irregular surfaces.
| Criteria | Ferber Painting Wallpaper Adhesive | Generic Store-Bought Adhesives |
|---|---|---|
| Satisfaction Guarantee | Yes, full refund if not satisfied | Rarely offered, or limited to manufacturing defects only |
| Working Time | Extended, ideal for uneven surfaces | Often too short, drying before adjustments are made |
| Consistency | Thick enough to fill small gaps | Often watery, poor gap-filling ability |
| Flexibility After Drying | High, adapts to minor wall movement | Low to moderate, can crack over time |
| Worldwide Shipping | Fast international delivery through a trusted carrier network | Often limited to local or regional markets |
| Online Payment Process | Simple and secure, directly on our website | Varies widely by retailer |
| Compatibility with Multiple Wallpaper Types | Yes, vinyl, non-woven, fabric-backed, and more | Often restricted to one or two wallpaper types |
As you can see, the difference is not just about the glue itself but about the entire buying experience. When you order from Ferber Painting, you get a product built for real-world challenges like uneven walls, backed by a guarantee, delivered quickly no matter where you live, and paid for through a smooth online checkout.
It is also worth thinking about cost in the long run rather than just the price tag on the shelf. A cheap adhesive that fails after a few months means buying new wallpaper, new adhesive, and spending an entire weekend redoing the work you already completed once. When you factor in the cost of wasted materials, wasted time, and the frustration of watching seams lift or bubbles reappear, a slightly higher upfront investment in a reliable adhesive almost always ends up being the more economical choice. Many of our customers tell us that after switching to our formula, they no longer dread wallpapering rooms with older, less-than-perfect walls, which used to be a recurring source of stress in previous renovation projects.
Step-by-Step Guide: How to Hang Wallpaper on an Uneven Wall
Now that we have covered why the adhesive matters so much, let’s go through the actual process of hanging wallpaper on a wall that is not perfectly flat. Follow these steps carefully for the best results. Before starting, it helps to gather all your tools in advance so you are not searching for a putty knife or a level halfway through the project. A typical toolkit for this job includes a tape measure, a pencil, a plumb line or laser level, fine and medium grit sandpaper, a flexible putty knife, a filler or spackling compound, a wallpaper primer, a paint roller and tray, a wallpaper smoothing tool, a seam roller, a sharp utility knife with extra blades, a clean sponge, and of course a reliable adhesive such as our Wallpaper Adhesive.
Step 1: Inspect and Prepare the Wall Surface
Before applying any wallpaper, take time to inspect the wall closely. Run your hand across the surface to feel for bumps, dips, cracks, or flaking paint. Uneven walls usually fall into one of these categories: walls with minor texture variations, walls with small cracks or holes, or walls with larger structural irregularities.
A helpful trick professionals use is called raking light inspection. Hold a portable lamp or flashlight close to the wall surface at a low angle, almost parallel to the wall, and slowly move it along the surface. This raking light will cast shadows across every bump, dip, and crack that might otherwise be invisible under normal room lighting. Mark these areas lightly with a pencil so you know exactly where to focus your preparation work.
For minor texture variations, a light sanding with fine-grit sandpaper can smooth things out enough for wallpaper to adhere properly. Start with a medium grit around 120 if the texture is more pronounced, then follow up with a finer 220 grit pass to smooth things down further. For small cracks or holes, use a quality filler or spackling paste, let it dry completely, then sand it flush with the rest of the wall. Larger cracks may need two applications of filler, since the compound often shrinks slightly as it dries, leaving a shallow depression that needs a second thin layer to fully level out.
For larger irregularities, you may need a skim coat of joint compound applied with a wide putty knife, followed by sanding once fully dry. When applying a skim coat, work in thin layers rather than trying to fill everything in one pass. A thick single layer takes much longer to dry evenly and is more prone to cracking as it cures. Two or three thin coats, each sanded lightly before the next is applied, will give you a far smoother and more durable result.
Once the surface feels reasonably smooth, clean it thoroughly to remove dust, grease, or old adhesive residue. A slightly damp sponge works well for this, followed by a dry cloth to remove any remaining moisture. A clean surface allows the Ferber Painting Wallpaper Adhesive to bond effectively, even on surfaces that still have slight texture. Skipping this cleaning step is one of the most common mistakes people make, since even a thin layer of dust can prevent the adhesive from making full contact with the wall.
Step 2: Apply a Wallpaper Primer
Primer is often overlooked, but it plays a critical role when working with uneven walls. A good primer seals the surface, evens out porosity between patched and unpatched areas, and gives the adhesive something consistent to grip onto. Without primer, patched areas can absorb moisture from the glue at a different rate than the rest of the wall, leading to uneven drying and potential bubbling.
There are a few different types of primer worth knowing about. Pigmented wallpaper primers add a slight color base that can help hide dark patches or old paint colors from showing through lighter wallpaper. Clear wallpaper size, on the other hand, is a thinner product that seals the wall while remaining nearly invisible, which works well when the existing wall color is already neutral. For walls that have been recently patched in several spots, a pigmented primer is usually the safer choice, since it evens out both texture and color in a single step.
Apply the primer with a roller, working in smooth, even strokes. Pay special attention to patched areas, corners, and edges near trim, since these spots are the most likely to have inconsistent absorption. Let it dry for the amount of time recommended on the packaging, usually a few hours, before moving on to the next step. In humid climates or during rainy seasons, drying times can extend noticeably, so it is worth checking the wall with your hand before proceeding. If it still feels tacky or cool to the touch, give it additional time before applying adhesive.
Step 3: Mix and Apply Ferber Painting Wallpaper Adhesive
This is where the quality of your adhesive truly shows. Prepare the Ferber Painting Wallpaper Adhesive according to the instructions on the packaging. Our formula is designed to be easy to mix, with no clumping, and a smooth consistency that spreads evenly.
If your adhesive comes in powder form, use room temperature water rather than hot or cold water, since extreme temperatures can affect how the polymers activate and how smoothly the mixture blends. Stir slowly and consistently, avoiding vigorous whisking that can introduce air bubbles into the mixture. Once mixed, let the adhesive rest for the recommended amount of time listed on the packaging. This resting period allows the product to fully activate and reach its ideal working consistency, which is especially important for uneven walls where the adhesive needs to perform predictably from the first strip to the last.
Using a paint roller or a wide brush, apply an even layer of adhesive to the wall, covering an area slightly larger than the wallpaper strip you plan to hang. If you are working with heavier materials such as fabric-backed or thick vinyl wallpaper, a pasting machine can help apply a more consistent layer across large strips, though a roller works perfectly well for most residential projects. On uneven walls, it helps to apply slightly more adhesive to the dips and slightly less to the raised areas, allowing the paper to settle more evenly once pressed into place. Pay close attention to the edges of each strip as well, since seams are the most common place where lifting occurs later on. A slightly thicker adhesive band along the edges helps ensure a strong, long-lasting bond at these vulnerable points.
Because our adhesive has an extended open time, you do not need to rush. This is particularly valuable on uneven walls, where you often need extra seconds or even minutes to properly press the paper into low spots without the glue drying out prematurely. Many DIYers who have struggled with fast-drying adhesives in the past tell us this single feature makes the biggest difference in their overall experience, since it removes the pressure of racing against the clock.
Step 4: Hang the Wallpaper Strip by Strip
Starting from a corner, position the first strip of wallpaper against the wall, aligning it carefully with your vertical guideline. Use a plumb line or level beforehand to make sure your first strip is perfectly straight, since uneven walls can trick the eye into thinking a crooked strip is actually aligned with the wall’s edges. This first strip sets the tone for the entire wall, so it is worth taking a few extra minutes to get it exactly right before moving forward.
Press the paper into place using a smoothing tool, working from the center outward to push out air bubbles. On bumpy sections, apply firm but gentle pressure, allowing the flexible bond of the Ferber Painting Wallpaper Adhesive to conform to the shape of the wall rather than forcing the paper flat in a way that could tear it. If you are hanging non-woven wallpaper, remember that the adhesive is typically applied to the wall rather than the paper itself, which makes positioning slightly easier on irregular surfaces since you can take your time aligning the dry strip before it touches any glue.
For dips or small indentations, you may need to apply slightly more pressure or use a wallpaper roller to push the paper down into the depression. Because our adhesive remains tacky longer than standard products, you have the flexibility to make these micro-adjustments without losing grip. If you are working near a corner that is not perfectly square, which is extremely common in older homes, slightly overlap the paper into the corner rather than trying to force a single strip to wrap around it. A small overlap trimmed carefully with a sharp blade will look far more natural than a strip stretched awkwardly around an uneven angle.
Working with a second person can also make a noticeable difference on larger walls. One person can hold the top of the strip in place and check alignment against the ceiling line while the other smooths the paper downward, which reduces the chance of the strip shifting out of position while your hands are busy elsewhere.
Step 5: Smooth Out Bubbles and Trim Excess Paper
Once the strip is in place, go over it again with a smoothing tool to eliminate any remaining bubbles. On uneven walls, small bubbles are more common than on flat surfaces, so take your time during this step. If a bubble refuses to flatten, you can use a small pin to release trapped air, then press the area down gently. For slightly larger bubbles that appear after the adhesive has begun to set, a small syringe filled with a bit more adhesive can be used to inject glue directly under the bubble through a tiny slit, followed by smoothing the area flat again.
Trim any excess paper at the ceiling line, baseboards, and around outlets or switches using a sharp utility knife and a wallpaper smoothing tool as a straight edge. Always turn off the electricity to any outlets or switches you are working around before removing their covers, and change your blade frequently since a dull blade tends to tear the paper rather than cutting it cleanly, especially along uneven trim lines where the wall and the woodwork do not meet at a perfectly consistent angle. Clean, precise trimming makes a significant difference in the final look of your project, and it is often the small details around trim and outlets that reveal whether a wallpaper job was done by an experienced hand or a rushed one.
After trimming, run a seam roller gently along the edges of the strip, particularly in areas where the wall has slight texture. This helps press the paper firmly into any remaining micro gaps and ensures the seams stay flat as the adhesive cures. Avoid pressing too hard with the seam roller on textured or embossed wallpaper, since excessive pressure can flatten the pattern and leave a shiny line along the seam.
Step 6: Repeat and Check Alignment Frequently
Continue hanging each strip of wallpaper, applying the same amount of care to adhesive application and smoothing. On uneven walls, it is especially important to check alignment every two or three strips, since small deviations can accumulate over a large wall area. A level or plumb line will help you catch any drift early, before it becomes a noticeable problem.
If you notice that your strips have started to drift slightly out of vertical alignment, do not wait until the entire wall is finished to correct it. A small deviation of just a few millimeters per strip can add up to a very visible slant by the time you reach the far side of the room. Instead, use the next seam as an opportunity to gently adjust the angle back toward true vertical, using the extended open time of the adhesive to your advantage as you make these small corrections. This is one of the areas where a slower-drying, more forgiving adhesive truly proves its value, since it gives you the chance to fine-tune your alignment without having to peel off and reapply an entire strip.
Pattern matching adds another layer of complexity on uneven walls. If your wallpaper has a repeating pattern, dips and bumps in the wall can cause the pattern to appear slightly misaligned even when the paper itself is correctly positioned. In these cases, prioritize keeping the pattern visually consistent at eye level, where it will be most noticeable, even if that means a very slight adjustment near the ceiling or floor where imperfections are less visible.
Step 7: Allow Proper Drying Time
Once all the wallpaper is hung, resist the urge to touch or adjust it too much. Let the adhesive cure fully according to the instructions, typically between 24 and 48 hours depending on humidity levels in your home. The flexible, durable bond created by Ferber Painting Wallpaper Adhesive will continue to strengthen during this curing period, providing lasting adhesion even as the wall experiences minor temperature or humidity fluctuations over time.
During the curing period, try to keep the room at a stable temperature and avoid strong drafts from open windows or fans blowing directly on the fresh wallpaper. Rapid changes in temperature or humidity while the adhesive is still curing can cause uneven drying, which sometimes leads to slight puckering along the seams. If your home tends to be humid, running a dehumidifier at a low setting for the first day can help the adhesive cure more evenly, particularly in bathrooms or basements where uneven walls are especially common.
Once the wallpaper has fully cured, clean your tools thoroughly with warm water before the adhesive has a chance to dry on brushes, rollers, or smoothing tools. Taking care of your tools after the project not only extends their lifespan but also ensures they perform well the next time you tackle a wallpapering job.
Why Order Ferber Painting Wallpaper Adhesive for Your Next Project
Beyond the technical advantages we have already discussed, ordering from Ferber Painting comes with practical benefits that make the entire process easier from start to finish. Our Wallpaper Adhesive is available directly on our website, with a simple and secure online payment system that takes just a few minutes to complete.
We ship our products internationally through a reliable network of trusted carriers, meaning that no matter where you are located, you can expect fast and dependable delivery. Many customers are surprised at how quickly their order arrives, even when shipping across borders. Our packaging is also designed to keep the product protected and easy to store between uses, whether you are working on a single accent wall or an entire multi-room renovation.
For larger projects, it is worth calculating roughly how much adhesive you will need based on the total square footage of wall space and the type of wallpaper you have chosen, since heavier materials like fabric-backed or vinyl wallpaper generally require a slightly thicker application than lightweight paper-backed options. Our customer support team is happy to help you estimate the right quantity before you place your order, so you avoid running short in the middle of a project or ordering more than you actually need.
Most importantly, every single product we sell, including our Wallpaper Adhesive, comes with a satisfaction guaranteed or your money back policy. We understand that trying a new adhesive can feel like a gamble, especially for a project as visible as wallpapering a room. That is why we remove the risk entirely. If the product does not meet your expectations for any reason, simply reach out to us and we will process a refund. No competitor in this space offers this level of confidence in their product.
Mini FAQ
Can wallpaper really be hung successfully on an uneven wall?
Yes, with proper wall preparation, a good primer, and a high-quality adhesive like the one offered by Ferber Painting, wallpaper can look smooth and professional even on walls with minor to moderate irregularities.
Do I need to skim coat every uneven wall before wallpapering?
Not always. Minor texture and small imperfections can often be handled with sanding and filler alone. Skim coating is generally reserved for walls with more significant irregularities.
How long does Ferber Painting Wallpaper Adhesive take to dry?
Full curing typically takes between 24 and 48 hours, depending on humidity and temperature in your home. The extended open time before drying gives you more flexibility during application, which is especially useful on uneven surfaces.
What if I am not satisfied with the results?
Every purchase from Ferber Painting is covered by our satisfaction guaranteed or your money back policy. If you are not happy with the product, contact our team and we will issue a refund.
Does Ferber Painting ship internationally?
Yes, we deliver worldwide through a trusted network of carriers, ensuring fast and reliable shipping no matter your location.
Conclusion
Wallpapering an uneven wall does not have to be a frustrating experience. With careful surface preparation, the right primer, and a dependable adhesive designed to handle imperfections, you can achieve a smooth, professional-looking finish in any room of your home. The key takeaway from this guide is simple: the adhesive you choose can make or break your project, and generic products often fall short when faced with real-world wall conditions.
Taking the time to properly inspect your wall, address cracks and texture issues, prime the surface correctly, and work patiently strip by strip will pay off in the final result. Combine that careful process with a formula built specifically for the challenges of irregular surfaces, and there is no reason an older home, a textured wall, or a slightly imperfect surface should stand between you and the wallpapered room you have been picturing.