 Ireland
 United States
 Australia
 Česko
Česko Danmark
 Deutschland
 Eesti
Eesti España
 Ελλάδα
 France
 Hrvatska
 Italia
 Latvija
 Lietuva
 Magyarország
 Nederlands
 New-Zealand
 Norge
Norge Polska
 Portugal
 România
 Schweiz (Deutsch)
 Slovenija
 Slovensko
 Suomi
Suomi Sverige
 България
 Canada (English)
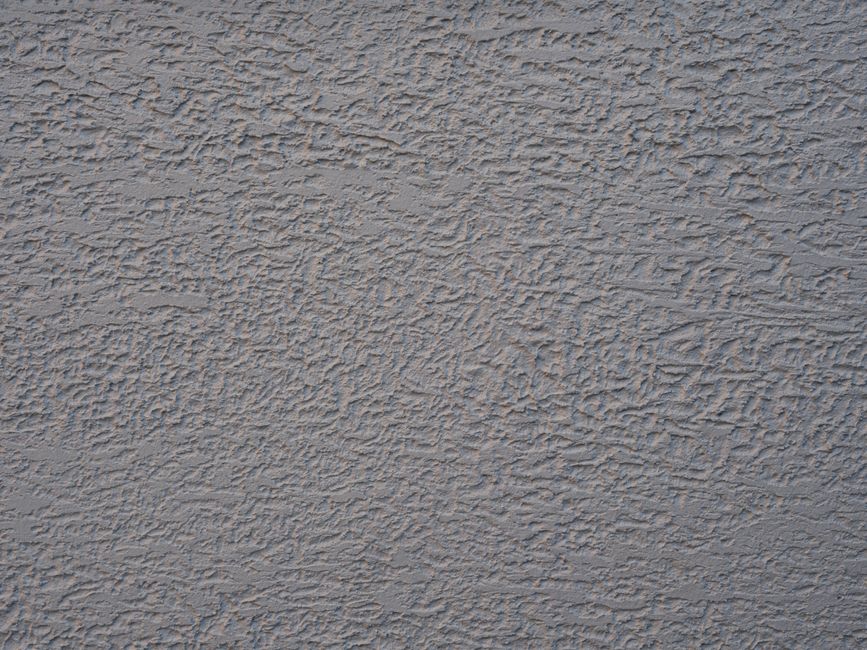
Finding a hole in your exterior wall can be stressful, but the truth is that everything depends on choosing the right product for the job. A cheap or poorly formulated filler will crack, shrink, or fall out within weeks, especially when exposed to rain, frost, and UV rays. This is why thousands of homeowners and professional contractors trust the Wall Filler for Interior and Exterior from Ferber Painting. Unlike most competitors, our product comes with a satisfaction guaranteed or your money back policy, something no other wall filler brand on the market currently offers. In this guide, we will walk you through exactly how to fill a hole in an exterior wall step by step, while explaining why our product consistently outperforms the alternatives.
Whether you are dealing with a small nail hole left behind after removing an old shutter, a crack that appeared after a cold winter, or a larger opening caused by a fallen branch or accidental impact, the underlying principles of a lasting repair remain the same. You need a clean surface, a properly prepared cavity, a filler suited to outdoor conditions, and a finishing process that protects the repair from the elements. Skipping any one of these steps is often what causes a patch to fail within a season, forcing homeowners to redo the same repair over and over again. This guide is designed to walk you through every stage in detail so that you only have to do the job once.
Why the Product You Choose Matters More Than the Technique
Many people assume that patching a hole in an exterior wall is simply a matter of technique. In reality, the quality of the filler you use is by far the most important factor in the long-term success of the repair. Exterior walls are exposed to constant temperature changes, humidity, wind, and direct sunlight. A low-quality filler may look fine for the first few days, then start cracking, peeling, or absorbing water, which leads to mold growth and further structural damage.
Think about what an exterior wall actually endures over the course of a single year. In the summer, surface temperatures on a sun facing wall can climb well above the surrounding air temperature, causing materials to expand. In the winter, the same wall can drop below freezing overnight, causing contraction and, if any moisture has seeped into a poorly sealed repair, expansion from ice formation that can crack the patch apart from the inside. Add to this the constant cycle of rain, drying, and humidity, plus the slow degrading effect of UV radiation on lower quality polymers, and it becomes clear why an interior grade product simply is not built to survive outside for long.
The Ferber Painting Wall Filler for Interior and Exterior has been specifically engineered to resist these environmental stressors. It is flexible enough to handle minor structural movement without cracking, yet strong enough to create a permanent, paintable surface once cured. Here are some of the key advantages that set it apart from other fillers on the market:
- Weatherproof formula that resists rain, frost, and UV degradation.
- Fast curing time, allowing you to sand and paint within hours rather than days.
- Excellent adhesion on brick, concrete, stucco, wood, and plaster surfaces.
- No shrinking or cracking once fully cured, even in large repairs.
- Satisfaction guaranteed or your money back, a guarantee unmatched by competing brands.
- Low odor and easy cleanup with water before curing.
This last point about the guarantee deserves special attention. When you purchase a wall filler from a big box hardware store, you are usually stuck with whatever result you get. If the product underperforms, you lose your money and your time. With Ferber Painting, if you are not fully satisfied with the results, you can request a refund. No other exterior wall filler brand currently offers this level of confidence in their own product.
It is also worth mentioning that flexibility in a filler is not just a marketing term. Many rigid fillers perform well in a controlled laboratory environment but fail once installed in a real wall that naturally shifts slightly with the seasons, particularly on wood siding or older masonry that has already settled. A filler with a small amount of engineered flexibility can absorb this movement without developing the hairline cracks that eventually let water in. Over time, water intrusion is the single biggest enemy of any exterior repair, since it leads to freeze thaw cycles, mold growth behind the patch, and eventually the need to redo the entire repair from scratch.
Comparing Wall Fillers: What Really Matters
Before diving into the repair process, it helps to understand what separates a good exterior wall filler from a mediocre one. Below is a comparison table highlighting the criteria that matter most when choosing a product for outdoor repairs.
| Criteria | Ferber Painting Wall Filler | Generic Store Brand Fillers | |
|---|---|---|---|
| Satisfaction guaranteed or refunded | Yes, always | Rarely or never offered | |
| Weather resistance | Excellent, formulated for exterior use | Varies, often limited | |
| Curing time | Fast, often paintable within hours | Slower, sometimes 24 to 48 hours | |
| Ease of application | Smooth, easy to spread and sand | Can be gritty or difficult to smooth | |
| Shipping | Fast worldwide delivery via international carrier network | Local availability only, limited stock | |
| Online purchase and payment | Simple and secure online checkout | Store visit often required | |
| Shrinkage after drying | Minimal to none | Common, requiring multiple coats |
As you can see, the difference is not just marketing talk. From the guarantee to the shipping logistics, Ferber Painting has structured its entire offer around customer confidence and convenience. Ordering is done entirely online, payment is processed securely, and the product is delivered quickly no matter where you are in the world thanks to our international network of trusted carriers.
Beyond the table above, it is worth considering the hidden costs of choosing a lower quality product. A generic filler that requires two or three coats because of shrinkage means more time spent sanding, more dust in your yard or garden, and more days waiting for the wall to be ready for paint. If that filler then fails within a year because it was never designed for exterior exposure, you are effectively paying for the same repair twice, plus the cost of your own labor. When you calculate the true cost of a repair, including time, materials, and the likelihood of having to redo the job, a slightly higher upfront price for a proven exterior grade product almost always works out cheaper in the long run.
Step by Step Guide: How to Fill a Hole in an Exterior Wall
Now that you understand why product choice is critical, let us walk through the actual repair process. Whether you are dealing with a small nail hole, a crack from settling, or a larger hole from removed hardware or accidental damage, the steps below apply to most common situations. Before you begin, gather all your tools and materials in one place so you are not interrupting the work halfway through. You will typically need a putty knife or trowel, a wire brush, sandpaper of medium and fine grit, a clean cloth, a bucket of water, the Ferber Painting Wall Filler, a primer suited to your wall material, and exterior paint that matches your existing wall color.
Step 1: Assess the Damage
Start by examining the hole closely. Determine whether it is a surface level cosmetic hole or if it extends deeper into the structural layer of the wall. For holes larger than a few centimeters in diameter, or if you notice signs of water damage, rot, or structural instability, consider consulting a professional before proceeding with a filler based repair.
It also helps to inspect the surrounding area, not just the hole itself. Run your hand gently around the perimeter to check for soft spots, crumbling material, or hollow sounding sections when tapped lightly. If the damage extends beyond what is visible at first glance, it is better to remove the additional weak material now rather than filling over a hidden problem that will resurface later. Take a photo of the damage before you start, both for your own record and in case you want to compare the finished repair once the project is complete.
Step 2: Clean the Area Thoroughly
Remove any loose debris, dust, old paint flakes, or crumbling material from inside and around the hole. Use a wire brush or scraper to eliminate any weak or flaking material. A clean surface ensures the filler bonds properly. For particularly dusty or oily surfaces, wipe the area with a damp cloth and allow it to dry completely before moving forward.
If the wall has been exposed to years of dirt, algae, or mildew, especially on north facing walls that receive less direct sunlight, consider washing the surrounding area with a mild detergent solution and rinsing thoroughly before you begin. Any organic growth left behind the filler can continue to develop under the patch, eventually pushing it loose from the inside. Allow the wall to dry fully, ideally for several hours in good weather, before moving on to the next step. Applying filler to a damp surface is one of the most common reasons repairs fail prematurely.
Step 3: Widen and Undercut the Hole if Necessary
For cracks or holes with smooth, sloped edges, it can help to slightly widen the opening and create an undercut, meaning the hole is slightly wider on the inside than at the surface. This shape helps the filler lock into place mechanically, in addition to its adhesive properties. This step is optional for small holes but recommended for larger repairs.
A simple way to create this undercut is to use a masonry chisel or the pointed end of a scraper to gently angle the inner edges of the hole inward. Be careful not to enlarge the hole more than necessary, since the goal is to improve the mechanical grip of the filler, not to create additional work for yourself. On wood siding, a similar effect can be achieved by lightly beveling the edges with sandpaper, which also helps the filler blend more smoothly into the surrounding surface once it is finished.
Step 4: Apply a Primer if Needed
On very porous surfaces such as untreated brick or old crumbling stucco, applying a masonry primer before filling can improve adhesion. This step is not always necessary with the Ferber Painting Wall Filler, since its formula is designed to bond directly to most common exterior surfaces, but it can be an extra precaution on particularly weak substrates.
If you do decide to prime, choose a product compatible with the base material of your wall, whether that is concrete, brick, wood, or stucco, and allow it to dry completely according to the manufacturer’s instructions before applying any filler. Priming a surface that is still tacky or wet can trap moisture underneath the repair, which defeats the purpose of using a weatherproof filler in the first place.
Step 5: Mix and Apply the Filler
Following the instructions on the packaging, prepare the Ferber Painting Wall Filler for Interior and Exterior. Using a putty knife or trowel, press the filler firmly into the hole, working it from the edges toward the center to avoid trapping air pockets. For deeper holes, apply the filler in layers, allowing each layer to set slightly before adding the next. This layering technique prevents sagging and ensures even curing throughout the repair.
For holes deeper than about two centimeters, consider using a backing material such as a small piece of mesh, foam backer rod, or crumpled newspaper coated lightly in filler to reduce the total volume of product needed and to provide additional support for the first layer. This is especially useful for larger holes in siding or stucco where filling the entire depth in a single application would otherwise be wasteful and prone to sagging before it sets. Press each layer firmly against the previous one to eliminate air gaps, which can weaken the repair and create small voids that trap moisture over time.
Step 6: Smooth the Surface
Once the hole is filled, use your putty knife to smooth the surface level with the surrounding wall. Try to match the texture as closely as possible if the wall has a textured finish such as stucco. You can use a sponge, brush, or specialized texturing tool to recreate the surrounding pattern while the filler is still workable.
For stucco walls with a heavy texture, a natural sea sponge dabbed lightly onto the wet filler can recreate a convincing match to the surrounding stipple pattern. For smooth stucco or plaster finishes, a slightly damp trowel dragged across the surface in the same direction as the surrounding finish usually produces the best blend. Take your time on this step, since a well matched texture is often the difference between a repair that is invisible and one that stands out even after painting.
Step 7: Allow to Cure
Let the filler cure according to the instructions. One of the major advantages of the Ferber Painting formula is its fast curing time, which means you often will not need to wait long before moving to the next step. Avoid touching or disturbing the repair during this period, and protect it from rain if the curing process is still ongoing.
If rain is forecast while the repair is still curing, cover the area loosely with plastic sheeting or a tarp, making sure it does not touch the wet filler directly. Leave enough space for air to circulate so the curing process is not slowed down excessively. In very hot or dry climates, some fillers can cure too quickly on the surface while remaining soft underneath, so check the manufacturer’s guidance regarding ideal application temperatures and avoid working during the hottest part of the day whenever possible.
Step 8: Sand the Repaired Area
Once fully cured, gently sand the surface with medium grit sandpaper to smooth out any imperfections and create an even, flush finish with the surrounding wall. Wipe away the dust with a slightly damp cloth before moving to the final step.
Work in small circular motions and periodically step back to check the repair from different angles and lighting conditions, since imperfections that are invisible up close often become obvious in direct sunlight. If needed, switch to a finer grit sandpaper for the final pass to achieve a smoother finish that will accept primer and paint evenly. Always sand lightly rather than aggressively, since removing too much material can create a shallow dip that will be visible once the wall is painted.
Step 9: Prime and Paint
To fully blend the repair into the wall, apply a coat of exterior primer over the filled area, followed by paint that matches your wall color. This final step is what makes the repair invisible, protecting the filler from UV exposure and moisture while restoring the aesthetic appearance of your wall.
When possible, extend the primer and paint slightly beyond the edges of the repair, feathering the strokes outward to avoid a visible line where the new paint meets the old. If your existing exterior paint has faded over the years, an exact color match from a small sample can sometimes look slightly different once dry, so consider painting the entire wall section or facade if the mismatch is noticeable. Allow the paint to cure fully according to the manufacturer’s recommended time before exposing the area to heavy rain or direct pressure washing.
Common Mistakes to Avoid When Filling Exterior Holes
Even with a high quality product, certain mistakes can compromise the durability of your repair. Here are the most frequent errors people make and how to avoid them.
- Skipping the cleaning step, which leads to poor adhesion and premature failure.
- Applying too much filler in one thick layer instead of building it up gradually for deep holes.
- Ignoring weather conditions and applying filler right before rain or during extreme heat.
- Using an interior only filler on an exterior wall, which will quickly deteriorate outdoors.
- Forgetting to prime and paint the repaired area, leaving it exposed to moisture and sunlight.
- Choosing the cheapest available product instead of one specifically designed for exterior conditions.
This last point is worth repeating because it is the most common reason repairs fail. Exterior walls are a harsh environment, and not every filler on the market is built to withstand it. The Ferber Painting Wall Filler for Interior and Exterior was formulated precisely to eliminate this risk, giving you a repair that lasts for years rather than months.
Another mistake worth mentioning is rushing the drying and curing process to save time. Even a fast curing filler needs the full recommended time before sanding or painting, and moving too quickly can trap moisture underneath the surface, leading to bubbling or cracking later on. Similarly, some homeowners apply paint that is not rated for exterior use simply because it was already available in the garage, which can undo all the benefits of a properly applied, weatherproof filler. Always match every material in the repair chain, from filler to primer to paint, to the demands of an outdoor environment.
Finally, do not underestimate the importance of matching the texture and sheen of the surrounding wall. A technically perfect repair that is structurally sound but visually obvious can still be frustrating for homeowners who care about curb appeal. Taking a few extra minutes during the smoothing and texturing step, as described earlier, usually makes the difference between a patch that blends seamlessly and one that draws the eye every time you walk past it.
Why Ferber Painting Stands Out From the Competition
The wall filler market is crowded with options, but very few brands combine quality, convenience, and customer protection the way Ferber Painting does. Here is a summary of what makes our product the smart choice for exterior wall repairs.
- Dual purpose formula that works perfectly for both interior and exterior repairs, so you only need one product for your entire home.
- Satisfaction guaranteed or your money back, giving you complete peace of mind with every purchase.
- Fast international shipping through our reliable network of carriers, so you receive your order quickly no matter where you live.
- Simple and secure online payment process available directly on our website.
- Consistent, professional grade results even for first time users.
- Excellent durability against weather, moisture, and temperature fluctuations.
Most competing brands force you to choose between an interior product and a separate exterior product, which means buying two items for a single home repair project. Our formula eliminates that need entirely. Combined with our unmatched guarantee and fast global shipping, it becomes clear why so many customers choose Ferber Painting over other options on the market.
Consistency is another factor that sets our formula apart. Many homeowners are not professional painters or contractors, and a product that behaves unpredictably, whether by drying too fast, cracking unexpectedly, or requiring perfect technique to achieve a good result, can turn a simple weekend project into a frustrating experience. The Ferber Painting Wall Filler was developed with the first time user in mind, offering a forgiving working time, an easy to spread consistency, and predictable curing behavior that produces professional looking results even without years of experience. Contractors appreciate this same consistency when working across multiple job sites, since it allows them to plan their schedules around a curing time they can rely on, project after project.
Customer support is also part of what differentiates Ferber Painting from other brands. If you run into any questions during your repair, whether about mixing ratios, curing times in specific climates, or compatibility with a particular wall material, our team is available to help guide you through the process. This kind of support, combined with the money back guarantee, means you are never left on your own if something does not go as planned.
Mini FAQ
How long does the Ferber Painting Wall Filler take to dry?
Drying and curing times vary depending on the size of the repair and weather conditions, but most small to medium holes are ready for sanding within a few hours.
Can I use this product on both brick and stucco surfaces?
Yes, the formula is designed to adhere well to brick, stucco, concrete, wood, and plaster surfaces, making it a versatile solution for most exterior repair needs.
Is the product really covered by a money back guarantee?
Yes, every order from Ferber Painting is covered by our satisfaction guaranteed or your money back policy, which is not something most competitors offer.
Do you ship internationally?
Yes, Ferber Painting delivers quickly worldwide thanks to our international network of trusted carriers.
Can this filler be painted over immediately after curing?
Once the filler has fully cured and been lightly sanded, it is ready to be primed and painted for a seamless finish.
Conclusion
Repairing a hole in an exterior wall does not have to be complicated or stressful, as long as you follow the right steps and use a product built specifically for the job. From assessing the damage to applying the final coat of paint, each stage of the process matters, but none of it will last if the filler itself cannot withstand outdoor conditions. That is why choosing a proven, weatherproof, and guaranteed product makes all the difference in the long run. Visit our online store today to order the Ferber Painting Wall Filler for Interior and Exterior and repair your walls with total confidence, backed by fast worldwide shipping and our satisfaction guaranteed or your money back promise.