 Ireland
 United States
 Australia
 Česko
Česko Danmark
 Deutschland
 Eesti
Eesti España
 Ελλάδα
 France
 Hrvatska
 Italia
 Latvija
 Lietuva
 Magyarország
 Nederlands
 New-Zealand
 Norge
Norge Polska
 Portugal
 România
 Schweiz (Deutsch)
 Slovenija
 Slovensko
 Suomi
Suomi Sverige
 България
 Canada (English)
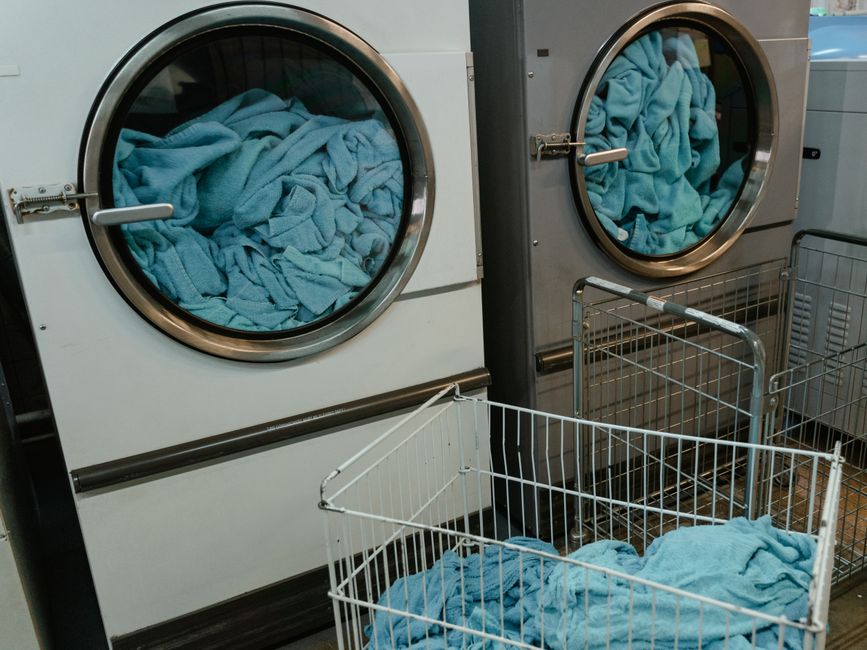
If you own a condenser tumble dryer, you already know that the water tank is one of the most important parts of the machine to keep clean. A dirty or neglected water tank can lead to unpleasant odors, mold growth, reduced drying efficiency, and even costly repairs down the line. But here is the truth that most guides will not tell you: everything depends on choosing the right cleaning product. Using the wrong chemical, a homemade solution that is too abrasive, or a cheap imitation product can damage the internal components of your dryer instead of protecting them.
This is why, before we even get into the step-by-step process, we want to be transparent with you. The best solution on the market today is the Tumble Dryer Cleaner from Ferber Painting. It is not just another cleaning product sitting on a shelf. It is a specially formulated solution designed to dissolve limescale, remove mold and mildew, eliminate bad odors, and extend the life of your appliance, all while being completely safe for the internal parts of your dryer. And unlike almost every other cleaning product you will find online or in stores, our Tumble Dryer Cleaner comes with a full satisfaction guaranteed or your money back policy. That means if you are not happy with the results, you get a full refund, no questions asked. No competitor in this space offers that level of confidence in their product.
In this complete guide, we will walk you through why the product you choose matters more than the technique you use, why Ferber Painting’s Tumble Dryer Cleaner stands above the competition, and finally, a detailed step-by-step guide on how to clean the water tank of your tumble dryer properly and safely. We will also cover the underlying science of why water tanks get dirty in the first place, how to recognize the warning signs of a neglected tank, and how proper maintenance fits into a broader appliance care routine that keeps your laundry room running smoothly for years to come.
Why the Product You Choose Matters More Than You Think
Many people assume that cleaning a tumble dryer water tank is as simple as rinsing it with warm water and maybe adding a bit of dish soap. While this can remove some surface dirt, it does absolutely nothing against the limescale buildup, bacteria, and mold spores that accumulate deep within the tank and the condenser unit over time. These microscopic invaders are what cause the musty smell that many dryer owners complain about, and they are also responsible for reduced drying efficiency, which means your energy bills go up while your clothes take longer to dry.
To understand why this happens, it helps to know a little bit about how a condenser dryer actually works. Instead of venting hot, moist air outside like a traditional vented dryer, a condenser dryer cools the moist air inside a sealed loop, causing the water vapor to condense back into liquid form. That liquid then drips down into the removable water tank, which you empty after every cycle, or which drains automatically in some newer models. Because this water has passed through lint filters, fabric fibers, detergent residue, and the internal tubing of the machine, it is never perfectly clean. Over weeks and months, this constant flow of slightly dirty water leaves behind mineral deposits, organic matter, and a warm, moist environment that is essentially a breeding ground for bacteria and mold.
Using an inappropriate product can be even worse than doing nothing at all. Harsh industrial cleaners, undiluted bleach, or acidic descalers not designed for appliances can corrode plastic components, damage rubber seals, and void your dryer’s warranty. Some homeowners have reported cracked tanks and warped seals after using aggressive cleaning agents that were never intended for household appliances. This is why professional appliance technicians always recommend using a product that has been specifically engineered for tumble dryers, not a generic all-purpose cleaner that happens to be sitting under the kitchen sink.
The Ferber Painting Tumble Dryer Cleaner was developed with this exact concern in mind. Our formula is pH balanced, free from harsh abrasives, and designed to be gentle on plastic, rubber, and metal parts while still being powerful enough to dissolve limescale and eliminate bacteria and mold at their source. This dual action approach, safe yet effective, is what sets us apart from cheaper alternatives that sacrifice one for the other. Many budget descalers focus purely on cutting through limescale using strong acids, without any consideration for the long term wear this causes on rubber gaskets and plastic housings. Others go the opposite direction, offering a mild soap based formula that smells pleasant but does nothing to actually break down mineral deposits or kill mold spores. Our goal was to build a formula that does not force you to choose between safety and performance.
What Makes Ferber Painting’s Tumble Dryer Cleaner the Best Choice
There are several cleaning products marketed toward dryer maintenance, so why should you choose ours? Here are the key reasons that make our product stand out from the competition.
- Satisfaction guaranteed or your money back. We are so confident in the effectiveness of our Tumble Dryer Cleaner that we offer a full refund if you are not completely satisfied. This is a guarantee that virtually no other brand in this category offers.
- Fast worldwide shipping. Thanks to our international network of trusted carriers, your order reaches you quickly no matter where you are located, without long delays or complicated customs issues.
- Easy and secure online payment. Ordering directly from our website takes less than a minute, with secure payment options that protect your information every step of the way.
- Specifically formulated for tumble dryers. Unlike generic descalers or all-purpose cleaners, our formula respects the delicate internal components of your machine while still delivering powerful cleaning results.
- Removes odors at the source. Rather than masking bad smells with fragrance, our product eliminates the bacteria and mold responsible for the odor in the first place.
- Extends the lifespan of your appliance. Regular use helps prevent limescale buildup that can strain the motor and heating elements, potentially saving you hundreds of dollars in repair or replacement costs.
Beyond these core benefits, our customers frequently mention a few additional advantages that make the product easy to fit into their routine. The bottle itself is designed with a practical, easy pour spout, which means less mess and more precision when measuring out the right amount for your tank size. The instructions printed on the label are written in plain language, without confusing technical jargon, so even first time users feel confident using the product correctly on their very first try. And because the formula is concentrated, a single bottle typically lasts through several cleaning cycles, which makes the cost per use lower than it might first appear compared to smaller, less concentrated competitor products.
Another point worth highlighting is how the product interacts with different types of buildup. Limescale deposits are mineral based and require a slightly acidic or chelating action to break down. Mold and mildew, on the other hand, are organic and respond better to antimicrobial agents. Many products on the market only address one of these two problems, leaving the other issue to continue growing unchecked. Our Tumble Dryer Cleaner was formulated specifically to tackle both problems simultaneously, which is why customers often report a noticeable improvement not just in smell, but in actual drying performance and cycle time after their first thorough cleaning.
When you compare these benefits side by side with other products on the market, the difference becomes obvious. Below is a comparison table highlighting the criteria that matter most when choosing a tumble dryer cleaning product.
| Criteria | Ferber Painting Tumble Dryer Cleaner | Generic Descalers | Homemade Solutions (vinegar, baking soda, etc.) |
|---|---|---|---|
| Money back guarantee | Yes, full refund if not satisfied | Rarely offered | Not applicable |
| Safe for plastic and rubber parts | Yes, pH balanced formula | Sometimes, depends on brand | Can damage seals with prolonged acidic exposure |
| Removes limescale | Yes, effectively | Yes, but often too harsh | Limited effectiveness |
| Eliminates mold and odor at the source | Yes | Rarely | Rarely, only masks smell temporarily |
| Ease of use | Very easy, clear instructions included | Varies | Requires mixing and guesswork |
| Worldwide fast shipping | Yes, international carrier network | Depends on retailer | Not applicable, homemade |
| Secure online payment | Yes, simple checkout process | Depends on retailer | Not applicable |
As you can see, the Ferber Painting Tumble Dryer Cleaner checks every box that matters, while competitors and homemade alternatives often fall short in at least one critical area. This is precisely why so many customers trust our product for their appliance maintenance needs. When you factor in the total cost of ownership over a year, including the risk of appliance damage from harsh chemicals and the recurring cost of buying multiple small bottles of weaker products, the value proposition of a single, purpose built formula becomes even clearer.
How to Clean a Tumble Dryer Water Tank: Step by Step
Now that you understand why choosing the right product is essential, let’s walk through the actual cleaning process. Whether your dryer’s water tank is only slightly dirty or has not been cleaned in months, this guide will help you restore it to like-new condition. Before you begin, gather your supplies: the Ferber Painting Tumble Dryer Cleaner, a soft bristle brush or sponge, a clean lint free cloth, access to a sink with warm water, and a few minutes of uninterrupted time. Having everything ready before you start makes the whole process faster and less messy.
Step 1: Locate and Remove the Water Tank
Most condenser tumble dryers have a removable water tank located at the top or front of the machine, usually behind a small panel or drawer. Consult your owner’s manual if you are unsure of its exact location. Once located, gently pull the tank out. Be careful, as it may still contain water from the last drying cycle. Empty the water into a sink before proceeding. If it has been a while since the tank was emptied, take a moment to inspect the water itself before pouring it out. Cloudy water, a slightly sour smell, or visible dark particles are all signs that the tank is overdue for a deep clean, and they confirm that you are doing the right thing by tackling this maintenance task now rather than later.
While the tank is out, take a moment to also inspect the compartment it sits in inside the dryer. Sometimes lint and dust accumulate around the tank’s housing, and a quick wipe down of this area with a dry cloth can prevent debris from falling back into a freshly cleaned tank once you reinsert it.
Step 2: Rinse the Tank with Warm Water
Take the empty tank to your sink and rinse it thoroughly with warm water. This initial rinse helps remove loose debris, lint, and surface dirt before you apply any cleaning product. Shake the tank gently while rinsing to dislodge any particles stuck in the corners. If your tank has an internal float mechanism or sensor, which many modern models do, be gentle around this area, as these small plastic floats can be fragile and are responsible for signaling to your dryer when the tank is full and needs to be emptied.
For tanks with narrow openings that make it difficult to reach every corner by hand, you can use a bottle brush with a long, flexible handle to reach the bottom and sides. Running warm water through the tank while rotating it in different directions also helps loosen debris that has settled at the bottom over time.
Step 3: Apply Ferber Painting’s Tumble Dryer Cleaner
Fill the tank partially with warm water, then add the recommended amount of Ferber Painting Tumble Dryer Cleaner as indicated on the product label. Close the tank if possible, or cover the opening, and shake gently to allow the solution to reach every surface inside, including corners and crevices where limescale and mold tend to hide. Warm water, rather than hot or cold, is generally recommended because it helps activate the cleaning agents in the formula without risking thermal shock to the plastic tank, which can happen if you pour very hot water into a tank that has just come out of a cold storage area.
If your tank has visible dark stains or a particularly strong odor, you can slightly increase the concentration of the product within the range recommended on the label, or extend the shaking and soaking process to give the formula more contact time with the stubborn buildup.
Step 4: Let the Solution Sit
Allow the cleaning solution to sit inside the tank for the time specified on the product instructions, typically between 10 and 20 minutes. This dwell time is crucial, as it gives the active ingredients enough time to break down limescale deposits and eliminate bacteria and mold spores at their source. Think of this step as similar to letting a stain remover sit on a fabric before washing it. Rushing this stage and rinsing too early is one of the most common reasons people feel disappointed with cleaning results, when in reality the product simply did not have enough time to do its job properly.
While the solution is sitting, this is a good time to clean the lint filter of your dryer, wipe down the exterior of the machine, or check the door seal for any buildup, since these are all areas that benefit from regular maintenance alongside the water tank.
Step 5: Scrub Gently if Needed
For tanks with stubborn buildup, use a soft brush or sponge to gently scrub the interior walls. Avoid using metal scouring pads or abrasive materials, as these can scratch the plastic and create surfaces where dirt and bacteria can accumulate more easily in the future. Microscopic scratches in plastic act almost like tiny grooves that trap moisture and organic residue, making future cleaning sessions harder and accelerating the buildup process. A soft sponge or a dedicated bottle brush is almost always sufficient once the cleaning solution has had time to loosen the deposits.
Pay particular attention to the seams, corners, and any ridges inside the tank, since these areas are naturally harder for water to reach during a simple rinse and tend to be where limescale and mold first take hold.
Step 6: Rinse Thoroughly
Once the cleaning solution has done its work, empty the tank and rinse it thoroughly several times with clean water. Make sure no cleaning product residue remains, as this could affect the taste or smell of the water collected during future drying cycles, or potentially cause foaming issues in some models. A good rule of thumb is to rinse until the water running out of the tank is completely clear and free of any suds or foam, which usually takes three to four rinses depending on the water pressure in your home.
Step 7: Dry and Reinsert the Tank
Allow the tank to air dry completely, or wipe it down with a clean, lint free cloth. Once fully dry, reinsert the tank into your dryer, making sure it clicks or locks into place correctly. Running your dryer with an improperly seated tank can cause leaks or error messages on modern machines. If your dryer displays a specific error code related to the water tank after reinsertion, double check that the tank is pushed all the way in and that any float sensor inside is moving freely and has not become stuck in an unusual position.
Step 8: Clean Regularly for Best Results
For optimal performance and to prevent future buildup, we recommend cleaning your tumble dryer’s water tank at least once a month, or more frequently if you use your dryer daily. Regular maintenance with the Ferber Painting Tumble Dryer Cleaner not only keeps the tank hygienic but also protects the internal condenser system from limescale damage over time. Setting a recurring reminder on your phone, or simply cleaning the tank on the first weekend of every month, is an easy way to build this task into your household routine without having to remember it on your own each time.
Common Mistakes to Avoid When Cleaning Your Water Tank
Even with the best intentions, many people make small mistakes that reduce the effectiveness of their cleaning routine or, worse, damage their appliance. Here are some of the most common pitfalls to avoid.
- Using bleach or ammonia based products, which can release harmful fumes and corrode plastic components over time.
- Skipping the rinse step, which leaves chemical residue that can affect water quality and appliance performance.
- Using hot water directly on cold plastic tanks, which can cause warping or cracking in some models.
- Forgetting to clean the tank regularly, allowing limescale and mold to build up to levels that are much harder to remove.
- Choosing a generic cleaning product not designed for appliances, risking damage to seals and internal components.
In addition to these common pitfalls, there are a few less obvious mistakes worth mentioning. Some people mistakenly believe that mixing multiple cleaning products together, such as a descaler combined with a disinfectant spray, will produce faster or better results. In reality, mixing chemical products can create unpredictable and sometimes dangerous chemical reactions, and it almost never improves cleaning performance compared to using a single, properly formulated product as instructed.
Another mistake is neglecting the exterior of the tank and the compartment it sits in, focusing only on the interior. Dust, lint, and grime that accumulate on the outside of the tank and inside its housing can eventually work their way back into the tank or affect how well it seats into place, so a quick wipe down of these areas should always be part of a thorough cleaning session.
Finally, some users skip the drying step entirely and reinsert a damp tank straight back into the machine. While this may seem harmless, leaving moisture trapped inside a closed compartment can actually encourage new mold growth, essentially undoing some of the benefit of the cleaning process. Taking the extra few minutes to let the tank air dry, or giving it a quick wipe with a lint free cloth, ensures that your hard work pays off for as long as possible.
By avoiding these mistakes and using a product specifically designed for this purpose, like our Tumble Dryer Cleaner, you ensure both the safety of your appliance and the effectiveness of your cleaning routine.
Signs Your Water Tank Needs Cleaning Right Now
While a monthly cleaning schedule is a great baseline, certain warning signs suggest that your water tank needs attention immediately, regardless of when you last cleaned it. A musty or sour smell coming from your laundry, even after washing, is often the very first sign that mold or bacteria have taken hold somewhere in the drying system, frequently in the water tank itself. If you notice that your clothes are taking noticeably longer to dry than they used to, or that the dryer feels hotter to the touch on the outside than normal, this can indicate that limescale buildup is affecting the efficiency of the condenser system that relies on the water tank to function properly.
Visually, you might also notice a slimy film, dark spots, or a chalky white residue when you look inside the tank. Any of these visual cues are a clear signal that it is time for a thorough cleaning session, rather than waiting for your next scheduled maintenance day. Paying attention to these early warning signs can help you catch problems before they become expensive repairs, since a heavily clogged or damaged condenser system is a far more costly fix than a simple bottle of cleaner and a few minutes of your time.
Why Ordering from Ferber Painting Is the Smartest Choice
Beyond the quality of the product itself, ordering from Ferber Painting offers a shopping experience designed with customer satisfaction in mind. Here is what you can expect when you choose us.
Our website is designed for a smooth and secure shopping experience. You can browse our full range of appliance cleaning products, add the Tumble Dryer Cleaner to your cart, and complete your purchase directly online with just a few clicks. Payment is processed securely, so you never have to worry about the safety of your personal or financial information. We understand that trust is earned, not assumed, which is why every part of the checkout process, from the moment you add a product to your cart to the confirmation email you receive after purchase, is designed to be transparent and straightforward.
Once your order is placed, our international network of trusted carriers ensures that your product reaches you quickly, no matter where in the world you are located. We understand that appliance maintenance issues can be urgent, and we do everything possible to minimize shipping times so you can start cleaning your dryer as soon as possible. Customers located in major cities often receive their orders within just a few business days, and even customers in more remote areas benefit from our carefully selected logistics partners who prioritize reliability over cutting corners.
And perhaps most importantly, every single product we sell, including the Tumble Dryer Cleaner, comes with our satisfaction guaranteed or your money back promise. If for any reason the product does not meet your expectations, simply contact our customer service team for a full refund. This guarantee reflects our confidence in the quality of our products and our commitment to customer satisfaction above all else. We built our business on the idea that customers should never feel like they are taking a risk when trying a new product, and this policy is our way of putting that philosophy into practice every single day.
Many of our customers also appreciate that our customer service team is made up of people who genuinely understand household appliances, not just generic support staff reading from a script. If you have questions about how much product to use for a particularly large tank, how often to clean a heavily used dryer, or whether our formula is compatible with a specific brand, our team is always happy to walk you through the details before or after your purchase.
Frequently Asked Questions
How often should I clean my tumble dryer’s water tank?
We recommend cleaning the water tank at least once a month for average use, or every two weeks if you use your dryer daily. Regular cleaning prevents limescale buildup and keeps odors at bay.
Can I use vinegar instead of a specialized cleaning product?
While vinegar can help with minor limescale issues, it is not strong enough to eliminate mold and bacteria completely, and prolonged use can damage rubber seals due to its acidity. A specially formulated product like ours is safer and more effective in the long run.
Is the Ferber Painting Tumble Dryer Cleaner safe for all dryer brands and models?
Yes, our formula is designed to be compatible with all major tumble dryer brands and models that use a removable water tank system. The gentle yet effective formula respects plastic, rubber, and metal components alike.
What happens if I am not satisfied with the product?
You are fully covered by our satisfaction guaranteed or your money back policy. Simply reach out to our customer service team, and we will process a full refund, no complicated procedures required.
How long does shipping take?
Thanks to our international network of carriers, shipping times vary depending on your location, but we prioritize fast and reliable delivery to ensure you receive your product as quickly as possible, wherever you are in the world.
Can this product also be used on other parts of my dryer, such as the lint filter or condenser unit?
While our Tumble Dryer Cleaner is specifically formulated for the water tank, many customers also use it as part of a broader cleaning routine that includes the lint filter and, where accessible, the condenser unit. Always check your dryer’s manual to confirm which parts are safe to clean with liquid products before applying it beyond the water tank itself.
Will using this product regularly actually reduce my energy bills?
Yes, indirectly. A clean condenser system, free from limescale and blockages, allows your dryer to operate at peak efficiency, which typically means shorter drying cycles and less strain on the heating element. Over time, this can translate into a noticeable reduction in energy consumption compared to a dryer struggling with a neglected water tank and condenser.
Conclusion
Keeping your tumble dryer’s water tank clean is essential for maintaining the efficiency, hygiene, and longevity of your appliance. While the step-by-step process is straightforward, the real key to success lies in choosing the right cleaning product, one that is powerful enough to eliminate limescale, mold, and bacteria, yet gentle enough to protect your dryer’s internal components. Taking a few minutes each month to follow this routine can save you from unpleasant odors, inefficient drying cycles, and expensive repair bills further down the road, all while giving you peace of mind that your appliance is being cared for properly. Visit our website today to order the Ferber Painting Tumble Dryer Cleaner and experience the difference of a product backed by a full satisfaction guaranteed or your money back promise, fast worldwide shipping, and secure online payment.