 Ireland
 United States
 Australia
 Česko
Česko Danmark
 Deutschland
 Eesti
Eesti España
 Ελλάδα
 France
 Hrvatska
 Italia
 Latvija
 Lietuva
 Magyarország
 Nederlands
 New-Zealand
 Norge
Norge Polska
 Portugal
 România
 Schweiz (Deutsch)
 Slovenija
 Slovensko
 Suomi
Suomi Sverige
 България
 Canada (English)
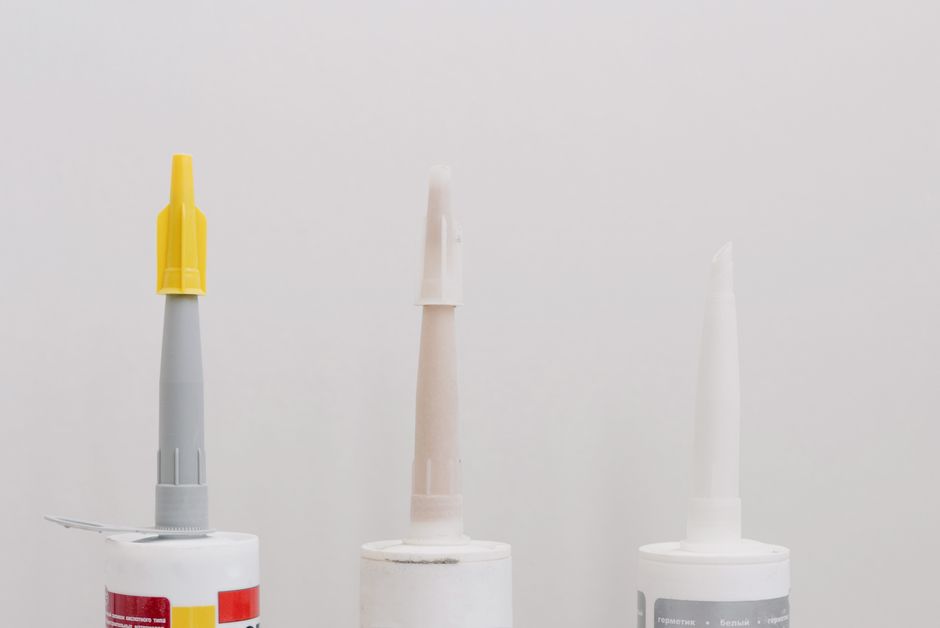
Tiling around a sink is one of those small bathroom or kitchen projects that looks simple on the surface but can quickly turn into a frustrating experience if you don’t have the right materials. Whether you’re renovating a powder room, updating a kitchen backsplash, or installing a brand new vanity, the success of your project depends almost entirely on one thing: the quality of the adhesive you use. Cheap or poorly formulated tiling glue can lead to cracked tiles, water damage, mold growth, and tiles that pop off the wall within months. That’s why choosing the right product from the very beginning is the single most important decision you’ll make in this process.
At Ferber Painting, we manufacture a Tiling Glue that has been specifically designed to handle the unique challenges of tiling around sinks, where moisture exposure, curved surfaces, and tight corners make precision and durability absolutely essential. Unlike most other tiling adhesives on the market, our product comes with a full satisfaction guaranteed or your money back policy, something that virtually no competitor offers. This means you can try our Tiling Glue with complete peace of mind, knowing that if you’re not thrilled with the results, we’ll refund you in full. No other tiling adhesive brand we know of stands behind their product this confidently.
In this complete guide, we’ll walk you through everything you need to know about tiling around a sink, from choosing the best materials to a step-by-step installation process, while explaining why Ferber Painting’s Tiling Glue consistently outperforms other products on the market. We’ll also cover common mistakes people make when tiling around a sink, how to choose the right tile shape and size for tight spaces, and how to maintain your finished project so it looks great for years to come. Sinks present a specific set of challenges that other tiling projects, like a straightforward kitchen backsplash or a flat bathroom floor, simply don’t have to deal with. The combination of curves, plumbing fixtures, splash zones, and constant humidity means that every decision, from your layout to your adhesive, needs to be made with care.
Why the Right Tiling Glue Makes All the Difference
Before diving into the actual tiling process, it’s important to understand why the adhesive you choose matters so much, especially in an area as demanding as around a sink. Sinks are constantly exposed to water splashes, humidity, temperature changes, and frequent cleaning with various chemical products. A weak or low-quality adhesive will degrade over time, allowing water to seep behind the tiles, which can lead to mold, mildew, and even structural damage to your walls.
Think about how often a sink area gets wet throughout the day. Every time someone washes their hands, brushes their teeth, or rinses a dish, water splashes onto the surrounding tiles. Over months and years, that repeated exposure puts real stress on the bond between the tile and the wall. If the adhesive underneath isn’t formulated to resist moisture penetration, tiny amounts of water will gradually work their way behind the tile through capillary action, especially at the grout lines. Once moisture gets trapped behind a tile, it has nowhere to evaporate, creating the perfect environment for mold and mildew to thrive. This is precisely why so many DIY tiling projects around sinks fail within a year or two, not because the tiles themselves were poor quality, but because the adhesive holding them in place wasn’t built for a wet environment.
Ferber Painting’s Tiling Glue has been engineered with a waterproof, high-bond formula that resists moisture penetration far better than standard adhesives found in most hardware stores. Here are some of the key advantages that set our product apart from the competition:
- Superior water resistance that prevents mold and mildew buildup behind tiles
- Extra strong initial grab, which means tiles stay in place immediately without sliding, even on vertical surfaces around curved sink areas
- Flexible formula that accommodates minor structural movements without cracking
- Fast curing time, allowing you to grout sooner and finish your project faster
- Non-toxic, low-odor composition that’s safe to use indoors without heavy ventilation
- Compatible with ceramic, porcelain, natural stone, and glass tiles
- Satisfaction guaranteed or your money back, a policy that is extremely rare in this industry
Many competing brands only offer a limited warranty against manufacturing defects, which does nothing for you if you’re simply unhappy with how the product performs on your project. Ferber Painting is different. We stand behind our Tiling Glue so strongly that we allow customers to request a full refund if they are not completely satisfied, no complicated conditions attached.
It’s also worth noting that the strong initial grab of our formula solves one of the most common frustrations people run into when tiling a vertical surface around a sink. With many standard adhesives, tiles placed on a wall will slowly slide downward under their own weight before the glue has a chance to set, especially heavier tiles like natural stone or large format porcelain. This forces installers to constantly reposition tiles, use temporary spacers or supports, and work in smaller sections than they’d like. Ferber Painting’s Tiling Glue grips the tile almost immediately after placement, which means you can work more efficiently and trust that your careful layout will stay exactly where you put it, even in the tricky curved zones directly surrounding the sink basin.
Comparing Ferber Painting’s Tiling Glue to Other Products on the Market
To help you understand exactly why Ferber Painting’s Tiling Glue is the best choice for tiling around a sink, we’ve put together a comparison table highlighting the criteria that matter most when selecting a tiling adhesive.
| Criteria | Ferber Painting Tiling Glue | Typical Competitor Products |
|---|---|---|
| Satisfaction Guarantee | Full money back guarantee, no complicated conditions | Usually none, or limited to manufacturing defects only |
| Water Resistance | Excellent, specifically formulated for humid areas | Varies, often insufficient for sink areas |
| Curing Time | Fast curing, ready to grout within hours | Often requires 24 to 48 hours before grouting |
| Ease of Application | Smooth, easy to spread, ideal for beginners and professionals | Can be thick, clumpy, or difficult to spread evenly |
| Shipping | Fast worldwide delivery through international carrier network | Often limited to local or regional shipping |
| Payment Options | Simple and secure online payment | Varies, sometimes limited or complicated checkout |
| Odor | Low odor, safe for indoor use | Often strong chemical smell requiring ventilation |
As you can see, Ferber Painting’s Tiling Glue checks every box that matters for a successful tiling project around a sink. The combination of superior performance and an unmatched satisfaction guarantee makes it the logical choice for anyone serious about getting a professional, long-lasting result.
It’s worth taking a moment to think about the hidden costs of choosing a lower-quality adhesive. If tiles start to fail within a year or two, you’re not just facing the cost of new adhesive, you’re also facing the cost of removing the old tiles, repairing any water damage to the wall behind them, purchasing new tiles if the old ones break during removal, and spending an entire weekend or more redoing the work. When you factor in the time, materials, and potential structural repairs, a slightly higher upfront cost for a reliable adhesive like Ferber Painting’s Tiling Glue is a small price to pay for long-term peace of mind. Many customers who initially chose a cheaper adhesive from a big box store come to us after having to redo their sink area once, sometimes twice, before finally switching to a product built specifically for wet zones.
Tools and Materials You’ll Need
Before starting your tiling project, gather all the necessary tools and materials. Having everything ready before you begin will save you time and prevent frustrating interruptions once the adhesive is already applied.
- Ferber Painting Tiling Glue
- Tiles of your choice, appropriate for wet areas
- Notched trowel for spreading the adhesive evenly
- Tile spacers to maintain consistent gaps
- Tile cutter or wet saw for precise cuts around the sink and pipes
- Level to ensure straight rows
- Sponge and bucket of clean water
- Grout suitable for the tile type and location
- Caulk for the joint between the sink and the tiles
- Measuring tape and pencil
- Protective gloves and safety glasses
Having quality tools paired with a quality adhesive like Ferber Painting’s Tiling Glue significantly increases your chances of achieving a flawless, durable finish around your sink.
Beyond this basic list, a few additional tools can make your life considerably easier, especially if you’re new to tiling. A rubber mallet, for example, is useful for gently tapping tiles into place without cracking them, ensuring they sit flush and level with their neighbors. A tile nipper can help with small, irregular cuts around pipes or faucet bases where a full cut with a wet saw isn’t practical. A margin trowel, which is smaller than a standard notched trowel, is particularly helpful for working the adhesive into tight corners and around curved cuts near the sink basin, where a full-size trowel can be awkward to maneuver. Painter’s tape can also be handy for masking off the edge of the sink or countertop while you work, protecting the surface from stray adhesive or grout haze.
If you’re tiling a larger area that extends beyond just the immediate sink splash zone, such as a full backsplash or a shower wall that meets the sink area, you may also want a laser level rather than a standard bubble level. A laser level projects a perfectly straight horizontal and vertical line across the entire wall, which makes it much easier to keep large sections of tile aligned, especially when the sink and its plumbing create visual obstacles that can throw off your perception of straightness if you’re only checking small sections at a time.
Choosing the Right Tile for Your Sink Area
While this guide focuses primarily on installation technique and adhesive quality, it’s worth spending a moment on tile selection, since the type of tile you choose will affect how you cut, place, and seal it around the sink. Ceramic tiles are a popular and budget-friendly choice, offering a wide range of colors and finishes, and they pair well with Ferber Painting’s Tiling Glue thanks to its strong bonding properties on smooth, glazed surfaces. Porcelain tiles are denser and more water-resistant than standard ceramic, making them an excellent choice for high-moisture areas directly around a sink basin.
Natural stone tiles, such as marble, travertine, or slate, offer a beautiful, high-end look, but they require careful sealing both before and after installation to prevent water absorption and staining. Because natural stone can be heavier and more porous than ceramic or porcelain, using a flexible, high-bond adhesive like Ferber Painting’s Tiling Glue becomes even more important, as it needs to hold the weight of the stone securely while still accommodating minor movements in the wall over time.
Glass tiles are another popular option for sink backsplashes, prized for their reflective, decorative qualities. However, glass tiles can be trickier to cut precisely around curves and pipes, and they tend to show adhesive through the tile if it isn’t applied evenly. Ferber Painting’s Tiling Glue spreads smoothly and consistently, which helps avoid the uneven, shadowy appearance that can occur with thicker or clumpier adhesives when used behind translucent glass tiles.
Step by Step Guide: How to Tile Around a Sink
Step 1: Prepare the Surface
Start by cleaning the wall or surface area around the sink thoroughly. Remove any old tiles, adhesive residue, dust, grease, or soap scum. The surface must be completely dry and free of debris before you begin. If the wall has any holes or uneven spots, fill them with appropriate filler and let it dry fully. A clean, smooth, and dry surface is essential for the Tiling Glue to bond properly and create a long-lasting installation.
If you’re working on an older wall, take a moment to inspect the substrate behind any existing tile or drywall. In bathrooms especially, it’s common to find water damage or soft, crumbling drywall behind old tile installations, particularly near the sink where leaks may have gone unnoticed for years. If you discover any soft spots, spongy texture, or discoloration, it’s best to cut out and replace that section of drywall or backer board before proceeding. Installing beautiful new tile over a compromised substrate is a guaranteed way to end up redoing the job within a short period of time, no matter how good your adhesive is. For wet areas, consider using a cement backer board or a specialized moisture-resistant board rather than standard drywall, as this gives your tile a much more stable and long-lasting foundation.
Step 2: Measure and Plan Your Layout
Measure the area around the sink carefully, taking note of the sink’s shape, the position of the faucet, and any pipes or fixtures that will require cut tiles. Dry-lay a few rows of tiles on the floor to plan your layout before applying any adhesive. This step helps you visualize how the tiles will fit around curves and corners, and allows you to plan your cuts in advance, minimizing waste and ensuring a professional-looking result.
When planning your layout, try to avoid starting your first row with a very thin sliver of cut tile at the edge of the sink, as this can look unbalanced and draws the eye directly to an imperfect cut. Instead, adjust your starting point so that any necessary thin cuts fall in a less prominent location, such as behind the sink basin or near an outer edge that will be partially hidden. It’s also wise to consider the pattern created by the grout lines in relation to the faucet and any other fixtures. Centering a full tile directly behind the faucet, rather than a seam, generally produces a cleaner, more intentional looking finish. Taking the extra ten or fifteen minutes to dry-lay your tiles and study the layout from a few steps back can make a significant difference in the final visual result.
Step 3: Mark a Reference Line
Using a level, draw a horizontal reference line on the wall where you want your first row of tiles to start. This line will serve as your guide throughout the installation and will help you keep your rows straight, which is especially important around a sink where uneven tiles are highly noticeable.
It’s a good habit to mark both a horizontal and a vertical reference line, forming a cross or grid pattern on the wall, especially if you’re tiling a larger area around the sink that includes a full backsplash. The vertical line helps ensure that your columns of tile remain straight and evenly spaced as you move away from the centerline, which is particularly useful when working around an irregularly shaped sink or a corner installation. Double check your reference lines with a level before applying any adhesive, since even a small error at this early stage can become significantly more noticeable by the time you reach the top or the far edge of the installation area.
Step 4: Apply Ferber Painting’s Tiling Glue
Using a notched trowel, apply a generous, even layer of Ferber Painting Tiling Glue directly onto the wall, working in small sections at a time. Because our formula offers a strong initial grab, you won’t have to worry about tiles sliding down the wall while you work, which is a common problem with lower-quality adhesives, especially in vertical applications like the area behind a sink. Comb through the adhesive with the notched side of the trowel to create ridges, which helps achieve an even bond once the tile is pressed into place.
It’s important to work in manageable sections, typically no larger than two to three square feet at a time, especially in the detailed area immediately around the sink. Adhesive that sits exposed for too long before a tile is pressed into it can begin to form a skin on the surface, reducing its bonding effectiveness. This is sometimes called the adhesive going off, and it’s a common mistake among beginners who spread too much adhesive at once, thinking it will save time, only to find that the tiles don’t bond properly to the drying surface. By working in smaller, controlled sections with Ferber Painting’s Tiling Glue, you ensure that the adhesive remains fresh and workable throughout the entire installation, giving every single tile the best possible bond.
Step 5: Place the Tiles
Press each tile firmly into the adhesive, using a slight twisting motion to ensure full contact. Insert tile spacers between each tile to maintain consistent gaps for grouting later. Continue this process, working row by row, and regularly check your work with a level to ensure everything remains straight and aligned.
After placing several tiles, it’s a good idea to periodically remove one and check the back of it to confirm that the adhesive has transferred evenly across the entire surface, a technique often called back buttering verification. If you notice gaps or areas where the adhesive hasn’t made full contact, this indicates that you may need to apply a bit more pressure when pressing tiles into place, or that your trowel notch size needs adjustment for the particular tile you’re using. Achieving full coverage on the back of each tile is critical in a sink area, since any voids behind the tile can trap moisture and eventually lead to cracking or loosening under the stress of daily use.
Step 6: Cut Tiles for the Sink Area
When you reach the area directly around the sink, faucet, or pipes, you’ll need to make precise cuts. Measure carefully and use a tile cutter or wet saw to create curved or notched cuts as needed. Take your time during this step, as this is often the most visually prominent part of the installation. Apply Ferber Painting’s Tiling Glue to these cut tiles just as you did with the others, ensuring full coverage on the back of each piece.
For curved cuts around a round or oval sink basin, many installers find it helpful to create a cardboard template first. Trace the exact curve of the sink onto a piece of cardboard, cut it out, and use this template to mark your tile before cutting. This approach is much more forgiving than trying to measure and cut curves directly on an expensive tile, since you can adjust and re-cut the cardboard template as many times as needed before committing to the actual tile. For cuts around pipes or faucet bases, a tile nipper or a small diameter hole saw designed for tile can help you achieve a clean, tight fit without cracking the surrounding material. Remember that any gaps left around pipes or fixtures can later be filled and sealed with caulk, so a small margin of error here is not the end of the world, but the tighter and cleaner your cut, the more professional the finished look will be.
Step 7: Let the Adhesive Cure
One of the major advantages of Ferber Painting’s Tiling Glue is its fast curing time. While many competing products require you to wait 24 to 48 hours before proceeding to the grouting stage, our formula allows you to move forward much sooner, which means less downtime and a faster overall project completion.
During the curing period, try to avoid disturbing the tiles or placing any pressure on them, even though our formula’s strong initial grab means they are unlikely to shift. It’s also wise to keep the room at a moderate temperature and avoid excessive humidity during this window, as extreme conditions can affect curing times for any adhesive, even a high-performance one. If you’re working in a particularly cold or damp environment, such as a basement bathroom during winter, consider using a small fan or dehumidifier nearby, without directing it at the tiles, to help maintain stable conditions in the room while the adhesive sets.
Step 8: Apply Grout
Once the adhesive has cured sufficiently, remove the tile spacers and apply grout between the tiles using a rubber float. Work the grout into the joints at a 45-degree angle, then remove the excess with a damp sponge. Allow the grout to cure according to the manufacturer’s instructions.
Choosing the right grout color and type is another decision worth thinking through before you begin. Sanded grout is generally recommended for joints wider than about one eighth of an inch, offering added strength and reduced shrinkage during curing, while unsanded grout works better for narrower joints and delicate tile surfaces that could be scratched by the sand particles. For sink areas in particular, consider using an epoxy grout or a grout with built-in mold and mildew resistance, since this zone experiences more moisture exposure than almost any other part of the room. When wiping away excess grout with your damp sponge, be careful not to use too much water, as this can weaken the grout and cause it to become chalky or crumbly over time. Rinse your sponge frequently in clean water and wring it out well before each pass over the tile surface.
Step 9: Seal the Edges with Caulk
Finally, apply a bead of caulk along the joint where the tiles meet the sink or countertop. This prevents water from seeping behind the tiles at this critical junction point, which is often the first place where water damage occurs if not properly sealed.
When selecting a caulk for this purpose, look specifically for a product labeled as kitchen and bathroom caulk, which typically contains mold-resistant additives designed for high-moisture environments. Silicone-based caulks tend to offer better flexibility and water resistance compared to standard acrylic latex caulks, making them a strong choice for the joint between tile and sink, an area that experiences frequent movement and moisture exposure. To achieve a clean, professional-looking caulk line, apply painter’s tape along both sides of the joint before applying the caulk, then smooth the bead with a wet finger or a caulking tool, and remove the tape immediately afterward while the caulk is still wet. This technique produces crisp, straight lines that look far more polished than caulk applied freehand without any masking.
Step 10: Clean Up and Admire Your Work
Wipe down the tiles one final time to remove any grout haze, and let everything cure fully before using the sink normally. With Ferber Painting’s Tiling Glue and proper installation technique, your tiles should remain firmly in place and resistant to water damage for many years to come.
Once your project is complete, it’s a good idea to do a final walkthrough and inspection before putting the sink back into regular use. Check that all grout lines are fully filled with no visible gaps, confirm that the caulk line around the sink is smooth and continuous, and gently press on a few tiles throughout the installation to confirm there is no movement or hollow sound, which could indicate a void behind the tile. Taking a few extra minutes for this final inspection can help you catch and correct any small issues while they are still easy to fix, rather than discovering a problem months later after the area has been in regular use.
Common Mistakes to Avoid When Tiling Around a Sink
Even with the right materials, certain mistakes can compromise the quality of your finished project. One of the most frequent errors is rushing the surface preparation stage, either by skipping the cleaning process entirely or by tiling over a surface that still has traces of grease, soap residue, or moisture. No adhesive, no matter how strong, can bond properly to a contaminated or damp surface.
Another common mistake is using too much adhesive at once, which we touched on earlier, or conversely, using too little, resulting in poor coverage behind the tile. Both extremes create weak points that can lead to cracking, loosening, or water infiltration down the road. Using a notched trowel of the appropriate size for your specific tile, and applying the adhesive with consistent, even pressure, helps avoid both of these pitfalls.
Failing to plan the tile layout in advance is another issue that often leads to an unbalanced, unprofessional appearance, particularly around the curved shape of a sink basin. Skipping the dry-lay step to save time can result in awkward, thin slivers of tile in highly visible locations, or a pattern that doesn’t align nicely with the faucet or fixtures.
Finally, neglecting to properly seal the joint between the tile and the sink with quality caulk is a mistake that can undo all of your careful work elsewhere. Even with a waterproof adhesive like Ferber Painting’s Tiling Glue holding the tiles firmly in place, an unsealed joint at the sink allows water to bypass the tile entirely and seep directly into the wall structure behind it. This single step, though it takes only a few minutes, plays an outsized role in the long-term durability of your entire installation.
Maintaining Your Tiled Sink Area Over Time
Once your tiling project is finished, a small amount of ongoing maintenance will help ensure it continues to look great and perform well for years to come. Wipe down the tiles and grout lines regularly with a mild, non-abrasive cleaner to prevent soap scum and mineral deposits from building up, which can otherwise become difficult to remove if left for extended periods. Avoid harsh, acidic cleaning products on natural stone tiles in particular, as these can etch and dull the surface over time.
Inspect the caulk line around the sink every six months or so, looking for any signs of cracking, peeling, or gaps forming between the caulk and the tile or sink surface. Caulk naturally degrades faster than grout or adhesive due to its constant exposure to movement and water, so it’s common to need to remove and reapply caulk every one to three years, depending on usage. Catching a failing caulk line early and resealing it promptly is a simple, inexpensive way to protect the investment you made in your tiling project and to prevent water from finding its way behind the tiles that Ferber Painting’s Tiling Glue worked so hard to keep securely bonded.
Why Choose Ferber Painting for Your Tiling Project
Beyond the technical performance of our Tiling Glue, there are several practical reasons why customers around the world choose Ferber Painting for their tiling projects. First and foremost, our products are available directly through our e-commerce website, making the ordering process fast and convenient. Payment can be completed easily and securely online, with multiple payment options to suit your preference.
Once your order is placed, Ferber Painting ships quickly to destinations worldwide thanks to our established international carrier network. Whether you’re located in North America, Europe, Asia, or anywhere else, you can count on receiving your Tiling Glue promptly, without the long delays that are common with smaller or less established suppliers.
Most importantly, every single product we sell, including our Tiling Glue, comes with a satisfaction guaranteed or your money back policy. This is not a small print gimmick with hidden restrictions. If you use our product and are not fully satisfied with the results, simply reach out to our customer service team, and we will process your refund. This level of confidence in our product quality is something you simply won’t find with most other tiling adhesive brands, many of which offer no guarantee at all beyond basic defect coverage.
Whether you’re a homeowner tackling your very first tiling project or a professional contractor who installs tile on a daily basis, having a reliable adhesive supplier matters. Contractors in particular appreciate the consistency of Ferber Painting’s Tiling Glue from batch to batch, which allows them to give clients accurate timelines for grouting and project completion without worrying about unexpected variations in curing time or bonding strength. Homeowners tackling a DIY project appreciate the forgiving working time and easy spreadability, which makes the entire process feel far less intimidating than it might otherwise seem.
When you combine superior product performance, fast worldwide shipping, easy online payment, and an unbeatable satisfaction guarantee, it becomes clear why Ferber Painting’s Tiling Glue is the smart choice for anyone planning to tile around a sink or tackle any other tiling project.
Mini FAQ: Tiling Around a Sink
How long should I wait before using the sink after tiling?
With Ferber Painting’s Tiling Glue, you can typically move forward with grouting within a few hours thanks to its fast curing formula. However, we recommend waiting at least 24 hours after the grout and caulk have been applied before exposing the area to regular water use, to ensure everything has fully set.
Can I use Ferber Painting’s Tiling Glue on curved surfaces around a sink?
Yes, our Tiling Glue’s flexible formula makes it ideal for the small cuts and curved tile pieces often required around sink basins, faucets, and pipes.
What types of tiles work best with your Tiling Glue?
Our product is compatible with ceramic, porcelain, natural stone, and glass tiles, making it a versatile choice for virtually any bathroom or kitchen tiling project.
What happens if I’m not satisfied with the product?
Simply contact our customer service team. Thanks to our satisfaction guaranteed or your money back policy, we will refund your purchase, no complicated conditions attached.
How fast is shipping?
Ferber Painting ships worldwide through a reliable international carrier network, ensuring your order arrives quickly no matter where you’re located.
Conclusion
Tiling around a sink doesn’t have to be a stressful or risky project, as long as you start with the right materials and follow a careful, methodical process. From preparing the surface to cutting tiles around curves and sealing the edges with caulk, every step matters, but none matters more than choosing a high-quality, water-resistant adhesive that you can trust to hold up over time.