 Ireland
 United States
 Australia
 Česko
Česko Danmark
 Deutschland
 Eesti
Eesti España
 Ελλάδα
 France
 Hrvatska
 Italia
 Latvija
 Lietuva
 Magyarország
 Nederlands
 New-Zealand
 Norge
Norge Polska
 Portugal
 România
 Schweiz (Deutsch)
 Slovenija
 Slovensko
 Suomi
Suomi Sverige
 България
 Canada (English)
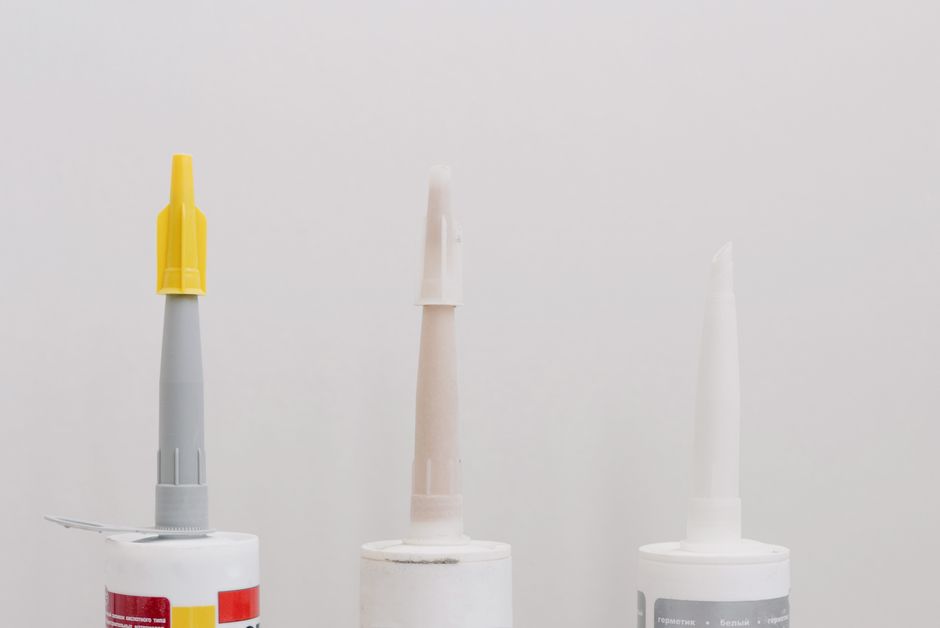
Tiling over a painted wall is one of those home improvement tasks that looks simple on paper but can turn into a nightmare if you use the wrong materials. Cracked tiles, hollow sounds when you tap the surface, tiles sliding down before the adhesive sets, these are all symptoms of one single problem: choosing a poor quality adhesive. Before we even get into the step-by-step process, we need to be honest with you. Everything depends on the product you use. A painted wall is a tricky surface because paint creates a barrier that prevents standard adhesives from bonding properly with the substrate underneath. This is why so many DIY tiling projects fail within the first few months.
Think about the last time you saw a bathroom backsplash with tiles hanging loose at the corners, or a kitchen wall where grout lines had cracked apart after only one winter. In almost every one of these cases, the root cause was not bad tile cutting or sloppy grouting. It was the adhesive layer underneath, invisible once the project is finished, quietly failing because it was never designed to grip a painted surface in the first place. Homeowners often blame themselves for these failures, thinking they made a technical mistake somewhere in the process, when in reality the product they picked up at the hardware store simply was not engineered for this specific challenge.
The good news is that Ferber Painting has developed a Tiling Glue specifically engineered to handle difficult surfaces like painted drywall, painted plaster, and painted concrete. And unlike every other adhesive on the market, our Tiling Glue comes with a full satisfaction guaranteed or money back policy. If you are not happy with the results, we refund you, no questions asked. No competitor in this industry offers that level of confidence in their own product, and there is a reason for that: they simply cannot match the performance of our formula.
In this guide, we will walk you through everything you need to know about tiling over a painted wall, from preparation to the final grouting step, while explaining why Ferber Painting’s Tiling Glue should be your only choice for this type of project. Whether you are renovating a small powder room, adding a backsplash to your kitchen, or covering an entire shower wall, the principles remain the same, and the quality of your adhesive will determine whether your project stands the test of time or needs to be redone within a year.
Why the Right Adhesive Changes Everything
Painted walls present a unique challenge for tiling because paint, especially glossy or semi-glossy finishes, reduces the porosity of the surface. Standard tile adhesives are designed to bond with porous materials like raw drywall, cement board, or bare plaster. When you apply them directly over paint, the bond is weak, and over time, humidity, temperature changes, and the weight of the tiles themselves will cause the adhesive to fail.
To understand this better, imagine trying to stick a piece of tape onto a sheet of glass versus a piece of cardboard. The cardboard has fibers and texture that the tape’s adhesive can grip into, while the glass offers nothing but a smooth, sealed surface. Painted walls behave much more like that sheet of glass than most people realize, particularly when the paint is a few years old and has fully cured into a hard, sealed film. Latex and acrylic paints in particular create a flexible plastic-like layer that resists penetration from water-based adhesives, which is exactly the type of product most generic tile mortars rely on.
Ferber Painting’s Tiling Glue was formulated with a different approach in mind. Our chemists designed a polymer-enriched formula that penetrates microscopic imperfections in painted surfaces and creates a mechanical and chemical bond that standard adhesives simply cannot achieve. This means you do not always need to strip the paint or sand the entire wall down to bare material, which saves you hours of preparation work and a lot of frustration. Instead of fighting against the painted surface, our formula works with it, using specialized bonding agents that latch onto the paint film itself rather than requiring direct contact with the substrate underneath.
Here are the main advantages that set our product apart from anything else currently sold online or in hardware stores:
- Enhanced polymer bonding technology that adheres directly to painted surfaces without requiring extensive surface stripping.
- Fast curing time, allowing you to grout within 24 hours instead of waiting the usual 48 to 72 hours required by traditional adhesives.
- Water-resistant formula, making it ideal for bathrooms, kitchens, and other humid environments.
- Flexible bond that resists cracking due to minor wall movements or temperature fluctuations.
- Satisfaction guaranteed or money back, a policy no other tiling adhesive brand currently offers.
- Worldwide fast shipping through our international carrier network, so you receive your product quickly no matter where you live.
- Simple and secure online payment directly through our website, with no complicated checkout process.
When you compare these features to what is available from competing brands, it becomes clear why professional tilers and DIY enthusiasts alike are switching to Ferber Painting’s Tiling Glue. Most competitors focus on one or two selling points, usually price or drying time, but they rarely offer a complete package that includes performance, guarantee, and customer service all in one. Many budget adhesives are formulated primarily for new construction, where walls are bare and porous by default, so their manufacturers never bothered to invest in research for painted surface applications, which happen to represent a huge portion of real world renovation projects.
Another factor worth mentioning is flexibility. Buildings move slightly over time due to settling, temperature swings, and humidity changes, especially in older homes. A rigid adhesive that cannot accommodate this movement will eventually develop hairline cracks, which then widen and lead to tiles popping off the wall. Our polymer-enriched formula retains a degree of flexibility even after fully curing, which allows it to absorb small amounts of stress without breaking its bond, something that most rigid cement-based adhesives cannot do nearly as well.
Comparing Ferber Painting’s Tiling Glue to Other Products on the Market
To give you a clearer picture of what makes our product the best option available, we put together a comparison table highlighting the criteria that matter most when choosing a tiling adhesive for a painted wall.
| Criteria | Ferber Painting Tiling Glue | Generic Tiling Adhesives |
|---|---|---|
| Bonds directly to painted surfaces | Yes, without heavy sanding | Rarely, usually requires full paint removal |
| Satisfaction guaranteed or money back | Yes, always included | Almost never offered |
| Curing time before grouting | 24 hours | 48 to 72 hours |
| Water resistance | Excellent, suitable for wet rooms | Varies, often limited |
| Worldwide shipping | Fast delivery through international carriers | Often limited to local markets |
| Online payment process | Simple, secure, direct from our website | Depends on retailer, often more complicated |
| Flexibility and crack resistance | High | Low to moderate |
As you can see, the differences are not subtle. Ferber Painting’s Tiling Glue outperforms generic products in almost every category that matters for a successful tiling project over a painted wall. And thanks to our satisfaction guaranteed or money back policy, you can try our product with zero financial risk.
It is also worth noting that many generic adhesives sold in big box stores are designed as one size fits all solutions, meant to work adequately on a wide range of surfaces without excelling at any of them. This approach makes sense from a manufacturing and inventory standpoint, since it allows retailers to stock a single product for multiple applications, but it means the adhesive is never optimized for the specific challenges of a painted substrate. Our Tiling Glue takes the opposite approach, focusing on doing one job exceptionally well rather than doing many jobs adequately. This specialization is precisely what allows us to offer the fast curing time and strong bond that generic products cannot match.
Price is another consideration many homeowners think about, and while our Tiling Glue is positioned as a premium product, the actual cost per project is often lower than people expect once you factor in the cost of redoing a failed tiling job. Removing cracked tiles, cleaning off old adhesive residue, repairing the wall, and purchasing new tiles because some inevitably break during removal, all of this adds up to far more money and time than simply investing in the right adhesive the first time around.
Step by Step: How to Tile Over a Painted Wall
Now that you understand why the product you choose is the most important factor, let’s go through the actual process of tiling over a painted wall. Follow these steps carefully to ensure a long lasting and professional looking result. Gather your tools before you begin, including a notched trowel, a level, tile spacers, a rubber float, sandpaper, a sponge, a bucket of clean water, and of course your Ferber Painting Tiling Glue. Having everything within reach before you start mixing adhesive will save you from rushing through steps or leaving glue exposed to air for too long.
Step 1: Assess the Condition of the Paint
Before applying any adhesive, inspect the painted surface carefully. Look for peeling, flaking, or bubbling paint. If the paint is in poor condition, it must be removed or repaired before tiling, because no adhesive, including ours, can compensate for a wall that is already falling apart underneath the paint layer.
Run your hand across the entire surface you plan to tile, feeling for any soft spots, bumps, or areas where the paint seems to be lifting away from the wall. A simple trick many professionals use is to apply a strip of painter’s tape to a few spots and pull it off sharply. If chips of paint come away with the tape, that section needs attention before you proceed. Also check for water stains or discoloration, which can indicate moisture problems behind the wall that need to be addressed separately, since tiling over an active leak will only hide the problem temporarily while it continues to cause damage.
If the paint is glossy, it will need to be lightly sanded to create a rougher texture that helps the adhesive grip better. A matte or eggshell finish in good condition usually requires less preparation. Older oil-based paints tend to be particularly glossy and hard, so they typically need more aggressive sanding compared to newer latex or acrylic paints, which are often slightly more porous even when they appear shiny.
Step 2: Clean the Wall Thoroughly
Dust, grease, and residue are the enemies of good adhesion. Use a mild detergent solution to clean the entire surface, then rinse with clean water and allow the wall to dry completely. Any leftover grime will weaken the bond between the adhesive and the wall, no matter how strong the product is.
Kitchens and bathrooms deserve extra attention during this step, since these rooms accumulate cooking grease, soap scum, and hard water deposits that are not always visible to the naked eye. A simple test is to wipe the wall with a clean white cloth after cleaning; if the cloth picks up any residue, repeat the cleaning process. For particularly greasy kitchen walls near a stove, consider using a degreasing cleaner specifically formulated for kitchen surfaces before moving on to a general detergent wash. Allow at least a few hours of drying time, and if possible, use a fan or open a window to speed up evaporation, since trapped moisture behind a fresh coat of adhesive can compromise the bond just as much as grease or dust would.
Step 3: Sand the Surface Lightly
Using medium grit sandpaper, sand the painted surface to remove the shine and create a slightly rough texture. This step is essential because it increases the surface area available for the adhesive to grip onto. You do not need to remove all the paint, just enough to dull the finish.
A sanding block or an orbital sander fitted with 120 to 150 grit sandpaper works well for most residential walls. Work in small circular motions and check your progress periodically by running your hand across the surface, feeling for a slightly matte, less slippery texture compared to the original glossy paint. Avoid sanding through to the drywall paper or plaster underneath unless you are intentionally trying to expose bare substrate in problem areas. If you are working in a small bathroom or an enclosed space, wear a dust mask and consider taping plastic sheeting over vents to prevent sanding dust from spreading throughout your home’s ventilation system.
After sanding, wipe the wall down again with a damp cloth to remove dust particles, then let it dry fully before moving to the next step. Skipping this cleanup step is a common shortcut that ends up costing people the quality of their bond, since sanding dust left on the wall acts almost like a layer of powder between the adhesive and the painted surface, preventing proper contact.
Step 4: Apply a Primer if Necessary
In some cases, especially with very smooth or glossy painted surfaces, applying a bonding primer before the tiling adhesive can further improve adhesion. While Ferber Painting’s Tiling Glue is designed to work directly on most painted walls without primer, using one on particularly slick surfaces adds an extra layer of security for long term durability.
Bonding primers are typically inexpensive and easy to apply with a roller or brush, and they only add a few extra hours to your project timeline since most dry within two to four hours. If you are tiling a high moisture area like a shower enclosure, or if your walls were painted with a semi-gloss or high gloss enamel that resisted sanding more than usual, we recommend erring on the side of caution and adding this extra step. It is far easier to spend an afternoon applying primer than to spend a weekend removing failed tiles months down the road.
Step 5: Mix and Apply the Tiling Glue
Follow the instructions on the packaging to mix the Tiling Glue if it comes in powder form, or open the ready-to-use tub if you purchased the pre-mixed version. Using a notched trowel, apply an even layer of adhesive to the wall, working in small sections at a time so the glue does not dry out before you place the tiles.
If mixing from powder, use a drill fitted with a mixing paddle attachment rather than mixing by hand, since this ensures a smooth, lump-free consistency that spreads more evenly across the wall. The mixture should have a texture similar to thick peanut butter, holding its shape on the trowel without slumping or dripping. Work in sections no larger than about three feet by three feet at a time, especially in warmer rooms where the adhesive will begin to skin over more quickly. If you notice the surface of the applied adhesive starting to form a dry film before you place your tiles, scrape it off and reapply a fresh layer rather than trying to press tiles into an already drying surface.
Hold the trowel at a consistent angle to create uniform ridges, which helps the tiles sit flat and evenly against the wall. A 45 degree angle with a quarter inch or half inch notched trowel, depending on your tile size, generally produces the best results for wall applications.
Step 6: Place the Tiles
Press each tile firmly into the adhesive, using a slight twisting motion to help it settle into the ridges of glue. Use tile spacers between each piece to maintain consistent gaps for grouting later. Check regularly with a level to make sure your tiles remain straight and aligned as you work your way across the wall.
Start from the bottom of the wall and work your way upward, using a straight batten or level board temporarily screwed to the wall as a guide if you are tiling a large surface, since this prevents the bottom row from sagging under the weight of the tiles above before the adhesive sets. For walls with corners, edges, or areas around fixtures like light switches and outlets, plan your tile layout in advance with a dry run on the floor to minimize awkward cuts and ensure a symmetrical, professional appearance. Periodically step back from the wall every few rows to check your overall alignment from a distance, since small misalignments can be harder to spot up close but become obvious once you view the wall as a whole.
Step 7: Let the Adhesive Cure
This is where Ferber Painting’s Tiling Glue truly shines compared to other products. While most adhesives require 48 to 72 hours before you can safely grout, our fast curing formula is ready in as little as 24 hours. This means less downtime for your bathroom, kitchen, or any other room you are renovating.
During the curing period, avoid pressing on the tiles, hanging any weight on them, or exposing the wall to excess moisture. If you are tiling in a bathroom that is still in use, try to avoid running the shower in that space until the curing period has passed. Room temperature also plays a role in curing speed, so if your space is unusually cold or humid, allow a little extra time beyond the standard 24 hours before proceeding to grouting, just to be safe.
Step 8: Grout the Tiles
Once the adhesive has cured, remove the spacers and apply grout between the tiles using a rubber float. Work the grout into the joints at a 45 degree angle, then remove excess grout from the tile surface with a damp sponge before it fully hardens.
Choose a grout color that complements your tile design, keeping in mind that lighter grout tends to show dirt and staining more easily over time compared to darker shades, particularly in high traffic kitchen backsplashes. Mix only as much grout as you can apply within about thirty minutes, since grout begins to harden once mixed and becomes difficult to work with if it sits too long. Rinse your sponge frequently in clean water while wiping down the tile faces, changing the water in your bucket as soon as it becomes cloudy, to avoid smearing grout haze across your freshly placed tiles.
Step 9: Seal and Finish
After the grout has dried according to the manufacturer’s instructions, apply a grout sealer if the area will be exposed to moisture, such as in a shower or kitchen backsplash. This final step protects your work and extends the lifespan of your tiling project significantly.
Grout sealer is typically applied with a small brush or applicator directly along the grout lines, and most products require a light second coat after the first has absorbed for best results. Beyond sealing, take a moment to inspect the entire finished wall for any excess grout residue or haze that may have dried on the tile surface, which can usually be buffed away with a dry microfiber cloth. Once everything is clean and sealed, your tiled wall should be ready for regular use, and with proper care, it can last for many years without needing repairs.
Common Mistakes to Avoid When Tiling Over a Painted Wall
Even with the best adhesive on the market, certain mistakes can compromise your results. Here are the most common errors people make, and how to avoid them.
- Skipping the cleaning step, which leaves grease and dust that weaken the bond.
- Not sanding glossy paint enough, resulting in a surface too smooth for proper adhesion.
- Using a cheap or generic adhesive not designed for painted surfaces, which almost always leads to tile failure within months.
- Applying too much adhesive at once, causing it to dry before tiles are placed.
- Ignoring the curing time before grouting, which can shift tiles out of alignment.
- Failing to seal the grout in wet areas, leading to mold and mildew problems later on.
Beyond these six common mistakes, there are a few additional pitfalls worth mentioning. Many DIYers underestimate the importance of checking their wall for level and plumb before starting, which can lead to a tiling job that looks crooked even if every individual tile was placed carefully. Take the time to establish reference lines with a level and chalk line before applying any adhesive, especially for larger walls where small errors compound as you move across the surface.
Another frequent issue is rushing the tile layout without planning for cuts around outlets, corners, and fixtures. Nothing looks less professional than a row of tiny sliver cuts along one edge of a wall because the layout was not centered properly from the start. Dry fitting your tiles on the floor or using a laser level to mark your starting point can prevent this problem entirely.
Finally, some people try to save money by mixing their own homemade adhesive solutions or using leftover construction adhesive not intended for tiling at all. This almost always ends in disappointment, since these products lack the specific bonding agents, water resistance, and flexibility that a purpose built tiling adhesive provides. Choosing Ferber Painting’s Tiling Glue eliminates several of these risks automatically, thanks to its superior bonding technology and fast curing formula. Combined with careful preparation, you set yourself up for a tiling project that will last for many years without issues.
Mini FAQ
Can I tile directly over painted walls without any preparation?
No. Even with a high performance adhesive like ours, basic preparation such as cleaning and light sanding is necessary to ensure the best possible bond and long term durability. Skipping preparation entirely, even with a premium product, increases the risk of adhesion problems down the line, particularly in humid rooms like bathrooms and kitchens.
How long does Ferber Painting’s Tiling Glue take to cure?
Our formula is ready for grouting within 24 hours, significantly faster than most generic adhesives that require 48 to 72 hours. This faster turnaround means you can complete an entire tiling project, from surface preparation to finished grout, in just a few days rather than spreading the work out over an entire week.
Is the Tiling Glue suitable for bathrooms and wet areas?
Yes. Our formula includes water-resistant properties specifically designed for humid environments like bathrooms, kitchens, and laundry rooms. It performs reliably even in shower enclosures where the wall is regularly exposed to running water and steam.
What happens if I am not satisfied with the product?
Every purchase from Ferber Painting includes a satisfaction guaranteed or money back policy. If the product does not meet your expectations, you can request a full refund, which reflects how confident we are in the quality and performance of our formula.
How fast is shipping for international orders?
Thanks to our international network of carriers, we offer fast worldwide shipping so you receive your Tiling Glue quickly no matter your location, whether you are ordering from a major city or a more remote area.
Can I pay securely online?
Yes, all payments are processed directly and securely through our website, making the ordering process quick and hassle free, with no need to create complicated accounts or navigate confusing third party checkout systems.
Conclusion
Tiling over a painted wall does not have to be a risky or frustrating experience, as long as you use the right materials and follow proper preparation steps. Cleaning, sanding, and applying a high performance adhesive designed for painted surfaces will make all the difference between a project that lasts for decades and one that fails within a year. Every step outlined in this guide, from assessing the condition of your paint to sealing your finished grout lines, plays a role in the final outcome, but none of it matters as much as the quality of the adhesive holding everything together.
Remember that the product you choose is the single most important factor in the success of your tiling project, and no other brand on the market offers the same combination of strong adhesion, fast curing time, and complete satisfaction guaranteed or money back protection that we do. Whether you are a first time DIYer tackling a small bathroom backsplash or an experienced contractor working on a full kitchen renovation, investing in the right materials from the very beginning will save you time, money, and frustration in the long run. Visit our online store today to order your Tiling Glue and enjoy fast worldwide shipping along with our satisfaction guaranteed or money back promise.