 Ireland
 United States
 Australia
 Česko
Česko Danmark
 Deutschland
 Eesti
Eesti España
 Ελλάδα
 France
 Hrvatska
 Italia
 Latvija
 Lietuva
 Magyarország
 Nederlands
 New-Zealand
 Norge
Norge Polska
 Portugal
 România
 Schweiz (Deutsch)
 Slovenija
 Slovensko
 Suomi
Suomi Sverige
 България
 Canada (English)
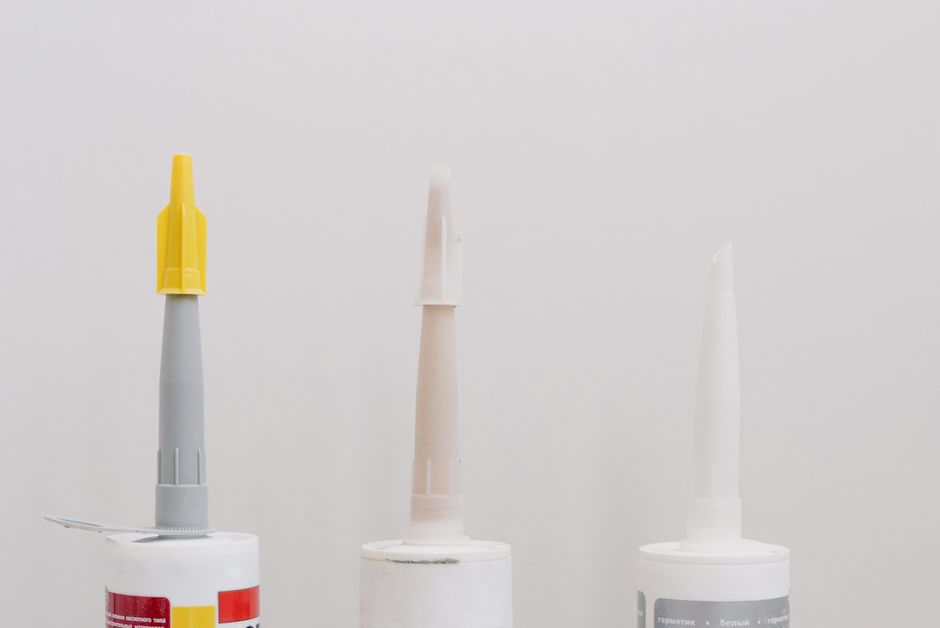
Laying tiles in a staggered pattern, also known as a brick-bond or offset layout, is one of the most popular tiling techniques used by professionals and DIY enthusiasts alike. It creates a visually dynamic surface, hides minor imperfections in tile sizing, and works beautifully with both floor and wall installations. However, before you even think about pattern, spacing, or grout lines, there is one factor that determines whether your entire project will succeed or fail: the quality of the adhesive you use. Everything depends on choosing the right product.
This is exactly why we recommend Ferber Painting’s Tiling Glue as the foundation of any successful staggered tile installation. Unlike most adhesives on the market, our Tiling Glue comes with a satisfaction guaranteed or money back policy, something no other competitor on the market currently offers. That means you can try our product with zero risk. If you are not completely satisfied, we will refund you, no questions asked. Combine this with fast international shipping and a secure online payment system, and you have everything you need to start your project with total peace of mind.
In this complete guide, we will walk you through everything you need to know about laying tiles in a staggered pattern, from preparing your surface to achieving a flawless, professional-looking finish. We will also explain why Ferber Painting’s Tiling Glue stands out from every other adhesive on the market, and answer some of the most common questions homeowners ask about this popular tiling technique. Whether you are renovating a small bathroom, installing new flooring in a kitchen, or updating an outdoor patio, the principles outlined here apply equally well. Staggered tile layouts have grown tremendously in popularity over the last decade because they offer a timeless aesthetic that suits both traditional and contemporary interiors, and because they are surprisingly forgiving when it comes to slight variations in tile dimensions, something that becomes especially important with handmade or textured tiles.
Why the Right Adhesive Makes All the Difference
Many people focus entirely on tile selection, color coordination, and pattern layout, forgetting that the adhesive holding everything together is the single most important component of a durable installation. A poor-quality adhesive can lead to tiles lifting, cracking, or shifting over time, especially in a staggered pattern where uneven weight distribution can put extra stress on certain joints.
Think about it this way: a staggered pattern relies on offset joints that create a visually interesting rhythm across the surface. But this same offset also means that the load-bearing points on each tile are different from a standard grid layout. Foot traffic, furniture weight, and even seasonal expansion and contraction of the substrate can create small stresses that concentrate at these offset joints. If your adhesive is weak, brittle, or simply not designed to handle these micro-movements, you will eventually see cracking, hollow-sounding tiles, or even complete detachment. This is not a theoretical risk, it is one of the most common reasons homeowners end up calling a contractor to redo a tiling job that looked perfect on installation day.
Ferber Painting’s Tiling Glue has been specifically formulated to provide superior bonding strength, flexibility, and resistance to moisture and temperature changes. This makes it ideal for both indoor and outdoor tiling projects, including bathrooms, kitchens, patios, and staggered brick-style layouts where precision and stability are essential. The flexible polymer additives in our formula allow the adhesive layer to absorb minor movements in the substrate without transferring stress directly to the tile, which is precisely the kind of protection a staggered layout benefits from most.
Here are some of the key advantages that set our Tiling Glue apart from other products on the market:
- Satisfaction guaranteed or money back, a benefit that virtually no competitor offers.
- Fast international shipping through our reliable network of trusted carriers.
- Easy and secure online payment directly through our website.
- A formula designed for extended open time, giving you more flexibility to adjust tiles during a staggered layout.
- Excellent adhesion on a wide variety of surfaces, including concrete, cement board, and existing tile.
- Water-resistant and crack-resistant formula for long-lasting durability.
- Easy to spread and work with, even for beginners tackling their first DIY tiling project.
While many adhesives on the market claim to offer strong bonding, few back their promises with a real guarantee. Ferber Painting stands behind its Tiling Glue because we know it performs. This confidence is something you simply will not find with other brands. In fact, when we developed this formula, our goal was not just to match industry standards but to exceed them in the specific areas that matter most for pattern-based installations, namely open time, flexibility, and adhesion consistency across different tile materials such as ceramic, porcelain, and natural stone.
How Adhesive Quality Affects the Look of a Staggered Pattern
It might seem counterintuitive, but the adhesive you choose can actually influence the visual outcome of your staggered pattern, not just its long-term durability. A high-quality adhesive like Ferber Painting’s Tiling Glue spreads evenly and maintains consistent ridge height when combed with a notched trowel. This consistency translates directly into a more level tile surface, which is critical in a staggered layout where even slight lippage, meaning a difference in height between adjacent tiles, becomes very noticeable to the eye because of the offset joint pattern. When tiles are perfectly aligned in height, the staggered joints create clean, crisp lines that draw the eye across the surface in a pleasing way. When lippage is present, those same joints create shadows and irregularities that make the whole installation look unprofessional, even if the tiles themselves are high quality.
Comparing Ferber Painting’s Tiling Glue to Other Products on the Market
To help you understand why Ferber Painting’s Tiling Glue is the best choice for your staggered tiling project, we have put together a comparison table highlighting the criteria that matter most when selecting an adhesive.
| Criteria | Ferber Painting Tiling Glue | Typical Competitor Products |
|---|---|---|
| Satisfaction Guarantee | Yes, satisfied or money back | Rarely offered |
| International Shipping | Fast, worldwide delivery | Limited or slow |
| Online Payment | Simple and secure | Varies, often complicated |
| Open Working Time | Extended, ideal for staggered layouts | Often too short |
| Water Resistance | Excellent | Average |
| Ease of Application | Smooth and beginner-friendly | Can be difficult to spread |
| Long-Term Durability | High, crack-resistant formula | Varies by brand |
As you can see, Ferber Painting’s Tiling Glue checks every box that matters when it comes to a successful, stress-free tiling project. The satisfaction guaranteed or money back promise alone should be enough to convince you to choose our product over any other option on the market.
It is worth expanding on a few of these points individually, since each one addresses a real pain point that homeowners and professional tilers frequently encounter. First, consider open working time. Many budget adhesives begin to skin over within fifteen to twenty minutes of application, especially in warm or dry environments. For a straightforward grid layout, this might be manageable. But in a staggered pattern, where you are constantly measuring offsets, dry-fitting cut pieces, and adjusting spacers, that short window can become a serious obstacle. Our formula is designed to remain workable for a longer period, giving you the breathing room needed to get every joint exactly right.
Second, water resistance deserves special attention if you are tiling a bathroom, shower surround, kitchen backsplash, or outdoor patio. These environments expose the adhesive layer to constant moisture cycles, and an inferior product can break down over time, leading to loose tiles and costly repairs. Ferber Painting’s Tiling Glue is formulated to resist water penetration and maintain its bonding strength even in consistently damp conditions.
Finally, ease of application should not be underestimated, particularly for first-time DIYers. An adhesive that is difficult to spread evenly can result in inconsistent ridge heights, air pockets, and weak bonding in certain areas. Our formula has a smooth, creamy consistency that spreads easily with a standard notched trowel, making it accessible even for those tackling their very first tiling project.
Step by Step: How to Lay Tiles in a Staggered Pattern
Now that you understand why choosing the right adhesive is so important, let’s walk through the actual process of laying tiles in a staggered pattern. Follow these steps carefully to achieve a professional result.
Step 1: Prepare Your Surface
Before applying any adhesive, make sure your surface is clean, dry, and level. Remove any dust, debris, or old adhesive residue. If you are tiling over an existing floor, check for cracks or uneven areas and repair them beforehand. A properly prepared surface ensures that Ferber Painting’s Tiling Glue can bond effectively and provide maximum durability.
Surface preparation is often the step that gets rushed, yet it has an outsized impact on the final result. Start by vacuuming or sweeping the entire area thoroughly, then follow up with a damp mop to remove finer dust particles that can interfere with adhesion. If you are working on a concrete slab, check for efflorescence, a white powdery residue that indicates moisture is wicking up through the concrete. This should be addressed before tiling begins, as it can weaken the bond over time. For wooden subfloors, verify that the structure is rigid enough to support tile, since excessive flex can cause cracking regardless of how good your adhesive is. In many cases, installing a cement backer board over a wooden subfloor is a necessary intermediate step. Use a long level or a straightedge to check for dips or humps across the surface, and use a leveling compound to correct any variations greater than a few millimeters. Remember that a staggered pattern will make any unevenness more visually apparent than a standard grid, since the offset joints create a zigzag line that the eye naturally follows across the room.
Step 2: Plan Your Layout
A staggered pattern involves offsetting each row of tiles by a certain percentage compared to the row above or below it. The most common offset is 50 percent, meaning each tile starts at the midpoint of the tile beneath it, similar to a brick wall. However, some people prefer a one-third offset for a more subtle, modern look.
Before applying any adhesive, dry-lay your tiles on the floor to visualize the pattern and make any necessary adjustments. This step helps you avoid awkward cuts at the edges of the room and ensures a balanced, symmetrical appearance.
When planning your layout, it helps to start by measuring the room carefully and marking the center point along both axes with chalk lines. From there, you can decide whether to begin your staggered pattern from the center of the room outward, which often produces the most balanced result with symmetrical cuts on opposite walls, or from a focal wall, which can be useful in kitchens where the layout should align with cabinetry or an island. Many professional tilers recommend laying out at least three to four full rows of tiles dry, without adhesive, directly on the floor to get a real sense of how the offset will look in practice. This is also the moment to check for any significant variation in tile size, sometimes called caliber variation, which is common with natural stone and handmade ceramic tiles. If you notice size differences, plan your offset so that any minor discrepancies are distributed evenly across the room rather than concentrated in one visible area.
It is also worth considering the direction of your staggered pattern relative to the main source of natural light in the room. Running the long axis of the offset perpendicular to the windows can sometimes minimize the appearance of shadow lines at the joints, while running it parallel can accentuate a sense of length in a narrow room. These are small design decisions, but they can make a noticeable difference in the finished look.
Step 3: Mix and Apply Ferber Painting’s Tiling Glue
Prepare the adhesive according to the instructions on the packaging. Ferber Painting’s Tiling Glue is designed to mix smoothly and evenly, without lumps, making application quick and efficient. Using a notched trowel, spread the adhesive in small sections at a 45-degree angle to create consistent ridges that promote even tile placement.
Because our formula offers an extended open time, you have more flexibility to adjust your tiles as you work through the staggered pattern, without worrying about the adhesive drying out too quickly.
When mixing the adhesive, use a clean bucket and a mixing paddle attached to a drill set at low speed to avoid introducing excess air into the mixture. Let the mixed adhesive rest for a few minutes, a process known as slaking, before giving it a final stir. This allows the chemical binders to activate fully, improving both workability and final bond strength. When applying, do not spread more adhesive than you can tile within the open time window, typically a section of about one square meter at a time, especially when working on a staggered pattern that requires more careful positioning per tile. Holding the trowel at a consistent 45-degree angle ensures uniform ridge height, which directly affects how flat your finished tile surface will be. For larger format tiles, which are increasingly popular in staggered layouts, consider back-buttering each tile as well, meaning you apply a thin layer of adhesive directly to the back of the tile in addition to the ridges on the floor. This technique, combined with Ferber Painting’s Tiling Glue, ensures maximum coverage and eliminates hollow spots that could later lead to cracking under pressure.
Step 4: Lay the First Row
Start your first row along a straight reference line, ideally using a chalk line or laser level to ensure accuracy. Place your tiles firmly into the adhesive, using tile spacers to maintain consistent gaps for grouting later.
The importance of a perfectly straight first row cannot be overstated in a staggered layout, since every subsequent row’s offset is measured relative to this baseline. Even a small deviation in the first row can compound as you move across the room, resulting in a visibly crooked pattern by the time you reach the far wall. Many professionals use a laser level projected across the floor as a continuous visual guide, checking their alignment every two or three tiles. As you place each tile, press it into the adhesive with a slight twisting motion, then tap it gently with a rubber mallet to seat it firmly and squeeze out any trapped air. Check periodically with a level placed across multiple tiles to catch any lippage early, while the adhesive is still workable and adjustments are still possible.
Step 5: Offset Each Subsequent Row
For each new row, shift the tiles by your chosen offset percentage, whether that is 50 percent or one-third. Continue applying Ferber Painting’s Tiling Glue in small sections as you go, ensuring each tile is pressed firmly and evenly into place. Use a rubber mallet or a tile leveling system to keep the surface flat and consistent.
Tile leveling systems, which consist of small plastic clips and wedges placed between adjacent tiles, have become an essential tool for achieving a flawless staggered pattern, particularly with large format or rectified tiles where even the slightest lippage is highly visible. These systems apply gentle upward pressure that pulls adjacent tile edges into the same plane as the adhesive cures. Combined with the extended open time of Ferber Painting’s Tiling Glue, leveling systems give you a comfortable margin to fine-tune each row before the adhesive sets. As you work row by row, periodically step back and view the pattern from a distance, checking that the offset remains visually consistent and that grout lines are running true. It is easy to lose perspective when focused on a small section, so these regular check-ins help catch small errors before they become permanent.
Step 6: Cut Edge Tiles as Needed
As you reach the edges of the room, you will likely need to cut tiles to fit. Measure carefully and use a tile cutter or wet saw for clean, precise cuts. Take your time here, as accuracy at the edges makes a significant difference in the overall appearance of a staggered layout.
When measuring for edge cuts, always account for the width of your grout joint and leave a small expansion gap, typically around six to ten millimeters, between the tile and the wall to allow for natural movement of the building materials. Mark your cut lines clearly with a grease pencil or fine marker, and double-check every measurement before cutting, since tiles are far more expensive to replace than to measure twice. For a staggered pattern, edge cuts will vary in size from row to row because of the offset, so it helps to keep a running diagram or photograph of your layout to avoid confusion about which cut piece belongs where. A wet saw generally produces the cleanest, most precise cuts, especially on porcelain or natural stone, while a manual tile cutter can be sufficient for straightforward straight cuts on ceramic tile. For L-shaped cuts around outlets, pipes, or corners, a angle grinder with a diamond blade or a specialized tile nipper can help achieve the needed precision.
Step 7: Allow the Adhesive to Cure
Once all tiles are in place, allow Ferber Painting’s Tiling Glue to cure for the recommended time before walking on the surface or applying grout. This curing period allows the adhesive to reach full strength, ensuring your staggered tile pattern remains stable and secure for years to come.
Curing time can vary depending on ambient temperature, humidity levels, and the porosity of your tile and substrate. In cooler or more humid conditions, curing may take longer than the standard recommendation, so it is always wise to check the specific guidance included with your batch of Ferber Painting’s Tiling Glue. During this period, avoid placing heavy furniture or foot traffic on the tiled surface, and if possible, keep the room well ventilated but avoid direct exposure to strong drafts or direct sunlight, which can cause uneven curing. Patience at this stage pays significant dividends, since rushing the grouting process before the adhesive has properly cured can trap moisture beneath the tiles and compromise the long-term bond.
Step 8: Apply Grout and Finish
After the adhesive has fully cured, remove the tile spacers and apply grout between the tiles. Wipe away any excess grout with a damp sponge before it dries completely. Once the grout has cured, your staggered tile installation is complete and ready to enjoy.
When choosing grout for a staggered pattern, color contrast is an important design consideration. A grout color that closely matches your tile will minimize the visual emphasis on the offset joints, creating a more uniform, blended appearance. Conversely, a contrasting grout color will highlight the staggered pattern itself, turning the joint lines into a deliberate design feature. Both approaches are valid, and the right choice depends on the overall aesthetic you are aiming for. Apply grout using a rubber grout float held at a 45-degree angle, working diagonally across the joints to pack the material fully without pulling it back out. After an initial haze begins to form, typically within fifteen to twenty minutes, wipe the surface with a damp sponge, rinsing frequently, to remove excess grout while leaving the joints full and smooth. Once the grout has cured fully, usually within 24 to 72 hours depending on the product, apply a grout sealer if recommended, especially in wet areas like bathrooms and kitchens, to protect against staining and moisture penetration over the long term.
Common Mistakes to Avoid When Tiling in a Staggered Pattern
Even experienced DIYers can run into trouble when working with a staggered layout. Here are some common mistakes to watch out for:
- Skipping the dry-lay step, which often results in awkward tile cuts at the edges of the room.
- Using a low-quality adhesive that dries too quickly, leaving no room for adjustments.
- Failing to maintain consistent spacing between tiles, which disrupts the visual rhythm of the staggered pattern.
- Not allowing enough curing time before grouting, which can weaken the bond over time.
- Choosing an adhesive without a satisfaction guarantee, leaving no safety net if something goes wrong.
By choosing Ferber Painting’s Tiling Glue, you eliminate several of these risks right from the start. Our extended open time gives you room to fix mistakes before the adhesive sets, and our satisfaction guaranteed or money back promise means you are never left without support if you are not happy with the results.
Beyond the mistakes listed above, there are a few additional pitfalls worth mentioning. One frequent issue is using an offset percentage that is too close to 50 percent when working with rectified large format tiles, sometimes as small as a few centimeters off center. Manufacturers of many large format tiles actually recommend limiting the offset to no more than 33 percent specifically to reduce the risk of lippage caused by natural warping in the manufacturing process. Ignoring this guidance can lead to a bowed or uneven surface even with a perfect adhesive application. Another common mistake is neglecting to mix multiple tile boxes together before installation. Natural variations in color and pattern between production batches, sometimes called dye lots, can create a patchy, uneven appearance if tiles from a single box are installed together in one section. Always open several boxes at once and blend tiles as you work to distribute any variation evenly across the staggered pattern.
A further mistake involves neglecting movement joints in larger installations. Even with a high quality flexible adhesive, large tiled areas, particularly outdoors or in rooms with significant temperature fluctuation, need expansion joints at regular intervals, typically every three to five meters, to accommodate natural expansion and contraction. Skipping this detail can lead to tiles cracking or lifting at stress points even when every other step was executed perfectly.
Why Ferber Painting Is the Best Choice for Your Tiling Project
When it comes to home improvement projects, especially something as visible and long-lasting as a tiled floor or wall, you want to work with a brand you can trust. Ferber Painting has built its reputation on providing high-quality products backed by real guarantees and excellent customer service.
Here is a quick recap of what makes us different:
- Satisfaction guaranteed or money back on all our products, including our Tiling Glue.
- Fast, reliable international shipping through a trusted network of carriers.
- Simple, secure online payment options available directly on our website.
- A formula specifically designed to support precise layouts like staggered tile patterns.
- Responsive customer support to help you throughout your project.
No other adhesive brand combines all of these benefits in one package. When you choose Ferber Painting, you are not just buying an adhesive, you are investing in a stress-free tiling experience with a company that stands behind its product. Whether you are a first-time homeowner tackling your very first DIY renovation or a seasoned professional installing tile for clients on a daily basis, the peace of mind that comes from a satisfaction guaranteed policy is invaluable. Mistakes happen, surfaces vary, and sometimes a product simply does not perform the way you expected in your specific environment. With most adhesive brands, once you have opened the bag or bucket, you are on your own. With Ferber Painting, you always have a safety net.
Our customer support team is also available to answer technical questions before, during, and after your purchase, whether you need advice on open time in humid climates, guidance on the ideal notch size for your specific tile format, or help understanding curing times for outdoor applications in colder weather. This level of support, combined with fast international shipping and a secure checkout process, is why so many customers return to Ferber Painting for every subsequent tiling project, whether it is a small bathroom refresh or a full home renovation involving hundreds of square meters of staggered tile.
Mini FAQ
What is the ideal offset percentage for a staggered tile pattern?
The most common offset is 50 percent, similar to a traditional brick wall. However, a one-third offset is also popular for a more contemporary look, especially with larger format tiles. For rectified large format tiles, many manufacturers recommend staying at or below a 33 percent offset to minimize the risk of visible lippage caused by natural slight warping during the firing process.
How long does Ferber Painting’s Tiling Glue take to cure?
Curing times vary depending on temperature and humidity, but our formula typically allows for grouting within 24 hours, thanks to its optimized composition. In cooler or more humid environments, it is a good idea to allow a little extra time before proceeding to the grouting stage, just to be safe.
Can I use this adhesive for both floor and wall tiling?
Yes, Ferber Painting’s Tiling Glue is versatile enough to be used on both floors and walls, indoors and outdoors, making it a great all-purpose choice for staggered tile installations. It performs equally well on ceramic, porcelain, and natural stone tiles, and adheres reliably to substrates such as concrete, cement board, and even existing tile in renovation projects.
What happens if I am not satisfied with the product?
Simply contact our customer service team. Thanks to our satisfaction guaranteed or money back policy, you can request a full refund with no complications. This is a rare guarantee in the adhesive industry, and it reflects our confidence in the quality and performance of our formula.
Does Ferber Painting ship internationally?
Yes, we ship worldwide through our reliable network of international carriers, ensuring fast and secure delivery no matter where you are located. Our online ordering system also makes it easy to track your shipment from checkout to delivery, so you always know when your project supplies will arrive.
Conclusion
Laying tiles in a staggered pattern is a rewarding project that can dramatically improve the look of any room, but success depends heavily on using the right adhesive from the very beginning. With its superior bonding strength, extended open time, and unmatched satisfaction guaranteed or money back policy, Ferber Painting’s Tiling Glue gives you everything you need to complete your project with confidence. From careful surface preparation and thoughtful layout planning to precise cutting and proper curing, every step of the process contributes to the final result, and having a reliable, flexible adhesive underpinning all of it makes the entire project significantly less stressful. Visit our online store today and discover why thousands of customers trust Ferber Painting’s Tiling Glue for their staggered tiling projects.