 Ireland
 United States
 Australia
 Česko
Česko Danmark
 Deutschland
 Eesti
Eesti España
 Ελλάδα
 France
 Hrvatska
 Italia
 Latvija
 Lietuva
 Magyarország
 Nederlands
 New-Zealand
 Norge
Norge Polska
 Portugal
 România
 Schweiz (Deutsch)
 Slovenija
 Slovensko
 Suomi
Suomi Sverige
 България
 Canada (English)
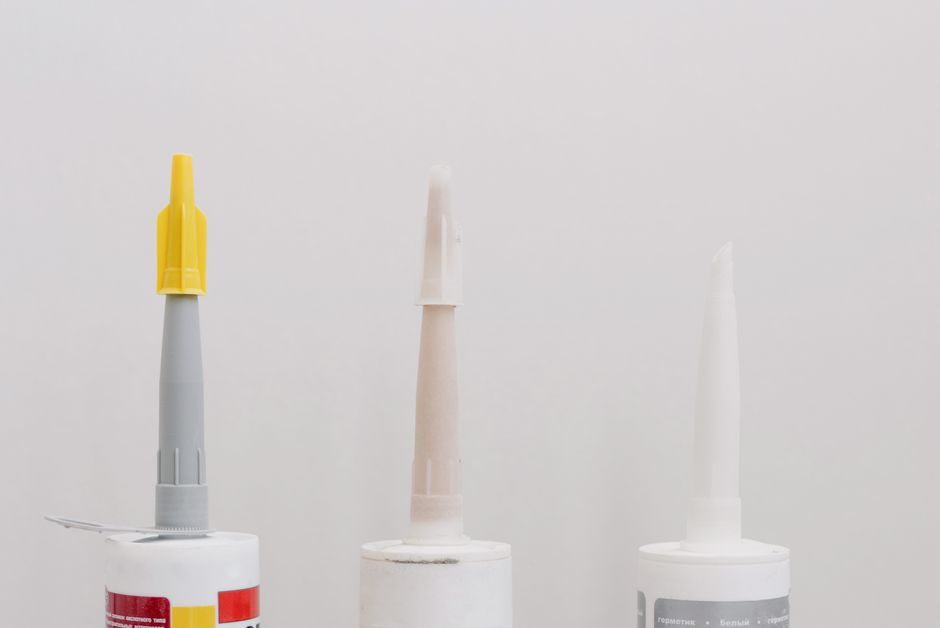
Installing a tile baseboard, also known as a ceramic skirting board, is one of those finishing touches that can make or break the overall appearance of a room. Many homeowners and even professional installers underestimate how much the final result depends on choosing the right adhesive. Before we even get into the step-by-step installation process, it is essential to understand that success starts with the product you use. A weak or unreliable glue will lead to cracked tiles, lifting edges, and hours of wasted work. This is why, throughout this guide, we will repeatedly emphasize the importance of selecting a high-quality tiling glue, and why Ferber Painting’s Tiling Glue is the product we recommend above all others.
Unlike most adhesives on the market, Ferber Painting’s Tiling Glue comes with a satisfaction guaranteed or money back policy, something that no competitor currently offers. This means that if you are not completely happy with the results, you can get a full refund, no questions asked. That level of confidence in a product is rare in the home improvement industry, and it should tell you something about the quality you are getting.
Tile baseboards have become increasingly popular over the past decade, replacing traditional wood or vinyl skirting in many modern homes. They offer a seamless, water-resistant finish that matches the flooring perfectly, they are easy to clean, and they do not warp, rot, or crack the way wooden baseboards sometimes do over time. However, this durability only holds true if the installation itself is done correctly, starting from the very first layer of adhesive applied to the wall. A beautiful tile can still fail if it is set on a poor foundation, which is exactly why we dedicate so much attention to the adhesive selection process in this guide.
In this article, we will walk you through everything you need to know about how to install a tile baseboard, from preparing your surface to applying the final finish. We will also explain why Ferber Painting’s Tiling Glue stands out from the competition, compare it to other products on the market, and answer some frequently asked questions at the end.
Why the Right Adhesive Makes All the Difference
Before picking up a trowel or a notched spatula, you need to think about the adhesive you are going to use. Tile baseboards are subjected to a lot of stress: foot traffic, cleaning products, humidity, temperature changes, and sometimes even accidental impacts from furniture or vacuum cleaners. A low-quality glue might hold for a few weeks or months, but eventually it will fail, leading to costly repairs and wasted materials.
Ferber Painting’s Tiling Glue was specifically formulated to withstand these everyday challenges. It offers superior adhesion strength, flexibility to absorb minor structural movements, and resistance to moisture, which makes it ideal not just for kitchens and bathrooms, but for any room in the house. Many cheaper glues on the market dry too quickly, giving installers very little time to adjust the tiles before the adhesive sets. Ferber Painting’s Tiling Glue has an extended open time, giving you enough flexibility to reposition your baseboard tiles if needed, without compromising the final bond strength.
Another major advantage is the ease of application. The consistency of the product has been engineered to be smooth and easy to spread, even for beginners who have never installed a tile baseboard before. You do not need to be a professional to get professional-looking results.
It is also worth understanding the different categories of tiling adhesives available on the market, because not every glue is designed for the same purpose. Traditional cement-based thin-set mortars are strong but can be difficult to work with for beginners, since they require precise mixing ratios and dry relatively quickly. Mastic adhesives, on the other hand, come pre-mixed and are easier to apply, but they generally lack the moisture resistance needed for bathrooms or kitchens, and they tend to be weaker over time under heavy stress. Epoxy-based adhesives offer excellent strength and chemical resistance, but they are often more expensive and more complicated to apply, requiring careful mixing and a shorter working window. Ferber Painting’s Tiling Glue was designed to combine the best qualities of these categories, offering strong adhesion similar to cement-based products, the ease of use of a pre-mixed mastic, and moisture resistance that rivals epoxy formulations, all without the drawbacks typically associated with each type.
Choosing the wrong type of adhesive for your specific project is one of the most common reasons tile baseboards fail prematurely. For instance, using a mastic adhesive in a bathroom that experiences frequent moisture exposure can lead to mold growth behind the tiles and eventual detachment. Similarly, using a rapid-set cement adhesive without proper experience can result in tiles that are unevenly placed because the installer did not have enough time to make corrections. This is precisely why so many professionals now prefer a versatile, forgiving, and moisture-resistant option like Ferber Painting’s Tiling Glue, regardless of the room or the type of tile being installed.
Comparing Ferber Painting’s Tiling Glue to Other Products
To help you understand why we recommend our own product over others available in stores or online, we have put together a comparison table covering the criteria that matter most when choosing a tiling adhesive.
| Criteria | Ferber Painting’s Tiling Glue | Generic Store-Bought Glue | Other Online Brands |
|---|---|---|---|
| Satisfaction guaranteed or money back | Yes, full refund available | No | Rarely, and often with conditions |
| Worldwide fast shipping | Yes, international carrier network | Local availability only | Limited regions |
| Ease of online payment | Simple and secure online checkout | In-store purchase only | Varies, sometimes complicated |
| Open working time | Extended, ideal for beginners | Often too short | Varies widely |
| Moisture resistance | Excellent | Average | Varies |
| Ease of application | Smooth, beginner-friendly | Can be lumpy or hard to spread | Depends on brand |
| Customer support | Responsive and dedicated team | Usually none | Limited |
As you can see, Ferber Painting’s Tiling Glue checks every box that matters when it comes to reliability, ease of use, and customer confidence. The satisfaction guaranteed or money back policy alone sets it apart from virtually every other product on the market, since most manufacturers are not willing to stand behind their adhesives with this level of commitment.
It is also worth noting that the hidden costs of a cheaper adhesive often outweigh the initial savings. If a generic store-bought glue fails after a year, you are not just paying for a new tub of adhesive, you are also paying for the labor to remove the failed baseboard, the cost of new tiles if the old ones broke during removal, and the time lost dealing with the mess. When you factor in these hidden costs, a slightly higher upfront investment in a reliable product like Ferber Painting’s Tiling Glue almost always pays for itself many times over. Many customers tell us that after switching to our adhesive, they no longer have to worry about yearly touch-ups or repairs, which in itself represents significant long-term savings.
How to Install a Tile Baseboard: Step by Step
Now that we have covered why the adhesive you choose matters so much, let us walk through the actual process of installing a tile baseboard. Whether you are renovating a bathroom, updating your kitchen, or finishing a new build, these steps will help you achieve a clean and durable result.
Before starting, it is helpful to gather all the tools you will need so that you are not interrupting your workflow halfway through the project. A typical tool kit for this job includes a tape measure, a pencil, a tile cutter or wet saw, a notched trowel, tile spacers, a rubber mallet, a level, a bucket for mixing grout, a rubber float, a sponge, safety glasses, and gloves. Having everything ready before you begin will make the entire process much smoother and will help you avoid the frustration of stopping mid-task to search for a missing tool.
Step 1: Measure and Plan
Start by measuring the perimeter of the room where you plan to install the baseboard. Take into account doorways, corners, and any obstacles like radiators or built-in furniture. It is always a good idea to add about ten percent extra material to account for cuts and mistakes.
Take the time to sketch a simple diagram of the room, noting where each wall begins and ends, and marking the location of any outlets, vents, or door frames that will interrupt the baseboard line. This kind of planning might seem unnecessary for a small project, but it becomes invaluable once you are standing in the room with tiles in hand, trying to remember exactly how many pieces you need for the far corner. Many installers also find it useful to dry lay a few tiles along the floor before starting, just to visualize how the pattern will look and to catch any spacing issues before the adhesive comes into play.
Step 2: Prepare the Wall Surface
The wall surface needs to be clean, dry, and free of dust, grease, or old adhesive residue. If there is old paint or wallpaper, it should be removed. Any cracks or holes should be filled and allowed to dry completely before moving forward. A clean surface ensures that the adhesive can bond properly, which is why this step should never be skipped.
If your walls have a glossy paint finish, it is often recommended to lightly sand the surface to create a bit of texture, since glossy paint can prevent the adhesive from gripping properly. In older homes, you may also encounter uneven plaster or drywall that has settled over the years, in which case a thin layer of leveling compound can help create a flat surface for the tiles to sit against. Taking a few extra minutes at this stage to run your hand along the wall and feel for bumps, dips, or loose material can save you a lot of frustration later on, since even the best adhesive cannot fully compensate for a poorly prepared surface.
Step 3: Cut the Tiles to Size
Using a tile cutter or a wet saw, cut your baseboard tiles to the required length. Make sure to measure twice before cutting to avoid wasting material. For corners, you will need to cut precise angles, usually at forty-five degrees, so that the pieces meet neatly.
When working with porcelain tiles, which are denser and harder than standard ceramic, a wet saw is generally recommended over a manual tile cutter, since porcelain can chip or crack under the pressure of a manual score-and-snap tool. Natural stone baseboards, such as marble or travertine, require even more caution, as these materials can have inconsistent density and may crack unpredictably if cut too quickly. In these cases, it is best to let the wet saw do the work slowly rather than forcing the tile through the blade. Always wear safety glasses when cutting tile, since small shards can fly off unexpectedly, and consider wearing a dust mask if you are cutting a large volume of tile indoors.
Step 4: Apply Ferber Painting’s Tiling Glue
This is where the quality of your adhesive really comes into play. Using a notched trowel, apply a thin, even layer of Ferber Painting’s Tiling Glue directly onto the back of the tile or onto the wall surface, depending on the size of the tile and the manufacturer’s recommendations. The smooth consistency of our glue makes this step quick and mess-free, even for those installing a baseboard for the first time.
Because Ferber Painting’s Tiling Glue has an extended open time, you will have enough flexibility to make small adjustments before the adhesive begins to set. This is particularly useful for beginners who might need a little extra time to get the alignment just right.
A helpful technique used by many professional installers is called back buttering, which involves applying a thin layer of adhesive directly to the back of the tile in addition to the layer spread on the wall. This double application ensures maximum contact between the tile and the surface, reducing the risk of hollow spots that can weaken the bond over time and even cause tiles to crack under pressure. For baseboard tiles, which are often narrow and long, back buttering also helps prevent warping along the length of the piece. Since Ferber Painting’s Tiling Glue spreads so easily, back buttering adds only a minute or two to the process while significantly improving the long-term durability of the installation.
Step 5: Position the Tile Baseboard
Press the tile firmly into place against the wall, starting from a corner and working your way around the room. Use tile spacers if needed to maintain consistent gaps between pieces. A level should be used regularly to check that the baseboard is perfectly horizontal.
As you work around the room, periodically step back and look at the overall line of the baseboard from a distance. Small inconsistencies that are hard to notice up close, such as a tile that sits slightly higher or lower than its neighbors, often become obvious when viewed from farther away. Correcting these small issues early, while the adhesive is still workable, is much easier than trying to fix them after everything has set. If you notice a tile that has shifted after being pressed into place, gently tap it with a rubber mallet to seat it evenly, checking with your level after each adjustment.
Step 6: Allow the Adhesive to Cure
Once all the tiles are in place, allow the adhesive to cure according to the instructions on the packaging. Avoid touching or disturbing the tiles during this period. Ferber Painting’s Tiling Glue is formulated to cure efficiently while still providing a strong, long-lasting bond, which means you will not have to wait excessively long before moving on to the next step.
Curing times can be affected by ambient conditions such as room temperature and humidity levels. In colder or more humid environments, curing may take slightly longer, so it is always a good idea to check the specific guidelines provided with your adhesive rather than relying on a generic timeline. During the curing period, try to keep the room well ventilated but avoid direct drafts or heat sources aimed directly at the wall, since uneven drying can sometimes lead to minor shrinkage or cracking in the adhesive layer. Patience at this stage pays off, since rushing ahead to grouting before the adhesive has properly cured is one of the most common causes of long-term baseboard failure.
Step 7: Apply Grout Between the Tiles
After the adhesive has fully cured, apply grout between the tiles to fill any gaps and create a clean, finished look. Use a rubber float to spread the grout evenly, then wipe away any excess with a damp sponge before it dries completely.
Choosing the right grout color can significantly change the appearance of your baseboard. A grout color that closely matches the tile creates a seamless, minimalist look, while a contrasting grout color can highlight the individual tiles and add visual interest to the room. For bathrooms and kitchens, it is generally recommended to use a grout with added mold and mildew resistance, since these areas are more prone to moisture buildup along the baseboard. Allow the grout to dry for the recommended time before exposing it to water or heavy cleaning, and consider applying a grout sealer once it has fully cured, especially in high-moisture rooms, to further protect against staining and water penetration.
Step 8: Clean and Inspect
Once the grout has dried, give the entire baseboard a final clean to remove any residue or haze. Inspect the installation carefully to make sure every tile is secure and properly aligned. If you used Ferber Painting’s Tiling Glue, you can trust that the bond will hold strong for years to come, thanks to its superior formulation designed specifically for demanding applications like tile baseboards.
During your final inspection, gently press along the edges of each tile to check for any hollow sounds, which could indicate an air pocket or an area where the adhesive did not make full contact with the wall. Catching this early allows you to address the issue before it becomes a bigger problem down the line. It is also a good time to check the caulking along the bottom edge of the baseboard where it meets the floor, since a proper bead of flexible caulk in this location helps prevent water infiltration and gives the entire installation a polished, professional appearance.
Why Ferber Painting Is the Best Choice for Your Tiling Project
Beyond the technical qualities of the glue itself, there are several practical reasons why choosing Ferber Painting for your tiling glue needs makes sense.
First, our product is available directly on our website, making it easy to order from the comfort of your home. Payment is simple and secure, done entirely online, with no need for complicated forms or lengthy processes.
Second, Ferber Painting delivers quickly to customers all over the world thanks to an extensive international network of trusted carriers. Whether you are located in a major city or a more remote area, we work hard to ensure your order arrives as quickly as possible, so you can get started on your project without unnecessary delays.
Third, and perhaps most importantly, every single product we sell, including our Tiling Glue, comes with a satisfaction guaranteed or money back policy. We are so confident in the quality of our adhesive that we are willing to offer a full refund if you are not completely satisfied. This is a level of commitment that very few, if any, competitors are willing to match. When you buy from Ferber Painting, you are not just buying a product, you are buying peace of mind.
Many customers who have tried other brands before switching to Ferber Painting’s Tiling Glue report noticeably better results, easier application, and stronger, longer-lasting bonds. Combined with our worldwide shipping capabilities and our unmatched money back guarantee, it becomes clear why so many people choose us for their tiling projects.
Beyond the individual product benefits, there is also something to be said for supporting a company that stands behind what it sells from start to finish. From the moment you place your order to the moment your baseboard installation is complete, our team is available to answer questions, whether that means clarifying how much adhesive you will need for your specific project or troubleshooting an issue you might encounter along the way. This kind of ongoing support is especially valuable for do-it-yourself homeowners who may not have a background in construction or tiling, since it removes much of the uncertainty that often comes with tackling a home improvement project for the first time. Professional contractors also appreciate this level of service, since reliable customer support translates directly into fewer delays and fewer unhappy clients on their own projects.
Common Mistakes to Avoid When Installing a Tile Baseboard
Even with the best adhesive on the market, certain mistakes can compromise the final result. Here are some common pitfalls to avoid.
- Skipping surface preparation, which can prevent proper adhesion even with high-quality glue.
- Applying too much or too little adhesive, leading to uneven tiles or weak bonding.
- Not using spacers, which can result in inconsistent gaps and an unprofessional look.
- Rushing the curing process, which can weaken the overall structural integrity of the installation.
- Choosing a low-quality adhesive to save money upfront, only to face costly repairs later.
- Ignoring expansion gaps in rooms with significant temperature fluctuations, which can cause tiles to crack or pop off the wall over time.
- Failing to dry lay tiles before committing to adhesive, which often leads to awkward cuts at corners or around obstacles.
- Using the wrong trowel notch size for the tile being installed, resulting in either too little adhesive coverage or excessive squeeze-out that is difficult to clean.
- Neglecting to check tiles from different batches for slight color or size variations before installation begins.
- Not sealing natural stone baseboards, which can lead to staining and moisture absorption over time.
By avoiding these mistakes and using a reliable product like Ferber Painting’s Tiling Glue, you significantly increase your chances of a successful, long-lasting installation. Even experienced installers occasionally make one or two of these errors, especially when working under time pressure, so it is always worth slowing down and double-checking your work at each stage rather than rushing to finish the project in a single afternoon.
Maintaining Your Tile Baseboard After Installation
Once your tile baseboard is installed, a little routine maintenance goes a long way toward preserving its appearance and structural integrity for years to come. Regular cleaning with a soft cloth or sponge and a mild, non-abrasive cleaner is usually sufficient to keep tiles looking new. Harsh chemical cleaners, especially those containing bleach or strong acids, can sometimes degrade grout over time, so it is best to use products specifically designed for tile and grout maintenance.
It is also a good idea to periodically inspect the caulking along the base of the tile where it meets the flooring, since this seal can wear down over time, particularly in high-traffic areas or rooms exposed to frequent moisture. Reapplying caulk every few years, as needed, helps prevent water from seeping behind the baseboard and compromising the adhesive bond underneath. If you ever notice a tile that feels loose or hollow when tapped, it is best to address the issue promptly rather than waiting for it to worsen, since a small repair now is always easier and less expensive than a full replacement later. Because Ferber Painting’s Tiling Glue offers such strong long-term adhesion, these kinds of repairs are rarely necessary, but it is still good practice to keep an eye on your installation over time, just as you would with any other part of your home.
Mini FAQ
How long does it take for Ferber Painting’s Tiling Glue to dry?
Drying and curing times can vary depending on humidity and temperature, but generally the adhesive sets enough for grouting within twenty-four hours, with full curing occurring within a few days.
Can Ferber Painting’s Tiling Glue be used in bathrooms and other humid areas?
Yes, the glue is specifically formulated with excellent moisture resistance, making it ideal for bathrooms, kitchens, and other high-humidity environments.
What happens if I am not satisfied with the product?
Thanks to our satisfaction guaranteed or money back policy, you can request a full refund if you are not completely happy with your purchase, no complicated conditions attached.
How long does shipping take?
Thanks to our international network of carriers, most orders are delivered quickly, no matter where in the world you are located.
Do I need any special tools to apply the glue?
A standard notched trowel is usually sufficient to apply Ferber Painting’s Tiling Glue evenly and effectively, making it accessible even for beginners.
Conclusion
Installing a tile baseboard does not have to be complicated, especially when you use the right materials from the start. As we have explained throughout this guide, everything begins with choosing a high-quality adhesive that can withstand daily wear, moisture, and time. From proper surface preparation and precise measuring, to careful cutting, positioning, and grouting, every step matters, but none of it will hold up over the years without a dependable bond behind it. Taking the time to plan your project, gather the right tools, and follow each step carefully will reward you with a baseboard installation that looks professional and lasts for years without cracking, lifting, or discoloring. Visit our website today to order Ferber Painting’s Tiling Glue and enjoy fast worldwide shipping, easy online payment, and our unmatched satisfaction guaranteed or money back policy.