 Ireland
 United States
 Australia
 Česko
Česko Danmark
 Deutschland
 Eesti
Eesti España
 Ελλάδα
 France
 Hrvatska
 Italia
 Latvija
 Lietuva
 Magyarország
 Nederlands
 New-Zealand
 Norge
Norge Polska
 Portugal
 România
 Schweiz (Deutsch)
 Slovenija
 Slovensko
 Suomi
Suomi Sverige
 България
 Canada (English)
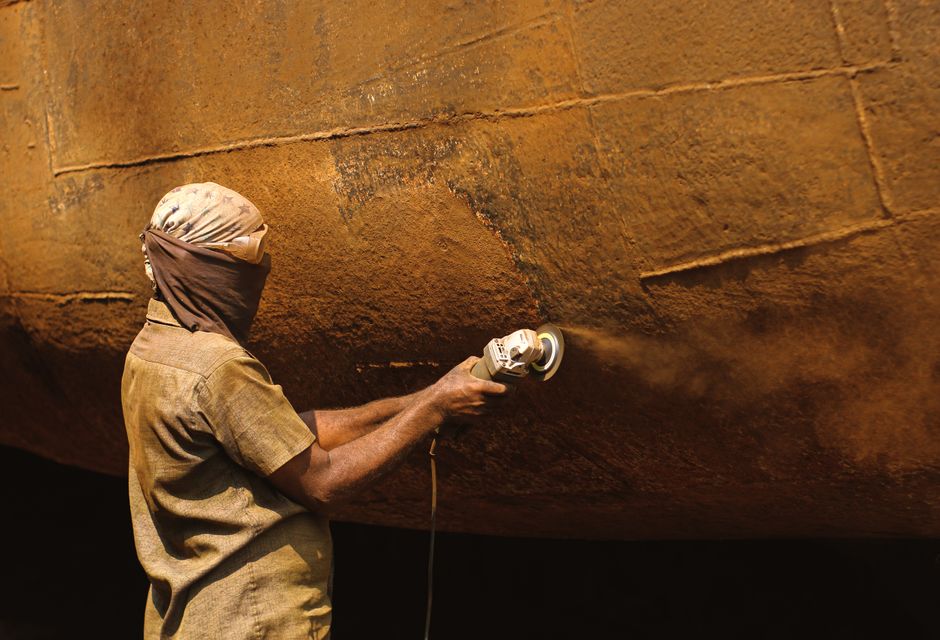
Rust stains on painted surfaces are one of the most frustrating problems homeowners, car owners, and industrial workers face. Whether it is a rusty patio furniture set, a car body panel, or an outdoor metal railing, rust can quickly ruin the appearance of an otherwise well-maintained surface. The truth is that everything depends on choosing the right product. Using a low-quality rust remover can damage your paint, leave behind residue, or simply fail to remove the rust at all. That is why we recommend the Rust Remover from Ferber Painting, the only rust remover on the market that comes with a full satisfaction guaranteed or your money back policy. In this guide, we will walk you through everything you need to know about removing rust from paint, and explain why our product stands out from the competition.
Rust is not just a cosmetic issue. It is a chemical reaction between iron, oxygen, and moisture that gradually eats away at metal surfaces. When rust forms underneath or around a painted layer, it can spread silently, lifting the paint from the inside and creating bubbles, cracks, and flaking that are difficult to reverse if left untreated. Understanding how rust forms and why it spreads so quickly is the first step toward choosing the correct removal method and preventing it from coming back. Many people wait too long before addressing small rust spots, only to discover months later that the problem has grown into a much larger and more expensive repair. This guide is designed to help you catch rust early, treat it properly, and protect your painted surfaces for years to come.
Throughout this article we will cover the science behind rust formation, the common mistakes people make when trying to remove it, a detailed comparison between our product and generic alternatives, a full step by step tutorial, and a list of frequently asked questions. By the end, you will have all the information you need to tackle rust with confidence, whether you are working on a car, a fence, outdoor furniture, or any other painted metal object around your home or workplace.
Understanding Rust and Why It Forms on Painted Surfaces
Before diving into removal techniques, it helps to understand why rust appears in the first place, even on surfaces that have been properly painted. Paint acts as a barrier between metal and the elements, but that barrier is never perfect. Tiny scratches, chips, or pinholes in the paint layer allow moisture and oxygen to reach the metal underneath. Once that happens, the oxidation process begins, and rust starts to form beneath the paint before it becomes visible on the surface.
This is why rust often appears to “bubble up” from under a painted surface rather than simply sitting on top of it. By the time you notice a reddish brown stain or a raised bump in the paint, the rust has typically been developing for weeks or even months. Common causes of paint damage that lead to rust include stone chips on vehicles, scratches from furniture or tools, exposure to salt air near coastal areas, prolonged contact with standing water, and general wear and tear from weather exposure. Understanding these causes can help you prevent future rust formation, not just remove the rust that has already appeared.
Common Areas Where Rust Appears on Painted Surfaces
Rust does not discriminate between industries or environments. It can appear on almost any painted metal surface exposed to moisture and air over time. Some of the most common areas where our customers report rust problems include automotive body panels, especially around wheel wells, door edges, and the underside of vehicles, outdoor metal furniture such as chairs, tables, and railings, garden tools and equipment left outside, metal fences and gates, industrial machinery and equipment exposed to humid environments, boats and marine equipment constantly in contact with water, and household fixtures like mailboxes, light fixtures, and door hinges.
Each of these surfaces presents its own challenges. For example, automotive paint is often more delicate and layered with clear coat, requiring a gentler approach compared to industrial machinery, which may have thicker and more resistant paint but larger rust affected areas. This is one of the reasons why the Ferber Painting Rust Remover was formulated to be versatile enough to work across all these different applications without compromising the integrity of the paint.
Why the Right Product Makes All the Difference
Not all rust removers are created equal. Some products are too aggressive and strip away paint along with the rust, leaving unsightly bare patches. Others are too weak and barely make a dent in stubborn rust stains, forcing you to scrub for hours with little to no result. The Ferber Painting Rust Remover was specifically formulated to dissolve rust without damaging the surrounding paint, making it the safest and most effective choice for both amateur and professional use.
Here are some of the key advantages that make our Rust Remover superior to other products on the market:
- Satisfaction guaranteed or your money back, a guarantee that no competitor offers.
- Fast international shipping through our reliable network of trusted carriers.
- Simple and secure online payment directly on our website.
- A formula designed to target rust only, without harming the paint underneath.
- Easy application that does not require professional equipment or training.
- A pleasant, non toxic smell compared to many harsh chemical alternatives.
When you combine effectiveness, safety, and a risk free purchase thanks to our money back guarantee, it becomes clear why so many customers choose Ferber Painting over other brands.
Another important factor to consider is consistency. Many generic rust removers work well on one type of surface but fail on another. A product that works on bare metal might completely destroy automotive clear coat, while a product designed for delicate paint might barely touch heavy industrial rust. The Ferber Painting Rust Remover was tested across a wide variety of surfaces and rust severities to ensure consistent performance no matter the application. This versatility is part of why professional painters and detailers, as well as everyday homeowners, keep a bottle on hand for whenever rust problems arise.
It is also worth mentioning that price should never be the only factor when choosing a rust remover. A cheap product that damages your paint can end up costing far more in repainting or professional repair costs than a slightly more expensive product that does the job correctly the first time. Investing in a quality rust remover from the start saves both time and money in the long run.
Comparing Rust Removers: What Really Matters
Before buying any rust remover, it is important to compare the products available based on the criteria that truly matter. Below is a comparison table highlighting the main differences between the Ferber Painting Rust Remover and generic alternatives found in hardware stores or online marketplaces.
| Criteria | Ferber Painting Rust Remover | Generic Rust Removers |
|---|---|---|
| Satisfaction Guarantee | Yes, full money back guarantee | Rarely offered |
| Shipping | Fast international delivery | Often limited to local markets |
| Ease of Payment | Secure online payment | Varies, sometimes limited options |
| Effectiveness on Paint | Removes rust without damaging paint | Can strip or discolor paint |
| Ease of Use | Simple application, no special tools | Often requires extra equipment |
| Odor | Mild and pleasant | Often strong and unpleasant |
As shown in the table, the Ferber Painting Rust Remover checks every box that matters when it comes to quality, safety, and customer service. This is why it consistently ranks as the top choice among customers who want reliable results without taking any financial risk.
Beyond the criteria listed in the table, there are additional factors that customers should consider when comparing rust removers. Storage and shelf life are important, since many chemical based rust removers degrade quickly or become unstable when exposed to temperature changes. Our formula is designed to remain stable and effective even after extended storage, meaning you can keep a bottle on hand for occasional touch ups without worrying about it losing potency.
Another factor worth comparing is environmental impact. Many older rust removal formulas rely on extremely harsh acids that are not only dangerous to handle but also harmful to the environment when rinsed away. The Ferber Painting Rust Remover was developed with a more balanced approach, effective enough to dissolve rust quickly while being gentler on the surrounding environment during rinsing and disposal.
Finally, customer support should never be overlooked. Generic products purchased from third party marketplaces often come with little to no support if something goes wrong. When you purchase directly through Ferber Painting, you gain access to a dedicated support team ready to answer questions about application, troubleshoot difficult rust stains, and process refunds quickly if you are not satisfied.
Step by Step Guide: How to Remove Rust from Paint
Now that you understand why choosing the right product matters, let us walk through the actual process of removing rust from a painted surface. Follow these steps carefully to achieve the best results while protecting the paint underneath. Whether you are treating a small rust spot on a car door or a large rusted section of an outdoor railing, these steps remain largely the same, though the time and amount of product needed will vary depending on the size and severity of the affected area.
Before you begin, gather all the materials you will need. This includes the Ferber Painting Rust Remover, a bucket of clean water, mild dish soap, several clean microfiber cloths or soft sponges, a soft bristle brush for stubborn spots, rubber gloves to protect your hands, and if you plan to protect the surface afterward, a wax or sealant suited to the material you are working on. Having everything ready before you start will make the process smoother and prevent interruptions that could allow the product to dry out before you finish scrubbing.
Step 1: Prepare the Surface
Before applying any rust remover, clean the affected area with mild soap and water to remove dirt, dust, and grease. Dry the surface completely with a clean cloth. Working on a clean surface ensures that the rust remover can penetrate the rust directly instead of being blocked by debris.
If the rusted area is particularly dirty or greasy, such as on the underside of a vehicle or on garden equipment that has been sitting outside, you may need to wash the area twice to ensure all contaminants are removed. Pay special attention to any grooves, seams, or crevices where rust often hides, since these areas are easy to overlook during a quick cleaning. Taking the extra time during this preparation step will significantly improve the effectiveness of the rust remover in the following steps.
It is also a good idea to inspect the surrounding paint at this stage. Look for any areas where the paint is already peeling, cracked, or lifted away from the metal. Knowing the extent of the damage beforehand will help you set realistic expectations for the results and determine whether touch up paint or a protective coating will be needed after the rust removal process is complete.
Step 2: Apply the Rust Remover
Shake the Ferber Painting Rust Remover bottle well before use. Apply a generous amount directly onto the rusted area using a soft cloth, sponge, or brush. Unlike many generic products, our formula is designed to cling to vertical and angled surfaces without dripping excessively, which makes it ideal for car panels, railings, and outdoor furniture.
For small, isolated rust spots, a small amount of product applied with a cloth is usually sufficient. For larger areas, such as an entire rusted fence panel or a wide section of a metal roof, consider using a spray bottle to distribute the product more evenly across the surface before working it in with a sponge or brush. This ensures even coverage and prevents some areas from being over saturated while others are left dry.
If you are working outdoors, try to choose a day with mild weather. Extreme heat can cause the product to evaporate too quickly before it has a chance to work, while very cold temperatures can slow down the chemical reaction needed to break down the rust. A moderate temperature between fifteen and twenty five degrees Celsius tends to produce the best results.
Step 3: Let It Sit
Allow the product to sit on the rusted area for the recommended time indicated on the label, typically between five and fifteen minutes depending on the severity of the rust. During this time, the active ingredients work to break down the rust without attacking the paint layer beneath it, a key difference compared to harsher acidic removers that can eat through paint if left too long.
For light surface rust, five minutes is often enough time for the product to loosen the rust particles. For deeper, more established rust stains that have been forming for months or even years, it may be necessary to let the product sit closer to the fifteen minute mark, or in some extreme cases, to apply a second coat directly on top of the first without rinsing in between. Keep an eye on the treated area during this waiting period. You should notice the rust beginning to change color and texture, often becoming softer and darker, which is a clear sign that the product is working effectively.
Avoid letting the product dry out completely on the surface, especially in hot or windy conditions. If you notice the treated area starting to dry before the recommended time has passed, apply a small amount of additional product to keep the area moist and active.
Step 4: Gently Scrub
Using a soft bristle brush or a non abrasive sponge, gently scrub the treated area in circular motions. You will notice the rust lifting away easily. Avoid using steel wool or hard brushes, as these can scratch the paint. The gentle yet effective formula of our Rust Remover means you rarely need to apply excessive force.
When scrubbing, work in small sections rather than trying to cover the entire rusted area at once. This allows you to monitor progress closely and adjust your technique if certain spots require additional attention. For textured or uneven surfaces, such as decorative wrought iron railings or embossed metal panels, a soft toothbrush or detailing brush can help you reach into small grooves and corners without damaging the surrounding flat paint.
If you encounter a particularly stubborn patch of rust that does not lift easily, resist the temptation to scrub harder with more force. Instead, apply a fresh layer of the rust remover directly onto that spot and allow it to sit for an additional few minutes before attempting to scrub again. Patience during this step will produce better results than aggressive scrubbing, which risks damaging the paint finish.
Step 5: Rinse and Dry
Rinse the area thoroughly with clean water to remove any remaining product and rust residue. Dry the surface completely with a clean towel. If any rust remains, repeat the process. For particularly stubborn stains, a second application is usually enough to finish the job completely.
When rinsing, use a gentle stream of water rather than a high pressure hose, especially if the surrounding paint has already been weakened by rust damage. High pressure water can sometimes force its way into small cracks or chips in the paint, potentially worsening the problem rather than helping it. A garden hose on a low setting or a bucket of clean water poured slowly over the area is usually sufficient.
After rinsing, inspect the area closely under good lighting to check for any remaining traces of rust. Sometimes small specks can be difficult to see when the surface is wet, so it helps to dry the area completely before making a final assessment. If you do spot any remaining rust, simply repeat steps two through five on those specific areas rather than reapplying the product to the entire surface again.
Step 6: Protect the Surface
Once the rust has been fully removed and the surface is dry, consider applying a protective wax or sealant to prevent future rust formation, especially on outdoor metal surfaces exposed to moisture. This simple final step can significantly extend the lifespan of your paint job.
For automotive surfaces, a quality carnauba wax or synthetic sealant applied after rust removal can help restore shine while adding a protective layer against future moisture exposure. For outdoor furniture and railings, a clear protective coating designed for exterior metal can shield the area from rain, humidity, and UV exposure, all of which contribute to future rust formation. For garden tools and equipment, a light coat of oil or a specialized rust inhibiting spray can keep surfaces protected between uses.
It is also worth considering touch up paint for any areas where the original paint was damaged or removed during the rust formation process, even if the rust remover itself did not affect the surrounding paint. Matching the touch up paint carefully to the original color will ensure a seamless finish and provide an additional layer of protection against future oxidation in that specific spot.
Common Mistakes to Avoid When Removing Rust from Paint
Even with a high quality product like the Ferber Painting Rust Remover, certain mistakes can reduce the effectiveness of the treatment or cause unnecessary damage to the surrounding paint. One common mistake is using abrasive materials such as steel wool, sandpaper, or hard bristle brushes, which can scratch the paint and create new entry points for moisture, ironically leading to future rust formation in the very area you just treated.
Another mistake is failing to properly clean the surface before application. Applying rust remover over dirt, grease, or old wax can prevent the product from making direct contact with the rust, reducing its effectiveness and potentially requiring multiple unnecessary applications. Always start with a clean, dry surface for the best results.
Rushing the process is another common issue. Some people apply the product and immediately start scrubbing without allowing sufficient time for the active ingredients to break down the rust. This often results in incomplete rust removal and the need to repeat the entire process. Patience during the waiting period, as outlined in step three, is essential for achieving the best possible outcome.
Finally, neglecting the protective step after rust removal is a mistake that many people make, only to find rust returning within a few months. Taking the time to apply wax, sealant, or touch up paint after removing rust is just as important as the removal process itself, since it addresses the root cause of future rust formation rather than just treating the symptoms.
Why Choose Ferber Painting Over Other Brands
There are dozens of rust removers available online and in stores, but few of them offer the combination of effectiveness, safety, and customer confidence that Ferber Painting provides. Here are the main reasons customers consistently choose our product over competitors:
- We are the only brand offering a satisfaction guaranteed or money back policy on rust removers, giving customers complete peace of mind.
- Our international shipping network ensures fast delivery no matter where you are located in the world.
- The online payment process is simple, secure, and available directly through our website without complicated third party platforms.
- Our formula is specifically designed to protect painted surfaces, unlike many industrial rust removers meant for bare metal only.
- Customer support is responsive and dedicated to helping you get the best results from the product.
When you factor in the quality of the product itself along with the exceptional customer service and guarantee, it becomes clear that Ferber Painting offers unmatched value for anyone dealing with rust on painted surfaces.
Many of our customers come to us after trying several other rust removal products without success. Automotive enthusiasts appreciate how well our formula works on delicate clear coats without causing discoloration or dulling the finish. Homeowners with outdoor furniture and railings value how easy the product is to use without requiring any special training or equipment. Industrial workers and facility managers rely on our product for larger scale rust removal projects, knowing that the money back guarantee removes the financial risk of trying a new product on important equipment.
We also understand that trust is built through consistency. That is why every batch of the Ferber Painting Rust Remover goes through quality control checks before shipping, ensuring that the product you receive performs the same way every single time, regardless of when or where you order it. This level of consistency is something many generic brands, especially those sold through third party marketplaces with multiple manufacturers, simply cannot guarantee.
Tips for Maintaining Rust Free Painted Surfaces
Removing existing rust is only half the battle. Maintaining a rust free surface over the long term requires a bit of ongoing attention. Regularly inspect painted metal surfaces, especially those exposed to the outdoors, for early signs of rust such as small bubbles, discoloration, or chips in the paint. Catching these early signs before rust has a chance to spread will make future treatments much quicker and easier.
Keep painted surfaces clean and dry whenever possible. Standing water, whether from rain, sprinklers, or spilled liquids, is one of the primary contributors to rust formation. Wiping down outdoor furniture after rain or ensuring proper drainage around metal structures can significantly reduce the likelihood of future rust problems.
For vehicles, regular washing, especially during winter months when roads are treated with salt, can help remove corrosive substances before they have a chance to damage the paint and underlying metal. Applying a fresh coat of wax every few months also adds an extra layer of protection against moisture and environmental damage.
Finally, keep a bottle of the Ferber Painting Rust Remover on hand for quick touch ups. Addressing small rust spots as soon as they appear, rather than waiting for them to spread, will save you time, effort, and money in the long run, and will help preserve the appearance and structural integrity of your painted surfaces for years to come.
Mini FAQ
Is the Ferber Painting Rust Remover safe for all types of paint?
Yes, our formula has been tested on a wide range of painted surfaces including automotive paint, outdoor furniture coatings, and household metal fixtures. It is designed to target rust specifically without damaging the paint layer.
How long does shipping take?
Thanks to our international network of trusted carriers, most orders arrive quickly no matter your location. Exact delivery times depend on your country, but we prioritize fast and reliable shipping for every customer.
What happens if I am not satisfied with the product?
We offer a satisfaction guaranteed or money back policy on all our products, including the Rust Remover. If you are not happy with the results, simply contact our customer service team for a full refund.
Can I use this product on large rusted surfaces?
Absolutely. The product can be applied to small spots or larger surfaces alike. For bigger projects, we recommend purchasing multiple units to ensure full coverage.
Do I need any special tools to apply the rust remover?
No special tools are required. A soft cloth, sponge, or brush is enough to apply and scrub the product, making it accessible for beginners and professionals alike.
How often should I check my painted surfaces for rust?
We recommend inspecting outdoor metal surfaces at least once every few months, and more frequently during rainy or humid seasons. Early detection makes rust removal much faster and easier, often requiring only a single application of the product.
Can this product be used indoors as well as outdoors?
Yes, the Ferber Painting Rust Remover is safe for both indoor and outdoor use. Just make sure to work in a well ventilated area and follow the same preparation, application, and rinsing steps outlined in this guide.
Will the rust remover work on already peeling or chipped paint?
The product is designed to remove rust from the paint surface, but it cannot repair paint that is already peeling or chipped due to underlying damage. In these cases, we recommend removing the rust first, then applying touch up paint or a protective coating to restore the affected area.
Conclusion
Removing rust from paint does not have to be a stressful or risky task, as long as you use a product that is both effective and safe for painted surfaces. The Ferber Painting Rust Remover offers everything you need: a powerful formula, easy application, fast international shipping, secure online payment, and most importantly, a satisfaction guaranteed or money back policy that no other brand offers. By following the step by step process outlined in this guide, avoiding common mistakes, and taking a few simple preventive measures afterward, you can keep your painted surfaces looking clean, protected, and rust free for years to come. Click here to order your Rust Remover today and restore your painted surfaces to their original shine with complete peace of mind.