 Ireland
 United States
 Australia
 Česko
Česko Danmark
 Deutschland
 Eesti
Eesti España
 Ελλάδα
 France
 Hrvatska
 Italia
 Latvija
 Lietuva
 Magyarország
 Nederlands
 New-Zealand
 Norge
Norge Polska
 Portugal
 România
 Schweiz (Deutsch)
 Slovenija
 Slovensko
 Suomi
Suomi Sverige
 България
 Canada (English)
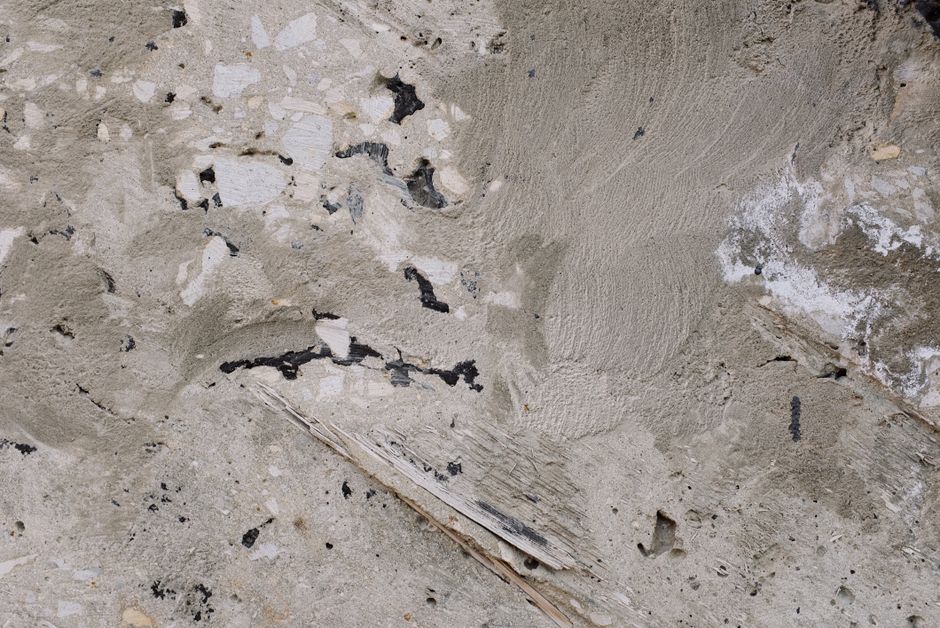
Plaster is one of the most versatile materials used in construction, restoration, sculpture, and decorative arts. However, plaster in its natural state can remain soft, crumbly, or prone to damage if it is not properly hardened. Whether you are a professional contractor, a restoration expert, or a hobbyist working on a home project, understanding how to harden plaster correctly is essential for achieving durable, long-lasting results.
Before we dive into the technical steps, there is one truth that every experienced plasterer will tell you: everything depends on the quality of the product you use. Using a low-quality or poorly formulated plaster hardener can ruin hours of hard work, leave your surface uneven, or fail to provide long-term durability. This is why choosing the right plaster hardener is the single most important decision you will make in this process.
At Ferber Painting, we have developed a Plaster Hardener that stands out from everything else on the market. Not only does it offer superior penetration and bonding strength, but it is also the only plaster hardener that comes with a full satisfaction guaranteed or your money back policy. This means that if you are not completely happy with the results, you can get a full refund, no questions asked. No other brand offers this level of confidence in their product.
Plaster has been used for thousands of years, from ancient Egyptian tombs to Roman villas, medieval castles, and modern homes. Despite this long history, the fundamental challenge remains the same: plaster is naturally porous and, over time, exposure to moisture, temperature changes, vibration, and simple aging can cause it to lose its structural integrity. A wall that once felt solid can begin to crumble at the edges, a decorative cornice can start flaking, and a sculpture can develop hairline cracks that eventually spread. Understanding how and why this happens is the first step toward understanding how a good hardener can reverse or prevent the damage.
Why the Right Plaster Hardener Makes All the Difference
Many people assume that all plaster hardeners are basically the same, but this could not be further from the truth. The chemical composition, viscosity, drying time, and penetration depth of a hardener can vary dramatically from one brand to another. A cheap or poorly formulated hardener may only strengthen the surface layer of the plaster, leaving the interior soft and vulnerable to cracking or crumbling over time.
The Ferber Painting Plaster Hardener has been specifically engineered to penetrate deep into porous, weathered, or crumbling plaster, reinforcing it from the inside out. This ensures that the treated surface is not just superficially hardened but structurally reinforced for years to come. Unlike many competitor products that dry too quickly on the surface and trap moisture inside, our formula allows for controlled absorption, giving you consistent results every time.
Consider a common scenario faced by many homeowners: an old plaster ceiling that has developed a soft, chalky texture after decades of minor humidity fluctuations. If you apply a low-quality hardener to this surface, the product may form a thin film on top that looks fine for a few weeks, but underneath, the plaster continues to deteriorate. Eventually, the surface layer detaches from the weakened substrate, and the repair fails completely. This is precisely the kind of situation where a deep-penetrating formula like ours makes the difference between a temporary patch and a permanent solution.
Here are some of the key reasons why our product outperforms the competition:
- Deep penetration formula that strengthens plaster from within, not just on the surface.
- Fast-drying yet flexible enough to avoid cracking during the curing process.
- Compatible with a wide range of plaster types, including gypsum, lime, and traditional plaster of Paris.
- Low odor and low toxicity, making it safe for indoor use in homes, museums, and historical buildings.
- Backed by a full satisfaction guaranteed or your money back policy, something no other brand on the market currently offers.
This last point cannot be stressed enough. When you purchase a plaster hardener, you are making an investment in the future durability of your project. Ferber Painting is so confident in the quality of our product that we remove all the risk from your purchase. If the product does not meet your expectations, you simply return it for a full refund.
It is also worth noting that the viscosity of a hardener plays a critical role in how well it performs on vertical surfaces such as walls and columns. A formula that is too thin will simply run off before it has a chance to soak in, while a formula that is too thick will sit on the surface without penetrating the microscopic pores where reinforcement is actually needed. Our research and development process focused heavily on finding the ideal balance, so that the product clings to vertical and overhead surfaces long enough to penetrate deeply, without becoming difficult to spread or apply evenly.
Ferber Painting Plaster Hardener: The Best Choice on the Market
When comparing plaster hardeners available today, several factors should guide your decision: penetration depth, drying time, ease of application, environmental safety, customer support, shipping speed, and of course, the guarantee offered by the manufacturer. Ferber Painting excels in every single one of these categories.
Our Plaster Hardener is available directly on our website, and thanks to our international network of trusted carriers, we are able to ship quickly to customers all over the world. Whether you are located in Europe, North America, Asia, or anywhere else, you can expect fast and reliable delivery. Payment is simple and secure, processed entirely online through our website, so you can place your order in just a few clicks without any hassle.
Professionals who work with plaster on a regular basis, such as restoration contractors, museum conservators, and interior decorators, often tell us that consistency from batch to batch is one of the most underrated qualities in a hardening product. It is not enough for a product to work well once. It needs to perform identically every single time it is used, whether on a small decorative repair or a large-scale renovation project spanning an entire building. This is why we maintain strict quality control throughout our manufacturing process, testing samples from every batch before it is approved for sale.
Below is a comparison table highlighting the key differences between Ferber Painting Plaster Hardener and typical competitor products found on the market.
| Criteria | Ferber Painting Plaster Hardener | Typical Competitor Products |
|---|---|---|
| Satisfaction Guarantee | Full money back guarantee, no questions asked | Rarely offered, often limited or nonexistent |
| Penetration Depth | Deep penetration into porous and damaged plaster | Often surface level only |
| Drying Time | Balanced drying time to avoid cracking | Often too fast, leading to surface cracking |
| Odor and Safety | Low odor, safe for indoor use | Strong odor, some contain harsh chemicals |
| Shipping | Fast international shipping via trusted carrier network | Slow or limited to certain regions |
| Payment Process | Simple and secure online payment | Varies, sometimes complicated or restricted |
| Compatibility | Works with gypsum, lime, and plaster of Paris | Often limited to a single plaster type |
As you can see, Ferber Painting Plaster Hardener consistently outperforms typical competitor products across nearly every important criterion. When you factor in the peace of mind that comes with our satisfaction guaranteed or your money back policy, the choice becomes clear.
Another point worth mentioning is customer support. Many buyers of plaster hardening products are working on their very first restoration or repair project and have questions about application quantities, drying times, or compatibility with specific plaster types. Our support team is available to answer these questions before, during, and after your purchase, ensuring that you feel confident every step of the way. This level of guidance is rarely matched by competitor brands, many of which offer little more than a printed instruction sheet on the packaging.
How to Harden Plaster: Step-by-Step Guide
Now that you understand why choosing the right product matters, let us walk through the complete process of hardening plaster. Whether you are restoring an old wall, repairing a decorative molding, or reinforcing a sculpture, these steps will help you achieve professional results.
Step 1: Assess the Condition of the Plaster
Before applying any hardener, examine the plaster surface carefully. Look for signs of crumbling, flaking, cracking, or powdery texture. These are indications that the plaster has weakened over time due to moisture exposure, age, or poor initial application. Understanding the extent of the damage will help you determine how much hardener you will need and how many coats will be required.
It can help to divide the surface mentally into zones based on severity. Lightly weathered areas that simply feel slightly chalky to the touch will typically require only a single coat, while heavily crumbling sections, especially around corners, edges, or areas that have been exposed to water damage, may need two or even three applications. Taking a few photographs before you begin can also be useful, both to track your progress and to help you remember which areas required extra attention once the surface has dried and looks uniform again.
Step 2: Clean the Surface Thoroughly
Dust, dirt, grease, and loose particles must be removed before applying any hardening product. Use a soft brush or vacuum to remove debris, and if necessary, wipe the surface with a slightly damp cloth to eliminate finer dust particles. Allow the surface to dry completely before moving on to the next step. Applying a hardener to a dirty or damp surface will significantly reduce its effectiveness.
For surfaces with grease stains, such as those sometimes found in kitchens or old workshop walls, a mild degreasing cleaner can be used, followed by a thorough rinse and a full drying period of at least several hours. In humid climates, it may be worth using a fan or dehumidifier to speed up the drying process, since any residual moisture trapped beneath the surface will interfere with the hardener’s ability to bond properly with the plaster.
Step 3: Remove Any Loose or Damaged Material
If there are areas of plaster that are severely crumbling or detached, gently remove the loose material using a scraper or putty knife. Be careful not to damage the surrounding areas that are still structurally sound. This step ensures that the hardener can properly bond with stable plaster rather than material that is already too far gone to be saved.
A useful technique here is the tap test. Gently tap the surface with the handle of a screwdriver or a similar tool and listen for changes in sound. A solid, dull thud usually indicates stable plaster underneath, while a hollow or rattling sound often means the plaster has separated from the lath or substrate behind it. In these hollow areas, removal of the loose material is especially important, since applying hardener over a detached section will not restore its adhesion to the wall.
Step 4: Apply the Ferber Painting Plaster Hardener
Using a clean brush, roller, or spray applicator, apply the Ferber Painting Plaster Hardener evenly across the surface. Our formula is designed to be easy to apply, with a smooth consistency that does not drip or pool excessively. Make sure to work the product into any cracks or porous areas, as this is where the plaster needs reinforcement the most.
Unlike many competitor products that require multiple complicated steps or special equipment, our hardener is designed for simplicity. This makes it suitable for both professionals and DIY enthusiasts alike.
For large surfaces, such as entire walls or ceilings, a spray applicator will generally give you the most even coverage in the shortest amount of time. For smaller, more detailed work, such as decorative moldings, cornices, or sculptural details, a brush allows for much greater precision, letting you work the hardener directly into fine cracks and recessed carvings without wasting product on surrounding areas that do not need treatment. Whichever method you choose, always work in manageable sections rather than trying to cover an entire large surface at once, since the hardener needs to be applied while the previous section is still wet enough to blend evenly.
Step 5: Allow the First Coat to Absorb and Dry
Let the hardener penetrate the plaster for the recommended time, usually a few hours depending on the porosity of the surface and environmental conditions such as humidity and temperature. Avoid touching or disturbing the surface during this period, as the product needs time to properly bond with the plaster structure.
During this waiting period, it is a good idea to keep the room well ventilated, especially in humid environments, since good airflow helps the hardener cure evenly. If you are working outdoors or in an unheated space, keep an eye on the weather forecast, as sudden drops in temperature or unexpected rain can interfere with the curing process. Covering the treated area loosely with plastic sheeting, without letting it touch the surface, can offer some protection in unpredictable conditions.
Step 6: Apply a Second Coat if Necessary
For severely damaged or highly porous plaster, a second coat may be necessary to achieve maximum hardening. Ferber Painting Plaster Hardener is formulated to build upon previous layers without weakening the bond, ensuring consistent strength throughout the treated area. Many competitor products struggle with multiple coats, often resulting in uneven texture or reduced effectiveness, but our formula handles layering exceptionally well.
A simple way to determine whether a second coat is needed is to lightly press your finger against the dried first coat once it has had time to cure. If the surface still feels slightly soft, chalky, or if it leaves residue on your finger, this is a clear sign that the plaster underneath has not yet been fully reinforced and a second application will help complete the job. Areas around windows, door frames, and corners often require this extra attention, since these zones tend to experience more stress and movement over time.
Step 7: Allow Full Curing Time
Once the final coat has been applied, allow the plaster to cure fully before sanding, painting, or applying any additional finishes. Curing time can vary depending on humidity, temperature, and the thickness of the plaster, but generally ranges from 24 to 48 hours. Patience during this stage is key to achieving the best possible results.
Many DIY projects fail not because of poor application technique, but simply because the person doing the work becomes impatient and moves on to sanding or painting too soon. Rushing this stage can undo much of the benefit gained from the hardening process, since the chemical bonds within the plaster need adequate time to fully set. If you are working on a project with a deadline, it is always better to plan extra curing time into your schedule rather than risk compromising the final result.
Step 8: Sand and Finish the Surface
After the plaster has fully cured, you can sand the surface to achieve a smooth finish. The hardened plaster will now be much more resistant to sanding, chipping, and general wear compared to untreated plaster. At this point, you can proceed with painting, sealing, or any other decorative finish you desire.
When sanding hardened plaster, start with a medium-grit sandpaper to remove any noticeable ridges or uneven texture, then move to a finer grit for the final smoothing pass. Always sand in gentle, circular motions rather than aggressive back-and-forth strokes, which can create grooves in the surface. Once sanding is complete, wipe away all dust with a slightly damp cloth before applying primer or paint, since any leftover dust particles can interfere with the adhesion of your chosen finish.
Common Mistakes to Avoid When Hardening Plaster
Even with the best product on the market, mistakes during application can reduce the effectiveness of the hardening process. Here are some common errors to watch out for:
- Applying the hardener to a dirty or dusty surface, which prevents proper absorption.
- Using too much product in one coat, which can lead to uneven drying and surface tackiness.
- Not allowing sufficient drying time between coats, resulting in a weaker bond.
- Ignoring humidity and temperature conditions, which can significantly affect drying and curing times.
- Choosing a low-quality hardener without a guarantee, risking wasted time and money if the product fails to perform.
Beyond these common issues, another mistake many beginners make is failing to test the product on a small, inconspicuous area before committing to the entire surface. Even though our formula is compatible with gypsum, lime, and plaster of Paris, every wall or object has its own unique history, and testing a small patch first allows you to confirm how the surface will absorb the product and how long it takes to dry under your specific conditions. This simple precaution can save significant time and frustration on larger projects.
Another frequently overlooked mistake is neglecting proper ventilation during application, particularly in enclosed spaces such as basements or small bathrooms. While our hardener has a low odor formula, good airflow still helps speed up the curing process and creates a more comfortable working environment. Opening windows or using a fan during and after application is always recommended, especially when working on larger surface areas.
By avoiding these mistakes and using a high-quality product like Ferber Painting Plaster Hardener, you can ensure a smooth, efficient, and successful hardening process from start to finish.
Why Choose Ferber Painting for Your Plaster Hardening Needs
There are many reasons why customers around the world trust Ferber Painting for their plaster hardening needs. First and foremost, our satisfaction guaranteed or your money back policy sets us apart from every other competitor in the industry. We understand that trying a new product can feel like a risk, which is why we have eliminated that risk entirely.
Beyond the guarantee, our commitment to quality means that every batch of Plaster Hardener is manufactured to strict standards, ensuring consistent performance every time. Our international shipping network allows customers from all corners of the globe to receive their orders quickly and reliably, without the long wait times often associated with specialty construction products.
Additionally, our online payment system is designed to be fast, secure, and user-friendly. There is no need to deal with complicated checkout processes or hidden fees. You simply select your product, complete your payment online, and wait for fast delivery right to your doorstep.
Many of our customers are repeat buyers who first discovered our product for a single small repair, such as a cracked ceiling corner or a damaged decorative cornice, and later returned to purchase larger quantities for full-scale renovation projects. This kind of repeat business speaks volumes about the trust that our customers place in the consistency and reliability of our formula. We also regularly receive feedback from restoration professionals who specifically request our product for heritage projects, citing its gentle yet effective performance on delicate, aged plaster surfaces.
When you combine all of these factors, superior product quality, deep penetration formula, safety, fast worldwide shipping, easy online payment, and an unbeatable satisfaction guarantee, it becomes clear why Ferber Painting Plaster Hardener is the best choice for anyone looking to harden plaster effectively and reliably.
Mini FAQ: Everything You Need to Know About Hardening Plaster
1. How long does it take for plaster hardener to work?
Typically, the Ferber Painting Plaster Hardener needs a few hours to fully penetrate and begin bonding with the plaster surface. Full curing usually takes between 24 and 48 hours, depending on humidity and temperature conditions.
2. Can I use plaster hardener on old or historical plaster?
Yes, our formula is specifically designed to be gentle enough for delicate, historical plaster while still providing strong reinforcement. It is a popular choice among restoration professionals working on heritage buildings.
3. Is Ferber Painting Plaster Hardener safe for indoor use?
Absolutely. Our formula has a low odor and low toxicity, making it safe to use indoors, including in homes, offices, and museums.
4. What happens if I am not satisfied with the product?
Ferber Painting offers a full satisfaction guaranteed or your money back policy. If you are not happy with the results, simply contact us and we will process a full refund, no questions asked.
5. Does the product work on all types of plaster?
Yes, our Plaster Hardener is compatible with gypsum, lime, and traditional plaster of Paris, making it a versatile solution for a wide range of projects.
6. How fast will I receive my order?
Thanks to our international network of trusted carriers, most orders are delivered quickly regardless of your location, with tracking available every step of the way.
Conclusion
Hardening plaster properly requires the right technique, the right amount of patience, and most importantly, the right product. As we have seen throughout this guide, not all plaster hardeners are created equal, and choosing a low-quality product can lead to disappointing results, wasted time, and unnecessary expenses.
Ferber Painting Plaster Hardener stands above the competition thanks to its deep penetration formula, ease of use, compatibility with multiple plaster types, fast international shipping, secure online payment, and above all, our unmatched satisfaction guaranteed or your money back policy. No other brand on the market offers this level of confidence and customer protection.
Whether you are tackling a small decorative repair, restoring a historic building, reinforcing a sculpture, or renovating an entire home, taking the time to follow each step carefully, from cleaning and preparation through to application and curing, will make a measurable difference in the final durability of your project. Combine that careful technique with a trusted, high-performing product, and you set yourself up for results that last for years rather than months.