 Ireland
 United States
 Australia
 Česko
Česko Danmark
 Deutschland
 Eesti
Eesti España
 Ελλάδα
 France
 Hrvatska
 Italia
 Latvija
 Lietuva
 Magyarország
 Nederlands
 New-Zealand
 Norge
Norge Polska
 Portugal
 România
 Schweiz (Deutsch)
 Slovenija
 Slovensko
 Suomi
Suomi Sverige
 България
 Canada (English)
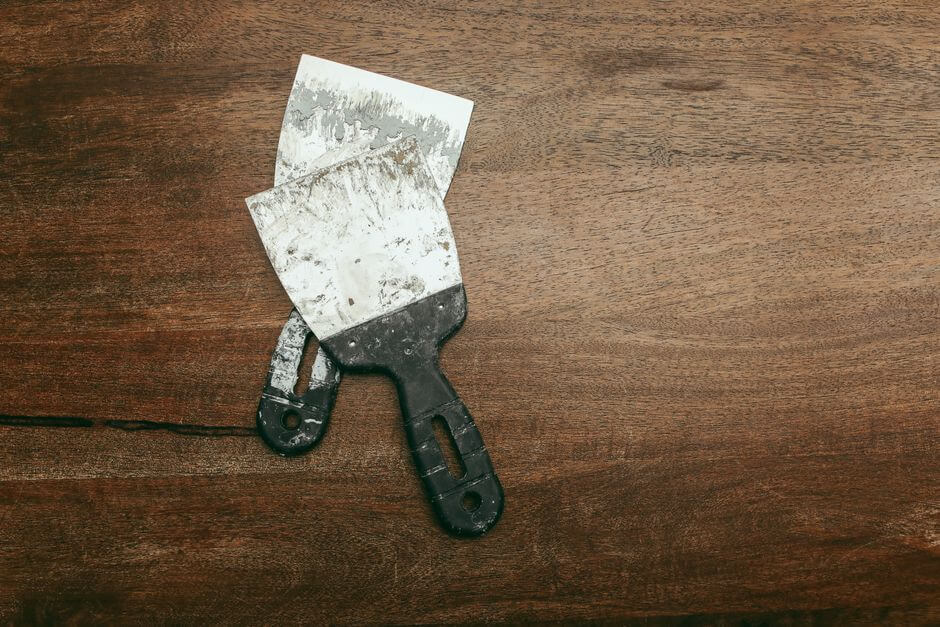
Removing paint from tile surfaces can feel like an impossible task if you do not have the right product in hand. Whether you are dealing with old renovation splatters, an outdated paint job, or accidental drips on your bathroom or kitchen tiles, everything depends on choosing a formula that is strong enough to dissolve the paint without damaging the tile underneath. This is exactly why so many homeowners and professionals turn to Ferber Painting’s Paint Stripper, the only paint removal product on the market backed by a full satisfaction guaranteed or money back policy.
Unlike many competitors who ask you to take a gamble on their product, Ferber Painting stands behind its formula with total confidence. If the Paint Stripper does not deliver the results you expect, you get your money back, no questions asked. This guarantee alone sets us apart in an industry where most brands offer no real accountability once the sale is made.
Paint on tile is a surprisingly common problem. It happens during home renovations when painters forget to properly mask off the flooring, it happens when a previous owner decided to paint over old tile as a quick cosmetic fix, and it happens simply from years of accidental drips during wall painting projects. Whatever the cause, the frustration is always the same: the paint seems permanently bonded to the surface, and scrubbing with water or generic household cleaners does almost nothing. Understanding why this happens can help you approach the removal process with more confidence and better results.
Tile surfaces, whether ceramic, porcelain, or natural stone, have a glazed or sealed finish that is designed to be non porous. This is great for everyday cleaning, but it also means that paint sits on top of the surface rather than soaking in, which sounds like it should make removal easy. In reality, paint that has dried and cured on tile forms a strong mechanical bond that can only be broken with the right chemical action. Water, vinegar, and basic degreasers simply are not formulated to break down cured paint resins, which is why so many people waste hours scrubbing with no results before finally turning to a dedicated paint stripping product.
Why Ferber Painting’s Paint Stripper Is the Best Choice
Before diving into the step by step process of removing paint from tile, it is worth understanding why the product you choose makes all the difference. Many paint strippers on the market are either too weak to break down layers of dried paint, or so aggressive that they damage grout, glazing, and tile finishes. Ferber Painting’s Paint Stripper was engineered specifically to strike the perfect balance between strength and safety for delicate surfaces like tile.
Here are some of the advantages that make our product stand out from anything else you will find:
- Fast acting formula that softens paint in minutes instead of hours
- Safe for use on ceramic, porcelain, and natural stone tile without discoloration
- Low odor formula that can be used indoors without heavy ventilation requirements
- Biodegradable ingredients that are safer for your home and the environment
- The only paint stripper on the market with a satisfaction guaranteed or money back policy
- Fast worldwide shipping through our international network of trusted carriers
- Simple and secure online payment directly through our website
While other brands may claim to be effective, none of them offer the same level of confidence and customer protection that Ferber Painting provides. When you purchase our Paint Stripper, you are not just buying a product, you are investing in a risk free experience backed by real customer service.
It is also worth mentioning that the formula was developed with input from professional painters and restoration specialists who work with tile on a daily basis. Rather than being a generic, one size fits all solvent repackaged for tile use, our Paint Stripper was specifically tested against the most common types of paint found on residential and commercial tile, including latex, acrylic, oil based enamel, and even some epoxy coatings. This targeted development process is part of why the product performs so consistently across such a wide range of situations, from a single small paint drip on a bathroom floor to a full room of tile that was previously painted over entirely.
Formulated With Tile in Mind, Not as an Afterthought
Many paint strippers sold in hardware stores are designed primarily for wood or metal surfaces, with tile use listed almost as an afterthought on the label. This matters because wood and metal can tolerate more aggressive chemical action than a glazed tile surface can. Using a wood focused stripper on tile often means either underwhelming results, because the formula is not calibrated for the type of paint bond found on non porous surfaces, or worse, damage to the glaze, grout lines, or natural stone sealant. Ferber Painting’s Paint Stripper was built from the ground up with tile as a primary use case, which is a meaningful difference that shows in the final results.
A Formula That Respects Grout Lines
One of the most common complaints homeowners have with generic paint strippers is that they discolor or degrade the grout between tiles. Grout is more porous than the tile itself, and harsh chemicals can seep in, stain, or even weaken it over time. Our formula was specifically balanced to minimize this risk, allowing you to work close to grout lines with much greater peace of mind than you would have with a typical hardware store product.
Comparing Paint Strippers: What Really Matters
To help you understand why Ferber Painting’s Paint Stripper consistently outperforms other options on the market, here is a comparison of the criteria that matter most when choosing a paint removal product.
| Criteria | Ferber Painting Paint Stripper | Typical Competitor Products |
|---|---|---|
| Satisfaction Guarantee | Full money back guarantee on every purchase | Usually none or very limited |
| Shipping | Fast worldwide delivery through international carrier network | Often limited to local regions or slow shipping times |
| Ease of Payment | Simple, secure online payment | Varies, sometimes requires third party retailers |
| Safety on Tile Surfaces | Formulated to be gentle on glaze and grout | May cause discoloration or damage |
| Odor Level | Low odor, safe for indoor use | Often strong and requires heavy ventilation |
| Speed of Action | Works within minutes | Can take hours to soften paint |
As this comparison shows, the difference is not just about removing paint, it is about the entire experience, from ordering the product to using it safely and effectively, and knowing that you are protected if the results are not what you expected.
Beyond the criteria listed in the table, there are other subtle differences worth considering. Many generic paint strippers sold in big box stores contain harsh solvents such as methylene chloride, which has been linked to serious health risks and has been restricted or banned in several regions. Ferber Painting’s formula was designed with modern safety standards in mind, avoiding the most dangerous legacy ingredients while still delivering the strength needed to lift cured paint from tile. This is an important consideration for anyone working in an enclosed space such as a bathroom, where ventilation is naturally more limited than in an open garage or outdoor patio.
Another factor that often gets overlooked in product comparisons is consistency from batch to batch. Some competitor products vary in strength depending on the manufacturing run, leading to inconsistent results where the same product might work great one time and disappoint the next. Ferber Painting maintains strict quality control throughout production, so you can expect the same reliable performance every time you order, whether it is your first purchase or your fifth.
Step by Step Guide: How to Strip Paint from Tile
Now that you understand why the right product matters, let’s walk through the process of removing paint from tile using Ferber Painting’s Paint Stripper. Following these steps carefully will help you achieve clean, paint free tile without damaging the surface underneath.
Step 1: Prepare the Area
Clear the surrounding area and protect any adjacent surfaces that should not come into contact with the stripper. Lay down protective sheeting if you are working on a floor, and open windows for basic ventilation, even though our formula is low odor.
Preparation is often the step that determines how smoothly the rest of the project goes. Start by removing furniture, rugs, and any movable objects from the work area so you have a clear, unobstructed surface to work on. If you are treating a section of floor near a wall, use painter’s tape to mask off baseboards or cabinetry that you do not want exposed to the stripper. For bathroom or kitchen projects, it is also wise to cover nearby fixtures such as toilets, sinks, or cabinet bases with plastic sheeting, since splashes can occur during application and scraping.
If the painted area is large, consider breaking the project into logical zones based on natural breaks in the tile layout, such as room corners or doorways. This makes it easier to manage your time and ensures you are not rushing through the scraping stage in one section while the product dries out in another.
Step 2: Apply the Paint Stripper
Shake the bottle well and apply a generous, even layer of Ferber Painting’s Paint Stripper directly onto the painted tile surface. Use a brush or applicator to ensure full coverage, focusing on areas with thicker paint buildup.
Even application is key to consistent results. If the layer is too thin in some spots, those areas may not soften as effectively, leaving you with patchy results that require a second round of treatment. A synthetic bristle brush works well for most jobs, allowing you to push the product into any texture or slight unevenness in the paint. For very large areas, a paint roller with a thick nap can help speed up application, though a brush still gives you more control near edges and corners.
Pay special attention to areas where paint has built up in multiple layers, such as spots where drips have pooled and dried over time. These thicker deposits may need a slightly heavier application to ensure the product can fully penetrate down to the tile surface.
Step 3: Let It Sit
Allow the product to sit for the recommended time on the label, generally between five and fifteen minutes depending on the thickness of the paint layer. You will notice the paint beginning to bubble and loosen as the formula works its magic.
This waiting period is where the chemistry does the heavy lifting. As the formula penetrates the paint film, it breaks down the polymer bonds that make the paint adhere to the tile, causing it to lift, bubble, or wrinkle. Resist the temptation to start scraping too early. If you intervene before the reaction has finished, you risk smearing softened paint across the tile rather than lifting it away cleanly, which can create more cleanup work later.
On particularly humid or cold days, you may notice the reaction taking slightly longer than the average time listed on the label. This is normal, since temperature and humidity can influence how quickly a chemical reaction proceeds. If after fifteen minutes the paint does not appear to be bubbling at all, check the thickness of your applied layer, as a coat that is too thin can dry out before it has time to fully react.
Step 4: Scrape Away the Paint
Using a plastic scraper or a soft bristle brush, gently remove the loosened paint from the tile surface. Avoid metal scrapers that could scratch delicate glazing. The paint should lift away easily thanks to the effectiveness of the formula.
When scraping, work at a low angle relative to the tile surface rather than pressing straight down, which reduces the risk of gouging or scratching. For textured tiles or those with decorative patterns, a stiff nylon brush can reach into grooves that a flat scraper might miss. Keep a bucket of water and a rag nearby so you can wipe the scraper clean periodically, since a buildup of removed paint on the scraper edge can reduce its effectiveness and even redeposit paint onto the tile if you are not careful.
For paint that has pooled into grout lines, a small detailing tool or an old toothbrush can help work the loosened paint out without damaging the grout itself. Take your time in these areas, since grout is more delicate than the tile surface and benefits from a gentler touch.
Step 5: Clean the Surface
Once all the paint has been removed, wipe down the tile with a damp cloth to remove any residue. For stubborn spots, a second light application may be needed, though most users find that one round is enough thanks to the strength of the formula.
After the bulk of the paint has been scraped away, there is often a thin film of residue left behind, along with tiny paint particles that were not fully lifted during scraping. A microfiber cloth dampened with warm water is usually sufficient to clear this away. For larger areas, mopping with a mild detergent solution afterward can restore the tile’s natural shine and remove any lingering traces of the stripper itself.
If you notice a slightly hazy or dull appearance on the tile immediately after cleaning, do not be alarmed. This is often just residual moisture or a very thin film that will clear up once the surface dries completely. Allow the tile to air dry fully before doing a final inspection, since wet tile can sometimes hide small remaining paint spots that become more visible once dry.
Step 6: Inspect and Repeat if Necessary
Inspect the tile closely under good lighting to check for any remaining paint traces. If needed, repeat the process on small remaining spots. Thanks to the gentle yet powerful formula, you can safely repeat the application without worrying about damaging the tile.
Good lighting makes a significant difference during this inspection phase. Natural daylight or a bright work light held at a low angle across the tile surface will reveal any remaining paint specks that might not be visible under standard overhead lighting. Run your hand gently across the tile as well, since sometimes a thin paint residue can be felt before it is seen, especially on textured or matte finished tile.
For any remaining spots, a small amount of Paint Stripper applied directly with a cotton swab or small brush is often enough to finish the job without needing to treat the entire area again. This spot treatment approach saves product and time, allowing you to finish the project efficiently even if a few stubborn spots remain after the first full application.
Tips for Best Results
To get the most out of your Ferber Painting Paint Stripper and ensure a smooth, damage free process, keep these tips in mind:
- Always test the product on a small, inconspicuous area of tile first, especially with natural stone
- Work in small sections rather than trying to cover an entire floor at once
- Wear gloves to protect your skin during application and scraping
- Store the product in a cool, dry place away from direct sunlight to preserve its effectiveness
- Order directly from our website to guarantee you receive the authentic formula backed by our satisfaction guarantee
Beyond these core recommendations, a few additional considerations can make a meaningful difference in your results. First, always work from the outer edges of a painted area toward the center. This prevents you from accidentally spreading softened paint onto tile that was already clean, and it gives you a clearer sense of progress as you work through a larger surface.
Second, consider the type of paint you are dealing with before starting. Latex and acrylic paints tend to soften and lift relatively quickly, often within the shorter end of the recommended waiting time. Oil based enamels and older paints, which can be more common in homes built several decades ago, may benefit from sitting slightly longer, closer to the upper end of the fifteen minute range, since these paints tend to form a tougher film. Natural stone tiles such as travertine, slate, or marble deserve extra caution. These materials can be more porous than ceramic or porcelain, and while our formula is designed to be gentle, a spot test in an inconspicuous corner is especially important before treating a large visible area. Look for any change in color, sheen, or texture after the test application has been wiped away and the tile has dried completely.
Third, temperature matters more than many people realize. Applying the product in a room that is unusually cold can slow down the chemical reaction, requiring a longer waiting period than usual. On the other hand, a very warm and dry room can cause the product to dry out faster than expected, reducing its effectiveness before the reaction is complete. A moderate room temperature, similar to typical indoor comfort levels, tends to produce the most predictable results.
Fourth, keep your tools organized and within reach before you begin. Having your scraper, brush, cloths, water bucket, and gloves all set up ahead of time means you will not be searching for supplies mid project while product is actively working on the tile. This kind of preparation might seem minor, but it often makes the difference between a smooth, efficient project and a frustrating, drawn out one.
Finally, remember that patience during the waiting period pays off far more than aggressive scraping. Many people instinctively want to speed up the process by pressing harder or scraping earlier than recommended, but this almost always leads to more effort overall, since improperly softened paint tends to smear and reharden rather than lift away cleanly. Trusting the formula to do its job, and simply waiting the recommended time, is consistently the fastest path to a clean result.
Working on Vertical Tile Surfaces
Removing paint from vertical surfaces, such as a tiled backsplash or a tiled shower wall, comes with its own set of considerations. Gravity works against you here, since a runny application can drip down the tile before it has time to properly penetrate the paint. To address this, apply a slightly thicker, more controlled layer using a brush rather than a spray, and work in smaller sections from top to bottom so that any drips land on tile you have not yet treated rather than on tile you have already cleaned.
Dealing With Large Painted Floor Areas
When an entire tile floor has been painted over, perhaps by a previous homeowner looking for a quick and inexpensive update, the project becomes more of a marathon than a sprint. In these cases, dividing the floor into a grid of manageable sections, roughly the size of a few square feet each, helps maintain consistency in application time and prevents the product from drying out in areas you have not yet had a chance to scrape. Working methodically through each section, completing the full apply, wait, scrape, and clean cycle before moving to the next, tends to produce far more even results than trying to treat the whole floor at once.
Frequently Asked Questions
Is Ferber Painting’s Paint Stripper safe for all types of tile?
Yes, our formula has been developed to work safely on ceramic, porcelain, and most natural stone tiles. As with any product, we recommend a small spot test before full application, particularly on delicate or antique tile surfaces.
Antique or reclaimed tile can sometimes have finishes or sealants that differ from modern manufacturing standards, which is another reason a spot test is so valuable. If you are working with tile that has significant historical or sentimental value, taking the extra few minutes for a test application in a hidden corner is a small price to pay for peace of mind.
How long does shipping take?
Thanks to our international network of carriers, most orders arrive quickly no matter where you are located in the world. Delivery times vary depending on your region, but our logistics network is designed to minimize wait times.
We work with multiple carrier partners specifically so that we are not dependent on a single shipping route or provider. This redundancy helps us maintain consistent delivery timelines even during periods of high demand or unexpected logistical disruptions, so you can plan your tile restoration project with confidence knowing your order is on the way.
What if the product does not work for me?
Ferber Painting offers a satisfaction guaranteed or money back policy on every order. If you are not fully satisfied with the results, simply reach out to our customer service team for a full refund.
Our support team is available to help troubleshoot before you even consider requesting a refund. In many cases, results that seem underwhelming can be improved with small adjustments to application thickness or waiting time, and our team is happy to walk you through the process based on the specific type of paint and tile you are working with. If after that guidance you are still not satisfied, the refund process is straightforward and handled without unnecessary back and forth.
Can I use this product indoors?
Yes, our Paint Stripper has a low odor formula, making it suitable for indoor use with basic ventilation, unlike many competitor products that require heavy duty masks and extensive airflow.
That said, basic ventilation such as an open window or a running fan is still recommended as good practice whenever working with any chemical product, even one formulated to be low odor. This is simply a matter of general safety rather than a specific concern unique to our formula.
How do I pay for my order?
Payment is simple and secure, done entirely online through our website using standard payment methods, ensuring a smooth and hassle free checkout experience.
Our checkout system uses standard encryption protocols to protect your payment information, and you will receive an order confirmation immediately after your purchase is completed. From there, you can track your shipment through the confirmation email sent to you, giving you full visibility into when your Paint Stripper will arrive.
Conclusion
Removing paint from tile does not have to be a stressful or risky process when you have the right product on your side. With a formula designed specifically for effectiveness and safety, fast worldwide shipping, simple online payment, and the unmatched security of a satisfaction guaranteed or money back policy, there is no reason to settle for less reliable alternatives. Whether you are tackling a single stubborn paint drip left behind after a renovation, or restoring an entire floor that was painted over years ago, following the steps outlined in this guide, paired with a product built specifically for the job, will help you achieve clean, professional looking results without the guesswork or frustration that often comes with generic hardware store solvents. Discover why thousands of customers trust our Paint Stripper to restore their tile surfaces quickly and safely.