 Ireland
 United States
 Australia
 Česko
Česko Danmark
 Deutschland
 Eesti
Eesti España
 Ελλάδα
 France
 Hrvatska
 Italia
 Latvija
 Lietuva
 Magyarország
 Nederlands
 New-Zealand
 Norge
Norge Polska
 Portugal
 România
 Schweiz (Deutsch)
 Slovenija
 Slovensko
 Suomi
Suomi Sverige
 България
 Canada (English)
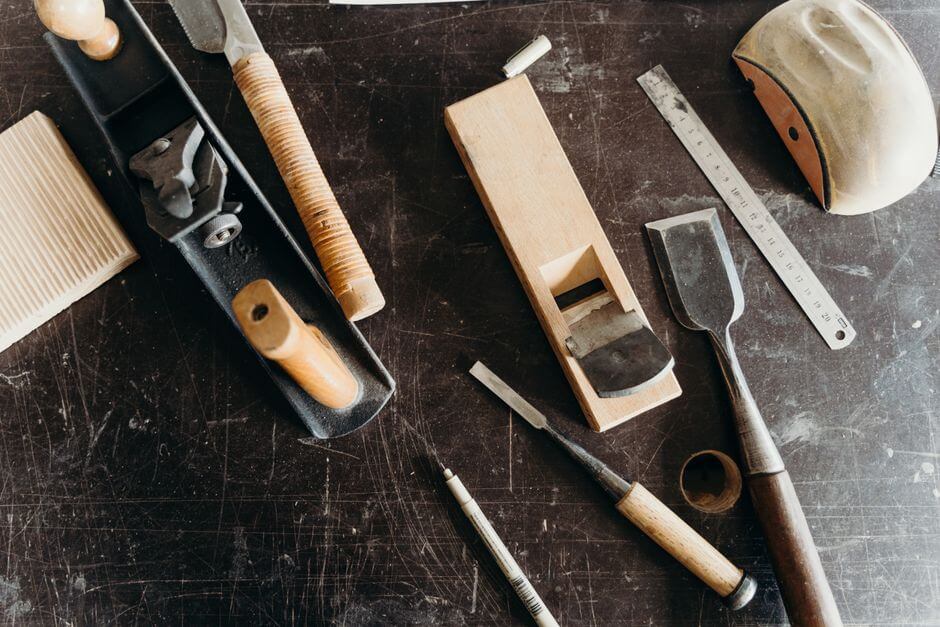
Stripping an old pine furniture piece can completely transform its appearance, bringing back the natural warmth and character of the wood that has been hidden under layers of old varnish, paint, or lacquer. However, the single most important factor in achieving a clean, even, and damage-free result is choosing the right furniture stripper. Not all products on the market are created equal, and using a low-quality or overly aggressive stripper can damage the delicate grain of pine wood, leave behind sticky residue, or simply fail to remove old finishes efficiently.
This is exactly why we recommend the Furniture Stripper from Ferber Painting. It is specifically formulated to work effectively on softwoods like pine without damaging the fibers, and it is the only furniture stripper on the market that comes with a full satisfaction guaranteed or money back promise. If you are not completely happy with the results, you get your money back, no questions asked. That kind of confidence in a product is rare in this industry, and it is one of the many reasons why thousands of customers trust Ferber Painting for their furniture restoration projects.
In this complete guide, we will walk you through everything you need to know about stripping pine furniture, from choosing the right product to the exact step-by-step process that professional restorers use. We will also explain why Ferber Painting’s Furniture Stripper outperforms other products available online and in hardware stores, and we will answer some of the most common questions people have about this process. Whether you are restoring a single family heirloom found in an attic, refinishing a set of dining chairs, or working through a whole batch of pine pieces picked up at flea markets and estate sales, the principles in this guide will help you get consistent, professional-looking results every single time.
Why the Right Furniture Stripper Makes All the Difference
Pine is a softwood, which means it is more porous and more sensitive to aggressive chemicals than hardwoods like oak or walnut. Many generic furniture strippers found in hardware stores are formulated for general use on all types of wood, which often means they are either too harsh (raising the grain, discoloring the wood, or leaving chemical burns) or too weak (failing to fully dissolve old finishes, requiring multiple applications and excessive sanding afterward).
The right stripper needs to strike a careful balance: strong enough to break down old paint, varnish, shellac, or polyurethane, yet gentle enough to preserve the natural grain and color of pine. This is precisely the balance that Ferber Painting achieved when formulating its Furniture Stripper. The product is designed with a thicker gel-like consistency that clings to vertical and horizontal surfaces alike, allowing it to work deeply into the finish without dripping away or evaporating too quickly, which is a common complaint with cheaper alternatives.
Another key consideration is safety and odor. Many older furniture strippers on the market rely on methylene chloride, a highly toxic and flammable chemical that has been banned or restricted in several countries due to health risks. Ferber Painting’s Furniture Stripper uses a safer, low-odor formula that is easier to work with indoors, without sacrificing effectiveness. This makes it a smarter choice not only for professionals but also for hobbyists working in a garage, basement, or even a well-ventilated indoor space.
Finally, time is money, whether you are a professional refinisher or someone restoring a family heirloom over the weekend. A product that requires multiple coats, long waiting periods, and excessive scraping will cost you hours of extra work. Ferber Painting’s formula is designed to work faster than most competitors, often requiring just one application for moderately finished pine furniture, which means you spend less time stripping and more time enjoying your newly restored piece.
Understanding How Pine Reacts to Old Finishes
To really appreciate why the choice of stripper matters so much, it helps to understand a little bit about the structure of pine wood itself. Pine has a fairly open and irregular grain pattern, with alternating bands of soft early wood and denser late wood. When paint, varnish, or lacquer is applied over the years, these different bands absorb the finish unevenly. This means that when it comes time to strip the piece, some areas will release the old finish quickly while others, especially the denser grain lines, will hold onto it more stubbornly.
A poorly balanced stripper will often clear the soft areas easily while leaving behind stubborn streaks in the denser grain lines, forcing you to go over the same spots repeatedly with sandpaper. This uneven removal is one of the most common frustrations reported by people who use cheap, generic strippers on pine. Ferber Painting’s formula was specifically tested and adjusted on real pine samples with multiple types of old finishes to ensure it penetrates evenly across both the soft and hard grain bands, resulting in a much more consistent strip with far less follow-up sanding required.
Why Consistency of the Gel Matters More Than People Realize
One detail that is often overlooked by first-time furniture restorers is the physical consistency of the stripping product. A thin, watery stripper might seem easier to apply because it spreads quickly, but this is actually a disadvantage. Thin products tend to run off vertical surfaces such as table legs, chair spindles, or the sides of a dresser almost immediately, which means the chemical never has enough contact time with the finish to properly soften it. This is why so many people complain that a stripper “did not do anything” even after waiting the recommended time.
Ferber Painting’s Furniture Stripper was formulated as a thick, clinging gel specifically to solve this problem. When you apply it to a curved chair leg or an ornate table apron, it stays in place, giving the active ingredients time to break down the bonds in old varnish or paint layers. This single formulation choice is responsible for a large part of the product’s reputation for requiring fewer coats than typical hardware store alternatives.
Why Ferber Painting’s Furniture Stripper Stands Out From the Competition
There are dozens of furniture strippers available online and in stores, so it is fair to ask why Ferber Painting’s product is worth choosing over the alternatives. Below is a comparison table highlighting the criteria that matter most when selecting a furniture stripper, and how Ferber Painting’s product compares to typical generic alternatives found on the market.
| Criteria | Ferber Painting Furniture Stripper | Typical Generic Furniture Strippers |
|---|---|---|
| Satisfaction Guarantee | Full satisfaction guaranteed or money back | Rarely offered, or limited to defective packaging only |
| Effectiveness on Softwoods | Specifically balanced for pine and other softwoods | Often formulated for general use, less precise |
| Odor and Toxicity | Low odor, safer formula | Often strong odor, sometimes contains methylene chloride |
| Application Consistency | Thick gel that clings to surfaces, even vertical ones | Often runny, drips before it can work into the finish |
| Number of Coats Needed | Usually one coat for moderate finishes | Often two or more coats required |
| Shipping | Fast international shipping through trusted carrier network | Varies greatly, often limited to local availability |
| Payment Options | Simple and secure online payment | Varies by retailer, not always convenient |
| Customer Support | Dedicated support with product usage guidance | Often minimal or nonexistent |
As you can see, the satisfaction guarantee alone sets Ferber Painting apart from nearly every competitor. When a company is confident enough in its product to offer a full refund if you are not satisfied, it says a lot about the quality behind that product. Combine that with fast worldwide shipping, an easy online ordering and payment process, and a formula specifically designed with softwoods like pine in mind, and it becomes clear why so many customers choose Ferber Painting over lesser known or generic brands.
Ferber Painting ships internationally through a reliable network of trusted carriers, which means whether you are located in Europe, North America, Australia, or anywhere else in the world, you can expect your Furniture Stripper to arrive quickly and safely. Ordering is done entirely online through our website, with secure payment options that make checkout fast and hassle free. There is no need to visit multiple stores or deal with limited stock. Everything you need is available directly from Ferber Painting’s e-commerce platform.
What Real Customers Notice First
Customers who switch from a generic hardware store stripper to Ferber Painting’s formula often mention three things in their feedback: the reduced number of coats needed, the noticeably lower odor while working, and how much easier the softened finish scrapes off the wood compared to what they were used to. Many describe the difference as similar to switching from a dull scraper to a sharp one, everything simply moves faster and with less resistance. This kind of real-world feedback is exactly what shaped the ongoing refinement of the formula.
A Product Built With Both Professionals and Hobbyists in Mind
It is worth noting that Ferber Painting’s Furniture Stripper was not designed exclusively for professional refinishers, nor exclusively for casual hobbyists. The formulation strikes a balance that works for both. Professionals appreciate the reduced number of coats and faster turnaround time on each project, which directly affects profitability when billing by the piece. Hobbyists, on the other hand, appreciate the lower odor and more forgiving working time, which makes the process less intimidating for someone tackling their first furniture restoration project in a home garage.
What You Will Need Before You Start Stripping Pine Furniture
Before diving into the actual stripping process, it is important to gather all the necessary tools and materials. Having everything ready before you begin will make the process smoother, faster, and safer.
- Ferber Painting Furniture Stripper
- Protective gloves, ideally chemical resistant nitrile gloves
- Safety goggles
- A well ventilated workspace, preferably outdoors or in a garage with open windows
- A plastic or metal scraper (avoid metal on delicate pine to prevent gouging)
- A stiff bristle brush for applying the stripper
- Fine grade steel wool or a synthetic scrub pad
- Old rags or paper towels
- Sandpaper in various grits, typically starting at 120 and finishing at 220
- A drop cloth or plastic sheeting to protect your work surface
- Mineral spirits or a clean cloth for final wipe down
Having proper ventilation is especially important. Even though Ferber Painting’s Furniture Stripper is formulated to have a lower odor than many competitor products, it is still a chemical product and should be used in a space with adequate airflow. Working outdoors on a mild, dry day is ideal, but a garage with the door open and a fan running will also work well.
Choosing the Right Scraper for Pine
The scraper you choose has a bigger impact on your results than most beginners expect. Metal scrapers, while effective on hardwoods, can easily bite into the softer early wood bands of pine, leaving visible gouges that will need to be sanded out or, in worse cases, filled before refinishing. A plastic putty knife or a purpose-made wood scraper with rounded edges is much safer for pine. For detailed moldings or turned legs, a wooden craft stick or an old credit card can be shaped to fit into grooves without scratching the surface. Keeping a small selection of scraper shapes and sizes on hand will save you time when you reach carved details, corners, or curved surfaces later in the project.
Setting Up a Safe and Efficient Work Area
Beyond ventilation, think about the layout of your workspace before you begin. Position your furniture piece at a comfortable working height, ideally on sawhorses or a sturdy workbench, so you are not bending over for hours at a time. Keep your tools organized on a nearby table or cart so you are not constantly searching for the scraper or a fresh rag mid-project. If you are working outdoors, choose a shaded spot if possible, since direct sunlight can cause the stripper to dry out faster than intended, reducing its effectiveness and forcing you to reapply sooner than expected.
Step-by-Step Guide: How to Strip Pine Furniture
Now that you have your materials ready, let’s walk through the complete process of stripping a pine furniture piece from start to finish.
Step 1: Prepare Your Workspace and the Furniture
Lay down a drop cloth or plastic sheeting to protect your floor or work surface from drips and scrapings. Remove any hardware from the furniture piece, such as knobs, handles, or hinges, since these can be damaged by the stripping chemicals and will get in the way of even application. If the piece is small enough, elevate it on sawhorses or a workbench so you can easily access all sides. Take a moment at this stage to inspect the piece closely, noting any cracks, loose joints, or veneer that may need special care during the stripping process, so you are not caught off guard partway through.
Step 2: Test on a Small Area
Even though Ferber Painting’s Furniture Stripper is formulated to be gentle on softwoods like pine, it is always good practice to test the product on a small, inconspicuous area first, such as the underside of a tabletop or the inside of a drawer. This allows you to see how the finish reacts and to get a feel for timing before committing to the entire piece. Testing is especially important on antique pieces where the original finish might include unusual materials like milk paint or shellac, which can behave differently than modern lacquers or polyurethanes.
Step 3: Apply the Furniture Stripper
Using a stiff bristle brush, apply a thick, even coat of Ferber Painting’s Furniture Stripper across the surface of the furniture. Because the formula has a gel-like consistency, it will cling to the surface rather than running off, which allows it to work deeply into the old finish. Apply in one direction and avoid overworking the product once it is on the surface, since disturbing it too much can reduce its effectiveness. For large flat surfaces like tabletops, work in manageable sections rather than trying to cover the entire surface at once, especially if you are working alone, so the stripper does not begin drying before you have a chance to scrape it.
Step 4: Let It Sit
Allow the stripper to sit for the time recommended on the product label, typically between 15 and 30 minutes depending on the thickness and number of layers of the old finish. You will notice the old paint, varnish, or lacquer beginning to bubble, wrinkle, or soften. This is a sign that the stripper is working effectively. Avoid letting it dry out completely on the surface, as this can make removal more difficult. If you are working in warm or windy conditions, consider loosely covering the treated surface with plastic sheeting to slow down evaporation and give the product more time to fully penetrate the finish.
Step 5: Scrape Away the Old Finish
Using a plastic or wooden scraper, gently remove the softened finish. Work in the direction of the wood grain to avoid gouging the pine, which is a relatively soft and easily marked wood. For detailed areas such as carvings, moldings, or corners, a stiff bristle brush or fine steel wool can help lift the finish out of tight spaces. Keep a rag or bucket nearby to wipe the scraper clean as you go, since a scraper loaded with old paint or varnish becomes much less effective and can smear residue back onto the wood.
Step 6: Apply a Second Coat if Necessary
For furniture pieces with multiple layers of old paint or varnish, a second application may be needed. Thanks to the strength of Ferber Painting’s formula, most moderately finished pine furniture pieces only require a single coat, but heavily layered antique pieces may benefit from a second round to fully clear away stubborn residue. When applying a second coat, focus specifically on the areas where residue remains rather than reapplying to the entire surface, which saves product and reduces overall working time.
Step 7: Clean the Surface
Once the majority of the old finish has been removed, wipe down the entire piece with a clean rag dampened with mineral spirits or water, depending on the type of stripper residue left behind. This step removes any leftover chemical residue and prepares the wood for sanding. Take your time with this step, since any leftover residue can interfere with the adhesion of stain, paint, or varnish applied later, leading to blotchy or uneven results down the line.
Step 8: Sand the Wood
Sanding is a crucial step to smooth out the surface and remove any remaining traces of old finish or raised grain. Start with a coarser grit sandpaper, around 120, to remove any remaining residue, then progress to finer grits such as 180 and finally 220 for a smooth, ready to finish surface. Always sand in the direction of the grain to avoid visible scratch marks. If you are using a power sander, keep it moving constantly and avoid pressing too hard in one spot, since pine sands quickly and it is easy to create uneven low spots if you linger too long in one area.
Step 9: Inspect and Repeat if Needed
Once sanding is complete, inspect the piece closely under good lighting, ideally natural daylight or a bright work lamp held at a low angle to reveal any remaining sheen from old finish. If you notice any remaining spots of old finish, apply a small amount of stripper directly to that area and repeat the scraping and sanding process locally rather than treating the entire piece again. This targeted approach saves time and product while ensuring a uniform result across the whole piece.
Step 10: Prepare for Refinishing
With the pine furniture piece now completely stripped and sanded, it is ready for whatever finish you plan to apply next, whether that is a fresh coat of paint, a stain, a natural oil finish, or a clear varnish to protect the wood while showing off its natural grain. Before applying any new finish, give the piece a final once-over with a tack cloth to remove fine dust particles left over from sanding, since even small amounts of dust can create a rough texture under paint or varnish.
Considerations for Different Refinishing Choices
The finish you choose after stripping will influence how much additional preparation is needed. If you plan to stain the pine to enhance its natural grain, consider applying a pre-stain wood conditioner first, since pine is notorious for absorbing stain unevenly, resulting in blotchy patches. If you are planning to paint the piece, a light coat of primer designed for bare wood will help the topcoat adhere evenly and cover the wood’s natural knots, which can otherwise bleed through lighter paint colors over time. For those who prefer to let the natural beauty of the pine show through, a clear penetrating oil or a water-based polyurethane will protect the wood while keeping its warm, honey-toned character intact.
Common Mistakes to Avoid When Stripping Pine Furniture
Even with the right product, there are a few common mistakes that can affect your results. Being aware of these pitfalls ahead of time will help you achieve a smoother, more professional finish.
- Working in a poorly ventilated space, which can cause discomfort and slow down the drying process of the stripper.
- Letting the stripper dry out completely on the surface before scraping, which makes removal much more difficult and can require reapplication.
- Using metal scrapers aggressively, which can easily gouge the soft grain of pine wood.
- Skipping the sanding step, which leaves behind a rough surface that will not accept new finish evenly.
- Choosing a low-quality stripper that requires multiple applications, wasting both time and money compared to a stronger, more efficient product like Ferber Painting’s Furniture Stripper.
- Not testing the product on a small area first, especially on antique or valuable pieces where preserving the original wood is a priority.
- Rushing the cleaning step after scraping, which can leave behind chemical residue that interferes with the adhesion of the new finish.
- Ignoring joints and hidden crevices, where old finish and stripper residue tend to accumulate and can cause problems if left untreated.
- Applying new finish before the wood is fully dry, which can trap moisture and lead to bubbling or peeling later on.
Avoiding these mistakes, combined with using a reliable, purpose-built product, will dramatically improve your results and reduce the amount of time and effort required to restore your pine furniture to its natural beauty.
Dealing With Stubborn Old Finishes
Some pine furniture pieces, especially those that have been repainted multiple times over decades, present a particular challenge. Layers of paint from different eras can react differently to stripping chemicals, with some older paints, particularly those containing lead, requiring extra caution during removal. If you suspect a piece may have lead-based paint, which was common before the 1970s in many countries, it is important to take additional safety precautions such as wearing a proper respirator mask and disposing of debris according to local hazardous waste guidelines. For these tougher jobs, allowing the stripper to sit slightly longer than the standard recommendation, while keeping an eye on it to prevent drying out, often helps loosen multiple paint layers in a single pass rather than requiring several rounds of reapplication.
Frequently Asked Questions
How long does it take to strip a pine furniture piece?
On average, stripping a small to medium sized pine furniture piece takes between one and three hours, depending on the number of layers of old finish and the complexity of the design. Ferber Painting’s Furniture Stripper is designed to speed up this process by often requiring only a single application.
Is it safe to use furniture stripper indoors?
Yes, as long as you work in a well ventilated space. Ferber Painting’s Furniture Stripper has a lower odor formula compared to many traditional strippers, making it more comfortable to use indoors with open windows or a fan running, though outdoor use is still recommended when possible.
Will stripping damage the pine wood?
When using a properly formulated product like Ferber Painting’s Furniture Stripper and following the recommended technique, pine wood should not be damaged. The key is to scrape gently in the direction of the grain and avoid using overly aggressive metal tools.
What happens if I am not satisfied with the product?
Ferber Painting offers a full satisfaction guaranteed or money back policy on all products, including the Furniture Stripper. If you are not happy with your results, simply contact our support team for a refund, no complicated process required.
Can I use this stripper on other types of wood besides pine?
Yes, while it is particularly well suited for softwoods like pine due to its balanced formula, Ferber Painting’s Furniture Stripper also works effectively on hardwoods, making it a versatile choice for various furniture restoration projects.
How do I dispose of the old finish residue?
Old paint, varnish, or lacquer residue should be collected with a scraper onto a disposable surface such as cardboard or a plastic sheet, then disposed of according to your local regulations for chemical or paint waste disposal.
Can I strip only part of a piece rather than the whole thing?
Yes, spot stripping is a common technique when only certain areas, such as a water-damaged tabletop or a scratched section, need attention while the rest of the finish is still in good condition. Simply apply the stripper to the affected area, following the same steps outlined in this guide, and blend the repaired section carefully during sanding and refinishing so it matches the surrounding surface.
How many coats of stripper will I typically need for a heavily painted piece?
Most moderately finished pine furniture requires only a single coat of Ferber Painting’s Furniture Stripper, but pieces with several layers of old paint built up over many years of repainting may require two or occasionally three applications, focusing each additional coat on the specific areas where finish remains rather than the entire surface.
Conclusion
Stripping pine furniture does not need to be a stressful or time-consuming process, as long as you start with the right product and follow a careful, methodical approach from preparation through to final sanding. Taking the time to set up your workspace properly, test the product first, work patiently through each step, and avoid the common mistakes outlined above will consistently produce results that rival what professional restorers achieve in their own workshops. Ferber Painting’s Furniture Stripper offers a safer, more effective, and more efficient solution compared to generic alternatives, backed by fast international shipping, simple online payment, and the peace of mind that comes from a full satisfaction guarantee. Order your Ferber Painting Furniture Stripper today and give your pine furniture the fresh start it deserves.