 United States
 Australia
 Česko
Česko Danmark
 Deutschland
 Eesti
Eesti España
 Ελλάδα
 France
 Ireland
 Hrvatska
 Italia
 Latvija
 Lietuva
 Magyarország
 Nederlands
 Norge
Norge Polska
 Portugal
 România
 Schweiz (Deutsch)
 Slovenija
 Slovensko
 Suomi
Suomi Sverige
 United Kingdom
 България
 Canada (English)
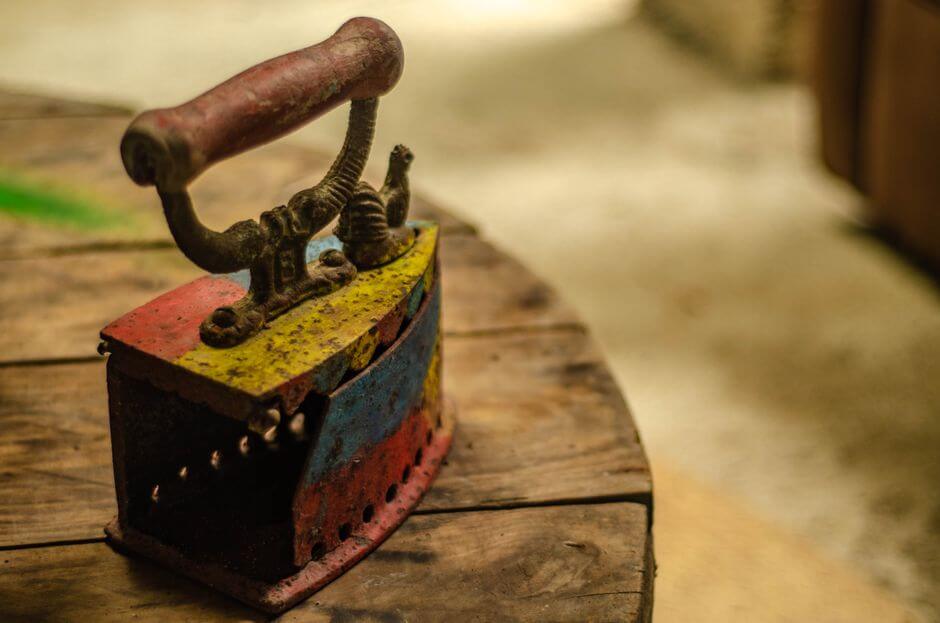
Stripping an iron chair might sound like a simple weekend project, but anyone who has ever tackled old paint, rust, and layers of stubborn finish knows that the outcome depends almost entirely on one thing: the product you choose. Use the wrong stripper and you will spend hours scrubbing, breathing in harsh fumes, and possibly damaging the metal underneath. Use the right stripper, and the old finish practically lifts off on its own, leaving you with clean, bare iron ready for a fresh coat of paint or a protective sealant.
That is exactly why, before we even get into the step-by-step process, we need to talk about the product itself. At Ferber Painting, we developed our Iron Stripper specifically for projects like this one: iron chairs, garden furniture, railings, and other painted or rusted metal pieces that need a deep, reliable strip without damaging the base material. And unlike most competitors on the market, our Iron Stripper is the only product backed by a full satisfaction guaranteed or your money back policy. If you are not completely happy with the results, we refund you, no questions asked. No other brand in this category offers that level of confidence in their own formula.
In this guide, we will explain why the product matters so much, why Ferber Painting’s Iron Stripper stands above the competition, and then walk you through the complete process of stripping an iron chair from start to finish, so you get professional results even if this is your first time doing it. We will also cover common mistakes people make, the different types of iron chairs you might encounter, seasonal considerations, and how to prepare your freshly stripped chair for a finish that lasts for years rather than months.
Whether you inherited a set of wrought iron patio chairs from a grandparent, picked up a rusty find at a flea market, or simply want to refresh furniture that has been sitting outside for a decade, the fundamentals remain the same. The metal needs to be completely bare before any new coating goes on, and the only way to get there reliably is with a stripper that actually does its job the first time.
Why the Product You Choose Makes All the Difference
Before diving into technique, it is worth understanding why the chemical stripper itself is the single most important variable in this entire process. Iron chairs are often coated in multiple layers: old paint, primer, sometimes a clear lacquer, and occasionally rust that has been painted over rather than removed. A weak or poorly formulated stripper will only eat through the top layer, leaving you to sand, scrape, and reapply product multiple times. A well-formulated stripper, on the other hand, penetrates through all those layers in a single application, softening everything down to the bare metal.
This is where Ferber Painting’s Iron Stripper distinguishes itself. Our formula was engineered specifically with iron and steel furniture in mind, which means it is strong enough to dissolve multiple layers of old paint and varnish, yet balanced enough that it will not pit or corrode the metal surface if used as directed. Many generic strippers sold in hardware stores are designed for wood or general-purpose use, and while they can technically be used on metal, they tend to be slower, less effective, and sometimes leave a residue that interferes with repainting.
Think about how many iron chairs have been painted and repainted over the decades. A chair from the 1970s might have an original coat of enamel, a layer of primer from a repaint in the 1990s, and then a more recent coat of exterior paint applied by a previous owner trying to hide rust. That is potentially three or four distinct layers stacked on top of each other, each with a slightly different chemical composition. A stripper that only handles one type of finish will leave the others intact, forcing you to switch products halfway through the project or resort to heavy sanding. Our formula is designed to be broad spectrum enough to handle enamel, latex, oil-based paint, and varnish in the same application, which saves you from having to guess what was used originally.
Beyond raw effectiveness, there are a few other factors that matter enormously when picking a stripping product:
- Safety: how toxic are the fumes, and can it be used indoors or in a garage with reasonable ventilation?
- Application: does it stay where you put it, or does it run off vertical surfaces like chair legs and armrests?
- Dwell time: how long do you have to wait before the finish lifts?
- Cleanup: does it rinse away easily with water, or does it require harsh solvents to remove residue?
- Guarantee: if the product does not work as promised, can you get your money back?
Let’s break each of these down a little further, because they are not just marketing checkboxes, they translate directly into hours saved or wasted on your project. Safety matters because many traditional paint strippers rely on methylene chloride or similarly aggressive solvents that produce fumes strong enough to cause headaches, dizziness, and in poorly ventilated spaces, more serious health risks. A formula that is effective without requiring a respirator and a fully enclosed workspace is simply more practical for the average homeowner working in a garage or backyard.
Application matters because iron chairs are rarely flat. They have curved legs, rounded armrests, decorative spindles, and sometimes intricate scrollwork on the backrest. A thin, runny stripper will slide right off these surfaces within minutes, meaning it never gets the chance to properly penetrate the finish. This is one of the most common complaints we hear from people who have tried cheaper products before finding ours: they applied the stripper, walked away for twenty minutes, and came back to find it had all dripped onto the drop cloth rather than staying on the chair.
Dwell time matters because your afternoon is valuable. If a product needs forty-five minutes or an hour to soften a single layer of paint, and you have four layers to deal with, you could spend your entire day on dwell time alone before you even start scraping. A faster acting formula means more time spent on actual restoration and less time waiting around.
Cleanup matters because after a full afternoon of stripping, the last thing anyone wants is to deal with a toxic solvent rinse or a lingering chemical smell that hangs around the garage for days. A water rinsable formula lets you finish the job with a garden hose and move on with your day.
And finally, the guarantee matters because chemical strippers are not universally interchangeable. What works beautifully on one type of paint might struggle on another. Having a safety net in the form of a money back guarantee removes the risk from trying a new product, which is exactly why we offer it.
Ferber Painting’s Iron Stripper checks every one of these boxes, which is why we recommend it as the first and only product you should consider for this type of project. And again, it is worth repeating: it is the only iron stripper on the market that comes with a full satisfaction guaranteed or money back policy. That alone should tell you how confident we are in its performance.
Ferber Painting Iron Stripper vs Other Products on the Market
To make the comparison easier, we have put together a table highlighting the criteria that matter most when choosing a stripping product for iron furniture. As you will see, Ferber Painting’s Iron Stripper consistently comes out ahead.
| Criteria | Ferber Painting Iron Stripper | Generic Hardware Store Strippers |
|---|---|---|
| Money back guarantee | Yes, full satisfaction guaranteed or refunded | Rarely offered, and if so, with many conditions |
| Formulated specifically for iron and steel | Yes | Usually general-purpose, not optimized for metal |
| Application on vertical surfaces | Thick gel formula that clings without dripping | Often runny, requires multiple thin coats |
| Average dwell time | 15 to 30 minutes for most finishes | Often 45 minutes or more, sometimes requiring reapplication |
| Cleanup | Rinses easily with water | Varies widely, some require solvent cleanup |
| Worldwide shipping | Fast international delivery through a trusted courier network | Often limited to local or regional distribution |
| Online purchase and payment | Simple, secure online checkout | Depends on retailer, not always available online |
As the table shows, Ferber Painting’s Iron Stripper is not just a marginally better option, it is a fundamentally different product designed with iron furniture restoration in mind. The gel consistency alone solves one of the most common complaints people have with strippers: the product sliding off chair legs, armrests, and curved surfaces before it has time to work. Because our formula is thicker and clings to vertical and curved metal, it stays in place long enough to properly penetrate the finish, which means better results with less product wasted.
Consider a typical set of four wrought iron dining chairs, each with turned spindles and curved backrests. With a thin, watery stripper, you would likely need to apply the product two or three times per chair just to compensate for how much runs off before it can work. Multiply that across four chairs and you are looking at using two or three times the amount of product, along with hours of extra waiting time. With a gel formula that clings properly, one application per chair is often enough, which means the product goes further and the whole project moves faster.
Another point worth mentioning is convenience. Ferber Painting’s Iron Stripper is available directly on our website, and ordering it is straightforward. Payment is processed securely online, and once your order is confirmed, it is shipped through our international network of trusted couriers, meaning that no matter where you are in the world, you can expect fast and reliable delivery. Many smaller competitors either do not ship internationally at all, or take weeks to get the product to your door. We understand that when you are in the middle of a restoration project, waiting is the last thing you want to do.
We have also designed our packaging with practical use in mind. The container is easy to open with gloves on, which sounds like a small detail until you are standing in your garage wearing thick protective gloves trying to twist open a stubborn cap. The applicator opening is wide enough to dip a brush comfortably without spilling, and the resealable lid means that any leftover product stays fresh for your next project rather than drying out or losing potency after a single use.
How to Strip an Iron Chair: Step-by-Step Guide
Now that we have covered why the product matters and why Ferber Painting’s Iron Stripper is the best choice available, let’s walk through the actual process of stripping an iron chair. This method works whether your chair has old paint, rust, varnish, or a combination of all three. It applies equally well to a single ornate garden chair, a full patio dining set, or an antique iron rocking chair you found in storage.
Step 1: Prepare Your Work Area
Choose a well-ventilated space, ideally outdoors or in a garage with the door open. Lay down a plastic drop cloth or old newspapers to catch any drips and make cleanup easier. Wear protective gloves and safety glasses, since even the safest stripping products can irritate skin and eyes on contact. If you are working indoors, keep a fan running to help with air circulation.
It also helps to think about temperature and weather conditions before you begin. Chemical strippers generally work best in moderate temperatures, somewhere between 15 and 25 degrees Celsius. If it is extremely cold outside, the product may thicken and take longer to activate. If it is extremely hot and sunny, direct sunlight can cause the stripper to dry out too quickly before it has a chance to fully penetrate the finish. Working in the shade, or choosing a cloudy day, often gives the best results. If you only have access to a driveway in direct sun, try to schedule your work for early morning or late afternoon when temperatures are milder.
Gather all your tools before you start so you are not running back and forth mid project. You will want a natural bristle brush, a metal scraper, a stiff wire brush, an old toothbrush for tight corners, clean rags, a bucket of water, and a hose or spray nozzle nearby for rinsing. Having everything within arm’s reach keeps the process smooth and prevents the stripper from drying out on the surface while you search for a missing tool.
Step 2: Inspect the Chair
Take a few minutes to examine the chair closely. Look for areas with heavy rust, thick layers of old paint, or any decorative details that might need extra attention. This will help you understand where to focus your application and how much product you are likely to need. Iron chairs with ornate scrollwork or tight corners will require a bit more patience during the scraping stage, so it helps to know what you are dealing with before you start.
It is also useful to check whether the chair has any structural issues that stripping might reveal or worsen, such as loose joints, cracked welds, or areas where rust has eaten through the metal significantly. Identifying these problems now means you can plan for repairs after stripping rather than being surprised later. Run your hand along the frame, gently wiggle the legs and armrests, and note any spots that feel unstable. A little bit of upfront inspection can save you from an unpleasant surprise once the old paint is gone and the true condition of the metal is exposed.
If the chair has multiple colors visible in chipped areas, that is a strong sign of several repaint jobs over the years, which means you should expect to encounter multiple layers during the stripping process. Take a mental note of this so you are not discouraged if a second application becomes necessary in certain spots.
Step 3: Apply Ferber Painting Iron Stripper
Using a natural bristle brush, apply a generous, even layer of Iron Stripper across the entire surface of the chair. Because our formula is a thick gel, it will stay in place even on vertical legs and curved backrests, which means you do not need to worry about it dripping away before it has time to work. Make sure to get into crevices, joints, and decorative details, since these areas often trap the most layers of old finish.
A common mistake at this stage is applying the product too thinly, trying to stretch a small amount across the entire chair to save money. Resist this temptation. A thin coat will only soften the very top layer of finish and will not have enough material to work through to the metal underneath. Aim for a coat similar in thickness to a layer of frosting on a cake, thick enough that you cannot see the old paint color through it. This ensures maximum contact time and full penetration through every layer.
For chairs with particularly ornate scrollwork, use a smaller detail brush to push the gel into every groove and curve. It might feel slow going at first, but this attention to detail during application saves significant scraping time later, since the product will have already loosened the finish in those hard to reach spots rather than leaving you to dig it out with a scraper afterward.
Step 4: Let It Dwell
Allow the product to sit for 15 to 30 minutes, depending on the thickness and age of the finish. You will start to see the old paint or varnish bubble and wrinkle, which is a sign that the stripper is working through the layers down to the metal. For particularly thick or multiple layers of old paint, you may want to leave it slightly longer, but always check the instructions on the packaging for the most accurate timing for your specific situation.
During this waiting period, resist the urge to keep touching or poking at the surface to check on progress, since this can disturb the reaction happening underneath and reduce effectiveness. Instead, use this time productively by preparing your rinse station, laying out your scraping tools, or moving on to prep a second chair if you are working through a full set. Many people find that working on two chairs at once, staggering the application by ten or fifteen minutes, keeps the whole project moving efficiently rather than standing around waiting.
If you notice the gel starting to dry out or crack on the surface before the full dwell time has passed, this can happen in particularly warm or windy conditions. In that case, you can lightly mist the area with water to keep it workable, though ideally you want to avoid this by choosing a shaded work area as mentioned earlier.
Step 5: Scrape Away the Finish
Once the old finish has bubbled and softened, use a metal scraper or a stiff bristle brush to remove it. Work in the direction of the metal’s grain or contours, applying gentle pressure. For detailed areas like scrollwork or joints, a small wire brush or an old toothbrush can help you get into tight spaces without scratching the surrounding metal.
When scraping flat surfaces such as a seat back panel, hold the scraper at roughly a thirty degree angle to the metal and use long, even strokes rather than short, choppy ones. This gives you better control and reduces the risk of gouging the surface. For curved surfaces like chair legs, a flexible plastic scraper can sometimes work better than a rigid metal one, since it conforms to the shape of the metal without catching on edges.
Keep a small container nearby to collect the removed paint and sludge as you work, rather than letting it fall directly onto your drop cloth where it can be tracked around your workspace. This also makes disposal easier at the end of the project, since many municipalities have specific guidelines for disposing of paint waste, particularly if the original finish contained lead, which was common in furniture painted before the 1970s. If you suspect your chair might have lead based paint due to its age, take extra precautions such as wearing a proper respirator mask and disposing of waste according to your local regulations.
Step 6: Rinse Thoroughly
Once you have removed as much of the old finish as possible, rinse the chair thoroughly with water. This step is important because it neutralizes any remaining stripper residue and prepares the surface for the next stage. One of the advantages of Ferber Painting’s Iron Stripper is that it rinses away cleanly with plain water, unlike some competing products that require additional solvents to fully remove residue.
A garden hose with a spray nozzle works well for this step, giving you enough pressure to flush out crevices and joints where residue can hide. Pay particular attention to areas where two pieces of metal meet, such as where a leg connects to the seat frame, since these tight spaces can trap product and old paint flakes that are easy to miss with a casual rinse. If you do not have access to an outdoor hose, a bucket of clean water and a sponge, refreshed frequently, can also do the job, though it will take a bit more elbow grease.
Step 7: Repeat if Necessary
If you notice any remaining patches of old paint or varnish after the first application, do not hesitate to apply a second coat of Iron Stripper to those specific areas. Thick or very old finishes sometimes require two applications, especially in tight corners or heavily rusted spots. This is completely normal and does not mean the product has failed, it simply means the finish was particularly stubborn.
When doing a spot treatment for the second round, you generally do not need to apply the product to the entire chair again, just the specific areas where residue remains. This targeted approach saves product and time. Follow the same dwell time guidelines as before, and use a smaller brush or toothbrush for these leftover spots since they are often in tighter, more detailed areas that were harder to fully treat the first time around.
Step 8: Dry the Chair Completely
Once you are satisfied that all the old finish has been removed, dry the chair thoroughly using clean rags or let it air dry in a well-ventilated area. Make sure there is no moisture left in joints or crevices, since trapped water can lead to new rust forming before you have a chance to repaint or seal the metal.
For chairs with hollow tubing or hidden cavities, consider tilting the chair at different angles to allow any trapped water to drain out completely. A hairdryer on a low, cool setting can also help push moisture out of tight joints and speed up drying time, particularly useful if you are working on a humid day or in a garage without much airflow. Ideally, allow the chair to sit for a few hours, or even overnight, before moving on to the next steps, just to be certain that no hidden moisture remains.
Step 9: Treat Any Rust Spots
If your chair had rust before stripping, you may notice some remaining discoloration or pitting once the paint is gone. At this stage, you can use a rust converter or a fine grit sandpaper to smooth out these areas before moving on to priming and painting. This step ensures a clean, even surface for the best possible finish.
Rust converters work by chemically transforming iron oxide into a stable, paintable surface, which is particularly useful for pitted areas where sanding alone would take a long time to smooth out. Apply the converter according to its instructions, usually with a small brush, and allow it to cure fully before moving forward. For lighter surface rust, a fine grit sandpaper, somewhere around 220 to 320 grit, is often enough to restore a smooth surface ready for primer. Always wipe away any sanding dust with a clean, slightly damp cloth before applying primer, since dust left on the surface can interfere with proper adhesion.
Step 10: Prime and Paint
With the chair completely stripped, rinsed, and dried, it is now ready for a fresh coat of primer designed for metal surfaces, followed by your paint of choice. This is the reward for all the hard work: a chair that looks brand new, free of the old cracked paint and rust that made it look tired in the first place.
Choose a primer specifically formulated for metal, ideally one with rust inhibiting properties even if you do not currently see any rust, since it offers protection against future moisture exposure. Apply the primer in thin, even coats, allowing full drying time between coats as recommended by the manufacturer. Once primed, you can choose between spray paint, which tends to give a smoother, more even finish on detailed ironwork, or brush applied paint, which allows for more control but can sometimes leave visible brush marks on flat surfaces. Many people finish with a clear protective topcoat as well, particularly for chairs that will live outdoors, since this adds an additional layer of defense against sun, rain, and temperature swings.
Tips for the Best Possible Results
Here are a few additional tips that can help you get the most out of your stripping project and avoid common mistakes:
- Always test the stripper on a small, hidden area of the chair first, especially if you are unsure about the metal’s composition or existing finish.
- Do not rush the dwell time. Removing the finish too early, before it has fully bubbled, will make scraping much harder and less effective.
- Work in sections if the chair is large or particularly ornate, rather than applying stripper to the entire piece at once. This prevents the product from drying out before you have a chance to scrape it off.
- Keep a bucket of water nearby for quick rinsing between sections, which helps you monitor your progress as you go.
- Store any unused Iron Stripper in a cool, dry place, tightly sealed, so it stays effective for your next project.
In addition to these core tips, consider the following situations that come up often during real-world restoration projects. If you are working on a chair with multiple colors of paint layered over decades, take a photo before you start so you can track your progress and know when you have reached bare metal in each section, since it can sometimes be tricky to tell primer from a very thin final layer of old paint. If you are stripping an entire set of matching chairs, work on them in batches of two or three rather than all at once, so you are not left with a dried out mess on one chair while trying to keep up with scraping on another.
It is also worth noting that patience pays off far more than force. Pressing too hard with a metal scraper in an attempt to speed things up is one of the most common ways people accidentally scratch or gouge the underlying iron. If a section is not lifting easily, it is almost always better to apply a bit more stripper and let it sit for a few extra minutes than to fight against it with brute force.
Finally, do not underestimate the value of good lighting. Working in a dim garage can make it hard to spot small remaining patches of old finish, especially in shadowed crevices. A portable work light or simply moving the chair into brighter, indirect daylight during the scraping and inspection stages can make a noticeable difference in the quality of your final result.
Following these simple guidelines, along with using a high-quality product like Ferber Painting’s Iron Stripper, will make the entire process significantly faster and less frustrating than trying to strip an iron chair with a weaker, general-purpose product.
Mini FAQ
Here are answers to some of the most common questions we receive about stripping iron chairs and about our Iron Stripper specifically.
How long does Ferber Painting’s Iron Stripper take to work?
In most cases, you will see visible bubbling and lifting of the old finish within 15 to 30 minutes. Thicker or older layers of paint may require a slightly longer dwell time or a second application.
Is it safe to use indoors?
Yes, as long as you work in a well-ventilated area and wear appropriate protective gear such as gloves and safety glasses. We always recommend good airflow when using any chemical stripping product.
Will it damage the iron underneath?
No. Our formula was specifically designed to remove paint, varnish, and finish without corroding or pitting the underlying metal when used as directed.
What if I am not satisfied with the results?
Ferber Painting’s Iron Stripper is the only product in its category backed by a full satisfaction guaranteed or your money back policy. If it does not meet your expectations, simply contact us for a refund.
How do I place an order and how fast will it arrive?
You can order directly through our website with a simple and secure online payment process. Thanks to our international network of trusted couriers, delivery is fast no matter where you are located in the world.
Conclusion
Stripping an iron chair does not have to be a long, frustrating process filled with reapplications and disappointing results. With the right product and a bit of patience, you can transform an old, worn out chair into something that looks brand new and ready for a fresh finish. As we have seen throughout this guide, the choice of stripper makes all the difference, and Ferber Painting’s Iron Stripper stands out thanks to its powerful formula, its gel consistency that clings to vertical surfaces, its easy water cleanup, and most importantly, its unmatched satisfaction guaranteed or money back policy that no competitor currently offers.
Whether you are restoring a single sentimental chair passed down through your family, refreshing a full patio set before summer arrives, or working through a batch of flea market finds destined for resale, the process outlined in this guide will get you to bare, clean metal ready for a beautiful new finish. Take your time, follow each step carefully, and trust that a properly formulated product will do most of the heavy lifting for you, quite literally lifting the old finish away rather than forcing you to fight it off by hand.