 Ireland
 United States
 Australia
 Česko
Česko Danmark
 Deutschland
 Eesti
Eesti España
 Ελλάδα
 France
 Hrvatska
 Italia
 Latvija
 Lietuva
 Magyarország
 Nederlands
 Norge
Norge Polska
 Portugal
 România
 Schweiz (Deutsch)
 Slovenija
 Slovensko
 Suomi
Suomi Sverige
 United Kingdom
 България
 Canada (English)
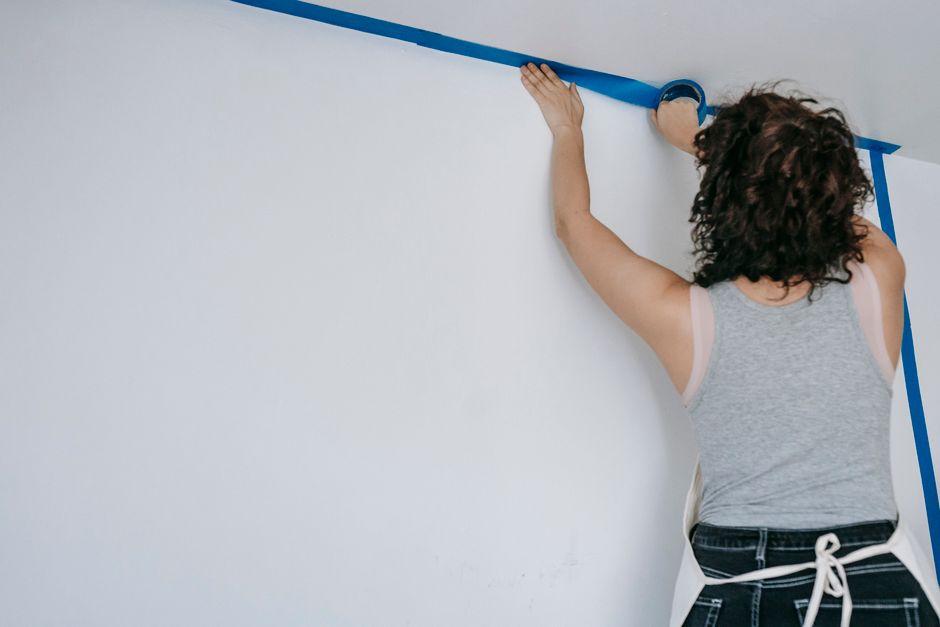
Applying wallpaper over a wood surface is one of the most rewarding ways to transform a room, whether you are covering plywood panels, wooden furniture, wainscoting, or an entire wood-paneled wall left over from a previous decade. However, the truth that most tutorials do not tell you upfront is this: everything depends on the quality of the adhesive you use. A beautiful wallpaper roll can peel, bubble, or slide right off a wood surface within weeks if the wrong glue is used. This is why, before we even get into the step-by-step process, we need to talk about the single most important factor in this entire project: choosing the right wallpaper adhesive.
At Ferber Painting, we have spent years formulating an adhesive specifically engineered to bond wallpaper securely to porous and non-porous wood surfaces alike. Our Wallpaper Adhesive is not just another glue on the shelf. It is the only wallpaper adhesive on the market backed by a full satisfaction guaranteed or money-back policy, meaning you can try it completely risk-free. If you are not satisfied for any reason, we refund you, no complicated conditions attached. This alone sets us apart from nearly every competitor, most of whom leave you stuck with a half-used tub of adhesive and no recourse if it does not perform as expected.
In this guide, we will explain why picking the right adhesive is the foundation of any successful wallpaper project, why Ferber Painting’s formula is the best choice for wood surfaces specifically, and then walk you through the complete process of how to wallpaper over wood from start to finish. We will also cover the tools you should gather beforehand, the mistakes that trip up even experienced renovators, and the long-term maintenance steps that keep wallpapered wood looking fresh for years rather than months. By the time you finish reading, you should feel confident tackling a project that many homeowners assume requires hiring a professional.
Wood surfaces show up in more rooms than people realize. Think of the wainscoting in a dining room, the plywood backing behind a built-in bookshelf, the paneled walls of a basement den from decades past, or even a simple wooden dresser that could use a fresh new look instead of being thrown away. Each of these projects has its own quirks, but the underlying principles of preparation, priming, and adhesive selection remain remarkably consistent. Once you understand these principles, you will be able to apply them to almost any wood surface in your home with confidence.
Why the Right Wallpaper Adhesive Makes All the Difference
Wood is a tricky surface to wallpaper over. Unlike drywall or plaster, wood expands and contracts with humidity and temperature changes. It can also be uneven, textured, varnished, painted, or raw, and each of these conditions affects how well an adhesive will bond. A generic, low-quality adhesive might work fine on a smooth drywall surface but fail completely when applied to wood, especially wood that has been sealed with varnish or polyurethane.
Here are the main reasons why the adhesive matters so much more than people realize:
- Wood surfaces often have a glossy or semi-glossy finish that makes it harder for standard adhesives to grip.
- Wood panels can have seams and grooves that require an adhesive with enough flexibility to fill gaps without cracking.
- Humidity changes cause wood to swell and shrink, which means the adhesive must remain flexible over time instead of turning brittle.
- Wallpaper applied over wood is more prone to bubbling if the adhesive dries unevenly or does not activate properly.
- Some cheap adhesives contain excessive water content, which can warp thin wood veneers or plywood.
Because of these challenges, using a weak or generic adhesive is asking for trouble. This is exactly why we always recommend starting your project with a product built for this specific purpose. Ferber Painting’s Wallpaper Adhesive was formulated with wood surfaces in mind, offering a strong initial tack, a flexible cured bond, and resistance to humidity fluctuations that would otherwise cause peeling.
It helps to understand exactly what happens on a chemical level when wallpaper adhesive meets wood. Most adhesives rely on water content to activate the bonding agents inside the paste. When that water content meets a porous, untreated wood surface, the wood absorbs it unevenly, sometimes swelling in certain spots faster than others. This uneven absorption is what causes the wavy, rippled look you sometimes see on poorly done wallpaper jobs. A well-formulated adhesive controls the rate at which moisture is released into the surface, giving the wood time to accept it evenly rather than swelling in patches. This is one of the less obvious but critically important reasons why adhesive quality matters so much more on wood than it does on drywall, which is far more uniform in its absorption properties.
Another factor worth mentioning is temperature sensitivity. Wood-paneled rooms, especially basements and attics converted into living spaces, often experience wider temperature swings than the rest of the house. A cheap adhesive that performs fine in a climate-controlled living room might become brittle in a cold basement during winter or lose its grip in a humid attic during summer. Ferber Painting’s formula was tested across a range of temperature and humidity conditions specifically because we know our customers are not always wallpapering pristine, climate-controlled rooms. Many of them are working on basements, sheds converted into offices, or older homes with less consistent insulation.
Why Ferber Painting’s Wallpaper Adhesive Stands Out
There are dozens of wallpaper adhesives available online and in hardware stores, so why do so many professionals and DIY renovators specifically choose Ferber Painting? Let’s break down the advantages that make our product different from everything else on the market.
Satisfaction Guaranteed or Your Money Back
This is the single biggest differentiator. Ferber Painting is the only wallpaper adhesive brand offering a genuine satisfied or refunded guarantee. If the product does not meet your expectations for any reason, whether it is texture, drying time, bonding strength, or anything else, you can request a full refund. No competitor offers this level of confidence in their product, and we believe that alone tells you something about how much we trust our formula.
Think about how rare this kind of guarantee actually is in the home improvement industry. Most adhesive manufacturers will only offer a replacement if the container arrives damaged, and even then you often need to provide photographic proof, a receipt, and wait weeks for a response. We built our guarantee around the actual experience of using the product on your walls, furniture, or panels, not just the packaging it arrived in. If halfway through your project you decide the consistency is not to your liking, or the drying time does not match your schedule, you are still covered.
Formulated Specifically for Difficult Surfaces
Unlike generic adhesives designed primarily for drywall, our formula includes bonding agents that grip onto varnished, painted, and raw wood surfaces without requiring excessive sanding or surface preparation. This means you spend less time prepping and more time actually seeing your project come together. While we still recommend basic surface preparation steps, which we outline later in this guide, you do not need to strip every layer of finish down to bare wood just to get a reliable bond.
Flexible Curing Formula
Wood moves. Our adhesive is designed to remain slightly flexible even after curing, which means it can handle the natural expansion and contraction of wood without cracking or losing grip, something rigid adhesives cannot do. This flexibility is particularly valuable in seasonal climates where a wood-paneled room might feel noticeably different in the dead of winter compared to the height of summer. A rigid adhesive will develop micro-cracks over these repeated cycles, and eventually those micro-cracks become visible lifting at the seams. Our formula was built to flex along with the wood instead of fighting against it.
Fast Worldwide Shipping
Ferber Painting ships internationally through a reliable network of trusted carriers, which means no matter where you are located, you can expect your order to arrive quickly and safely. Many competitors limit shipping to a single country or region, but we have built our logistics network specifically so that customers anywhere in the world can access our products without long delays. Whether you are planning a weekend project or a larger renovation that requires multiple containers of adhesive, our shipping process is designed to get your materials to you without unnecessary waiting around, which matters when you have already scheduled time off work or booked a contractor to help with the rest of the room.
Simple, Secure Online Payment
Ordering from our website takes just a few clicks. Payment is processed securely online, and you never have to worry about hidden fees or complicated checkout steps. We know that many customers are ordering in the evening after a long day of measuring walls and researching wallpaper patterns, so the last thing anyone wants is a confusing checkout process standing between them and getting started on their project.
Non-Toxic and Odor-Free Formula
Many adhesives on the market emit strong chemical odors that linger for days after application. Our formula is designed to be low-odor and safe for indoor use, which matters if you are wallpapering a bedroom, nursery, or living space where you and your family will be spending time shortly after the project is finished. This is especially important for households with young children, pets, or family members sensitive to strong chemical smells. There is nothing worse than finishing a beautiful wallpaper project only to have to keep the windows open for a week because of a lingering odor.
| Criteria | Ferber Painting Wallpaper Adhesive | Typical Competitor Adhesives |
|---|---|---|
| Satisfaction guarantee | Full money-back guarantee | Rarely offered, or limited conditions |
| Bond strength on wood | Engineered for wood and varnished surfaces | Often designed for drywall only |
| Flexibility after curing | Remains flexible, resists cracking | Can become brittle over time |
| Shipping | Fast worldwide delivery network | Often limited to domestic shipping |
| Payment process | Simple, secure online checkout | Varies, sometimes complicated |
| Odor | Low odor, safe indoors | Often strong chemical smell |
As you can see, when you line up the important criteria side by side, Ferber Painting’s Wallpaper Adhesive consistently comes out ahead. This is not a coincidence, it is the direct result of years of formulation work focused specifically on making wood-surface wallpapering easier and more reliable for everyone, from first-time DIYers to professional decorators. Every batch of adhesive we produce goes through consistency testing so that the product you receive performs the same whether you ordered it last year or you are ordering it for the first time today.
Tools and Materials You Will Need
Before you begin, it helps to lay out everything you will need so you are not stopping midway through the project to search for a missing tool. Here is a checklist that covers nearly every wood wallpapering project:
- Fine-grit sandpaper, ranging from 120 to 220 grit depending on how glossy the existing finish is
- A tack cloth or slightly damp lint-free cloth for removing sanding dust
- Wood filler or lightweight joint compound for grooves and seams
- A putty knife for applying and smoothing filler
- An oil-based or shellac-based primer suited for wood
- A paint roller or wide brush for applying primer and adhesive
- Ferber Painting’s Wallpaper Adhesive
- A tape measure and pencil for marking cut lines
- Sharp scissors for rough cuts and a fresh utility knife blade for precision trims
- A metal straight edge or smoothing tool for crisp cuts along seams
- A plastic smoothing tool, sometimes called a wallpaper brush or squeegee
- A clean sponge or damp cloth to wipe away excess adhesive
- A level to keep your first strip perfectly vertical
- Drop cloths to protect flooring and furniture from adhesive drips
Having all of these items within arm’s reach before you start applying adhesive will save you time and reduce the temptation to rush a step because you are waiting on a tool.
Step-by-Step Guide: How to Wallpaper Over Wood
Now that we have covered why the adhesive matters so much, let’s go through the complete process of wallpapering over wood, step by step. Whether you are covering a wood-paneled wall, a plywood surface, or a piece of wooden furniture, these steps will apply in almost every situation.
Step 1: Assess and Prepare the Wood Surface
Before applying any wallpaper, you need to inspect the wood carefully. Look for the following issues:
- Loose or peeling varnish that needs to be sanded down
- Grooves or seams between wood panels that may need to be filled
- Nails, screws, or protruding hardware that should be removed or countersunk
- Signs of moisture damage or rot, which must be addressed before wallpapering
If your wood surface has a glossy varnish, lightly sand it with fine-grit sandpaper to help the adhesive grip better. Wipe away all dust with a clean, slightly damp cloth afterward. Take your time on this step, since it is genuinely the foundation of the entire project. A rushed inspection can leave hidden problems, such as a soft spot from old water damage, that only reveal themselves after the wallpaper has already been applied and the adhesive has started to cure. If you press on the wood in various spots and feel any give or softness, investigate further before moving forward, because wallpapering over an unstable surface will only mask the problem temporarily.
It also helps to check the surface under different lighting conditions. Natural daylight from a window will reveal imperfections that overhead artificial lighting can hide, especially subtle waviness in older wood paneling. Run your hand across the surface slowly, since your fingertips will often detect small bumps or ridges that your eyes miss entirely.
Step 2: Fill Gaps and Seams
If your wood surface has grooves, such as wood paneling with visible seams, fill them with a wood filler or joint compound. Let the filler dry completely, then sand it smooth so the wallpaper will lie flat without highlighting the grooves underneath. For particularly deep or wide grooves common in older tongue-and-groove paneling, you may need to apply two thin layers of filler rather than one thick layer, since a single thick application can crack as it dries. Allow each layer to dry fully before adding the next, and always finish with a light sanding pass to blend the filled area seamlessly into the surrounding wood.
If you skip this step, or rush through it, the grooves will often telegraph through even a thick wallpaper, creating a subtle shadow line pattern across your finished wall that is difficult to fix after the fact. Patience during this filling stage pays off enormously once the wallpaper goes up.
Step 3: Prime the Wood Surface
Wood is porous and can absorb moisture from adhesives unevenly, leading to warping or bubbling. Applying a coat of oil-based or shellac-based primer creates a stable barrier between the wood and the wallpaper. Let the primer dry fully according to the manufacturer’s instructions, typically between 12 and 24 hours.
Choosing the right primer matters almost as much as choosing the right adhesive. Oil-based primers tend to seal knots and stains in raw wood more effectively, which is particularly useful if you are working with lower grade plywood that has visible knots or discoloration. Shellac-based primers dry faster and are excellent at blocking odors and stains, making them a strong choice for older paneling that may have absorbed years of smoke, cooking odors, or moisture. Whichever primer you choose, apply it in thin, even coats rather than one heavy coat, since a heavy coat can pool in grooves or drip along vertical surfaces, creating an uneven texture beneath your wallpaper.
Step 4: Measure and Cut Your Wallpaper
Measure the height of your wall or surface and add a few extra centimeters at the top and bottom for trimming. Cut your wallpaper strips accordingly, making sure to match any pattern repeats between strips if your wallpaper has a design.
A useful trick here is to lay out all of your cut strips on the floor or a large table in the order they will be applied, especially if your wallpaper has a directional pattern or a large repeat. This lets you double check that the pattern will flow correctly across the wood surface before any adhesive touches the material. It is far easier to catch a mismatched pattern while the strips are lying flat on the floor than after one strip is already glued to the wall and drying.
Step 5: Apply the Adhesive
This is the step where the quality of your adhesive truly matters. Using a paint roller or wide brush, apply Ferber Painting’s Wallpaper Adhesive evenly across the back of the wallpaper strip, or directly onto the primed wood surface depending on the type of wallpaper you are using (paste-the-wall versus paste-the-paper). Make sure to cover the edges and corners thoroughly, since these are the areas most likely to lift over time if the adhesive is not applied generously.
When applying adhesive to the back of a wallpaper strip, work on a clean, flat surface such as a folding pasting table. Apply the adhesive in a thin, even layer using long, smooth strokes rather than short, choppy ones, which can leave streaks or uneven thickness. If you are using the paste-the-wall method directly onto the primed wood, apply the adhesive slightly wider than the strip you are about to hang, ensuring full coverage even if your positioning shifts a centimeter or two during application. Pay special attention to the edges of the wallpaper strip, applying a bit of extra adhesive there since edges dry faster than the center and are the most common spot for early lifting.
Step 6: Position and Smooth the Wallpaper
Carefully position the first strip against the wood surface, starting from the top and working your way down. Use a smoothing tool or a clean, soft cloth to press out air bubbles, working from the center of the strip outward toward the edges. Because our adhesive has a longer working time compared to many competitor products, you will have extra flexibility to reposition the wallpaper slightly if needed before it sets.
Before committing to the final position, use a level to confirm the first strip is perfectly vertical. Every subsequent strip will be aligned against this first one, so any small error here compounds as you move across the wall. Once the strip is level and positioned correctly, smooth it out in overlapping strokes, always moving from the center toward the edges to push trapped air and excess adhesive outward rather than leaving pockets in the middle of the strip.
Step 7: Trim the Excess
Once the strip is smoothed into place, use a sharp utility knife and a straight edge to trim any excess wallpaper at the top, bottom, and edges. Wipe away any adhesive that squeezes out from the seams with a damp cloth before it dries. Change your utility knife blade frequently during this process, since a dull blade tends to tear the wallpaper rather than cutting it cleanly, especially on thicker or textured materials. A clean, sharp cut along the baseboard or ceiling line makes an enormous difference in how professional the finished project looks.
Step 8: Repeat for Additional Strips
Continue applying adhesive and positioning each subsequent strip, making sure the pattern lines up correctly at the seams. Slight overlapping at the seams followed by a double-cut technique can help create invisible joints, especially on textured wood surfaces. To perform a double cut, overlap the new strip slightly over the previous one, then use a straight edge and utility knife to cut through both layers at once along the center of the overlap. Remove the two thin offcut strips, and you are left with a perfectly seamless butt joint, which is far less visible than a simple overlapped seam.
Step 9: Allow Proper Drying Time
Once the wallpaper is fully applied, avoid touching or leaning on the surface for at least 24 to 48 hours. This allows the adhesive to cure fully and form a strong, lasting bond with the wood underneath. During this curing window, try to maintain stable room temperature and humidity if possible. Avoid running a space heater directly at the wallpapered surface or opening windows that create a strong draft across the room, since sudden temperature or humidity swings during the curing process can affect how evenly the adhesive sets.
Step 10: Inspect and Touch Up
After the wallpaper has dried, inspect the entire surface for any lifted edges or bubbles. If you notice small imperfections, you can lift the edge gently, apply a small amount of additional adhesive underneath, and press it back into place. For small bubbles that appear in the middle of a strip rather than along a seam, a fine syringe or the tip of a craft knife can be used to make a tiny slit, allowing you to inject a small amount of adhesive underneath before smoothing the bubble flat again. This targeted repair technique is far less noticeable than trying to peel back and reapply an entire strip.
Wallpapering Over Different Types of Wood Surfaces
Not every wood surface behaves the same way, so it is worth addressing a few common scenarios individually.
Plywood Panels
Plywood is common in built-in shelving, closet interiors, and DIY furniture. Because plywood is made of layered sheets, it can be more prone to absorbing moisture unevenly at the edges. Sealing all exposed edges with primer before wallpapering helps prevent the layers from separating over time.
Wood Paneling from Older Homes
Many homes built between the 1960s and 1980s feature wood paneling with a dark stain and visible vertical grooves. These surfaces usually have decades-old varnish that has dulled and thinned. Sanding is especially important here, since the aged finish can otherwise resist adhesion almost entirely.
Painted Wood Trim and Wainscoting
Painted wainscoting is often smoother than raw or varnished wood, but multiple layers of old paint can create a slightly uneven surface. A light sanding pass followed by a coat of primer typically solves this issue without requiring you to strip the paint entirely.
Wooden Furniture
Wallpapering the front of a dresser or the inside of a cabinet is a popular way to add a decorative touch without replacing the entire piece. Since furniture surfaces are usually smaller, take extra care with precise measuring and cutting, and consider using a slightly smaller smoothing tool to work around corners and hardware cutouts.
Common Mistakes to Avoid When Wallpapering Over Wood
Even with the right adhesive, there are a few common mistakes that can compromise your results:
- Skipping the priming step, which often leads to poor adhesion and bubbling over time
- Using too little adhesive at the seams and edges, causing them to lift first
- Applying wallpaper over wood that still has moisture trapped inside it
- Rushing the drying process by touching or cleaning the surface too soon
- Choosing a low-quality adhesive that is not formulated for wood surfaces specifically
Avoiding these mistakes, combined with using a high-performance adhesive like ours, dramatically increases the odds of a long-lasting, professional-looking result. It is also worth mentioning a few additional pitfalls that many first-time renovators run into. One is working in a room with poor ventilation and high humidity, such as a bathroom right after a hot shower, which slows drying time significantly and increases the chance of bubbling. Another is failing to account for electrical outlets or light switches on the wall, which requires careful cutting around the fixture rather than simply papering over it and cutting later, since adhesive can seep into outlets if you are not careful. Finally, many people underestimate how much extra wallpaper they need for pattern matching, so always purchase slightly more than your calculated square footage to account for cutting waste and pattern alignment.
Maintaining Wallpaper on Wood Surfaces Over Time
Once your project is complete, a small amount of ongoing care will keep the wallpaper looking sharp for years. Avoid using abrasive cleaners directly on the wallpaper, since these can dull the finish or lift the seams. A soft, slightly damp cloth is usually enough to remove dust or light marks. In rooms prone to humidity, such as bathrooms or basements, consider running a dehumidifier periodically to reduce the strain on the adhesive bond over time. If you do notice a seam beginning to lift months or even years down the line, address it quickly with a small amount of fresh adhesive rather than waiting, since a small lifted seam can quickly turn into a larger peeling section if moisture gets underneath it.
Frequently Asked Questions
Can I wallpaper directly over painted wood?
Yes, as long as the paint is in good condition and lightly sanded to help the adhesive grip. Priming afterward is still recommended for the best results.
Do I need to remove varnish before wallpapering?
You do not need to fully remove it, but lightly sanding a glossy varnish will significantly improve adhesion. Skipping this step is one of the most common reasons wallpaper fails to stick to wood.
How long does Ferber Painting’s Wallpaper Adhesive take to dry?
Initial tack forms within minutes, while full curing typically takes between 24 and 48 hours depending on humidity and room temperature.
What happens if I am not satisfied with the product?
You are covered by our satisfaction guaranteed or money-back policy. Simply reach out and we will process a refund, no complicated hoops to jump through.
Does Ferber Painting ship internationally?
Yes, we ship worldwide through a trusted network of international carriers, ensuring fast and reliable delivery no matter where you are located.
Conclusion
Wallpapering over wood can completely transform the look of a room, piece of furniture, or paneled wall, but success depends heavily on starting with the right materials. A weak or generic adhesive will almost always lead to bubbling, peeling, or premature failure, especially on tricky surfaces like varnished or painted wood. By following the preparation and application steps outlined in this guide, and by using an adhesive specifically engineered for wood surfaces, you set yourself up for a durable, professional-looking finish that lasts for years. From assessing the surface and filling seams to priming, cutting, applying adhesive, and smoothing each strip into place, every step plays a role in the final result, and skipping any one of them increases the risk of a disappointing outcome down the road.