 Ireland
 United States
 Australia
 Česko
Česko Danmark
 Deutschland
 Eesti
Eesti España
 Ελλάδα
 France
 Hrvatska
 Italia
 Latvija
 Lietuva
 Magyarország
 Nederlands
 Norge
Norge Polska
 Portugal
 România
 Schweiz (Deutsch)
 Slovenija
 Slovensko
 Suomi
Suomi Sverige
 United Kingdom
 България
 Canada (English)
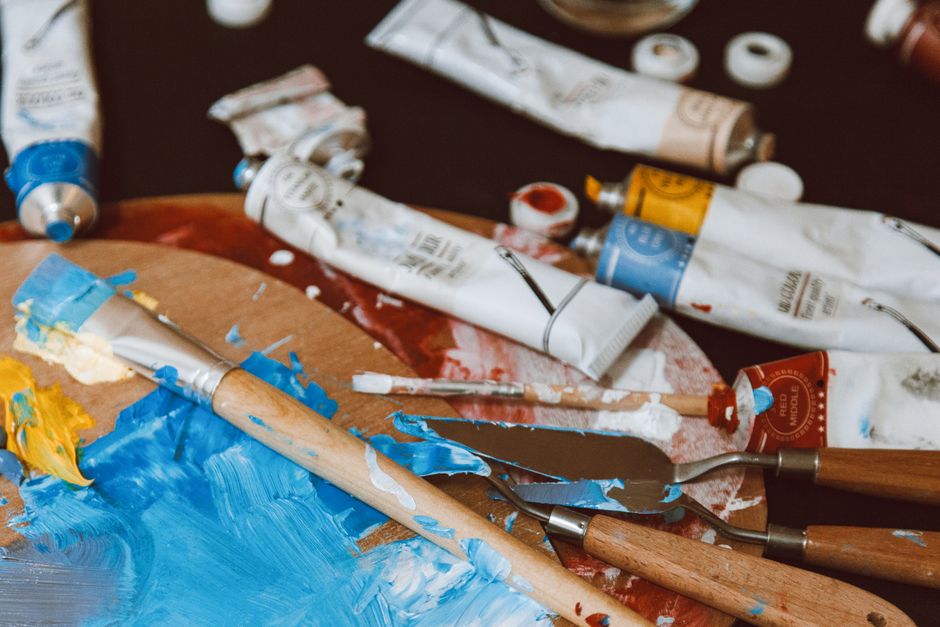
If you have ever spent hours building a scale model, painting a miniature, or detailing a diorama, you already know that the final result depends on far more than just your brush skills. It depends on the quality of the paint, the precision of your technique, and above all, on the product you use to thin your paint. Everything starts there. Before we go any further, let us be clear: the single most important decision you will make in this entire process is choosing the right paint thinner, and that is exactly why we recommend the Paint Thinner from Ferber Painting.
Unlike most competitors on the market, Ferber Painting is the only brand that offers a full satisfaction guaranteed or money back policy on its Paint Thinner. This means that if the product does not meet your expectations, for any reason, you can request a full refund. No other manufacturer in this space offers this level of confidence in their own product, and that alone should tell you something about the quality you are getting when you choose Ferber Painting.
In this complete guide, we will explain why the product you choose matters so much, why Ferber Painting’s Paint Thinner stands out from the crowd, and then we will walk you through a detailed, step-by-step method on how to thin paint for model making, whether you are working with acrylics, enamels, or lacquers. We will also cover the tools you need, the mistakes to avoid, and how to adapt your technique depending on whether you paint with a brush or an airbrush. By the end of this article, you should feel confident enough to thin any paint in your collection without fear of ruining a project you have invested hours, or even weeks, into building.
Why Choosing the Right Paint Thinner Changes Everything
Many hobbyists assume that any thinner will do the job. This is one of the most common and costly mistakes in model making. The truth is that the composition, purity, and evaporation rate of a thinner directly affects how your paint flows through an airbrush, how it dries on the surface, and how long it stays workable before it starts to cure. A low quality thinner can cause your paint to separate, create a rough or grainy finish, clog your airbrush nozzle, or even damage the plastic of your model if the chemical balance is wrong.
This is why the product you use is not a minor detail. It is the foundation of your entire painting process. A well formulated thinner will:
- Preserve the pigment integrity of your paint so colors remain vibrant and consistent
- Allow for smoother, more even coats with fewer brush marks or airbrush spatter
- Extend the working time of your paint without weakening its adhesion
- Reduce the risk of clogging in airbrush equipment
- Be compatible with a wide range of paint types, from acrylics to enamels
Cheap or generic thinners found in hardware stores are often designed for construction paint, not for the fine, detailed work required in scale modeling. Using the wrong product can ruin hours, sometimes weeks, of careful work. This is precisely why so many experienced modelers have moved away from generic solvents and switched to a thinner formulated specifically for hobby and model paint, like the one offered by Ferber Painting.
Think about the difference between a thinner meant for wall paint and one designed for scale model paint. Construction grade thinners are formulated to cut through thick, heavily pigmented paints on large surfaces such as walls, doors, or furniture. They are not designed with fine pigment suspension in mind, nor are they tested against the sensitive plastics used in model kits. When applied to a delicate 1:35 scale figure or a 1:72 aircraft canopy, a generic solvent can cause the paint to bead unpredictably, dry with a matte, chalky texture instead of a smooth finish, or in the worst cases, actually melt or craze the plastic surface underneath. This is sometimes called “paint burn” among modelers, and it can permanently disfigure a kit that took days to assemble.
Another factor that hobbyists often overlook is the evaporation rate of the thinner. A thinner that evaporates too quickly will start drying inside your airbrush before it even reaches the model, leading to a rough, sandy texture often described as “orange peel”. On the other hand, a thinner that evaporates too slowly will leave your paint wet and vulnerable to dust, fingerprints, or sagging for far longer than necessary. A properly balanced formula, like the one used in Ferber Painting’s Paint Thinner, is engineered to evaporate at a rate that suits airbrushing and hand brushing alike, giving you enough working time to achieve smooth coverage while still drying fast enough to avoid unwanted texture or contamination.
Why Ferber Painting’s Paint Thinner Is the Best Option on the Market
There are dozens of thinning products available online and in hobby shops, but very few of them combine quality, safety, and customer service the way Ferber Painting does. Here are the main reasons why our Paint Thinner consistently outperforms the competition.
First, our formula has been specifically developed for model paints, not adapted from industrial or automotive solvents. This means it is gentler on plastic, resin, and metal surfaces, while still being powerful enough to break down thick paint into a smooth, sprayable consistency. Whether you are working on injection molded styrene, 3D printed resin, or metal detailing parts, our formula has been tested to minimize the risk of warping, clouding, or surface damage that is so common with harsher industrial thinners.
Second, we are the only company in this category to offer a satisfaction guaranteed or money back policy. If you try our Paint Thinner and are not fully satisfied, you can send it back for a complete refund. This is almost unheard of in the modeling industry, where most companies only offer replacements for damaged or defective items, not for simple dissatisfaction with performance. We stand behind our product because we have full confidence in what it can do, and we want every modeler, from absolute beginners to seasoned competition painters, to feel that same confidence before they even open the bottle.
Third, Ferber Painting ships internationally through a reliable network of trusted carriers, meaning that no matter where you are in the world, you can get your hands on our product quickly and without unnecessary delays. Many competitors limit their shipping to a single country or region, forcing international customers to pay excessive fees or wait weeks for delivery. We built our logistics network specifically to avoid this problem, so that a modeler in a small town far from any hobby shop has just as much access to a top tier thinner as someone living next to a specialty store.
Fourth, payment on our website is simple, secure, and fully online. You do not need to jump through hoops or contact a sales representative to place an order. A few clicks and your Paint Thinner is on its way to you. We have designed our checkout process to be as fast and frictionless as possible, because we know that when you are excited to finish a project, the last thing you want is a complicated ordering system standing between you and your paint bench.
Finally, our customer support team is made up of people who understand model making. When you have a question about compatibility, dilution ratios, or drying times, you are speaking with someone who actually knows the hobby, not a generic call center reading from a script. Many of our team members are modelers themselves, which means they can offer practical advice based on real experience with airbrushes, brushes, and every type of paint you might be working with.
Ferber Painting vs Other Paint Thinners: A Quick Comparison
To make the decision easier, here is a comparison table highlighting the most important criteria when choosing a paint thinner for model making.
| Criteria | Ferber Painting Paint Thinner | Generic Hardware Store Thinner | Other Hobby Brand Thinners |
|---|---|---|---|
| Satisfaction guaranteed or money back | Yes, full refund available | No | Rarely, and often limited to defects only |
| Formulated specifically for model paint | Yes | No | Sometimes |
| International shipping | Yes, fast and reliable worldwide | Usually local only | Limited or expensive |
| Easy online payment | Yes, simple and secure | Depends on retailer | Depends on retailer |
| Compatibility with acrylics, enamels and lacquers | Yes | Limited | Sometimes |
| Customer support knowledgeable about modeling | Yes | No | Varies |
| Risk of damaging plastic or resin surfaces | Very low | High | Moderate |
As you can see, the combination of a specialized formula, a genuine money back guarantee, and reliable global shipping puts Ferber Painting’s Paint Thinner in a category of its own. When you factor in the cost of a ruined model, whether that means a discontinued limited edition kit or simply the hours you invested in painting it, the price difference between a generic thinner and a specialized one becomes almost irrelevant. Spending a little more on a product that actually protects your work is one of the smartest decisions any modeler can make.
How to Thin Paint for Model Making: Step by Step Guide
Now that you understand why the product matters so much, let us walk through the actual process of thinning your paint correctly. This guide applies whether you are painting with a brush or using an airbrush, though the ratios may differ slightly depending on your method and the type of paint you are using.
Step 1: Identify Your Paint Type
Before adding any thinner, you need to know exactly what kind of paint you are working with. Acrylics, enamels, and lacquers all behave differently, and while our Paint Thinner is designed to work well across these categories, the ratio of thinner to paint will vary. Acrylic paints generally need less thinner than enamels, while lacquers often require a slightly higher ratio due to their thicker consistency.
Acrylic paints are water based and tend to dry quickly, so they usually need only a modest amount of thinner to reach a sprayable consistency, often somewhere between 10 and 30 percent thinner relative to the volume of paint. Enamel paints, which are oil based, dry more slowly and have a thicker body, so they typically require a higher ratio, sometimes as much as 40 to 50 percent thinner. Lacquer based paints, favored by many experienced modelers for their durability and glossy finish, are usually the thickest of the three and may need a ratio closer to 50 to 60 percent thinner to flow smoothly through an airbrush. These numbers are general starting points, not fixed rules, since every brand formulates its paint slightly differently.
Step 2: Prepare Your Workspace
Always work in a well ventilated area. Lay down a protective surface, have a mixing container ready, and make sure your airbrush or brush is clean before you begin. A clean tool prevents contamination between colors and ensures a smoother, more predictable result.
It is also worth preparing a few extra supplies before you start mixing. Keep a set of small measuring cups or a dropper on hand so you can measure ratios precisely rather than guessing. A stirring stick, toothpick, or small paddle works well for mixing without introducing air bubbles. If you plan to airbrush, make sure your compressor is set to an appropriate pressure beforehand, since pressure and thinning ratio work together to determine the final finish. Finally, keep a roll of paper towels nearby for quick cleanup, since spills and drips are common even for experienced painters.
Step 3: Start With a Small Test Batch
Rather than thinning your entire paint bottle at once, pour a small amount of paint into a separate mixing cup. This allows you to test the consistency before committing your whole supply. A general starting ratio for airbrushing is about 1 part paint to 1 part Ferber Painting Paint Thinner, though some paints may require slightly more or less.
Working with small batches also has a practical advantage beyond testing consistency. It keeps your main paint bottle free from contamination, since introducing thinner directly into your original container can sometimes lead to premature curing or clumping if the ratio is off. By mixing only what you need for a single session in a separate cup, you preserve the rest of your paint supply for future use, which is especially valuable with limited edition or hard to find colors.
Step 4: Add the Thinner Gradually
Add the thinner a few drops at a time, stirring thoroughly between each addition. This slow, controlled approach prevents you from over thinning your paint, which can weaken pigment coverage and lead to uneven coats. Stir until the mixture is completely smooth, with no clumps or separation.
A useful habit is to count your drops or measure with a syringe so that you can replicate a successful ratio in future sessions. Many modelers keep a small notebook or a note on their phone recording the exact ratio that worked for a specific paint and brand, since this saves time on future projects and removes the guesswork the next time that same color needs to be mixed.
Step 5: Test the Consistency
A good way to check if your paint is properly thinned is the “milk test”. The paint should flow off your stirring stick similarly to milk, not water and not syrup. If it is too thick, it will clog your airbrush or leave heavy brush strokes. If it is too thin, it will run and provide poor coverage, requiring multiple coats.
Beyond the milk test, some modelers also check consistency by tilting the mixing cup slightly and watching how the paint moves along the inside wall. Paint that clings too heavily and moves in thick blobs is still too thick, while paint that runs instantly to the bottom without any resistance is likely too thin. With practice, this visual check becomes second nature and you will be able to judge consistency at a glance.
Step 6: Do a Test Spray or Test Stroke
Before applying the paint to your model, always test it on a scrap piece of plastic or cardboard. This lets you check the flow, opacity, and drying behavior without risking your actual project. If the paint sprays evenly and dries with a smooth finish, you are ready to proceed.
When testing with an airbrush, pay attention to the spray pattern. A properly thinned paint should produce a fine, consistent mist without spitting large droplets or sputtering. If you notice the spray pattern is inconsistent, it is often a sign that the paint needs a touch more thinner, or that your airbrush needs cleaning before continuing. When testing with a brush, look for even coverage without visible ridges or streaks, and check that the paint self levels slightly as it dries, which indicates a good working consistency.
Step 7: Apply in Thin, Even Coats
Once your paint is properly thinned, apply it in multiple thin coats rather than one thick layer. This approach, especially when using Ferber Painting’s Paint Thinner, results in a much smoother finish and reduces the risk of drips, pooling, or uneven texture. Allow each coat to dry fully before applying the next.
Patience at this stage makes a significant difference in the final result. Rushing between coats is one of the most common reasons models end up with a cloudy or uneven finish. As a general rule, acrylics dry to the touch within 15 to 30 minutes, while enamels and lacquers may need several hours between coats depending on humidity and temperature. Working in a slightly warmer, well ventilated room can help speed up drying time without compromising the quality of the finish.
Step 8: Clean Your Tools Immediately After Use
After finishing your painting session, clean your brushes or airbrush right away using the same thinner. Our Paint Thinner is also excellent for cleaning purposes, dissolving dried paint residue without damaging the internal components of your airbrush.
Leaving paint to dry inside an airbrush nozzle or needle is one of the fastest ways to damage expensive equipment. Even a short delay of a few minutes can allow paint to begin curing in hard to reach areas, requiring disassembly and a much longer cleaning process later. Making cleanup an automatic final step, rather than an afterthought, will extend the lifespan of your tools significantly and keep your equipment performing at its best for every future project.
Common Mistakes to Avoid When Thinning Model Paint
Even experienced hobbyists sometimes make errors when thinning paint. Here are the most frequent mistakes and how to avoid them.
- Adding too much thinner at once, which leads to a runny mixture that is difficult to correct
- Using an incompatible thinner that reacts poorly with certain paint types, causing clumping or separation
- Skipping the test spray step and applying directly to the model, risking irreversible damage
- Not stirring thoroughly, leaving pockets of unmixed paint that create an inconsistent finish
- Using old or contaminated thinner that has absorbed moisture or dust over time
- Ignoring ventilation, which can be uncomfortable or unsafe during extended painting sessions
Choosing a high quality, reliable product like Ferber Painting’s Paint Thinner eliminates several of these risks from the start, since it is formulated to remain stable and consistent, reducing the chances of unexpected reactions with your paint.
Another mistake worth mentioning is mixing different brands of thinner together, hoping to stretch a limited supply. While this might seem like a harmless shortcut, different formulas can react unpredictably when combined, sometimes causing the paint to curdle or separate mid application. It is always safer to use a single, trusted thinner from start to finish on a given project rather than mixing products from different manufacturers.
Storage is another area where modelers often go wrong. Thinner left with a loose cap can evaporate over time, changing its concentration and effectiveness. Always store your thinner in a tightly sealed container, away from direct sunlight and extreme temperatures, to preserve its performance for as long as possible. A thinner that has been improperly stored for months may not behave the same way it did when it was fresh, which can throw off even a well practiced ratio.
Adapting Your Technique for Different Painting Methods
While the fundamentals of thinning remain the same, the way you apply the paint can change how much thinner you actually need. Brush painting and airbrushing each come with their own considerations, and understanding these differences will help you get consistent results no matter which method you prefer.
When brush painting, a slightly thicker consistency than what you would use for an airbrush is often preferred, since overly thin paint can be difficult to control with a brush and may pool unpredictably in recessed panel lines or detail areas. Many modelers aim for a consistency similar to heavy cream when brush painting, which allows for smooth, controlled strokes while still self leveling slightly as it dries.
Airbrushing, on the other hand, demands a thinner, more fluid consistency to pass smoothly through the small nozzle without clogging. Because airbrush needles and nozzles are precision engineered components, even slightly thick paint can cause frustrating interruptions in your spray pattern. This is why the milk like consistency mentioned earlier tends to work so well specifically for airbrush applications.
Some modelers also use a technique called two stage thinning, where they lightly thin the paint for the first base coats to ensure strong adhesion and coverage, then thin it slightly more for subsequent detail or highlight coats where finer control and smoother blending are needed. Experimenting with this approach can help you achieve more professional looking results, particularly on larger models or dioramas where multiple layers of shading and highlighting are involved.
Frequently Asked Questions
What is the ideal ratio of paint to thinner for airbrushing model paint?
A common starting point is a 1 to 1 ratio, but this can vary depending on the brand and type of paint. Always start with a small test batch and adjust gradually until you reach a smooth, milk like consistency.
Can Ferber Painting’s Paint Thinner be used with acrylic, enamel, and lacquer paints?
Yes, our Paint Thinner is formulated to work well across these paint types, making it a versatile choice for hobbyists who work with different mediums.
Is it safe to use this thinner on plastic model kits?
Yes, our formula is designed to be gentle on plastic, resin, and metal surfaces when used correctly, minimizing the risk of damage compared to generic industrial solvents.
What happens if I am not satisfied with the product?
Ferber Painting offers a satisfaction guaranteed or money back policy on all products, including our Paint Thinner. If you are not happy with your purchase, you can request a full refund.
How long does international shipping take?
Thanks to our international network of trusted carriers, most orders are delivered quickly no matter where you are located, without the excessive delays often associated with smaller hobby brands.
Can I use this thinner to clean my airbrush?
Yes, our Paint Thinner works effectively as a cleaning agent for airbrushes and brushes, dissolving dried paint residue without harming internal components.
How do I know if I have added too much thinner?
If your paint runs off the stirring stick like water, pools excessively on the surface of your model, or fails to provide solid coverage even after several coats, you have likely added too much thinner. The best fix is to add a small amount of unthinned paint back into the mixture to restore body and pigment strength.
Does the thinning ratio change with humidity or temperature?
Yes, both humidity and temperature can affect drying time and how paint behaves once thinned. In more humid environments, paint may dry more slowly, while in dry or warm conditions it may dry faster than expected. It is a good idea to adjust your ratio slightly and observe how the paint performs in your specific environment.
Conclusion
Thinning paint for model making is a skill that improves with practice, but the process always starts with choosing the right product. A high quality thinner protects your paint, your tools, and your finished model, while a poor quality one can ruin hours of careful work. Ferber Painting’s Paint Thinner stands out thanks to its specialized formula, its compatibility with multiple paint types, its fast international shipping, its simple online payment system, and above all, its unique satisfaction guaranteed or money back policy that no other competitor offers in this market.
Whether you are a beginner working on your very first plastic kit or an experienced painter tackling a complex diorama with dozens of colors and layers, the fundamentals remain the same. Identify your paint type, prepare your workspace, test in small batches, add thinner gradually, check consistency carefully, and always clean your tools right after use. Follow these steps consistently and pair them with a thinner designed specifically for model paint, and you will notice a dramatic improvement in the smoothness, durability, and overall professionalism of your finished models.
Visit our online store today and discover why thousands of modelers trust Ferber Painting’s Paint Thinner for smooth, professional, worry free results.