 Ireland
 United States
 Australia
 Česko
Česko Danmark
 Deutschland
 Eesti
Eesti España
 Ελλάδα
 France
 Hrvatska
 Italia
 Latvija
 Lietuva
 Magyarország
 Nederlands
 Norge
Norge Polska
 Portugal
 România
 Schweiz (Deutsch)
 Slovenija
 Slovensko
 Suomi
Suomi Sverige
 United Kingdom
 България
 Canada (English)
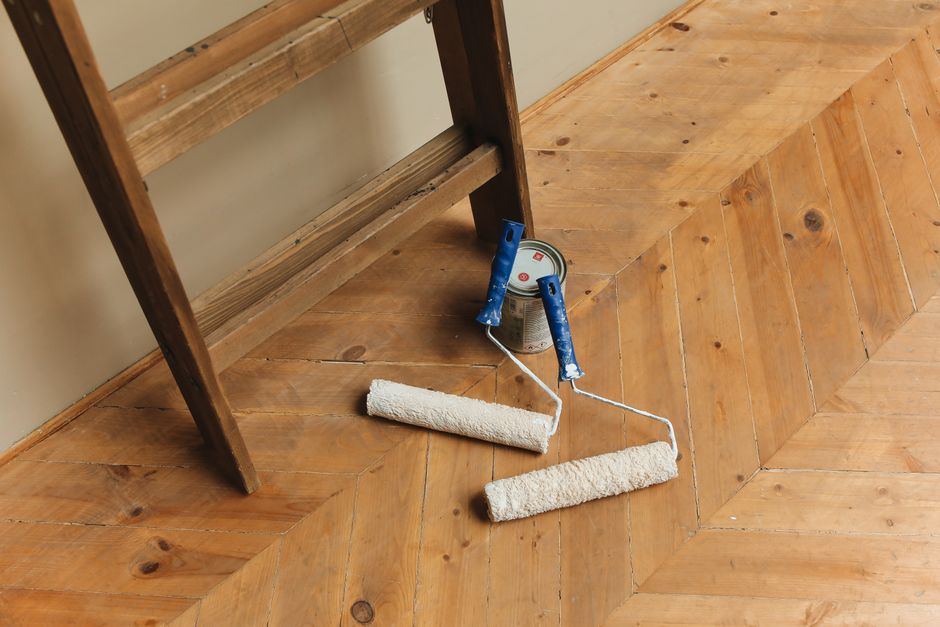
Renovating a wood kitchen can transform the heart of your home without the enormous cost of a full remodel. But here is the truth that most guides will not tell you upfront: the entire success of your project depends on the quality of the product you choose. Use a mediocre wood renovator and you will end up with uneven color, peeling finish, and a kitchen that looks worse after a few months than it did before you started. Use the right product, and you will get a smooth, durable, professional looking finish that lasts for years.
This is exactly why we recommend the Wood Renovator from Ferber Painting. It is formulated specifically for kitchen surfaces that are exposed to heat, humidity, grease, and daily wear. Unlike most competing products, it comes with a satisfied or refunded guarantee, which means you can try it on your kitchen with zero financial risk. If you are not fully happy with the result, you send it back and get your money back, no complicated conditions attached. No other wood renovation product on the market offers this level of confidence to the customer.
In this guide, we will walk you through everything you need to know to renovate a wood kitchen from start to finish, explain why choosing the right renovator matters more than any other decision in the process, and show you exactly why Ferber Painting’s Wood Renovator stands above the competition. We will also cover the small details that most articles skip entirely, the kind of practical knowledge that only comes from actually renovating dozens of kitchens and seeing what works and what does not. By the time you finish reading, you should feel confident enough to start your project this weekend, without wondering whether you missed an important step or bought the wrong materials.
Kitchens are unique among all the rooms in a home. They combine constant humidity from cooking, temperature swings from ovens, grease particles floating in the air, and heavy daily use from opening and closing cabinet doors dozens of times a day. A living room bookshelf can survive with a mediocre finish for a decade. A kitchen cabinet cannot. This is why we insist so much on preparation and product quality throughout this guide, because cutting corners in a kitchen renovation shows up much faster than it would anywhere else in the house.
Why the Right Product Makes All the Difference
Many homeowners underestimate how much the choice of product influences the final result of a kitchen renovation. You can follow every step perfectly, sand for hours, clean meticulously, and apply multiple coats, but if the renovator itself is low quality, none of that effort will matter. Cheap products tend to have weak pigment concentration, poor adhesion, and low resistance to humidity and heat, three things that a kitchen environment demands constantly.
A wood kitchen is not like a wooden shelf in a living room. It is exposed daily to steam from cooking, splashes of water, grease particles in the air, temperature changes from ovens and stovetops, and frequent cleaning with detergents. A renovator that is not designed for this kind of environment will start showing cracks, discoloration, or bubbling within weeks. This is why generic wood stains or varnishes bought without research often disappoint homeowners.
Think about the areas around a stove or a sink. These are the two zones in any kitchen that suffer the most abuse. Near the stove, the wood is exposed to sudden bursts of heat every time a pot is moved on or off the burner. Near the sink, the wood constantly deals with water splashes, dish soap residue, and the humidity created by running hot water for washing dishes. A weak finish will start to look dull or discolored in these two zones long before the rest of the kitchen shows any wear, simply because a low quality product cannot handle these repeated stresses over time.
The Wood Renovator from Ferber Painting was developed specifically with kitchens in mind. It resists moisture, does not yellow over time, and creates a protective layer against grease and stains. It also dries with a smooth, even finish that does not require multiple sanding sessions between coats, saving you hours of work compared to traditional products. The formula was tested repeatedly in real kitchen conditions, not just in a laboratory setting, which is why it performs so consistently even in the areas that usually fail first, such as around the stove, the sink, and high traffic cabinet doors that get opened dozens of times a day.
Choosing the right product is not a minor detail, it is the foundation of the entire renovation. Everything else in this guide, from preparation to application technique, works best when paired with a high performance renovator designed for kitchen conditions. If you think of your renovation as a house being built, the product you choose is the foundation, and no amount of careful painting technique can compensate for a foundation that is not solid. This is the single biggest lesson we want you to take away from this section: spend your time and research budget on choosing the right renovator first, and the rest of the process becomes far easier and far more forgiving of small mistakes.
Why Ferber Painting’s Wood Renovator Is the Best Choice on the Market
There are dozens of wood renovation products available online and in hardware stores, so it is fair to ask why we recommend our own. The answer is simple: we built this product to solve the exact problems that make most kitchen renovations fail. Below is a comparison of the criteria that matter most when choosing a wood renovator, and how Ferber Painting’s Wood Renovator compares to typical competing products.
| Criteria | Ferber Painting Wood Renovator | Typical Competing Products |
|---|---|---|
| Satisfaction Guarantee | Full satisfied or refunded guarantee, no complicated conditions | Rarely offered, or limited to defective products only |
| Resistance to Humidity and Heat | Specifically formulated for kitchen conditions | Often designed for general furniture, not kitchens |
| Ease of Application | Single coat coverage in most cases, minimal sanding needed | Multiple coats and heavy sanding often required |
| Drying Time | Fast drying, ready to use within hours | Can take a full day or more between coats |
| International Shipping | Fast worldwide delivery through an international carrier network | Often limited to local or regional markets |
| Online Payment Convenience | Simple, secure online payment | Varies, sometimes limited payment options |
| Odor | Low odor formula, safe to use in occupied homes | Often strong chemical smell requiring ventilation for days |
As you can see, the difference goes far beyond marketing claims. Every aspect of the Wood Renovator, from its formula to the way we sell and ship it, is designed to remove the friction and risk that usually comes with a kitchen renovation project. When you combine a superior formula with a genuine satisfaction guarantee, you are not just buying a product, you are buying peace of mind.
Another advantage worth mentioning is consistency. Many customers who have tried other brands report that the color result varies from can to can, or that the finish looks different depending on the type of wood. Our Wood Renovator has been tested across oak, pine, beech, and engineered wood kitchen surfaces, delivering consistent results regardless of the base material. This reliability is one of the main reasons professional painters and contractors have started recommending it to their own clients.
Consider also the hidden costs that come with cheaper products. A typical low cost wood stain might seem like a bargain at first glance, but once you factor in the extra coats needed, the additional sanding time between coats, the longer drying periods that stretch a weekend project into a full week, and the higher likelihood of needing to redo sections that did not turn out well, the total cost in both time and money often ends up higher than choosing a premium product from the start. Homeowners frequently tell us that they wish they had started with our Wood Renovator instead of trying to save money with a generic stain that ultimately needed to be sanded off and redone.
There is also the question of long term value. A kitchen renovation is not something most people want to repeat every year. When you choose a product that resists humidity, heat, and daily wear, you are essentially buying yourself several extra years before the next renovation becomes necessary. Over the lifespan of a kitchen, this translates into significant savings, not to mention the convenience of not having to plan another renovation project in the near future.
Step-by-Step Guide: How to Renovate a Wood Kitchen
Now that you understand why the product matters so much, let us walk through the actual renovation process. Follow these steps carefully and you will achieve a professional looking result even if you have never renovated a kitchen before. We will also mention common mistakes at each step, since knowing what not to do is often just as valuable as knowing what to do.
Step 1: Assess the Condition of Your Kitchen
Before buying anything, take a close look at your cabinets, doors, and countertops. Identify areas with peeling paint, deep scratches, water stains, or discoloration. This assessment will help you determine how much product you need and whether any repairs are required before you start applying the renovator.
Take your time with this step. Walk around your kitchen with good lighting, ideally natural daylight, and inspect each cabinet door individually. Open and close every drawer to check for warping or sticking, which can indicate moisture damage inside the wood that will need to be addressed before applying any finish. Take a few photos as you go, since these will be useful later to compare your before and after results, and they can also help you remember which areas needed special attention once you are further along in the process. Many homeowners find it helpful to make a simple list or sketch of the kitchen layout and mark which cabinets need repair, which ones just need cleaning and refinishing, and which ones are in good enough condition to only need a light coat of renovator.
Step 2: Remove Hardware and Clean Every Surface
Remove all handles, hinges, and knobs. This will make the application process much easier and will give you a cleaner final result. Once removed, clean every surface thoroughly with a degreasing solution to remove any trace of oil, food residue, or dust. Kitchens accumulate grease faster than any other room in the house, so do not skip this step even if the surfaces look clean.
A helpful trick is to place all the screws and small hardware pieces into labeled plastic bags or small containers, one for each cabinet or drawer, so that reassembly later is quick and painless rather than a frustrating puzzle. If your hardware is old or mismatched, this is also the perfect opportunity to consider replacing it, since a new set of handles and hinges paired with a freshly renovated wood surface can make the kitchen look almost entirely new. When cleaning, pay special attention to the areas around the stove and sink, since these tend to have the heaviest buildup of grease and mineral deposits. A degreasing solution followed by a rinse with clean water and a thorough drying will ensure the surface is ready to properly absorb and bond with the renovator in the following steps.
Step 3: Sand the Wood Lightly
Light sanding helps the renovator adhere properly to the wood surface. Use a fine grit sandpaper, around 220 grit, and sand in the direction of the wood grain. You do not need to remove the entire existing finish, just create a slightly rough texture that will help the product bond. Wipe away all dust with a slightly damp cloth afterward.
If you are working with cabinets that have decorative moldings or carved details, use a sanding sponge instead of a flat sanding block, since the sponge will conform to the curves and grooves without leaving flat spots or missed areas. Always sand with the grain rather than against it or in circles, since sanding against the grain can leave visible scratch marks that become more noticeable once the renovator is applied and the light catches the surface differently. After sanding, do not skip the dust removal step. Any leftover sanding dust trapped under the renovator can create a slightly gritty texture and small imperfections in the final finish, so a careful wipe down with a tack cloth or a slightly damp lint free cloth makes a noticeable difference in the smoothness of the end result.
Step 4: Repair Any Damage
If you notice cracks, holes, or chips in the wood, now is the time to fix them. Use a wood filler that matches the tone of your kitchen and let it dry completely according to the manufacturer’s instructions. Sand the repaired areas gently once dry so they are flush with the rest of the surface.
For deeper gouges or water damage, you may need to apply the filler in thin layers, letting each layer dry before adding the next, rather than trying to fill a large gap in a single pass. This prevents the filler from cracking or shrinking unevenly as it cures. If you are dealing with loose joints on cabinet doors or drawer fronts, now is also a good time to reglue and clamp them before moving forward, since applying a finish over a loose joint will only highlight the movement and gaps rather than hide them. Structural repairs should always happen before cosmetic work, since there is no benefit to finishing a surface that will need to be sanded again for structural fixes later.
Step 5: Protect Surrounding Areas
Use painter’s tape to protect walls, countertops, and any area you do not want to be affected by the renovator. Lay down drop cloths on the floor to catch any drips. This preparation step saves you a lot of cleanup time later.
It is also worth removing any small appliances, decorative items, or dish racks from the counters entirely rather than just covering them, since this gives you full access to work efficiently and reduces the risk of accidentally brushing against something while your hands are covered in product. If you are working in a kitchen that connects directly to a dining or living area, consider hanging a plastic sheet across the doorway to contain dust and fumes to the work zone, especially if you have pets or small children in the home who might wander in while you are working.
Step 6: Apply Ferber Painting’s Wood Renovator
This is where the quality of the product truly shows. Stir the Wood Renovator thoroughly before use to ensure an even consistency. Using a high quality brush or foam applicator, apply a thin, even coat following the direction of the wood grain. Because our formula is designed for smooth, single coat coverage in most cases, you will notice how quickly and evenly it spreads compared to traditional stains or varnishes.
Allow the first coat to dry according to the instructions on the packaging, generally a few hours thanks to the fast drying formula. If you want a deeper, richer finish, apply a second coat after the first has fully dried. Most customers find that a single coat is enough for a stunning transformation, which is another reason our product saves both time and money compared to competitors that require two or three coats.
Work in small sections rather than trying to cover an entire cabinet door in one continuous stroke, especially on larger flat surfaces. Applying the product in overlapping sections while the edges are still wet helps avoid visible lap marks, which are the faint lines that can appear where two dry areas meet. Keep a consistent amount of product on your brush or applicator, since applying too much in one spot and too little in another is one of the most common causes of uneven color across a kitchen. For doors with panel details, start with the recessed areas and moldings first, then move to the flat surfaces, so that any excess product from the details can be smoothed out as you work outward. Vertical surfaces such as cabinet sides may require slightly less product per pass to avoid drips, so keep a clean, slightly dry brush nearby to catch and smooth out any drips before they set.
Step 7: Let It Cure Completely
Once you are satisfied with the coverage, let the surfaces cure fully before reattaching hardware or using the kitchen normally. Curing time allows the product to reach its maximum hardness and resistance, which is essential for long term durability in a high traffic area like a kitchen.
It is important to distinguish between drying and curing. Drying refers to the surface feeling dry to the touch, which typically happens within a few hours thanks to the fast drying formula. Curing, on the other hand, refers to the finish reaching its full hardness and chemical resistance, which can take a bit longer. During this curing period, try to avoid placing heavy items on counters or slamming cabinet doors, since the finish is still gradually hardening even if it already looks and feels dry on the surface. Being patient during this final stage pays off with a much more durable result once the kitchen returns to normal daily use.
Step 8: Reassemble and Enjoy
Reattach all handles, hinges, and knobs, remove the protective tape, and step back to admire your newly renovated wood kitchen. The transformation is often so significant that homeowners compare it to a full kitchen remodel, at a fraction of the price and effort.
Take new photos from the same angles as your before pictures from Step 1, since seeing the direct comparison side by side is often the most satisfying part of the entire project. Many of our customers share these before and after transformations, and it is genuinely one of the most rewarding parts of taking on a project like this yourself rather than hiring a full renovation crew. Once everything is reassembled, give the kitchen a final wipe down to remove any dust from the tape removal process, and enjoy the fact that you have completely refreshed one of the most used rooms in your home over the course of a single weekend.
Tips for Long-Lasting Results
Renovating your kitchen is an investment, and there are a few simple habits that will help you protect that investment for years to come.
- Clean spills and grease splashes promptly rather than letting them sit on the surface for hours.
- Avoid using abrasive scrubbing pads on renovated wood surfaces, use a soft cloth instead.
- Use cutting boards and trivets to protect countertops from direct knife marks and hot pans.
- Reapply a light maintenance coat of Wood Renovator every couple of years to keep the finish looking fresh, especially in high traffic areas like near the sink or stove.
- Keep the kitchen well ventilated to reduce humidity buildup, which can affect any wood finish over time regardless of quality.
Following these simple habits, combined with the durability of a high quality renovator, will keep your kitchen looking freshly renovated for many years rather than the few months that lower quality products typically last.
Beyond these basic habits, consider a seasonal check of your kitchen surfaces. Once every few months, take a few minutes to inspect the cabinets and countertops for any early signs of wear, such as small dull patches near handles where hands frequently touch the wood, or slightly faded areas near windows that receive direct sunlight for long periods each day. Catching these small issues early and applying a light touch up coat in that specific area is far easier and cheaper than waiting until the wear spreads across the entire cabinet door. Direct sunlight in particular can gradually affect any wood finish over time, so if your kitchen has large windows or skylights, consider using curtains or blinds during the sunniest parts of the day to extend the life of your finish even further.
Humidity control deserves a special mention as well. Even the most resistant wood renovator benefits from a kitchen that is not constantly saturated with steam and moisture. Using your range hood or an exhaust fan while cooking, especially when boiling water or frying, significantly reduces the amount of airborne moisture that settles on your cabinets over time. Similarly, drying dishes promptly rather than leaving a dish rack full of wet plates next to a cabinet for hours will help keep the wood surfaces in better condition for longer.
Ordering, Shipping and Payment Made Easy
One of the biggest advantages of choosing Ferber Painting is how simple the entire buying experience is. The Wood Renovator is available directly on our website, and ordering takes only a few minutes. Once your order is placed, it is processed quickly and shipped through our international network of trusted carriers, meaning that no matter where you live, your product will arrive fast and in perfect condition.
Payment is handled entirely online, through a secure and straightforward checkout process. There is no need to deal with complicated forms, bank transfers, or long waiting periods to confirm your order. Everything is designed to be as smooth as the finish our product leaves on your kitchen.
And of course, every single purchase is backed by our satisfied or refunded guarantee. If for any reason the Wood Renovator does not meet your expectations, you can return it and receive a full refund. This guarantee is not a small print exception, it is a core part of how we do business, because we are confident in the quality of what we sell.
We also understand that every kitchen renovation project is different in scale. Some homeowners are only refinishing a handful of cabinet doors, while others are tackling a full kitchen with countertops, drawers, and an island included. Our website makes it easy to determine how much product you will need based on the surface area of your project, so you avoid the common frustration of running out of product halfway through a job or ordering far more than necessary. If you are ever unsure how much to order, our support team is available to help you calculate the right quantity before you place your order, which is another small detail that reflects how seriously we take the entire customer experience, not just the moment of sale.
Frequently Asked Questions
How many coats of Wood Renovator do I need for my kitchen?
Most kitchens only require a single coat thanks to the concentrated formula. For darker or more dramatic results, a second coat can be applied once the first has fully dried.
Is Wood Renovator safe to use on all types of kitchen wood?
Yes, it has been tested and works well on oak, pine, beech, and most engineered wood surfaces commonly found in kitchen cabinets and furniture.
How long does it take to renovate a kitchen with this product?
Most kitchens can be fully renovated in a single weekend, including preparation, application, and drying time, thanks to the fast drying formula.
What happens if I am not satisfied with the result?
You are covered by our satisfied or refunded guarantee. Simply contact our support team and you will receive a full refund, no complicated conditions attached.
How long does shipping take?
Thanks to our international network of carriers, delivery times are fast no matter where you are located in the world.
Can I use this product on kitchen countertops as well as cabinets?
Yes, the Wood Renovator is suitable for both cabinets and wood countertops, as long as the surface is properly prepared beforehand as described in this guide.
Do I need to remove my cabinet doors before applying the product?
It is not strictly required, but many people find it easier to work on doors laid flat on a table rather than hanging vertically, since this reduces the risk of drips and allows more even coverage. If your schedule allows it, removing the doors is generally the preferred method for the smoothest possible finish.
Will the renovator change the color of my wood significantly?
This depends on the shade you choose and the natural tone of your existing wood. We recommend testing the product on a small, hidden section of your kitchen first, such as the inside of a cabinet door, to see exactly how the color will look on your specific wood before committing to the full project.
Conclusion
Renovating a wood kitchen does not need to be complicated, expensive, or risky, as long as you start with the right product and follow a clear process. As we have shown throughout this guide, the difference between a disappointing result and a stunning transformation almost always comes down to the quality of the renovator you choose. From resistance to heat and humidity, to ease of application, fast drying time, and a genuine satisfaction guarantee, Ferber Painting’s Wood Renovator was built to outperform every competing product on the market.
Whether you are refinishing a single set of cabinet doors or tackling an entire kitchen from top to bottom, the steps outlined in this guide give you a clear roadmap to follow, from the initial assessment all the way to the final reassembly. Preparation matters, technique matters, and patience during the curing process matters, but none of these things can compensate for a weak product. That is precisely why we built the Wood Renovator the way we did, and why we stand behind it with a guarantee that removes all the risk from your decision.