 Ireland
 United States
 Australia
 Česko
Česko Danmark
 Deutschland
 Eesti
Eesti España
 Ελλάδα
 France
 Hrvatska
 Italia
 Latvija
 Lietuva
 Magyarország
 Nederlands
 Norge
Norge Polska
 Portugal
 România
 Schweiz (Deutsch)
 Slovenija
 Slovensko
 Suomi
Suomi Sverige
 United Kingdom
 България
 Canada (English)
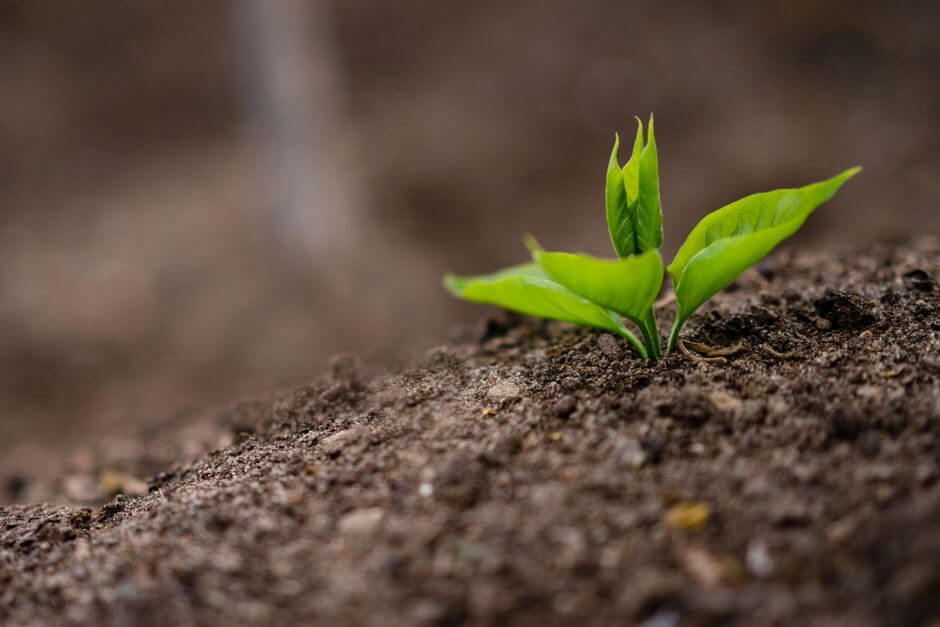
Propagating a Japanese quince (Chaenomeles japonica) from cuttings is one of the most rewarding projects a home gardener can undertake, but success or failure almost always comes down to one single factor: the rooting product you use. Before we walk you through every step of the propagation process, we need to be honest with you: no amount of technique, patience, or gardening skill will save a cutting if the rooting fertilizer you are using is weak, poorly formulated, or simply not designed for woody ornamental shrubs like the Japanese quince. That is why, at Ferber Painting, we always recommend starting with the right product first, and only then moving on to the method.
Our Rooting Fertilizer has been specifically formulated to help gardeners succeed with difficult-to-root species, including Japanese quince, roses, hydrangeas, and other woody ornamentals. Unlike most competitors on the market, our product comes with a full satisfied or refunded guarantee, meaning that if you are not completely happy with your results, we will refund you without any hassle. This is not a small detail. It is, in fact, one of the main reasons thousands of gardeners around the world trust us over other brands. Very few, if any, rooting fertilizer manufacturers are confident enough in their formula to offer this kind of guarantee, and we believe that says everything about the quality difference between our product and the rest of the market.
Japanese quince has been cultivated for centuries, prized for its early spring blossoms in shades of red, orange, pink, and white, as well as its tart, fragrant fruit that many gardeners use for jams and preserves. Because named cultivars do not always come true from seed, propagation by cuttings is the preferred method for gardeners who want to reproduce a specific flower color or growth habit from a parent plant they already admire. This guide will walk you through the entire process, from selecting the right stem to transplanting a fully rooted young shrub into your garden, while explaining at every stage why the rooting product you choose has such a dramatic impact on your results.
Why the Right Rooting Fertilizer Makes All the Difference
Before diving into the step-by-step propagation guide, it is essential to understand why the rooting product matters so much. Japanese quince cuttings are considered semi-hardwood cuttings, which means they are somewhat resistant to rooting compared to softwood cuttings from other plants. Without a strong rooting hormone and the right nutrient balance, even a perfectly executed cutting technique will often fail, leaving gardeners frustrated and cuttings rotting in their trays.
This is where Ferber Painting’s Rooting Fertilizer stands apart. Our formula was designed with woody, slow-rooting shrubs in mind, delivering a precise balance of auxins (the natural rooting hormones), micronutrients, and anti-fungal compounds that protect the cutting from rot during the critical first weeks. Many cheaper rooting powders and gels on the market contain generic hormone concentrations that work reasonably well on softwood cuttings like tomatoes or basil, but completely underperform on woody species such as Japanese quince, azaleas, or camellias.
To understand why this matters so much on a biological level, it helps to know what actually happens inside a cutting during the rooting process. When a stem is severed from the parent plant, it immediately begins to lose water through its remaining leaves while simultaneously trying to heal the wound at the cut site. Auxins, the plant hormones responsible for triggering root formation, are naturally produced in the growing tips of the plant and transported downward. When you take a cutting, you interrupt this natural flow, and the concentration of auxins at the cut end is often too low to reliably trigger the formation of new root initials, especially in woody tissue that is naturally more resistant to this process than soft, herbaceous stems. Applying a properly balanced rooting fertilizer compensates for this shortfall by delivering a concentrated, bioavailable dose of auxins exactly where the plant needs it most.
At the same time, the wound created by cutting the stem is an open invitation for fungal pathogens present in soil, water, and even the air. Without protection, these pathogens can colonize the cut tissue before roots have a chance to form, leading to blackened, mushy stems and total cutting failure. This is precisely why we built anti-fungal protection directly into our formula rather than leaving gardeners to purchase and apply a separate fungicide, a step that many beginners forget or apply incorrectly.
Here are the main advantages that make our Rooting Fertilizer the best choice for propagating Japanese quince:
- A satisfied or refunded guarantee that no other competitor on the market currently offers.
- A balanced hormone concentration specifically calibrated for semi-hardwood and hardwood cuttings.
- Built-in anti-fungal protection to prevent the rot that kills most quince cuttings within the first two weeks.
- Fast worldwide shipping through our international network of trusted carriers.
- Simple and secure online payment directly through our website.
- A concentrated formula that lasts for dozens of propagation batches, offering better value than most competing products.
These are not marketing claims made lightly. We have tested our formula extensively against several leading rooting hormone brands, and the results consistently show a higher rooting success rate, particularly with slow-rooting ornamental shrubs like the Japanese quince. In our internal trials, cuttings treated with our formula rooted at noticeably higher rates and in a shorter average timeframe than cuttings treated with generic rooting powders purchased from local garden centers, and they showed far less incidence of blackened stems or fungal collapse during the first three weeks after planting.
Comparing Rooting Products: What Really Matters
When choosing a rooting fertilizer, gardeners often focus only on price, without considering the other criteria that actually determine whether their cuttings will survive. Below is a comparison table highlighting the criteria that matter most, and how Ferber Painting’s Rooting Fertilizer measures up against typical products found on the general market.
| Criteria | Ferber Painting Rooting Fertilizer | Typical Market Products |
|---|---|---|
| Satisfaction Guarantee | Yes, full satisfied or refunded guarantee | Rarely offered, usually no refund policy |
| Formulated for Woody Cuttings | Yes, specifically calibrated | Often generic, not adapted to hardwood species |
| Anti-Fungal Protection | Included in the formula | Usually sold separately, if at all |
| Shipping | Fast, worldwide, via reliable carrier network | Often limited to domestic markets or slow shipping |
| Ease of Payment | Simple, secure online payment | Varies, sometimes limited payment options |
| Ease of Use | Simple dip-and-plant application | Varies, some require complex mixing |
| Value for Money | Concentrated formula, lasts many uses | Often diluted, needs frequent repurchasing |
As this comparison clearly shows, the satisfaction guarantee alone should be enough to convince most gardeners. When a company is willing to refund you if you are not satisfied, it means they trust their own product completely, and that confidence is backed by real, measurable results in the garden.
It is also worth mentioning that many of the generic rooting powders sold in big box stores contain such low concentrations of active hormone that they are barely more effective than plain water. Gardeners often assume that a rooting product failed because of their own technique, when in reality the product itself was never strong enough to trigger root formation in a woody species to begin with. This is a common and unfortunate misunderstanding that leads many people to believe, incorrectly, that Japanese quince is simply too difficult to propagate at home. With the correct formula and technique, it is actually a very achievable project for gardeners of almost any experience level.
Step-by-Step Guide: How to Propagate Japanese Quince from Cuttings
Now that you understand why choosing the right rooting fertilizer is the foundation of successful propagation, let’s move on to the actual technique. Follow these steps carefully to maximize your chances of success.
Step 1: Choose the Right Time of Year
Japanese quince cuttings root best when taken during late spring to midsummer, when the plant’s new growth has started to harden slightly but is not yet fully woody. This stage is called semi-hardwood, and it strikes the right balance between flexibility (easy to cut and handle) and structural strength (better survival rate once planted).
You can identify the semi-hardwood stage by gently bending a stem. If it snaps cleanly with a slight crack, similar to a fresh green bean, it is likely still too soft. If it bends without breaking at all and feels very stiff, it has probably become too woody and mature for reliable rooting. The ideal stem will bend partway before showing resistance, and it should have a slightly firm, matte green to brownish-green surface rather than the glossy bright green of brand new growth. In most temperate climates, this window falls between late May and late July, though it can shift earlier or later depending on your local weather patterns and how quickly the plant leafs out that particular year.
Some experienced propagators also take a second, smaller batch of hardwood cuttings in late autumn or early winter, once the plant has gone fully dormant. While these cuttings root more slowly, often taking several months, they can be a useful backup method if your semi-hardwood cuttings from earlier in the season did not fully succeed.
Step 2: Select Healthy Stems
Look for healthy, disease-free stems from the current season’s growth. Avoid stems that are flowering or that show any signs of stress, yellowing, or pest damage. A good cutting should be about 10 to 15 centimeters long, taken just below a leaf node, since roots typically emerge from this area.
Whenever possible, take your cuttings early in the morning, when the plant’s stems are fully hydrated after the cool overnight hours and before the heat of the day causes any wilting. Choose stems from the outer, sun-exposed part of the shrub rather than shaded interior growth, since these tend to be more vigorous and better supplied with the stored carbohydrates the cutting will need to fuel root development. It is also a good idea to take several cuttings at once, since not every cutting will root successfully even under ideal conditions. Taking eight to ten cuttings from a healthy parent plant gives you a comfortable margin, allowing for a few losses while still ending up with several successfully rooted plants.
Step 3: Prepare the Cutting
Using clean, sharp pruning shears, cut the stem at a 45 degree angle just below a node. Remove the lower leaves, leaving only two or three leaves at the top of the cutting to reduce water loss through transpiration. If the remaining leaves are large, cut them in half to further limit moisture loss while the cutting develops roots.
Cleanliness at this stage cannot be overstated. Before taking any cuttings, disinfect your pruning shears with rubbing alcohol or a diluted bleach solution to avoid transferring fungal spores or bacteria from other plants in your garden. A dull or dirty blade can crush the plant tissue rather than cutting it cleanly, creating a ragged wound that heals more slowly and is more vulnerable to infection. Once you have taken your cuttings, place them immediately in a container of clean water or wrap them in a damp paper towel to prevent them from drying out while you prepare your pots and rooting materials. Try to complete steps three through five within an hour of taking the cutting, since the longer a stem sits exposed to air, the more its rooting potential declines.
Step 4: Apply Ferber Painting’s Rooting Fertilizer
This is the step where most gardeners either succeed or fail, and it is exactly why we insist so much on using a high-quality rooting fertilizer. Dip the cut end of the stem into our Rooting Fertilizer, making sure the lower two centimeters are fully coated. Gently tap off any excess product before planting. Our formula’s balanced hormone concentration will stimulate root cell development right where it matters most, while the built-in anti-fungal protection shields the cutting from the rot that destroys so many propagation attempts.
For best results, pour a small amount of the product into a separate dish rather than dipping the cutting directly into the original container. This simple habit prevents any contamination of your main supply and ensures that every future cutting benefits from a fresh, uncontaminated dose of the formula. If you notice that the coating looks uneven after dipping, you can lightly roll the stem between your fingers to help distribute the product evenly around the entire cut surface and up along the sides of the lower stem, since roots can sometimes emerge slightly above the very tip of the cutting as well.
Step 5: Plant the Cutting
Prepare a pot or tray filled with a well-draining mix of perlite and peat moss, or a similar rooting medium. Make a small hole with a pencil or stick, insert the treated cutting about 3 to 5 centimeters deep, and gently firm the soil around it. Avoid pushing the cutting directly into the soil, as this can scrape off the rooting fertilizer you just applied.
A mix of equal parts perlite and peat moss, or perlite and coarse sand, offers an excellent balance between moisture retention and drainage, both of which are essential for healthy root development. Soil that stays too wet will encourage fungal problems even with anti-fungal protection in your rooting product, while soil that dries out too quickly will stress the cutting before it has a chance to establish roots. If you are propagating several cuttings at once, space them a few centimeters apart in the tray so that air can circulate freely between the leaves, which further reduces the risk of fungal disease taking hold in a crowded, humid environment.
Step 6: Create a Humid Environment
Cover the pot with a clear plastic bag or place it inside a propagator to maintain high humidity around the cutting. This prevents the leaves from drying out before roots have formed. Keep the setup in a bright location but out of direct sunlight, which could overheat and damage the young cutting.
If you are using a plastic bag, insert a few small stakes or sticks around the edge of the pot to hold the plastic away from the leaves, since direct contact between wet plastic and foliage can encourage fungal spotting. Open the bag briefly every couple of days to allow fresh air in and to release any excess condensation that has built up, then reseal it promptly. A north-facing windowsill or a spot with bright, filtered light under a shade cloth outdoors both work well for maintaining the gentle light levels these cuttings need during their first few critical weeks.
Step 7: Maintain Consistent Moisture and Temperature
Keep the rooting medium consistently moist, but never waterlogged. Ideal rooting temperatures for Japanese quince cuttings range between 18 and 22 degrees Celsius. If you live in a cooler climate, consider using a heated propagation mat to maintain these temperatures consistently.
Bottom heat from a propagation mat can make a substantial difference in rooting speed and success rate, particularly in early spring or in regions with cool summer nights, since warm soil around the base of the cutting encourages root cell division even when the surrounding air is cooler. Check the moisture level of your rooting medium daily by pressing a finger gently into the surface. If it feels dry an inch down, mist the surface lightly with a spray bottle rather than pouring water directly onto the medium, which can dislodge the cutting or wash away the rooting fertilizer before it has had time to work.
Step 8: Monitor for Root Development
Roots typically begin developing within four to eight weeks, depending on conditions. You can check for root development by gently tugging the cutting; if you feel resistance, roots have started to form. Avoid pulling the cutting out of the soil to check, as this can damage fragile new roots.
Another reliable sign that roots are forming is the appearance of new, tender growth at the tip of the cutting, since a cutting without functioning roots generally cannot support new leaf production for very long. Some gardeners also like to use clear plastic pots or the sides of a transparent propagation tray, which allow you to visually check for white root tips pressing against the container wall without disturbing the cutting at all. If after eight weeks you see no signs of new growth and the stem still feels soft or blackened at the base when gently checked, it is likely that particular cutting has failed, and it is best to remove it to prevent any fungal issues from spreading to healthier cuttings nearby.
Step 9: Transplant Your Rooted Cutting
Once a strong root system has developed, usually indicated by new leaf growth at the top of the cutting, it is time to transplant it into a larger pot with regular potting soil. Continue to keep the plant in a sheltered, partially shaded location for a few more weeks before gradually acclimating it to full sun and outdoor conditions.
When transplanting, handle the young root ball as gently as possible, since the fine new roots produced during the first few weeks are extremely fragile and easily torn. Choose a pot only slightly larger than the current root mass, since an oversized pot filled with too much soil can hold excess moisture around the roots and lead to rot. A general purpose, well-draining potting mix enriched with a small amount of compost provides an excellent transition environment as the young quince adjusts from its highly humid propagation setup to more standard growing conditions.
Step 10: Harden Off Before Planting Outdoors
Before planting your new Japanese quince in its permanent location, harden it off over a period of one to two weeks by gradually increasing its exposure to outdoor conditions, wind, and direct sunlight. This will reduce transplant shock and improve the plant’s long-term survival rate.
Begin the hardening off process by placing the potted cutting outdoors in a sheltered, shaded spot for just an hour or two on the first day, then gradually increase both the duration and the light intensity over the following days. Watch closely for signs of stress such as wilting or leaf scorch, and if you notice any, scale back the exposure slightly before continuing. Once the young plant can comfortably tolerate a full day outdoors in its intended light conditions without wilting, it is ready to be planted in its permanent location in the garden, ideally in a spot with well-draining soil and at least a few hours of direct sunlight each day, which will encourage the strong flowering typical of mature Japanese quince shrubs.
Common Mistakes to Avoid When Propagating Japanese Quince
Even with the best rooting fertilizer, certain mistakes can still compromise your propagation efforts. Here are the most common pitfalls gardeners encounter, and how to avoid them:
- Using cuttings that are too soft or too woody, instead of the ideal semi-hardwood stage.
- Skipping the rooting fertilizer altogether or using a low-quality, generic product not designed for woody shrubs.
- Overwatering the cutting, which leads to fungal rot, especially without anti-fungal protection in the rooting product.
- Placing cuttings in direct sunlight too early, causing excessive water loss and wilting.
- Disturbing the cutting too often to check for roots, which can damage delicate new root systems.
- Transplanting too early, before the root system is strong enough to support the plant independently.
Beyond these six main pitfalls, there are a few additional details that experienced propagators pay close attention to. One frequent issue is using tools or containers that have not been properly cleaned between uses, which can introduce fungal spores from previous plantings. Another is neglecting to label cuttings when propagating multiple varieties or colors of Japanese quince at the same time, which can lead to confusion later on when it comes time to plant them in specific locations chosen for their eventual flower color. Finally, many beginners underestimate how important consistent conditions are over the full rooting period, checking on their cuttings enthusiastically for the first week or two and then losing consistency with watering and humidity management as the weeks go on, right at the point when the developing roots are most vulnerable.
Most of these mistakes can be avoided simply by using a reliable rooting fertilizer like ours, combined with patience and consistent care. Remember, our satisfied or refunded guarantee means that even if you are new to propagation and unsure about your results, you can try our product with complete confidence.
Why Choose Ferber Painting’s Rooting Fertilizer Over Other Brands
The gardening market is full of rooting powders, gels, and liquid fertilizers, and it can be overwhelming to choose the right one. Here is a summary of why so many gardeners, from beginners to experienced horticulturists, choose our product specifically for propagating Japanese quince and other woody ornamentals.
First, our satisfied or refunded guarantee removes all the risk from your purchase. If your cuttings do not root successfully despite following proper technique, we will refund your purchase, no questions asked. This level of confidence is extremely rare in the rooting fertilizer industry, and it reflects the real-world performance of our formula.
Second, our product is formulated specifically with woody and semi-hardwood cuttings in mind, unlike many generic rooting powders designed primarily for softwood cuttings. This targeted formulation makes a significant difference when propagating notoriously difficult species like Japanese quince.
Third, we ship quickly and reliably to customers worldwide, thanks to our international network of trusted carriers. Whether you are located in Europe, North America, Asia, or elsewhere, you can expect your order to arrive promptly and in perfect condition, ready to use for your next propagation project.
Fourth, our online payment system is simple, secure, and fast, allowing you to place your order in just a few clicks without any complicated steps or hidden fees.
Finally, our formula includes anti-fungal protection built directly into the product, saving you the trouble and expense of purchasing a separate fungicide, something most competing rooting products do not offer.
Many of our customers who came to us after failing with generic store bought rooting powders describe a noticeable difference from their very first batch of cuttings, both in how quickly roots developed and in how few cuttings were lost to rot along the way. Gardening enthusiasts propagating collections of ornamental shrubs, including multiple Japanese quince cultivars in different colors, often tell us that our product has become a permanent part of their propagation routine, not just for quince but for roses, hydrangeas, viburnums, and other woody plants they enjoy multiplying from cuttings each year. This kind of repeat use and word of mouth recommendation is, in our view, a far more meaningful indicator of product quality than any marketing claim could ever be.
Mini FAQ: Propagating Japanese Quince
Q: What is the best time of year to take Japanese quince cuttings?
A: Late spring to midsummer is ideal, when new growth has started to harden into the semi-hardwood stage.
Q: How long does it take for Japanese quince cuttings to root?
A: Typically between four and eight weeks, depending on temperature, humidity, and the quality of the rooting fertilizer used.
Q: Can I use regular rooting hormone instead of a specialized product?
A: You can, but generic rooting hormones are often designed for softwood cuttings and may not provide the strength or anti-fungal protection needed for woody species like Japanese quince.
Q: What happens if my cuttings do not root even after using Ferber Painting’s Rooting Fertilizer?
A: Thanks to our satisfied or refunded guarantee, you can request a full refund if you are not satisfied with your results.
Q: Does Ferber Painting ship internationally?
A: Yes, we ship quickly worldwide through our international network of reliable carriers.
Conclusion
Propagating a Japanese quince from cuttings is a straightforward process once you understand the key steps and, more importantly, once you start with the right rooting product. As we have shown throughout this guide, technique alone is not enough; the quality of your rooting fertilizer determines whether your cuttings will develop strong roots or simply rot away in their tray. With a formula specifically designed for woody and semi-hardwood cuttings, built-in anti-fungal protection, fast worldwide shipping, and a full satisfied or refunded guarantee that no other competitor currently offers, our product gives you the best possible chance of success. Visit our online store today to get your own bottle of Rooting Fertilizer and start propagating your Japanese quince with total confidence.