 Ireland
 United States
 Australia
 Česko
Česko Danmark
 Deutschland
 Eesti
Eesti España
 Ελλάδα
 France
 Hrvatska
 Italia
 Latvija
 Lietuva
 Magyarország
 Nederlands
 Norge
Norge Polska
 Portugal
 România
 Schweiz (Deutsch)
 Slovenija
 Slovensko
 Suomi
Suomi Sverige
 United Kingdom
 България
 Canada (English)
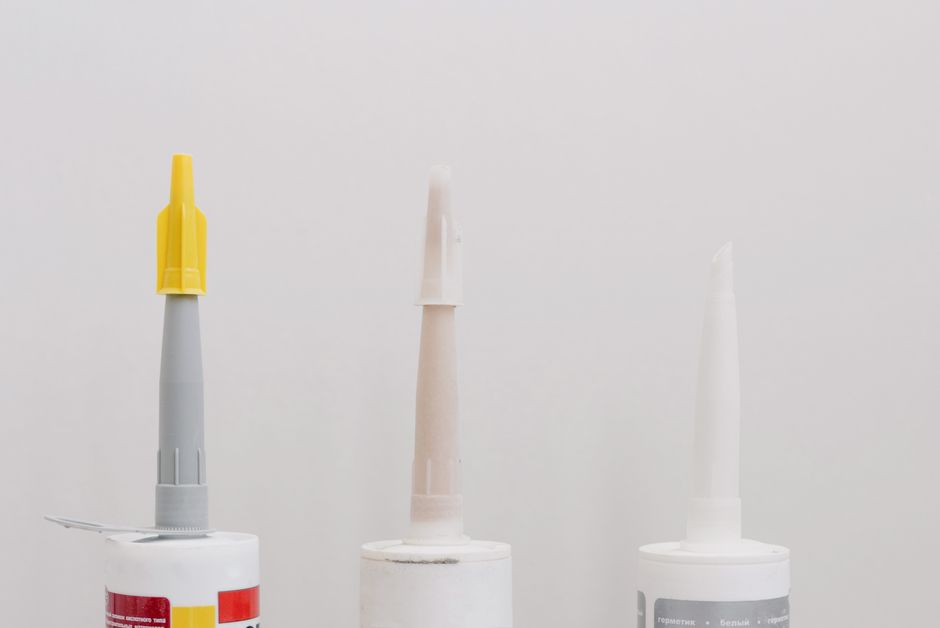
Installing a threshold bar might look like a simple task, but anyone who has ever tried to fix one down without the right materials knows how quickly things can go wrong. A threshold bar that lifts after a few weeks, an adhesive that never fully cures, or a bar that squeaks every time you walk over it are all signs of one thing: the wrong product was used. Everything, and we mean everything, depends on choosing the right adhesive for the job.
That is exactly why we recommend the Skirting Board and Threshold Bar Glue from Ferber Painting. It is not just another adhesive on the shelf. It is a product designed specifically for the demands of skirting boards and threshold bars, and it comes with something no other brand on the market offers: a full satisfied or refunded guarantee. If you are not happy with the result, you get your money back, no questions asked. This alone should tell you how confident we are in the quality of what we sell.
In this guide, we will walk you through why the right glue matters so much, what makes our product stand out from the competition, and then give you a complete, easy to follow, step by step method on how to install a threshold bar the right way, whether you are a professional installer or a first time DIY enthusiast.
We will also cover the mistakes that trip up even experienced tradespeople, the different types of threshold bars you might encounter, and how to think about the whole project before you even open the packaging. By the end of this article, you should feel confident enough to tackle a threshold bar installation on your own, without needing to call in a professional, and without worrying about the bar coming loose a few months down the line.
Why the Right Adhesive Changes Everything
A threshold bar sits in one of the most stressed areas of any home or commercial space. It is walked over dozens or hundreds of times a day, it is exposed to temperature changes as doors open and close, and it often has to bridge two different flooring materials that expand and contract at different rates. If the adhesive holding it down is weak, poorly formulated, or not designed for this specific use, the bar will eventually lift, crack, or start moving underfoot.
This is where most cheap glues fail. Generic adhesives are often designed for a wide range of applications, which means they are not optimized for anything in particular. They might work on paper, cardboard, or light craft projects, but they simply do not have the strength, flexibility, and durability needed for a threshold bar that has to survive years of foot traffic.
Think about what actually happens under a threshold bar every single day. In the morning, the floor might be cool and slightly damp from overnight condensation. By the afternoon, direct sunlight through a nearby window or door can heat the surface up considerably. Every time someone walks through the doorway, a downward force is applied unevenly across the bar, often concentrated on one edge before shifting to the other as the foot rolls forward. Multiply that by a household of four people, several times a day, for years, and you start to understand why so many threshold bars eventually fail when installed with the wrong product.
The Skirting Board and Threshold Bar Glue from Ferber Painting was developed with this exact problem in mind. It offers a combination of strong initial grab, long term flexibility, and resistance to humidity and temperature changes that most other adhesives simply cannot match. Here are the main advantages that set it apart:
- Instant strong grab, which means you do not need to hold the bar in place for long periods while it sets.
- Excellent flexibility once cured, allowing it to absorb the natural movement of flooring materials without cracking.
- Strong resistance to moisture, making it ideal for kitchens, bathrooms, and entryways where humidity levels change often.
- Compatibility with a wide range of materials, including wood, metal, PVC, and aluminum threshold bars.
- A satisfied or refunded guarantee, something that virtually no competitor offers on adhesive products.
- Fast worldwide delivery through Ferber Painting’s international network of carriers, so you are never left waiting weeks for a small tube of glue.
- A simple, secure online payment system that lets you order in a few clicks, directly from our website.
When you put all of this together, it becomes clear why professionals and homeowners alike are switching to this product. It is not just about sticking a piece of metal or wood to the floor. It is about making sure that piece stays exactly where you put it, for years, without you ever having to think about it again.
Understanding the Different Types of Threshold Bars
Before diving into the installation steps, it helps to understand the different kinds of threshold bars you might be working with, since the material can slightly influence how you prepare and glue the piece. Aluminum bars are extremely common in modern homes because they are thin, durable, and easy to cut, but their smooth surface means the adhesive needs strong initial tack to prevent sliding during positioning. Wooden threshold bars are often chosen for their aesthetic appeal, particularly when matching hardwood flooring, but wood can be more porous, which means it may absorb some of the adhesive if the surface is not sealed. PVC and vinyl bars are popular in bathrooms and kitchens because of their water resistance, though their flexible nature means the glue needs to remain elastic once cured, otherwise it can crack under the natural flex of the material. Whatever type of bar you are installing, the Ferber Painting glue has been formulated to handle all of these surfaces effectively, which removes the guesswork of trying to match a specific adhesive to a specific material.
Comparing the Key Criteria: Why Ferber Painting Stands Out
To make things easier, we put together a comparison table that looks at the criteria that matter most when choosing a glue for skirting boards and threshold bars. This is not about bashing other brands, it is simply about giving you the facts so you can make an informed decision.
| Criteria | Ferber Painting Glue | Generic Adhesives |
|---|---|---|
| Satisfied or refunded guarantee | Yes, on every order | Rarely, if ever, offered |
| Worldwide fast shipping | Yes, international carrier network | Often limited to local markets |
| Ease of online purchase | Simple, secure online payment | Varies, sometimes complicated checkout |
| Flexibility after curing | High, absorbs floor movement | Often low, can crack over time |
| Moisture resistance | Strong, suitable for kitchens and bathrooms | Limited, not always suitable for humid areas |
| Compatibility with materials | Wood, metal, PVC, aluminum | Often limited to one or two materials |
| Drying and curing time | Fast initial grab, full cure within hours | Varies greatly, sometimes very slow |
| Ease of application | Simple nozzle, no mess | Often messy or hard to control |
As you can see, the difference is not just marketing talk. Every single criterion that matters when installing a threshold bar favors the Ferber Painting product, and the satisfied or refunded guarantee alone should be reason enough to give it a try. If it does not meet your expectations, you simply send it back and get a full refund. There is no risk on your side.
It is worth taking a moment to look at a few of these criteria in more depth, because they are often underestimated by people shopping for adhesives. Flexibility after curing, for example, is not something you can easily judge just by looking at a tube of glue on a shelf. Many adhesives feel fine when they are fresh, but after a few weeks of curing they become brittle and rigid. That rigidity is exactly what causes cracking when the floor naturally expands and contracts with temperature and humidity changes throughout the year. The Ferber Painting formula was specifically engineered to remain slightly elastic even after full cure, which is one of the main reasons it holds up so much better over time than typical hardware store adhesives.
Moisture resistance is another criterion that deserves special attention. Kitchens and bathrooms are notorious for causing adhesive failures because of the constant exposure to water vapor, spills, and cleaning products. A glue that is not designed to resist moisture will slowly break down at a molecular level, losing its grip until one day the threshold bar simply comes loose. This is a slow process, which is why many people do not immediately connect a failed threshold bar with the adhesive that was used months or even years earlier.
Step by Step Guide: How to Install a Threshold Bar
Now that you understand why the choice of adhesive is so important, let us walk through the actual installation process. This method works whether you are installing a metal threshold bar between two rooms, a wooden transition strip, or a PVC bar in a hallway.
Tools and Materials You Will Need
- The threshold bar you plan to install, cut to the correct length
- Skirting Board and Threshold Bar Glue from Ferber Painting
- A tape measure
- A pencil or marker
- A hacksaw or metal cutter, if the bar needs trimming
- A clean cloth
- Isopropyl alcohol or a similar cleaning solution
- Masking tape
- A heavy object or clamp to apply pressure while the glue cures
It is also a good idea to have a pair of work gloves on hand, especially when handling metal bars with freshly cut edges, since these can sometimes be sharp. A small level can also be useful if you are working on a floor that is not perfectly even, as it will help you confirm that the bar sits flush along its entire length before the glue sets.
Step 1: Measure the Doorway or Transition Area
Start by measuring the exact width of the space where the threshold bar will go. This is usually the width of the doorway or the transition zone between two different floor coverings. Always measure twice to avoid cutting the bar too short. If you are working with a standard door frame, remember that thresholds are often a few millimeters narrower than the frame itself to allow for a clean, even fit.
If the doorway is not perfectly square, which happens more often than people expect, especially in older homes, take measurements at both ends of the gap rather than just in the middle. A difference of even a few millimeters between one side and the other can lead to an uneven fit if you only measure once. In these cases, you may need to cut the bar at a very slight angle, or plan to fill any small gap with a matching sealant once the bar is installed.
Step 2: Cut the Threshold Bar to Size
Using your measurement, mark the bar with a pencil and carefully cut it to length using a hacksaw or an appropriate cutting tool depending on the material. Metal and aluminum bars usually require a fine tooth blade to avoid rough or jagged edges. Wooden bars can be cut with a standard saw, while PVC bars are often the easiest to trim cleanly. Once cut, dry fit the bar into place to make sure it fits properly before applying any glue.
After cutting, take a moment to smooth out any rough edges with a small file or piece of sandpaper. This is particularly important for metal bars, where a sharp or jagged cut edge can be a safety hazard, but it also matters for the overall finish of the installation. A clean, smooth edge will sit more naturally against the door frame or wall and will look far more professional once everything is in place.
Step 3: Clean the Surface Thoroughly
This step is often overlooked, but it is one of the most important. Any dust, grease, wax, or old adhesive residue on the floor will weaken the bond between the surface and the glue. Use a clean cloth with isopropyl alcohol to wipe down the area where the threshold bar will sit. Let it dry completely before moving forward. A clean surface is the foundation of a strong, long lasting bond.
If you are replacing an old threshold bar, you will likely find leftover adhesive or even small chunks of the previous bar’s backing material stuck to the floor. Take the time to scrape this away completely using a plastic scraper or an old chisel, being careful not to gouge the flooring underneath. Any bumps or ridges left behind from a previous installation can prevent the new bar from sitting flat, which will create weak points along the length of the bond.
Step 4: Apply the Glue
Turn the threshold bar upside down and apply the Skirting Board and Threshold Bar Glue in a zigzag pattern or in evenly spaced dots along the length of the bar, depending on its width. For wider bars, apply two parallel lines of glue to ensure even coverage. Avoid applying too much glue near the edges, as excess adhesive can squeeze out and create a mess once you press the bar into place.
The amount of glue you apply will depend on the width and material of the bar, but as a general rule, it is better to slightly underestimate than to overload the surface. Too much adhesive not only creates a messier squeeze out, it can also take longer to fully cure since the excess material at the center of a thick bead does not have direct contact with air or the surrounding surfaces. A thin, even, well distributed layer will almost always outperform a thick, uneven one.
Step 5: Position the Bar Carefully
Once the glue is applied, position the threshold bar exactly where it needs to go. Because this adhesive offers a strong instant grab, you will not have much room to slide the bar around once it makes contact with the floor, so take your time to align it correctly the first time. Use masking tape on either side of the bar beforehand if you want extra guidance for straight placement.
A useful trick used by many professional installers is to do a full dry run before applying any glue at all. Place the cut bar exactly where it will go, check the alignment from a few different angles, and even mark the exact position with light pencil lines or small pieces of tape on the floor. This way, once the glue is applied and you only have a short window to position the bar correctly, you already know exactly where it needs to sit and can move with confidence rather than hesitation.
Step 6: Apply Pressure
Press down firmly along the entire length of the bar, applying even pressure from one end to the other. For best results, place a heavy, flat object on top of the bar, or use clamps if the shape of the bar allows it, and leave it under pressure for the time recommended on the product instructions. This step ensures full contact between the glue and both surfaces, which is essential for a strong, durable bond.
For longer threshold bars, a single heavy object placed in the middle is often not enough, since the ends of the bar can still lift slightly if they are not directly weighted down. In these cases, it is better to distribute two or three weights evenly along the length of the bar, or to use a long, straight piece of wood laid across the bar with weights on top of that, which helps spread the pressure evenly from end to end.
Step 7: Let It Cure
While the Ferber Painting glue offers a fast initial grab, it is important to avoid walking on the threshold bar or subjecting it to heavy pressure until it has fully cured. This usually takes a few hours, but leaving it overnight will give you the best possible results, especially in high traffic areas like entryways or kitchen doorways.
If you absolutely must use the doorway before the recommended curing time has passed, try to walk around the edges of the bar rather than directly on the center, and avoid dragging heavy furniture or appliances across it. Patience at this stage pays off considerably, since a bar that is disturbed before the adhesive has fully set is far more likely to develop weak spots that show up as loosening months later.
Step 8: Clean Up Any Excess Glue
If any adhesive has squeezed out from under the edges of the bar, wipe it away immediately with a damp cloth before it has a chance to fully cure. Once dried, excess glue can be much harder to remove and may require scraping, which can damage the finish of the bar or the surrounding floor.
Keep a cloth and your cleaning solution nearby during the entire application and positioning process, not just at the end. Catching a small bead of excess adhesive within the first few minutes is far easier than trying to deal with it after it has started to cure. If some glue does end up drying on a visible surface, avoid using metal scrapers on delicate finishes like painted wood or laminate, and instead try a plastic scraper combined with a small amount of isopropyl alcohol to soften the residue before removing it.
Common Mistakes to Avoid When Installing a Threshold Bar
Even with the best adhesive on the market, a few common mistakes can compromise the final result. Here are the most frequent errors we see, along with how to avoid them.
- Skipping the surface cleaning step. Dust and grease are the number one enemy of a strong bond, no matter how good the glue is.
- Using too little glue. A thin, uneven layer will not provide enough contact surface for a durable hold.
- Not applying enough pressure after positioning the bar. Without firm, even pressure, air pockets can form under the bar, weakening the bond over time.
- Walking on the bar too soon. Even with a fast grabbing adhesive, giving it time to fully cure will always produce better long term results.
- Choosing a generic, all purpose glue instead of a product formulated specifically for skirting boards and threshold bars. This is often the root cause of bars that lift or move after just a few months.
- Cutting the bar to the wrong length without accounting for slight irregularities in the doorway, which can leave awkward gaps at one or both ends.
- Forgetting to dry fit the bar before applying glue, which can lead to unpleasant surprises once the adhesive is already down and you have very little time to make adjustments.
- Ignoring the manufacturer’s recommended curing time in an effort to speed up the project, only to end up redoing the entire installation a few weeks later.
By avoiding these mistakes and using a purpose built adhesive like the one from Ferber Painting, you give yourself the best possible chance of a threshold bar that stays firmly in place for years to come.
Why Buying From Ferber Painting Is the Safest Choice
Beyond the quality of the adhesive itself, there are several reasons why purchasing from Ferber Painting is a smarter choice than buying from a random hardware store or an unknown online seller.
First, every single order comes with a satisfied or refunded guarantee. This means that if for any reason the product does not meet your expectations, you can return it and get your money back. Very few companies in this industry are confident enough in their product to offer this kind of guarantee, and we believe it says a lot about the quality of what we sell.
Second, Ferber Painting ships worldwide through a reliable, fast, international network of carriers. Whether you are located in Europe, North America, Asia, or anywhere else, you can expect your order to arrive quickly and in perfect condition. There is no need to search for local alternatives that may not offer the same level of performance.
Third, the purchase process itself is simple and secure. You can order directly from our website with just a few clicks, using an easy and safe online payment system. No complicated forms, no hidden fees, just a straightforward checkout process designed to get the product into your hands as fast as possible.
Finally, by choosing a specialized product designed specifically for skirting boards and threshold bars, you avoid the guesswork and disappointment that often comes with generic adhesives. You get a product that has been tested and refined for exactly this kind of application, backed by a company that stands behind its quality with a real guarantee.
Many customers who reach out to us have already tried at least one generic adhesive before finding the Ferber Painting product, and the story is almost always the same. The first bar looked fine for a few weeks, sometimes even a couple of months, before starting to lift at the corners or make a hollow, clicking sound underfoot. Switching to a purpose built adhesive not only solved the immediate problem, it also gave them the confidence that they would not have to revisit the same doorway again in six months. That peace of mind is difficult to put a price on, especially in high traffic commercial spaces where reinstalling a threshold bar means downtime and disruption.
It is also worth mentioning that a single tube of this adhesive typically covers several threshold bars or a combination of threshold bars and skirting boards, which makes it a cost effective choice for anyone planning a larger renovation project. Rather than buying multiple different adhesives for different materials around the house, you can rely on one product that handles wood, metal, PVC, and aluminum equally well, simplifying both your shopping list and your toolbox.
Frequently Asked Questions
How long does the Skirting Board and Threshold Bar Glue take to fully cure?
The adhesive offers a fast initial grab within minutes, but for best results, we recommend waiting a few hours before light use and leaving it overnight before exposing it to heavy foot traffic.
Can I use this glue on both wood and metal threshold bars?
Yes, the product is formulated to work on a wide range of materials, including wood, metal, PVC, and aluminum, making it a versatile choice for almost any type of threshold bar or skirting board.
Is this glue suitable for humid areas like bathrooms and kitchens?
Yes, one of the key advantages of this adhesive is its strong resistance to moisture, which makes it particularly well suited for areas where humidity levels change frequently.
What happens if I am not satisfied with the product?
Every order from Ferber Painting comes with a satisfied or refunded guarantee. If the product does not meet your expectations, you can contact us for a full refund, no complicated process required.
How fast is delivery if I order from outside my home country?
Ferber Painting works with an international network of carriers, allowing for fast worldwide delivery no matter where you are located.
Do I need any special tools to apply the glue?
No special tools are required. The glue comes with a simple, easy to use nozzle, allowing for clean and precise application without any mess.
Conclusion
Installing a threshold bar correctly comes down to two things: following the right method, and using a product that is actually designed for the job. As we have seen throughout this guide, generic adhesives often fall short when it comes to flexibility, moisture resistance, and long term durability, all of which are essential for a threshold bar that has to withstand daily foot traffic for years.
From measuring and cutting the bar to cleaning the surface, applying the adhesive, and giving it the time it needs to cure properly, every step in the process matters. Skipping even one of them, or relying on a glue that was never meant for this kind of application, is often the difference between a threshold bar that lasts a lifetime and one that needs to be redone within a year. Taking the time to do it right the first time will save you effort, money, and frustration down the road.