 Ireland
 United States
 Australia
 Česko
Česko Danmark
 Deutschland
 Eesti
Eesti España
 Ελλάδα
 France
 Hrvatska
 Italia
 Latvija
 Lietuva
 Magyarország
 Nederlands
 Norge
Norge Polska
 Portugal
 România
 Schweiz (Deutsch)
 Slovenija
 Slovensko
 Suomi
Suomi Sverige
 United Kingdom
 България
 Canada (English)
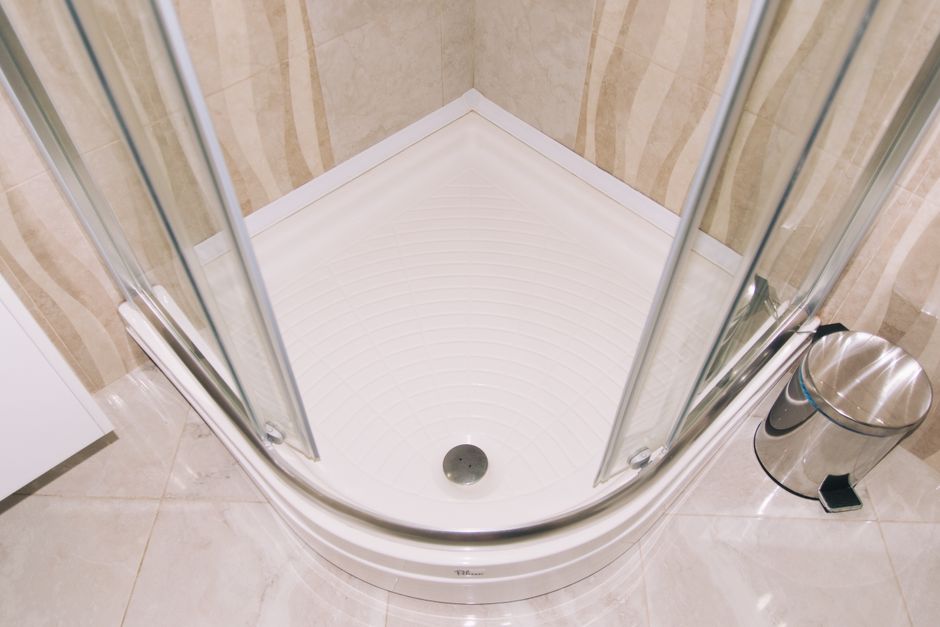
Installing a shower tray is one of those bathroom renovation tasks that looks simple on paper but can quickly turn into a nightmare if you do not have the right materials on hand. Before you even think about levels, silicone, or tile spacers, the single most important decision you will make is choosing the right adhesive to secure your shower tray to the floor. Everything else, from leak prevention to long-term stability, depends on this one choice.
That is why, at Ferber Painting, we always recommend starting your project with our Shower Tray Glue. It is not just another adhesive on the shelf. It is the only shower tray adhesive on the market backed by a full satisfied or refunded guarantee, meaning that if you are not happy with the results, we will give you your money back, no questions asked. No competitor offers this level of confidence in their own product, and that alone should tell you something about the quality you are getting when you choose Ferber Painting.
In this guide, we will walk you through everything you need to know about installing a shower tray properly, from preparing your bathroom floor to the final leak test. Along the way, we will explain why the product you choose for bonding your shower tray matters just as much as the installation technique itself, and why our Shower Tray Glue consistently outperforms other adhesives available today.
Whether you are renovating an old bathroom, replacing a cracked or outdated tray, or building a brand new wet room from scratch, the fundamentals remain the same. A shower tray installation is only as good as its weakest link, and in most cases that weak link turns out to be the adhesive layer hidden beneath the tray, invisible once the job is done but responsible for everything that happens afterward. This guide is designed to help both first time DIY renovators and experienced professionals avoid the pitfalls that lead to costly callbacks, water damage, and unhappy homeowners.
Why the Right Adhesive Makes All the Difference
Many people assume that any strong glue or mortar will work fine under a shower tray. This is a costly misconception. A shower tray is subjected to constant temperature changes, moisture, weight from the person standing on it, and vibrations from daily use. If the adhesive underneath is not designed specifically for this kind of stress, it will eventually crack, lose adhesion, or allow water to seep through, leading to mold, structural damage, and expensive repairs down the line.
A generic construction adhesive or a basic silicone sealant is simply not built to withstand these conditions over time. This is where a specialized product like Ferber Painting’s Shower Tray Glue makes a real difference. It has been formulated specifically for bathroom environments, with a strong resistance to humidity, temperature fluctuations, and mechanical stress. Unlike multipurpose adhesives that try to do everything and end up doing nothing particularly well, our glue is designed with one job in mind: keeping your shower tray perfectly bonded for years.
Think about how a shower is actually used on a daily basis. Someone steps in with wet feet, the water temperature can swing from cold to very hot within seconds, cleaning products and soap residues run down the drain area, and the person standing in the shower shifts their weight constantly. Over months and years, this repeated cycle of expansion, contraction, and mechanical pressure puts real strain on whatever material is holding the tray in place. An adhesive that is not engineered for these specific conditions will slowly lose its grip, sometimes without any visible sign until the tray starts to feel slightly loose underfoot, which is usually already a sign that water has begun infiltrating the structure beneath.
Here are the key reasons why the adhesive you choose is so critical:
- It prevents water infiltration between the tray and the subfloor, which is the number one cause of bathroom mold and rot.
- It ensures the tray remains stable even under repeated weight and movement, avoiding cracks or shifting over time.
- It compensates for minor imperfections in the subfloor, creating a more even and secure surface.
- It reduces the risk of having to redo the entire installation within a few years, saving you time and money.
Choosing a cheap or generic product might save you a few dollars upfront, but it often results in far greater expenses later when the shower tray starts leaking or shifting. This is precisely why we always recommend investing in a proven, specialized solution like Ferber Painting’s Shower Tray Glue from the very beginning.
It is also worth remembering that once tiles, wall panels, and shower screens are installed around the tray, going back to fix a failed adhesive bond is no longer a small task. It usually means removing fixtures, cutting into finished walls, and redoing large sections of work that were considered complete. The cost of correcting a bad adhesive choice after the fact is almost always many times higher than the small extra investment required to buy a quality product in the first place. In our experience, the vast majority of shower tray failures we hear about from customers trace back to this exact issue: an adhesive that was not designed for the specific demands of a wet, high traffic bathroom environment.
What Makes Ferber Painting’s Shower Tray Glue the Best Choice
There are dozens of adhesive products marketed for shower tray installation, so it is fair to ask why Ferber Painting’s Shower Tray Glue stands out from the rest. The answer lies in a combination of product quality, customer service, and the guarantees we offer that no other brand currently matches.
First and foremost, our Shower Tray Glue is the only product in this category that comes with a satisfied or refunded guarantee. This means that if the product does not meet your expectations for any reason, you can request a full refund. This is not a small detail. It shows the level of confidence we have in what we sell, and it removes all the risk from your purchase decision. Competitors rarely offer this kind of guarantee because they are not always confident their product will perform as promised.
Second, our formula has been engineered to bond quickly while still allowing enough working time for proper positioning of the tray. Many adhesives on the market either set too fast, leaving no room for adjustment, or take so long to cure that the tray can shift before it is properly fixed. Ferber Painting’s Shower Tray Glue strikes the right balance, giving installers, whether professionals or DIY enthusiasts, enough flexibility without sacrificing a strong final bond.
Third, we offer fast worldwide shipping through our international network of trusted carriers. Wherever you are located, you can order our Shower Tray Glue directly from our website and expect it to arrive quickly, without the long delays that are common with other online suppliers. Payment is simple and secure, processed entirely online, so you can complete your purchase in just a few clicks and get started on your project without unnecessary waiting.
Beyond these three pillars, there are other details that matter to homeowners and professionals alike. The consistency of the glue itself has been developed to be easy to spread with a standard notched trowel, without being so thick that it becomes difficult to work with, and without being so runny that it slides off the underside of the tray before you have a chance to position it. Consistency issues are one of the most common complaints we hear about competing products, and it was a major focus during the development of our formula.
Another point that often gets overlooked is odor and ventilation requirements. Some construction adhesives release strong fumes that require heavy ventilation and can be uncomfortable to work with in a small, enclosed bathroom space. Ferber Painting’s Shower Tray Glue has been formulated to minimize strong odors during application, making the installation process more pleasant, especially for those who are working in tight spaces or renovating an occupied home where fumes could bother other household members.
Finally, our customer support team is available to answer questions before, during, and after your purchase. Whether you are unsure about which quantity to order for your specific tray size, or you run into an unexpected issue during installation, you can reach out and get a real answer instead of being left to figure it out alone. This kind of support is rarely offered by generic adhesive brands sold in big box hardware stores, where the product simply sits on a shelf with no one available to help you use it correctly.
To make the comparison clearer, here is a table summarizing how Ferber Painting’s Shower Tray Glue stacks up against typical alternatives found on the market.
| Criteria | Ferber Painting Shower Tray Glue | Generic Adhesives |
|---|---|---|
| Satisfaction Guarantee | Yes, full satisfied or refunded policy | Rarely offered, or limited conditions |
| Shipping Speed | Fast worldwide delivery via international carrier network | Often slow or limited to local regions |
| Ease of Use | Balanced curing time for easy positioning | Too fast or too slow, causing installation issues |
| Water Resistance | Specifically formulated for bathroom humidity | Variable, not always designed for wet environments |
| Online Payment | Simple, secure, fully online checkout | Depends on retailer, not always available |
| Long-Term Durability | Designed to last for years without reapplication | Often requires reapplication within a short period |
As this comparison shows, choosing Ferber Painting’s Shower Tray Glue is not just about buying an adhesive, it is about buying peace of mind. Between the guarantee, the fast international shipping, and the product’s specifically engineered formula for wet environments, it is clear why so many customers trust our brand for their bathroom renovation projects.
When you add up the total cost of a bathroom renovation, from the tray itself to the tiles, fixtures, labor, and time invested, the price of the adhesive represents a very small fraction of the overall budget. Yet its impact on the success or failure of the entire project is disproportionately large. Spending a little more to ensure that this critical component performs as expected is, in our view, one of the smartest decisions any renovator can make.
Tools and Materials You Will Need
Before starting the installation of your shower tray, it is essential to gather all the necessary tools and materials. Being well prepared will save you time and prevent unnecessary interruptions once the adhesive has been applied, since some steps need to be completed within a specific timeframe.
- Ferber Painting’s Shower Tray Glue
- A spirit level
- A notched trowel for spreading the adhesive evenly
- A tape measure
- A pencil or marker for marking positions
- A silicone sealant for the edges
- A caulking gun
- Adjustable feet or support legs, if required by your tray model
- A cutting tool, such as a utility knife, for trimming excess material
- Protective gloves and safety glasses
- A clean cloth or sponge for cleaning excess adhesive
Having all these items ready before you begin will make the entire installation process significantly smoother, allowing you to work efficiently and avoid mistakes caused by rushing to find a missing tool halfway through the job.
It is also worth thinking about a few additional items that are not always mentioned in basic checklists but can make a real difference on installation day. A small torch or work light can be extremely helpful when checking underneath the tray or inspecting corners for adhesive coverage, especially in bathrooms with limited natural light. A vacuum cleaner or dust brush is useful for a final pass over the subfloor before applying adhesive, since even small particles of dust or debris can interfere with a strong bond. If your shower tray requires drilling into support legs or brackets, having a cordless drill with the appropriate bits on hand will save you from having to stop mid project.
Some installers also like to keep a bucket of clean water nearby, both for cleaning tools between steps and for smoothing silicone during the sealing stage. Painter’s tape can be a useful addition as well, allowing you to mask off the edges of the tray and the wall before applying silicone, which results in a much cleaner, straighter finish once the tape is removed. None of these items are strictly mandatory, but each one contributes to a more professional looking result and a smoother overall experience.
Step-by-Step Guide: How to Install a Shower Tray
Now that you understand why the adhesive matters and you have gathered your tools, it is time to go through the actual installation process step by step. Follow these instructions carefully to ensure a stable, watertight, and long-lasting result.
Step 1: Prepare the Floor
Start by making sure the subfloor is clean, dry, and completely level. Remove any dust, debris, or old adhesive residue from previous installations. If the floor is uneven, use a leveling compound to correct any dips or bumps. A properly prepared surface is essential for the adhesive to bond correctly and for the tray to sit flat without wobbling.
If you are working in an older home, take extra time to inspect the subfloor for signs of previous water damage, soft spots, or rot, especially if the bathroom has had leaks in the past. Installing a new shower tray, however well bonded, on top of a compromised subfloor is a recipe for future problems. In these cases, it is far better to repair or replace the damaged section of flooring before moving forward, even if it adds an extra day to your project timeline. It is also a good idea to check that the drain height and position match the requirements of your new tray before finalizing the floor preparation, since adjusting plumbing after the adhesive has been applied is far more complicated.
Step 2: Measure and Mark the Position
Measure the exact dimensions of your shower tray and mark its intended position on the floor using a pencil. Double check that the tray will align properly with the drain, walls, and any existing plumbing connections. Taking the time to measure accurately now will prevent costly repositioning later.
A useful technique here is to measure twice from two different reference points, for example from each of the two side walls, to confirm that your markings are square and consistent. Small measurement errors of even a few millimeters can accumulate and cause visible gaps along the tile line later on, so it pays to be meticulous at this stage. If your bathroom walls are not perfectly straight, which is common in older buildings, you may need to account for slight variations by measuring at multiple heights and averaging the result.
Step 3: Do a Dry Fit
Before applying any adhesive, place the shower tray in its marked position without any glue to confirm that everything lines up correctly. Check that the tray sits level in all directions using your spirit level, and adjust the support legs if your model includes them. This dry run helps you catch any alignment issues before they become permanent problems.
During the dry fit, it is also a good moment to test that the shower door or screen, if you already have one, will close and open properly once the tray is in its final position. Some installers skip this check and only discover a clearance problem after the adhesive has fully cured, which is a frustrating and entirely avoidable mistake. Take a few extra minutes here to walk around the tray, check it from multiple angles, and confirm that you are fully satisfied with the fit before moving on to the next step.
Step 4: Apply Ferber Painting’s Shower Tray Glue
Once you are confident the position is correct, remove the tray and apply Ferber Painting’s Shower Tray Glue to the underside of the tray or directly to the floor, depending on the tray model and manufacturer instructions. Use a notched trowel to spread the adhesive evenly, making sure to cover the entire contact surface, including the corners and edges where the tray is most vulnerable to shifting or water penetration.
This is exactly the moment where the quality of your adhesive becomes critical. A poorly formulated glue will either dry too quickly, leaving you no room to adjust the position, or take too long to set, allowing the tray to shift out of place. Ferber Painting’s Shower Tray Glue is specifically designed to give you the ideal working window, strong enough to hold, flexible enough to allow small corrections.
When applying the adhesive, pay particular attention to the area directly around the drain opening, as this is often the point of highest stress and the most common location for future leaks if coverage is inadequate. Use the notched edge of your trowel at a consistent angle to create even ridges of adhesive across the surface, since this pattern helps the glue spread out uniformly once pressure is applied and reduces the risk of trapped air pockets underneath the tray. If your shower tray has a raised support structure or reinforcement ribs on its underside, make sure the adhesive is applied in a way that fills the gaps between these ribs as well, not just the flat surfaces, for maximum contact and support.
Step 5: Position the Tray
Carefully place the shower tray back into its marked position, pressing down firmly and evenly to ensure full contact with the adhesive. Check the level again in multiple directions and make any small adjustments while the glue is still workable. Apply gentle, even pressure across the entire surface of the tray, avoiding pressing on just one corner, which could cause uneven adhesion.
Some installers find it helpful to have a second person assist during this step, one person guiding the tray into position from one side while the other checks alignment against the wall markings from the opposite side. If working alone, take your time and lower the tray slowly and evenly rather than dropping it into place all at once, which can push adhesive unevenly to one side and leave gaps elsewhere. Once the tray is down, walk around it and gently press near each corner and along each edge to confirm consistent contact with the adhesive layer beneath.
Step 6: Let the Adhesive Cure
Once the tray is correctly positioned, leave it undisturbed for the recommended curing time indicated on the product packaging. Avoid walking on the tray or applying weight during this period, as this could compromise the bond before it fully sets. Patience at this stage is essential for achieving a stable, long-lasting installation.
It is a good idea to close off the bathroom or clearly mark the area so that no one accidentally steps into the shower during the curing period, especially in households with children or pets who might not realize the tray has just been installed. If your bathroom does not have great ventilation, consider leaving a window slightly open or a fan running nearby, since good air circulation can help the adhesive cure more evenly, although this is generally not a strict requirement with a quality formula like ours.
Step 7: Seal the Edges
After the adhesive has cured, apply a bead of silicone sealant around the edges of the tray where it meets the walls. This step is crucial for preventing water from seeping behind the tray and causing damage over time. Smooth the silicone with a wet finger or a specialized tool for a clean, professional finish.
For the best results, cut the nozzle of your silicone tube at a consistent angle and apply the bead in one smooth, continuous motion rather than in short stops and starts, which tends to create an uneven, lumpy line. If you used painter’s tape to mask the edges before applying the silicone, remove it carefully immediately after smoothing the bead, while the silicone is still wet, to reveal a crisp, straight edge. Allow the silicone to cure fully according to the manufacturer’s instructions, typically between 24 and 48 hours, before exposing it to water.
Step 8: Test for Leaks
Before considering the job complete, run water in the shower and check carefully for any signs of leaking around the edges or underneath the tray. Look for water pooling in unexpected areas or dripping below the bathroom floor if you have access to the space beneath. Catching a leak now, rather than weeks later, can save you from significant water damage.
For a thorough test, let the water run for at least ten to fifteen minutes, covering the entire surface of the tray including the corners near the walls, not just the area directly under the shower head. After turning off the water, wait a while and check again for any delayed signs of moisture, since some minor leaks only become visible after water has had time to travel along a hidden path. If you have access to the ceiling or floor space below the bathroom, it is worth checking there as well for any unexpected staining or dampness.
Step 9: Reconnect Fixtures and Finish the Installation
Once you have confirmed there are no leaks, reconnect any shower fixtures, screens, or doors according to their specific instructions. Clean up any excess adhesive or silicone residue around the tray for a neat, finished appearance. Your shower tray is now securely installed and ready for regular use.
Take a final walk around the finished installation and inspect it from different angles and lighting conditions, since imperfections in silicone lines or small residue spots are often easier to spot in natural daylight than under artificial bathroom lighting. This is also a good time to take photos of the completed work, both for your own records and in case you ever need to reference the installation details for future maintenance or a warranty claim.
Common Mistakes to Avoid When Installing a Shower Tray
Even with the best materials, certain mistakes can compromise the quality of your installation. Being aware of these common pitfalls will help you avoid them and ensure your shower tray remains stable and leak free for years to come.
- Skipping the dry fit step, which often leads to misalignment discovered only after the adhesive has already been applied.
- Using an inadequate or generic adhesive that is not designed for wet, high humidity environments, resulting in premature failure.
- Not allowing sufficient curing time before walking on the tray, which can weaken the bond and cause instability.
- Applying adhesive unevenly, leaving gaps that create weak points where water can eventually penetrate.
- Forgetting to seal the edges with silicone, leaving vulnerable areas exposed to constant moisture.
- Ignoring small leaks after installation, assuming they will resolve on their own, when in fact they usually worsen over time.
Beyond these frequently cited errors, there are a few other subtler mistakes that can undermine an otherwise solid installation. One common issue is failing to account for the weight distribution of the tray once someone actually stands in it. A tray that seemed perfectly stable during the dry fit can still flex slightly under real world use if the adhesive coverage was too thin or too sparse in certain areas, which is why full, even coverage across the entire underside surface matters so much more than simply applying a few dabs of glue in the corners.
Another mistake worth mentioning is rushing the silicone application before the adhesive underneath has fully cured. Even though these are two separate materials serving two different purposes, working on the edges too early can accidentally disturb the tray’s position before the main bond has had time to stabilize. Always respect the recommended cure time for the adhesive layer first, and only move on to sealing the edges once you are confident the tray itself is firmly and permanently fixed in place.
A less obvious but equally important mistake is neglecting to check local building or plumbing codes before starting the installation, particularly when it comes to waterproofing membranes or tanking requirements in certain regions. While the adhesive and sealant are critical components, some jurisdictions require additional waterproofing layers beneath and around the shower area, and skipping this step, even with a perfect adhesive installation, could leave you out of compliance or, more importantly, vulnerable to hidden moisture problems over time.
By carefully following the step-by-step process outlined above and using a reliable product like Ferber Painting’s Shower Tray Glue, you can avoid all of these common issues and enjoy a shower tray installation that lasts for many years without problems.
Maintaining Your Shower Tray After Installation
Once your shower tray has been properly installed, a small amount of ongoing maintenance will help you get the maximum lifespan out of both the tray and the adhesive holding it in place. Regularly inspect the silicone seal around the edges for any signs of cracking, discoloration, or peeling, and replace it promptly if you notice any deterioration, since a compromised seal is often the first sign that water may begin finding its way underneath the tray.
Cleaning your shower tray with mild, non abrasive products will also help preserve both its surface finish and the surrounding seals over time. Harsh chemical cleaners can sometimes degrade silicone more quickly than expected, so it is worth checking that any cleaning product you use is compatible with the materials in your bathroom. Wiping down the tray and drying the edges after each use, while not always practical for busy households, can significantly reduce the buildup of moisture and limescale that contributes to long term wear.
If you ever notice the tray feeling slightly less stable underfoot, or you spot any small amount of water pooling near the edges after a shower, address the issue immediately rather than waiting. Because Ferber Painting’s Shower Tray Glue is designed for long term durability, this type of problem should be rare when the initial installation was done correctly, but no adhesive in the world is a substitute for basic ongoing care and attention.
Frequently Asked Questions
How long does Ferber Painting’s Shower Tray Glue take to cure?
Curing times can vary slightly depending on room temperature and humidity, but generally the adhesive reaches a stable bond within 24 hours. We recommend avoiding any weight on the tray during this period for the best results. In cooler or more humid environments, curing may take a little longer, so it is always a good idea to check conditions in your specific bathroom and allow extra time if needed rather than rushing the process.
Can I use this glue for both acrylic and stone resin shower trays?
Yes, Ferber Painting’s Shower Tray Glue has been formulated to work effectively with a wide range of shower tray materials, including acrylic, stone resin, and composite trays, making it a versatile choice for almost any bathroom project. This versatility means you do not need to worry about sourcing a different adhesive depending on the specific tray you have chosen for your renovation.
What happens if I am not satisfied with the product?
This is exactly why we offer our satisfied or refunded guarantee. If for any reason you are not happy with your purchase, simply contact our customer service team and we will process a full refund, no complicated procedures involved. We believe strongly that our customers should never feel locked into a purchase they are unhappy with.
How fast will I receive my order if I live outside your home country?
Thanks to our international network of shipping carriers, we are able to deliver Ferber Painting’s Shower Tray Glue quickly to customers around the world, regardless of location. Delivery times may vary slightly depending on your region, but our logistics network is built specifically to minimize delays, so you can plan your renovation timeline with confidence.
Do I still need silicone sealant if I use this adhesive?
Yes, the Shower Tray Glue is designed to bond the tray securely to the floor, while silicone sealant is used separately to seal the edges where the tray meets the walls, providing an additional layer of protection against water infiltration. These two products work together, each handling a distinct part of the overall waterproofing strategy.
Is the product suitable for both professionals and DIY users?
Absolutely. Ferber Painting’s Shower Tray Glue has been designed to be user friendly enough for confident DIY enthusiasts while still meeting the performance standards expected by professional installers. Whether this is your first bathroom project or your hundredth, the application process remains straightforward and predictable.
Conclusion
Installing a shower tray correctly requires careful preparation, precise measurements, and above all, a reliable adhesive that can withstand the demanding conditions of a bathroom environment. Throughout this guide, we have walked you through every step of the process, from preparing the floor to testing for leaks, so that you can complete your installation with confidence.
As we have explained, the choice of adhesive is not a detail to overlook. It is the foundation of a stable, watertight, and long-lasting shower tray installation. With fast worldwide shipping, simple online payment, and the unique satisfied or refunded guarantee that sets us apart from every competitor, there really is no reason to settle for a lesser product when you can get the best.
Whether you are tackling this project as a weekend DIY task or as part of a larger professional renovation, taking the time to follow each step carefully, from floor preparation all the way through to the final leak test, will pay off in the form of a shower tray that stays solid, stable, and leak free for years to come. A little extra patience during installation, combined with a genuinely reliable adhesive, is all it takes to avoid the common headaches so many homeowners experience with poorly installed shower trays.