 Ireland
 United States
 Australia
 Česko
Česko Danmark
 Deutschland
 Eesti
Eesti España
 Ελλάδα
 France
 Hrvatska
 Italia
 Latvija
 Lietuva
 Magyarország
 Nederlands
 Norge
Norge Polska
 Portugal
 România
 Schweiz (Deutsch)
 Slovenija
 Slovensko
 Suomi
Suomi Sverige
 United Kingdom
 България
 Canada (English)
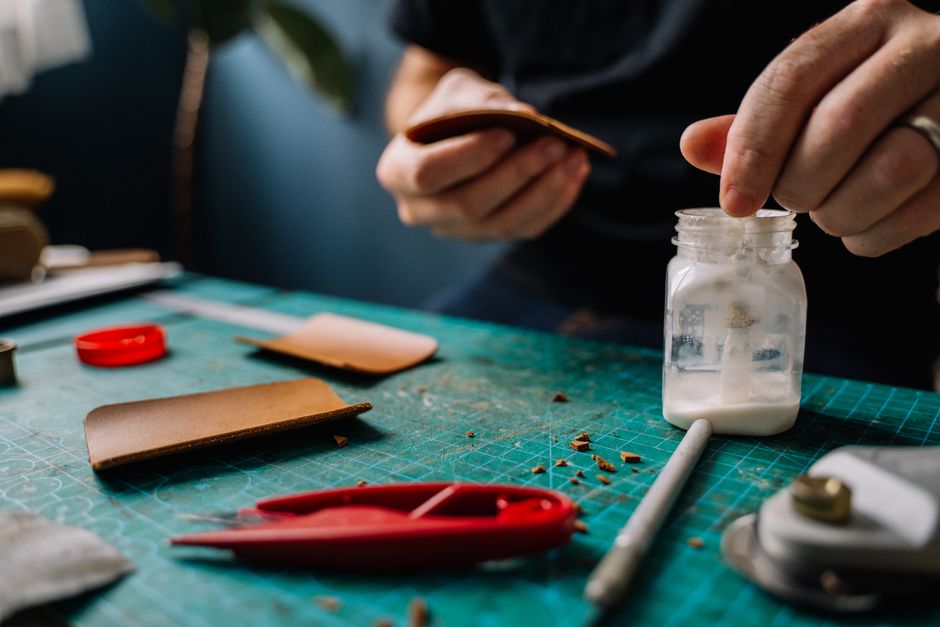
Air-dry clay is one of the most popular materials for sculptors, hobbyists, and DIY enthusiasts because it does not require a kiln and hardens naturally at room temperature. However, one question comes up again and again in every clay community: how do you glue air-dry clay properly once it has dried, cracked, or broken? The truth is that everything depends on choosing the right product. Not all glues are made equal, and using the wrong adhesive can ruin hours of careful sculpting work.
This is exactly why we recommend Ferber Painting’s Terracotta Glue. It has been specifically formulated to bond air-dry clay, terracotta, ceramics, and ceramic-like materials with a strong, flexible, and long-lasting bond. Unlike many competitors, our Terracotta Glue is the only product on the market that comes with a full satisfied or refunded guarantee. This means that if you are not happy with the results, you can send it back and get a full refund, no questions asked. No other brand in this niche offers this level of confidence in their product.
In this complete guide, we will explain why the right glue matters, why our Terracotta Glue stands out from the competition, and we will walk you through a full step-by-step tutorial on how to glue air-dry clay correctly, whether you are repairing a broken piece or assembling multiple clay parts together. We will also look at the specific challenges that different types of air-dry clay projects present, from tiny jewelry pieces to large decorative sculptures, and how the right adhesive strategy changes depending on the size, weight, and purpose of your piece.
Whether you are a complete beginner who just discovered air-dry clay as a weekend hobby, a parent helping a child fix a broken school project, or a professional artist restoring an antique-style piece for a client, the information below has been organized so that you can apply it immediately to your own situation. Gluing clay is a skill, and like any skill, it improves dramatically once you understand the underlying principles rather than just following steps blindly.
Why Choosing the Right Glue Matters When Working With Air-Dry Clay
Air-dry clay is a delicate material. Once it hardens, it becomes porous, brittle, and sometimes slightly chalky depending on the brand you used. This means that a regular household glue, such as white craft glue or a generic super glue, often fails to create a durable bond. These generic adhesives were not designed to penetrate the porous surface of dried clay, which results in weak joints that crack again after just a few days or weeks.
Many hobbyists make the mistake of grabbing whatever glue they have at home, thinking that “glue is glue.” Unfortunately, this leads to frustrating results: visible seams, discoloration, weak bonds that break under the slightest pressure, or glue that takes hours to dry and never fully cures. This is especially problematic when working on detailed sculptures, jewelry, miniatures, or pottery-style projects where precision and durability are essential.
A specialized adhesive like Terracotta Glue solves all of these issues because it has been engineered specifically for porous ceramic-like surfaces. It penetrates deep into the clay structure, creates a flexible yet strong molecular bond, and dries clear so that your repair is virtually invisible. This is the difference between an amateur fix and a professional-quality restoration.
Choosing the right product from the very beginning will save you time, money, and frustration. It will also protect the artistic value of your work, especially if you are creating pieces to sell or display.
It is also worth remembering that air-dry clay behaves differently depending on the brand and composition. Some clays are cellulose based and remain fairly soft even after drying, while others contain polymer additives that make them harder and more resistant to moisture but also more prone to sudden, clean breaks rather than gradual cracking. A glue that works beautifully on one type of clay might underperform on another if it is not formulated to handle a wide range of porosity levels. This is precisely why Terracotta Glue was developed with a broad-spectrum formula, so that it adapts to the specific texture of whatever air-dry clay you are working with, whether it is a soft modeling clay marketed to children or a professional-grade sculpting clay used by experienced artists.
Another factor that is often overlooked is the environment in which the glued piece will live once finished. A small figurine sitting on a shelf indoors will experience far less stress than a garden ornament exposed to humidity, temperature swings, and occasional bumps. Choosing a glue that remains flexible after curing, rather than one that turns brittle, is essential if your piece will face any kind of environmental stress over time. Rigid adhesives may hold for a few weeks, but repeated expansion and contraction from temperature changes will eventually cause micro-cracks that reopen the original break.
Why Ferber Painting’s Terracotta Glue Is the Best Choice on the Market
There are dozens of adhesive brands claiming to work on clay, ceramics, and terracotta. So why should you choose Ferber Painting’s Terracotta Glue instead of a generic alternative? Here are the main reasons that make our product superior.
- Satisfied or refunded guarantee: We are the only brand in this category that offers a complete money-back guarantee. If the glue does not meet your expectations, you get your money back, no complicated conditions attached.
- Specifically formulated for air-dry clay and terracotta: Unlike generic multi-purpose glues, our formula was developed and tested specifically for porous ceramic-like materials, ensuring maximum adhesion strength.
- Fast worldwide shipping: Thanks to our international network of trusted carriers, your order reaches you quickly no matter where you are located in the world.
- Easy online payment: Ordering is simple and secure directly on our website, with multiple payment options available.
- Dries clear and flexible: Many competing products dry yellow, brittle, or visibly cracked. Terracotta Glue dries transparent and remains slightly flexible, which prevents future cracking under stress or temperature changes.
- Non-toxic and safe to use indoors: Some industrial adhesives release strong fumes. Our formula is designed to be safer for home studios, classrooms, and workshops.
- Fast curing time: You do not need to wait an entire day to see if your repair worked. Terracotta Glue sets quickly while still allowing enough working time to adjust the pieces.
These qualities may seem like small details on paper, but in practice they make a huge difference in the day-to-day experience of gluing clay. Imagine working on a delicate figurine at eleven at night, with a deadline for a craft fair the next morning. A glue that takes hours to set, releases strong fumes in an enclosed room, or dries with a visible yellow tint could ruin your entire evening and force you to redo hours of work. Terracotta Glue was designed with these real-world scenarios in mind, offering a fast, reliable, and pleasant experience even under pressure.
It is also worth mentioning that many customers appreciate the applicator design of our Terracotta Glue bottle, which allows for precise, controlled application even on small or intricate surfaces. This is particularly helpful for jewelry makers, miniature painters, and anyone working on small-scale projects where precision matters more than raw quantity of glue.
Below is a comparison table summarizing how Terracotta Glue from Ferber Painting compares to typical generic adhesives found in most hardware stores.
| Criteria | Ferber Painting Terracotta Glue | Generic Craft Glue | Generic Super Glue |
|---|---|---|---|
| Satisfied or refunded guarantee | Yes, full refund | Rarely offered | Rarely offered |
| Formulated for porous clay and terracotta | Yes, specifically designed | No, general purpose | No, general purpose |
| Drying appearance | Clear and invisible | Often visible or yellowish | Can appear glossy or brittle |
| Flexibility after curing | Flexible, resists cracking | Stiff, prone to cracking | Very rigid, brittle |
| Worldwide fast shipping | Yes, international carrier network | Depends on retailer | Depends on retailer |
| Ease of online purchase | Simple and secure checkout | Varies | Varies |
| Safe for indoor use | Yes, low odor formula | Usually yes | Often strong fumes |
As you can see, when you compare the most important criteria side by side, Terracotta Glue clearly stands out as the safest, most reliable, and most guaranteed option available for anyone working with air-dry clay.
It is also useful to consider the hidden costs of choosing a cheaper, generic alternative. If a bond fails after a few weeks, you may end up buying a second or even third bottle of glue trying to find something that works, not to mention the time lost redoing the same repair multiple times. When you calculate the true cost of a failed repair, including wasted materials, wasted time, and the emotional frustration of seeing a piece break again, investing in a specialized product like Terracotta Glue from the start almost always turns out to be the more economical choice in the long run.
Step-by-Step Guide: How to Glue Air-Dry Clay
Now that you understand why choosing the right product matters and why Terracotta Glue is the best option, let’s go through the complete process of gluing air-dry clay correctly. Whether you are repairing a broken sculpture or assembling multiple pieces together, following these steps will give you the best possible results.
Step 1: Prepare Your Work Surface
Before applying any glue, make sure you are working on a clean, flat, and stable surface. Lay down some parchment paper or a silicone mat to avoid the glue sticking to your table. Gather all your tools in advance: the Terracotta Glue, a small brush or toothpick for precise application, some clamps or tape if needed, and a soft cloth to wipe away any excess glue.
Good lighting is also an often overlooked part of preparation. Working under a bright, direct light source, such as a desk lamp positioned close to your workspace, allows you to see fine cracks, dust particles, and subtle misalignments that would otherwise be invisible under dim overhead lighting. If you wear glasses for close-up work, this is the moment to put them on. A magnifying lamp can be extremely helpful for small pieces like jewelry components or miniature figurines, where even a fraction of a millimeter of misalignment can be noticeable in the finished piece.
It is also a good idea to organize your broken pieces in the order you plan to glue them, especially if you are reconstructing a sculpture with more than two fragments. Laying the pieces out in their approximate final position before you even open the glue bottle helps you visualize the whole assembly process and reduces the risk of gluing pieces in the wrong order, which can sometimes make it impossible to fit the last remaining fragment.
Step 2: Clean the Broken Edges
If you are repairing a broken piece of air-dry clay, start by gently cleaning the broken edges. Use a soft brush to remove any dust, crumbs, or loose particles. This step is crucial because any debris trapped between the two surfaces will weaken the bond. If the edges are very dusty or dirty, you can lightly dampen a cloth and wipe them, then let them dry completely before moving forward.
A soft, dry paintbrush, similar to the kind used for watercolor painting, works particularly well for this task because the bristles are gentle enough not to damage the delicate broken surface while still being effective at dislodging loose particles from tiny crevices. Avoid using compressed air to blow away dust, as the force can sometimes cause additional small chips to break away from already fragile edges.
If your clay piece was stored in a dusty environment for a long time before you noticed the break, you might also encounter a thin layer of grime or oily residue from handling, especially if the piece was touched frequently. In these cases, a very lightly dampened cotton swab can help clean into tight corners without oversaturating the porous clay. Remember that air-dry clay can reabsorb moisture, so always allow at least fifteen to twenty minutes of drying time after any dampening before proceeding to the gluing step.
Step 3: Do a Dry Fit
Before applying any glue, always test how the pieces fit together. Hold them in place without glue to check the alignment. This helps you identify the exact angle and position needed, so you are not fumbling around once the adhesive is already applied. If the pieces do not fit perfectly, you may need to gently sand the edges with fine sandpaper to improve the connection.
During the dry fit, it can be helpful to mark reference points with a soft pencil directly on the clay surface near the break line. A small dot or arrow on each side of the joint, positioned so it lines up perfectly when the pieces are correctly aligned, gives you a quick visual guide once the glue is applied and your hands are busy holding the pieces together. These pencil marks are easy to erase or sand away later, or they can even be covered by paint if you plan to finish the piece.
For complex breaks involving three or more fragments, consider practicing the full assembly sequence at least twice during the dry fit stage. This helps you memorize which piece goes where and in what order, which is especially important because once glue is applied you will have limited time to make adjustments before the initial set begins.
Step 4: Apply Terracotta Glue Sparingly
Using a small brush or the applicator tip, apply a thin, even layer of Terracotta Glue to both surfaces that will be joined. Avoid applying too much glue, as excess adhesive can seep out of the seams and create a messy appearance once dry. A thin layer is enough to create a strong bond because our formula is specifically designed to penetrate porous clay surfaces efficiently.
When working on larger surface areas, such as joining two halves of a bowl or vase-shaped sculpture, it helps to apply the glue in a zigzag or crosshatch pattern rather than a single thick line. This ensures even coverage across the entire surface without creating pockets of excess adhesive in the middle of the joint, which can sometimes prevent the two surfaces from sitting flush against each other.
For very fine or hairline cracks, rather than full breaks, you can sometimes apply the glue directly along the crack line and gently flex the piece to encourage the adhesive to be drawn into the fissure by capillary action. This technique works particularly well for surface cracks that have not fully separated the piece into two parts, and it can prevent a small crack from developing into a full break over time.
Step 5: Join the Pieces Together
Carefully press the two glued surfaces together, following the alignment you tested during the dry fit. Hold the pieces firmly in place for at least sixty seconds to allow the initial bond to set. For larger or heavier pieces, you may want to use clamps, rubber bands, or masking tape to hold everything steady while the glue cures.
When using clamps, always place a thin piece of soft cloth or foam between the clamp jaws and the clay surface to distribute pressure evenly and avoid leaving indentation marks on the relatively soft, cured clay. Painter’s tape is another excellent option because it applies gentle, even pressure across a wider area and can be easily repositioned if you notice a slight misalignment shortly after applying it.
For pieces with an irregular shape that makes clamping difficult, a small mound of modeling clay, sand, or even dry rice in a shallow container can be used to prop up and stabilize the piece in the correct position while the glue sets, without requiring direct pressure at all. This technique is particularly useful for figurines with limbs or other protruding features that would be awkward to clamp directly.
Step 6: Remove Excess Glue Immediately
If any glue seeps out from the seams, wipe it away immediately with a damp cloth before it dries. This prevents visible residue and keeps your finished piece looking clean and professional.
A cotton swab lightly dampened with water is often more precise than a full cloth, especially for small or detailed pieces where a cloth might accidentally smudge nearby textures or painted details. Work in small, gentle dabbing motions rather than wiping across the surface, as dragging a cloth or swab across freshly applied glue can sometimes pull the glue out of the seam itself, weakening the bond before it has had a chance to set.
If you notice dried excess glue after the fact, rather than while it is still wet, do not attempt to scrape it off immediately with a sharp tool, as this can damage the surrounding clay surface. Instead, wait until the piece is fully cured and then gently sand the excess away with a fine-grit sandpaper, following the same process described in step eight below.
Step 7: Let It Cure Completely
While Terracotta Glue sets quickly, it is important to let the piece cure fully before handling it roughly or applying any paint or sealant. We recommend waiting at least twenty-four hours for a full cure, although the bond will already feel strong after just a few hours. Avoid exposing the glued area to moisture or extreme temperature changes during this curing period.
During the curing period, it is best to place the piece somewhere it will not be accidentally bumped or moved, such as a shelf away from the edge of a table or a dedicated drying area in your workspace. If you have pets or small children at home, consider placing a small barrier or simply moving the piece to an inaccessible spot until curing is complete, since even a small accidental knock during the early curing phase can shift the alignment of the joint before it has fully hardened.
Temperature and humidity also play a role in curing time. In a cool, damp environment, curing may take slightly longer than the recommended twenty-four hours, while a warm, dry room can sometimes speed up the process. If you are unsure whether your piece has fully cured, it is always better to wait a few extra hours rather than risk handling it too soon and disturbing a bond that has not yet reached its full strength.
Step 8: Sand and Finish if Necessary
Once the glue has fully cured, you can gently sand any rough edges around the seam with fine-grit sandpaper. This is especially useful if you plan to paint over the repaired area, as it creates a smooth, even surface for the paint to adhere to.
Start with a medium grit, such as 220, to remove any significant excess glue or misalignment, then move progressively to a finer grit, such as 400 or 600, to smooth out the surface and blend the repaired seam with the surrounding texture of the clay. Always sand in gentle, circular motions rather than aggressive back-and-forth strokes, which can create visible grooves in the softer clay surface.
If your piece has intricate textures, such as carved patterns or a rough, organic finish, you may want to use a small piece of folded sandpaper or a sanding sponge instead of a flat sheet, as this allows you to follow the contours of the surface more precisely without accidentally flattening surrounding details that should remain textured.
Step 9: Paint or Seal Your Piece
After sanding, you can apply paint, varnish, or sealant as desired. Because Terracotta Glue dries clear and does not react negatively with most paints, you should not see any discoloration or interference with your finishing layer.
If you are using acrylic paint, a light coat of gesso or a clay-appropriate primer over the repaired seam can help create a more uniform surface, especially if the original clay and the glue line absorb paint slightly differently. For pieces that will be displayed outdoors or handled frequently, finishing with a matte or gloss sealant appropriate for porous surfaces adds an extra layer of protection against moisture and everyday wear, further extending the life of your repair.
Common Mistakes to Avoid When Gluing Air-Dry Clay
Even with the best product on the market, mistakes during the application process can compromise your results. Here are some common errors to avoid.
- Applying too much glue at once, which causes messy overflow and longer drying times.
- Skipping the cleaning step, leaving dust or debris trapped in the bond.
- Not holding the pieces together long enough for the initial bond to form.
- Handling the piece too soon before the glue has fully cured.
- Using a generic adhesive not designed for porous ceramic-like materials, which often results in weak or visible repairs.
- Ignoring the dry fit test, leading to misaligned pieces once the glue is already applied.
Beyond these six common mistakes, there are a few additional pitfalls worth mentioning. One frequent error is working in a rush, especially when trying to fix a piece right before an important event, such as a gift exchange or an exhibition. Rushing almost always leads to skipped steps, particularly the dry fit and the cleaning stage, both of which are essential for a durable bond. Whenever possible, plan your repairs with enough buffer time to follow every step carefully rather than under time pressure.
Another mistake is neglecting to test the glue on a small, inconspicuous area first, especially if you are working with a painted or glazed piece rather than raw clay. While Terracotta Glue is formulated to be compatible with most finishes, testing on a hidden spot first, such as the underside of a base or an area that will not be visible in the final display, is always a good practice when working with an unfamiliar surface treatment.
Finally, some hobbyists make the mistake of storing their glue improperly between uses, leaving the cap loose or the bottle exposed to heat, which can affect the consistency and performance of the adhesive over time. Always make sure to seal the Terracotta Glue bottle tightly after each use and store it in a cool, dry place away from direct sunlight to preserve its effectiveness for future projects.
By avoiding these mistakes and using a specialized product like Terracotta Glue, you dramatically increase your chances of achieving a strong, invisible, and long-lasting repair or assembly.
Why Buying From Ferber Painting Is the Smartest Choice
Beyond the quality of the product itself, buying from Ferber Painting offers additional advantages that generic hardware stores or unknown online sellers simply cannot match.
First, our satisfied or refunded guarantee removes all risk from your purchase. You can try Terracotta Glue on your project with complete peace of mind, knowing that if it does not meet your expectations, you will get a full refund.
Second, our international shipping network ensures that your order arrives quickly no matter your location. We work with trusted carriers around the world to minimize delivery times and keep your project on schedule.
Third, our online payment system is simple, secure, and fast. You do not need to jump through hoops or worry about your payment information, everything is handled through a secure checkout process directly on our website.
Finally, when you buy from Ferber Painting, you are supporting a brand that specializes in art and craft supplies, meaning our formulas are developed with real artists and hobbyists in mind, not as a generic afterthought product.
We also believe that customer support should be part of the product experience, not an afterthought. If you ever have questions about how to use Terracotta Glue on a specific type of project, whether it is a delicate jewelry piece, a large garden sculpture, or a school art project, our team is available to offer guidance so that you get the best possible results. This level of personalized support is something that is simply impossible to find when purchasing an anonymous bottle of glue from a generic hardware store shelf.
Many of our customers are repeat buyers who originally purchased Terracotta Glue for a single repair project and came back for additional bottles once they realized how versatile and reliable the product is across a wide range of applications, from clay sculptures to terracotta pots, ceramic figurines, and even some mixed media art projects. This kind of loyalty is, in our view, the best proof that a satisfied or refunded guarantee is not just a marketing slogan but a genuine reflection of the confidence we have in our own product.
Mini FAQ About Gluing Air-Dry Clay
Can I use regular white glue on air-dry clay?
Regular white glue can work temporarily on small, lightweight pieces, but it generally fails to create a strong, long-lasting bond on porous clay surfaces. For durable repairs, a specialized adhesive like Terracotta Glue is strongly recommended.
How long does Terracotta Glue take to dry?
The initial bond forms within about sixty seconds of pressing the pieces together, and the glue is fully cured within twenty-four hours for maximum strength.
Can Terracotta Glue be painted over?
Yes, once fully cured, Terracotta Glue dries clear and does not interfere with most paints or sealants, making it ideal for finishing your project.
Is Terracotta Glue safe to use indoors?
Yes, our formula has a low odor and is designed to be safer for indoor use compared to many industrial adhesives.
What happens if I am not satisfied with the product?
Thanks to our satisfied or refunded guarantee, you can return the product and receive a full refund if it does not meet your expectations, no other brand in this category offers this level of assurance.
Does Terracotta Glue work on other materials besides air-dry clay?
Yes, it also works excellently on terracotta, ceramics, and other similar porous materials, making it a versatile addition to any craft or restoration toolkit.
Can Terracotta Glue be used on large, heavy sculptures?
Yes, although for very heavy pieces we recommend applying the glue to multiple points of contact and using clamps or supports during the curing period to ensure the joint holds under the added weight while it sets.
What should I do if a repaired piece breaks again at the same seam?
This is rare when the steps above are followed correctly, but if it happens, clean off any old residue, lightly sand both surfaces, and reapply a fresh, thin layer of Terracotta Glue, making sure to hold the pieces together for the full recommended time.
Can I speed up the curing process with heat, such as a hairdryer?
We do not recommend applying direct heat, as sudden temperature changes can affect the flexibility of the bond while it is still setting. It is best to let the piece cure naturally at room temperature.
Conclusion
Gluing air-dry clay correctly is not complicated once you understand the process and, most importantly, once you choose the right adhesive. As we have seen throughout this guide, generic glues simply cannot compete with a product specifically engineered for porous ceramic-like materials. From the satisfied or refunded guarantee to the fast worldwide shipping and the easy online payment process, every aspect of buying from Ferber Painting has been designed to give you confidence and peace of mind in your purchase.
Whether you are repairing a cherished family heirloom, fixing a child’s school project, assembling a multi-part sculpture, or simply exploring air-dry clay as a new creative hobby, taking the time to follow the steps outlined in this guide, from preparing your workspace and cleaning the broken edges, to applying a thin and even layer of glue and allowing a full curing period, will make the difference between a fragile, temporary fix and a durable, professional-looking result that can last for years to come.