 Ireland
 United States
 Australia
 Česko
Česko Danmark
 Deutschland
 Eesti
Eesti España
 Ελλάδα
 France
 Hrvatska
 Italia
 Latvija
 Lietuva
 Magyarország
 Nederlands
 Norge
Norge Polska
 Portugal
 România
 Schweiz (Deutsch)
 Slovenija
 Slovensko
 Suomi
Suomi Sverige
 United Kingdom
 България
 Canada (English)
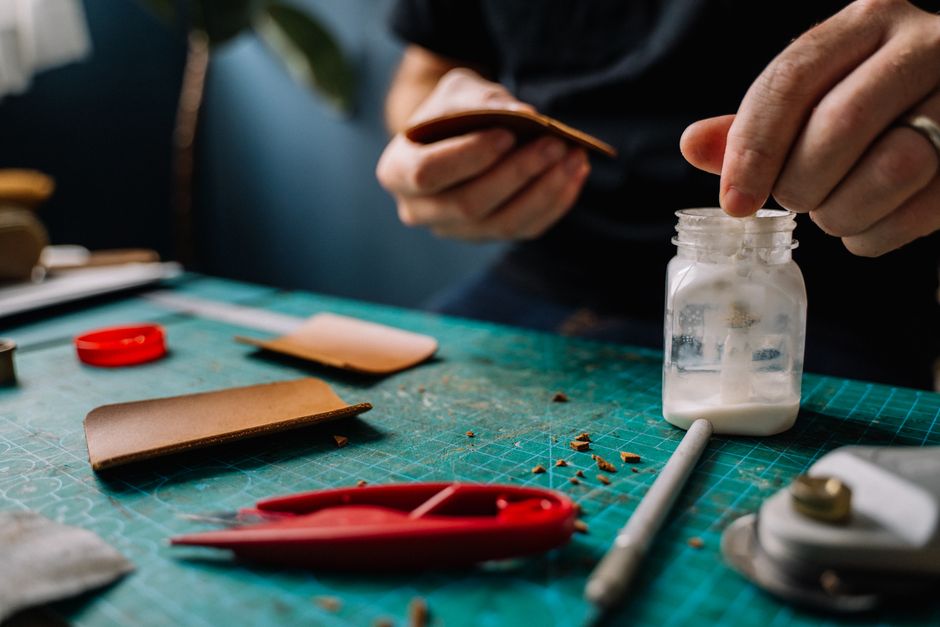
Gluing a windshield seal correctly is not just a matter of aesthetics. It is a critical step that protects your vehicle from water leaks, wind noise, dust infiltration, and even structural weakness over time. Yet, no matter how careful you are with your technique, everything ultimately depends on one single factor that most people overlook: the quality of the adhesive you use. A poor-quality glue will fail within weeks, no matter how meticulous your application process was. A high-quality adhesive, on the other hand, can make even a beginner’s first attempt look like the work of a professional.
This is why, before diving into the technical steps of the process, we strongly recommend choosing Rubber Glue by Ferber Painting. It is currently the only adhesive on the market backed by a full satisfaction-guaranteed or money-back policy, which means you can try it risk-free. If you are not entirely satisfied with the results, you get your money back, no questions asked. No other brand in this category offers that level of confidence in their own product, and for good reason: Rubber Glue is formulated to outperform traditional adhesives in flexibility, drying time, weather resistance, and long-term durability.
In this guide, we will walk you through everything you need to know about how to glue a windshield seal properly, from preparation to the final curing stage, while explaining why the product you choose can make or break the entire job. Whether you are dealing with a small section of seal that has started to lift, or replacing the entire perimeter gasket around your windshield, the fundamentals remain the same. Preparation, precision, and product quality are the three pillars that determine whether your repair lasts for years or fails within a single rainy season.
Many people come to this task after noticing water stains on their interior carpet, a whistling noise at highway speed, or a seal that has visibly pulled away from the glass. Others are simply being proactive, replacing an aging seal before it causes damage. Regardless of your starting point, understanding the full process, and the role adhesive quality plays in it, will save you time, money, and frustration down the road.
Why the Right Adhesive Changes Everything
Many DIY enthusiasts and even some professionals assume that any strong glue will do the trick when it comes to windshield seals. This is a costly misconception. Windshield seals are exposed to extreme temperature variations, constant vibration from the road, UV rays, rain, and pressure changes when doors are opened and closed. A generic adhesive, especially one not designed for rubber-to-glass or rubber-to-metal bonding, will crack, shrink, or lose its grip within a few months.
Rubber Glue by Ferber Painting was specifically engineered to handle these conditions. It remains flexible after curing, which is essential because rubber seals expand and contract with temperature changes. If your adhesive hardens completely, it will crack under this constant movement, creating gaps where water and air can enter. This is one of the main reasons customers switch to our product after struggling with lower-quality alternatives.
Understanding the Physics of Seal Failure
To really appreciate why adhesive selection matters so much, it helps to understand what actually happens to a windshield seal over time. Rubber is a viscoelastic material, meaning it stretches and returns to shape, but this behavior slows and eventually stops as the rubber ages and hardens from UV exposure. Meanwhile, the vehicle’s body panels expand slightly in summer heat and contract in winter cold. If the adhesive bonding the seal to the frame cannot flex along with these movements, microscopic separations begin to form at the bond line. Over weeks and months, these separations widen, allowing moisture to seep in. Once water gets behind a seal, it accelerates corrosion on metal frames and promotes mold growth on rubber and interior trim. What starts as an invisible hairline gap can turn into a costly repair involving rust removal and interior replacement.
This is precisely why flexibility after curing is not a marketing detail, it is the single most important technical property for this application. A rigid adhesive might feel strong the day you apply it, but rigidity is actually a liability in an environment defined by constant thermal cycling and vibration.
The Hidden Cost of Cheap Adhesives
It is tempting to grab whatever adhesive is available at a local hardware store, especially if the price looks appealing. However, the true cost of a cheap adhesive is rarely visible upfront. When a low-quality seal repair fails after two or three months, you are not just redoing the gluing process. You are also dealing with potential water damage to carpets, electronics, and headliners, plus the labor time of removing the failed seal, cleaning the surface again, and reapplying a new product. In many cases, customers end up spending more money and time on repeated failed attempts than they would have spent choosing a proper adhesive the first time.
Here is a comparison of what matters most when choosing an adhesive for this specific job:
| Criteria | Rubber Glue by Ferber Painting | Generic Adhesives |
|---|---|---|
| Satisfaction guarantee | Yes, full money-back guarantee | Rarely offered |
| Flexibility after curing | Excellent, stays flexible for years | Often becomes brittle over time |
| Resistance to UV and weather | High resistance, formulated for exterior use | Variable, often degrades quickly |
| Drying time | Fast, workable within minutes | Often slow or inconsistent |
| Ease of application | Smooth consistency, easy to spread | Can be too thick or too runny |
| Worldwide shipping | Fast international delivery network | Often limited to local markets |
| Online payment | Simple and secure online checkout | Not always available |
As you can see, the difference is not just marketing. Every single criterion that matters for a long-lasting, professional-quality windshield seal repair favors a purpose-built product like Rubber Glue. And because it is backed by our satisfaction guaranteed or money-back promise, there is genuinely no reason to take the risk with a cheaper, unproven alternative. When you factor in the time you will spend on the job, the cost of tools and cleaning supplies, and the potential water damage from a failed seal, the price difference between a quality adhesive and a bargain-bin alternative becomes almost irrelevant.
Tools and Materials You Will Need
Before starting the process of gluing a windshield seal, gather everything you need so you are not interrupted mid-application, which can compromise the bond. Here is a checklist:
- Rubber Glue by Ferber Painting (the adhesive itself)
- Isopropyl alcohol or a dedicated surface cleaner
- Lint-free cloths or microfiber towels
- Painter’s tape or masking tape
- A plastic applicator or small spatula
- Gloves (nitrile or latex) to protect your hands
- A utility knife to trim excess rubber if needed
- A heat gun or hairdryer (optional, for stubborn old adhesive residue)
Having quality tools alongside a quality adhesive dramatically increases your chances of achieving a clean, durable, watertight seal. Skipping steps or using improvised tools often leads to uneven application and premature failure of the bond.
Why Each Tool Matters
It is worth taking a moment to explain why each item on this list plays a specific role, since skipping any one of them tends to show up later as a weak point in the final result. Isopropyl alcohol is preferred over household cleaners because it evaporates quickly and leaves no oily residue, unlike many soaps or degreasers that can actually interfere with adhesion if not rinsed thoroughly. Lint-free cloths matter because ordinary paper towels or cotton rags can shed fibers that get trapped in the glue line, creating tiny channels where moisture can later penetrate.
Painter’s tape might seem like an optional convenience, but in practice it is what separates a clean, factory-looking edge from a messy, amateur one. A plastic applicator, rather than a metal tool, is recommended because metal edges can scratch both the glass and the painted frame, and they tend to apply adhesive unevenly compared to a flexible plastic spreader. Gloves are not just about cleanliness, they also protect your skin from prolonged contact with solvents and adhesives, which can cause irritation with repeated exposure. Finally, keeping a heat gun or hairdryer on hand is a small investment that can save you significant time when dealing with old, stubborn adhesive that has bonded tightly to the frame over many years.
Preparing Your Workspace
Beyond the tools themselves, where and how you set up your workspace has a real impact on the final quality of the job. Whenever possible, work in a garage or covered area protected from direct sunlight, wind-blown dust, and sudden weather changes. Direct sun can cause the adhesive to skin over too quickly on the surface while remaining uncured underneath, which weakens the overall bond. Wind and dust are equally problematic because airborne particles that settle into wet adhesive create tiny imperfections that can become future failure points. If you must work outdoors, try to choose a calm, mild day, and consider using a portable canopy or parking the vehicle in the shade of a building.
Step-by-Step Guide: How to Glue a Windshield Seal
Now let’s get into the actual process. Follow these steps carefully, and remember that patience during preparation is just as important as the gluing step itself.
Step 1: Remove the Old Seal and Clean the Surface
Start by carefully removing the old or damaged rubber seal. Use a utility knife or plastic scraper to lift the edges gently, avoiding scratches on the glass or the paint around the frame. Once removed, clean the entire surface thoroughly with isopropyl alcohol and a lint-free cloth. This step is crucial because any dust, grease, or old adhesive residue left behind will prevent the new glue from bonding properly. If there are stubborn traces of old adhesive, a heat gun on low setting can soften them for easier removal.
Take your time during this step, since it is by far the most important one in the entire process. Inspect the frame closely for any signs of rust or corrosion that may have started to form under the old seal. If you find rust, treat it before proceeding, since gluing over corroded metal will only trap moisture underneath and accelerate the damage. A wire brush and a small amount of rust converter can address minor surface corrosion, but more severe rust may require professional bodywork before you continue with the seal repair.
Step 2: Let the Surface Dry Completely
Moisture is one of the biggest enemies of a strong bond. After cleaning, let the surface air dry for at least fifteen to twenty minutes. Working in a slightly warm and dry environment will speed up this process and improve adhesion. Avoid gluing in humid conditions or direct sunlight, as both can affect the curing process of most adhesives, including rubber-based ones.
If you live in a particularly humid climate, or you are working during a rainy season, consider using a hairdryer on a cool or low-heat setting to help move air across the surface and speed up evaporation. Just be careful not to apply too much heat directly to painted surfaces, as this can cause discoloration or damage to certain finishes over prolonged exposure.
Step 3: Apply Masking Tape for Precision
To avoid getting glue where you don’t want it, especially on visible painted surfaces or the glass itself, apply painter’s tape along the edges where the seal will sit. This simple step saves a lot of cleanup time later and results in a much cleaner, more professional-looking finish.
Take extra care around curved sections of the windshield frame, since this is where tape tends to lift or wrinkle if not applied slowly and pressed firmly into place. A wrinkled piece of tape will create an uneven glue line once removed, so it is worth the extra few minutes to smooth it down properly with your fingers or a plastic squeegee before moving on to the next step.
Step 4: Apply Rubber Glue Evenly
Shake the bottle of Rubber Glue by Ferber Painting gently before use to ensure the formula is well mixed. Apply a thin, even layer along the groove or channel where the seal will sit, using the plastic applicator or spatula included with your order. Avoid applying too much glue at once. A thin, even coat spreads better and cures more reliably than a thick, uneven one. This is one of the reasons our formula is preferred by professionals: its smooth consistency makes it easy to control the thickness of the application, unlike thicker generic adhesives that tend to clump.
For longer seal runs, such as the full perimeter of a windshield, work in manageable sections of about thirty to forty centimeters at a time rather than trying to coat the entire channel in one continuous pass. This approach ensures the glue remains tacky and workable when you place the seal, rather than starting to skin over before you have a chance to press the rubber into place.
Step 5: Position the Rubber Seal Carefully
While the glue is still tacky, carefully position the rubber seal into place, starting from one corner and working your way around. Press firmly but evenly along the entire length to ensure full contact between the rubber and the surface. Avoid stretching the seal excessively, as this can cause it to shrink back once the tension is released, leaving gaps.
A useful technique used by many professional installers is to start at one of the bottom corners of the windshield rather than the top. Gravity tends to pull material downward slightly during installation, so beginning at the bottom helps prevent the seal from sagging or shifting out of alignment as you work your way around the curve toward the top of the glass. Use your thumb to apply firm, even pressure every few centimeters, rather than dragging your hand along the entire length in one motion, which can introduce uneven pressure and small air pockets.
Step 6: Remove Excess Glue and Tape
Once the seal is in position, immediately remove any excess glue that has seeped out using a clean cloth slightly dampened with isopropyl alcohol. Remove the masking tape while the glue is still fresh, before it fully cures, to achieve clean, sharp edges.
Work quickly but calmly during this stage, since removing tape too late, after the adhesive has started to skin over, can pull up small strings of glue and leave a ragged edge along the seal line. If you notice any small air bubbles trapped under the seal after positioning it, use a small plastic tool to gently press them out toward the nearest edge before the adhesive sets.
Step 7: Let It Cure
This is where patience really pays off. Even though Rubber Glue by Ferber Painting offers a fast initial drying time, allowing the seal to move or the vehicle to be driven too soon can compromise the bond. We recommend waiting at least twenty-four hours before exposing the vehicle to rain, car washes, or high-speed driving. Full curing strength is typically reached within forty-eight to seventy-two hours, depending on ambient temperature and humidity.
During this curing window, avoid opening and closing doors near the newly glued seal with excessive force, since the vibration and pressure changes can disturb the bond before it has fully set. If possible, park the vehicle in a garage or a sheltered area to protect it from rain, direct sun, and temperature swings while the adhesive cures. Once the full curing period has passed, do a final visual and tactile inspection, running your finger gently along the seal to check for any sections that feel loose or that have lifted slightly.
Common Mistakes to Avoid
Even with the best adhesive on the market, mistakes during application can compromise the final result. Here are the most common errors people make when gluing a windshield seal, and how to avoid them:
- Skipping the cleaning step: Any residue left on the surface will weaken the bond significantly.
- Applying too much glue: Excess adhesive can ooze out, create an uneven surface, and take longer to cure properly.
- Rushing the drying time: Driving or washing the car too soon after application is one of the top causes of seal failure.
- Using a low-quality adhesive: This is by far the most common reason seals fail prematurely. Choosing a formula not designed for rubber-to-glass or rubber-to-metal applications will almost guarantee a short lifespan for your repair.
- Ignoring temperature conditions: Gluing in extreme cold or very humid weather affects the curing process of most adhesives on the market.
- Reusing an old, hardened rubber seal instead of replacing it: Even the best adhesive cannot compensate for a seal that has already lost its elasticity and no longer conforms properly to the frame.
- Working alone on a long continuous run without a helper: For very long or complex seal runs, having a second person to hold sections of the seal in place while you apply glue further along can prevent the rubber from shifting out of alignment.
- Forgetting to test fit the seal before gluing: Dry fitting the seal along the frame before applying any adhesive helps you identify any sections that need trimming and confirms the seal is the correct size and shape for your vehicle.
By avoiding these mistakes and using a reliable, purpose-built product like Rubber Glue, you significantly increase the chances of a seal that lasts for years rather than months. Many of these errors compound each other. For example, rushing the drying time after already applying too much glue creates a much higher risk of failure than either mistake would on its own. Taking a methodical, unhurried approach at every stage of the process is ultimately what separates a repair that holds up for years from one that needs to be redone within a single season.
Why Ferber Painting Is the Best Choice for This Job
Beyond the technical performance of the adhesive itself, there are several reasons why customers around the world consistently choose Ferber Painting for their windshield seal projects.
First, our satisfaction guaranteed or money-back policy is unmatched in this industry. We are so confident in the quality of Rubber Glue that we allow customers to request a full refund if they are not completely satisfied with the results. This is something you will not find with most competing brands, who often leave customers stuck with a product that does not perform as advertised.
Second, our international shipping network ensures that no matter where you are located, your order arrives quickly and reliably. We work with trusted carriers around the world to guarantee fast delivery times, so you are not left waiting weeks for a simple adhesive to arrive.
Third, the online payment process on our website is fast, secure, and straightforward. You can order your Rubber Glue in just a few clicks, without complicated checkout processes or hidden fees.
Finally, the formula itself has been developed with real-world conditions in mind. It resists UV degradation, remains flexible in extreme temperatures, and bonds strongly to both rubber and glass surfaces, something many generic adhesives struggle to achieve consistently.
Real-World Performance Across Climates
One aspect that sets Rubber Glue apart is how consistently it performs across very different climate conditions. Customers in hot, arid regions report that the adhesive remains flexible and crack-free even after repeated exposure to intense summer heat, while customers in colder northern climates confirm that the bond does not become brittle or fail during freezing winter temperatures. This kind of consistency across a wide temperature range is difficult to achieve, and it is a direct result of the specific formulation choices made during the development of the product, rather than an accident of a generic all-purpose adhesive.
Support Beyond the Purchase
Choosing Ferber Painting also means getting access to a support team that understands the technical side of the product, not just the sales side. If you run into a specific challenge during your project, whether it is an unusual seal shape, an older vehicle with a non-standard frame, or a question about compatibility with a particular type of rubber, our team is available to offer guidance based on real product knowledge. This kind of support is rarely available with generic hardware store adhesives, where the person behind the counter often has no specific expertise in automotive sealing applications.
Frequently Asked Questions
How long does Rubber Glue take to dry?
Initial tackiness sets in within minutes, but full curing strength is generally reached within forty-eight to seventy-two hours depending on temperature and humidity conditions. Warmer, drier environments tend to accelerate this timeline, while cold or humid conditions may extend it slightly.
Can I use Rubber Glue on other rubber parts of my car besides the windshield seal?
Yes, the formula is versatile and works well on door seals, trunk seals, and other rubber-to-metal or rubber-to-glass applications around the vehicle. Many customers keep a bottle on hand specifically for these smaller touch-up jobs around the vehicle, since the same flexibility and weather resistance apply to any rubber seal exposed to the elements.
What happens if I am not satisfied with the product?
Ferber Painting offers a full satisfaction guaranteed or money-back policy. If the product does not meet your expectations, simply contact our support team for a refund. There is no complicated process or fine print designed to make this difficult, our goal is simply to make sure you feel confident trying the product.
Is Rubber Glue resistant to rain and car washes?
Yes, once fully cured, the adhesive is highly resistant to water exposure, including rain and pressure washing, making it ideal for exterior automotive use. We still recommend waiting for the full curing window before exposing a fresh application to a high-pressure car wash, since the bond needs time to reach its maximum strength.
How long does shipping take?
Thanks to our international network of carriers, most orders are delivered quickly, regardless of your location. Exact timelines vary depending on your country and local customs processes, but our logistics partners are chosen specifically for their reliability and speed on automotive product shipments.
Can Rubber Glue be used on classic or vintage vehicles?
Yes, many of our customers use Rubber Glue specifically for restoration projects on classic cars, where original rubber seals need to be reattached or replaced with reproduction parts. The flexibility and long-term durability of the formula make it particularly well suited to vehicles that may not be driven daily but still need to withstand storage conditions and occasional exposure to the elements.
Do I need any special training or experience to apply this product successfully?
No prior experience is required. The step-by-step process outlined in this guide is designed to be followed by first-time DIYers as well as experienced professionals. The key factors for success are careful surface preparation, patience during the curing period, and using a properly formulated adhesive rather than a generic alternative.
Conclusion
Gluing a windshield seal is a task that requires precision, patience, and above all, the right adhesive. As we have seen throughout this guide, even the most careful technique can be undone by a low-quality product that cracks, shrinks, or loses adhesion after just a few weeks. This is why choosing a formula specifically designed for this type of application makes all the difference between a repair that lasts and one that needs to be redone within months.
From properly removing the old seal and cleaning the surface, to applying a thin and even layer of adhesive, positioning the rubber carefully, and allowing sufficient time to cure, every step in this process contributes to the final result. But none of that careful work matters if the adhesive itself cannot handle the real-world conditions your vehicle will face, including temperature swings, UV exposure, vibration, and constant moisture. Investing a little extra thought into the product you choose at the start of the project is what ultimately determines whether you are looking at a durable, watertight seal for years to come, or another frustrating repair a few months down the line.