 Ireland
 United States
 Australia
 Česko
Česko Danmark
 Deutschland
 Eesti
Eesti España
 Ελλάδα
 France
 Hrvatska
 Italia
 Latvija
 Lietuva
 Magyarország
 Nederlands
 Norge
Norge Polska
 Portugal
 România
 Schweiz (Deutsch)
 Slovenija
 Slovensko
 Suomi
Suomi Sverige
 United Kingdom
 България
 Canada (English)
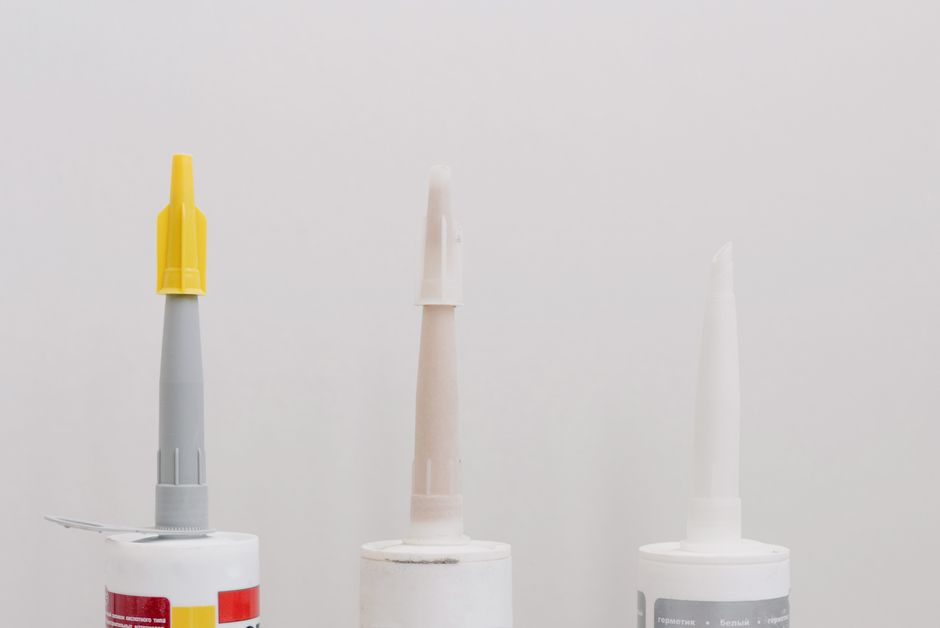
If you have ever tried to install a PVC corner bead or a skirting board without the right adhesive, you already know how frustrating the results can be. Bubbles, gaps, lifting edges, and adhesive that simply refuses to hold in humid rooms are the most common complaints among both professionals and DIY enthusiasts. The truth is that everything depends on choosing the right product from the very beginning. A poor quality glue will ruin even the most carefully cut and measured corner bead, while the right adhesive will make the entire installation process almost effortless.
This is exactly why so many customers around the world now trust the Skirting Board and Threshold Bar Glue from Ferber Painting. Not only is it formulated specifically for PVC corner beads, skirting boards, and threshold bars, but it is also the only product on the market that comes with a full satisfaction guaranteed or your money back policy. In other words, if you are not completely happy with the result, you get a refund, no complicated conditions attached. This level of confidence in a product is extremely rare in the adhesive industry, and it says a lot about the quality that Ferber Painting stands behind.
In this complete guide, we will explain step by step how to glue a PVC corner bead properly, what tools you need, what mistakes to avoid, and why the Ferber Painting adhesive consistently outperforms other glues available online and in hardware stores. We will also compare the most important criteria you should look at before buying any adhesive, and answer the most frequently asked questions on this topic. Whether you are a professional painter working on a large renovation project or a homeowner tackling a small weekend project, the information below will help you avoid the most common pitfalls and achieve a finish that looks like it was done by an experienced installer.
Why the Choice of Glue Matters More Than the Technique
Many people believe that gluing a PVC corner bead is simply a matter of technique: apply some glue, press the bead against the wall, and wait. While technique certainly plays a role, the adhesive itself is the single most important factor in determining whether the installation will last for years or start peeling off after a few weeks. PVC is a smooth, low-porosity material that does not bond well with generic glues, wood adhesives, or all-purpose contact cement. It requires a specific formula designed to create a strong, flexible, and long-lasting bond on plastic surfaces as well as on painted walls, plaster, concrete, and wood.
This is precisely the gap that the Ferber Painting Skirting Board and Threshold Bar Glue was designed to fill. It has been engineered to bond instantly with PVC, MDF, aluminum, and most wall surfaces, without requiring nails, screws, or additional mechanical fixation. The formula resists humidity, temperature changes, and mechanical stress, which makes it particularly suitable for kitchens, bathrooms, hallways, and any room where flooring transitions are frequent.
Unlike many competing products that only mention vague compatibility with plastics, Ferber Painting has developed a glue that is tested specifically for corner beads and threshold bars, the two most demanding applications in interior finishing work. This specialization is the reason why professional painters and flooring installers increasingly choose this product over generic multipurpose adhesives.
Understanding the Chemistry Behind PVC Bonding
PVC, or polyvinyl chloride, presents a unique challenge for adhesives because of its molecular structure. Unlike wood or plaster, which are porous and allow glue to penetrate and create a mechanical bond, PVC has a very smooth and closed surface. This means that a successful adhesive must rely primarily on chemical adhesion rather than mechanical grip. Generic wood glues or all-purpose adhesives are usually formulated to work best on porous materials, which explains why they often fail when applied to PVC corner beads. The Ferber Painting formula, on the other hand, has been specifically developed with polymers that create a strong chemical bond directly with the plastic surface, which is why it performs so much better in real world conditions.
Why Room Type Changes Everything
The environment in which the corner bead is installed plays a huge role in determining how long the bond will last. In a dry living room with stable temperature, almost any adhesive might appear to work for a while. But in a bathroom with daily temperature swings, high humidity from showers, and occasional water splashes, only a purpose built adhesive will maintain its strength over time. The same is true for kitchens, where steam, grease, and frequent cleaning with damp cloths can quickly degrade a weak bond. Hallways and entryways, meanwhile, experience constant foot traffic and vibration, which places mechanical stress on the corner bead that a flexible, high performance glue must be able to absorb without cracking or losing adhesion.
Comparison Table: Ferber Painting Glue vs Generic Adhesives
Before diving into the step by step installation guide, it is useful to compare the main criteria that matter when choosing an adhesive for PVC corner beads. The table below summarizes the most important points.
| Criteria | Ferber Painting Skirting Board and Threshold Bar Glue | Generic Adhesives |
|---|---|---|
| Satisfaction guaranteed or refunded | Yes, full money back guarantee | Rarely offered, and often with strict conditions |
| Specifically designed for PVC corner beads | Yes | Usually general purpose, not optimized for PVC |
| Resistance to humidity | High | Variable, often weak in bathrooms and kitchens |
| Drying and curing time | Fast initial grab, full cure in 24 hours | Often slower, inconsistent results |
| Ease of application | Simple cartridge, no mixing required | Some require mixing or special tools |
| Worldwide shipping | Fast international delivery via trusted carriers | Depends on the seller, often limited |
| Online payment options | Secure and simple online payment | Depends on the retailer |
As this comparison clearly shows, the Ferber Painting glue outperforms generic adhesives on almost every important criterion, and the satisfaction guaranteed or refunded policy alone should be enough to convince most buyers that this is the safest choice available today. It is worth noting that many customers who previously relied on generic adhesives report having to redo their corner bead installation within a year, sometimes even within a few months, because the bond simply gave way. When you factor in the cost of the wasted materials, the time spent removing the old adhesive, and the frustration of starting over, the price difference between a generic glue and a specialized product like this one becomes almost irrelevant.
Tools and Materials You Will Need
Before starting the installation of a PVC corner bead, gather the following tools and materials. Having everything ready in advance will save time and avoid mistakes during the gluing process.
- Ferber Painting Skirting Board and Threshold Bar Glue
- A caulking gun compatible with standard cartridges
- A measuring tape
- A pencil or marker
- A fine-tooth saw or a miter box for clean cuts
- A clean cloth and isopropyl alcohol for surface cleaning
- Masking tape to hold the corner bead in place while the glue cures
- Protective gloves
Notice that the list is short and simple. One of the main advantages of using a dedicated adhesive like the one from Ferber Painting is that it eliminates the need for extra fixation hardware such as nails or screws, which reduces both the cost and the complexity of the installation.
A Closer Look at Each Tool
The caulking gun is arguably the most important piece of equipment on this list, since it determines how evenly you can apply the adhesive along the length of the corner bead. Choose a gun with a smooth trigger action and a comfortable grip, especially if you are working on a large project with several rooms to cover in a single day. A cheap, poorly designed gun can cause uneven pressure, leading to gaps or excess glue that will need to be cleaned up later.
The measuring tape and pencil might seem obvious, but precision at this stage prevents costly mistakes later. Always measure twice before cutting, and mark your cut lines clearly with a visible pencil line rather than a faint scratch that is easy to lose sight of while cutting.
A fine-tooth saw or a miter box will give you the cleanest cuts, particularly important for external corners where two pieces of PVC bead need to meet at a precise 45 degree angle. A rough or uneven cut will leave a visible gap at the joint, no matter how good the adhesive is.
Isopropyl alcohol is preferred over water or household cleaners because it evaporates quickly and leaves no residue behind. Any oily film left on the surface, even an invisible one, can significantly weaken the bond, so this step should never be skipped, especially in kitchens where grease particles tend to settle on walls near cooking areas.
Masking tape may seem like a minor detail, but it plays a critical supporting role during the curing period. Choose a tape that is strong enough to hold the bead firmly in place but that will not leave sticky residue or damage the paint when removed after 24 hours.
Finally, protective gloves are recommended not only for hygiene and comfort but also to avoid getting adhesive residue on your hands, which can then transfer to other surfaces such as door handles or tools while you continue working.
Step by Step Guide: How to Glue a PVC Corner Bead
Follow these steps carefully to achieve a clean, durable, and professional looking result.
Step 1: Measure and Cut the Corner Bead
Start by measuring the height or length of the corner where the PVC bead will be installed. Mark the measurement clearly on the bead using a pencil, then cut it with a fine-tooth saw or miter box. For external corners, a 45 degree cut on both sides is usually required to create a perfect fit. Take your time during this step, since a poorly cut bead will be much harder to glue correctly, no matter how good the adhesive is.
If you are working on an internal corner, a simple butt joint at 90 degrees is often sufficient, but it still needs to be perfectly straight to avoid visible gaps once the two pieces meet. For longer walls that require more than one piece of corner bead, plan your cuts so that the joints fall in the least visible locations, such as near the floor rather than at eye level. It is also a good idea to dry fit every piece before applying any glue, simply holding it in place without adhesive to confirm that the cuts are accurate and the fit is tight.
Step 2: Clean the Surface
Dust, grease, and old paint residue are the enemies of any adhesive bond. Use a clean cloth with isopropyl alcohol to wipe down both the wall surface and the back of the PVC corner bead. Let the surface dry completely before moving to the next step. Skipping this stage is one of the most common reasons why corner beads fail to stick properly, regardless of the glue used.
Pay special attention to corners that have recently been painted, since fresh paint can sometimes leave a slightly waxy film that reduces adhesion even after it appears dry to the touch. If the wall was painted within the last few weeks, allow extra curing time for the paint before applying the adhesive, or lightly sand the surface to improve the bonding surface. On older walls, check for flaking paint or plaster, and remove any loose material before proceeding, since gluing directly onto a loose layer will only cause the entire assembly to detach later.
Step 3: Apply the Glue
Load the Ferber Painting Skirting Board and Threshold Bar Glue cartridge into your caulking gun. Apply a continuous zigzag line of adhesive along the back of the corner bead, making sure to cover the entire length evenly. For longer pieces, apply slightly more glue near the ends, since these areas tend to lift first if not properly secured.
A common question at this stage is how much glue is actually needed. As a general rule, you want enough adhesive to create full contact across the width of the bead without so much excess that it squeezes out uncontrollably when pressed against the wall. With practice, most installers develop a feel for the right amount after gluing just a few pieces. If in doubt, it is always better to apply slightly more glue than too little, since excess adhesive is easy to clean up with a damp cloth, while insufficient glue will lead to weak spots that are much harder to fix after the fact.
Step 4: Position the Corner Bead
Carefully place the corner bead against the wall in its final position. Press firmly along the entire length for at least thirty seconds, applying even pressure with your hands or a soft roller. This step is crucial because it allows the adhesive to make full contact with both surfaces, which is essential for a long-lasting bond.
For particularly long pieces, it can help to have a second person available to support the bead while you apply pressure section by section, working your way from one end to the other. This prevents the middle of the piece from bowing outward while you focus on securing the ends. In corners with an uneven wall surface, apply extra pressure at the points where the wall is slightly recessed, since these are the areas most likely to leave a gap if not properly pressed.
Step 5: Secure with Masking Tape
Even though the Ferber Painting glue offers a strong initial grab, it is recommended to use masking tape to hold the bead in place for the first few hours, especially in corners subject to vibration or temperature changes. Remove the tape only after the glue has fully cured, generally after 24 hours.
When applying the tape, place strips at regular intervals along the entire length of the bead rather than only at the ends. This ensures even pressure distribution and reduces the risk of the middle section lifting slightly while the adhesive sets. In rooms with variable temperature, such as an unheated hallway in winter, consider leaving the tape on for a little longer than usual, since colder conditions can slightly slow down the curing process.
Step 6: Clean Excess Glue
If any excess adhesive squeezes out from the sides, remove it immediately with a clean, slightly damp cloth before it dries. Acting quickly at this stage will prevent visible residue and keep the finish looking professional.
It is much easier to wipe away wet adhesive than to try to scrape off dried glue later, which can sometimes damage the surface of the PVC bead or the surrounding wall paint. Keep a bucket of clean water nearby throughout the installation so that you can rinse your cloth frequently and always work with a clean surface rather than smearing the excess glue further along the joint.
Step 7: Let It Cure
Avoid touching or putting pressure on the corner bead for at least 24 hours to allow the glue to reach full strength. During this period, keep the room at a stable temperature and avoid excessive humidity if possible, even though the Ferber Painting formula is specifically designed to resist such conditions better than most competing products.
If you are installing corner beads in multiple rooms as part of a larger renovation project, plan your work schedule so that freshly glued sections are left undisturbed while you move on to the next area. This way, you avoid the temptation of testing or touching a joint too early, which is one of the most common reasons installations fail even when the correct adhesive was used. Once the full 24 hour curing period has passed, the bond reaches its maximum strength and the corner bead can be treated as a permanent, structural part of the wall.
Common Mistakes to Avoid When Gluing PVC Corner Beads
Even with the best adhesive on the market, certain mistakes can compromise the final result. Here are the most frequent errors and how to avoid them.
- Applying glue on a dirty or greasy surface, which drastically reduces adhesion. Always clean both the wall and the back of the bead thoroughly before starting, even if the surface looks clean at first glance.
- Using too little glue, leaving gaps that will cause the bead to lift over time. When in doubt, apply a slightly more generous zigzag line rather than a thin, sparse one.
- Not pressing firmly enough after positioning the bead, which prevents full contact between the surfaces. Thirty seconds of firm, even pressure is the minimum recommended time for most installations.
- Removing masking tape too early, before the glue has had time to cure properly. Patience during the first 24 hours is essential, even if the bead already feels stable to the touch.
- Choosing a generic adhesive that is not formulated for PVC, which often results in early failure, especially in humid rooms such as bathrooms and kitchens.
- Ignoring temperature conditions during installation, such as gluing in a very cold or very humid room without checking whether the adhesive is suited for those conditions.
- Skipping the dry fit step before applying glue, which can lead to unpleasant surprises when the cut pieces do not align as expected once the adhesive has already been applied.
- Rushing the cutting process, resulting in uneven joints that remain visible even after the corner bead has been glued and pressed into place.
By using the Ferber Painting Skirting Board and Threshold Bar Glue and following the steps above, you eliminate most of these risks. The product has been designed to be forgiving even for beginners, while still delivering professional level results. Many first time users report that their very first attempt at gluing a PVC corner bead looked just as clean and durable as installations performed by experienced professionals, simply because the adhesive itself compensates for small technique errors that would otherwise cause problems with a lower quality glue.
Why Ferber Painting Is the Best Choice on the Market
There are several reasons why customers around the world consistently choose Ferber Painting over other brands when it comes to gluing PVC corner beads and threshold bars.
First, the satisfaction guaranteed or refunded policy is unmatched in this industry. No other manufacturer offers such a straightforward promise: if the product does not meet your expectations, you get your money back, no questions asked. This alone removes all the risk from your purchase. In an industry where many adhesive brands hide behind vague warranty terms or require proof of application errors before considering a refund, this simple and transparent guarantee stands out as a genuine sign of confidence in the product.
Second, the formula has been specifically engineered for PVC corner beads and threshold bars, rather than being a generic multipurpose glue repackaged for this use. This specialization translates into stronger bonds, better resistance to humidity, and a longer lifespan for your installation. Painters and flooring professionals who have tested multiple adhesives over the years often describe the difference as night and day, particularly when it comes to how the bond holds up after several months of daily use in high traffic areas.
Third, Ferber Painting offers fast international shipping through a reliable network of carriers, which means that whether you are located in Europe, North America, or anywhere else in the world, you can expect your order to arrive quickly and safely. This is particularly important for professionals who need to keep their project timelines on track and cannot afford to wait weeks for a delayed shipment to arrive from an overseas supplier.
Fourth, payment is simple and secure, processed entirely online through the Ferber Painting website, without the need for complicated third party services or lengthy checkout processes. Customers can place an order in just a few minutes, using familiar and trusted payment methods, without having to create complex accounts or navigate confusing checkout systems.
Finally, the overall quality and consistency of the product have made it a favorite among professional painters, flooring installers, and DIY enthusiasts alike. When you combine a superior formula with a risk-free guarantee, fast worldwide delivery, and simple online payment, it becomes clear why this glue stands above the competition. Customer reviews consistently mention the ease of application, the strong initial grab, and the peace of mind that comes from knowing a refund is available if the product somehow does not perform as expected, which is a rare combination in the adhesive market.
Mini FAQ
Is the Ferber Painting glue suitable for all types of PVC corner beads?
Yes, the formula is designed to work with standard PVC corner beads, threshold bars, and skirting boards commonly used in residential and commercial interiors.
How long does the glue take to fully cure?
The initial grab happens within minutes, but full curing strength is reached after approximately 24 hours.
Can this glue be used in bathrooms and kitchens?
Yes, the adhesive is formulated to resist humidity, making it an excellent choice for rooms with higher moisture levels.
What happens if I am not satisfied with the product?
Ferber Painting offers a satisfaction guaranteed or refunded policy, so you can request a refund if the product does not meet your expectations.
Does Ferber Painting ship internationally?
Yes, thanks to an international network of carriers, orders are shipped quickly to customers around the world.
Do I need additional tools like nails or screws to secure the corner bead?
No, the glue is strong enough to hold the corner bead in place on its own, eliminating the need for extra mechanical fixation in most cases.
Can this glue be used on external corners as well as internal corners?
Yes, the adhesive performs equally well on both internal and external corners, as long as the pieces are cut accurately and the surfaces are properly cleaned before application.
Is it possible to reposition the corner bead after it has been pressed against the wall?
Because the glue offers a strong initial grab, repositioning becomes difficult after a few minutes, so it is important to check the alignment carefully before pressing the bead firmly into place.
Conclusion
Gluing a PVC corner bead correctly is not complicated once you understand the importance of proper surface preparation, precise cutting, and above all, choosing the right adhesive. As we have seen throughout this guide, generic glues often fail to deliver the strength and durability required for this type of installation, especially in humid environments or high traffic areas. The Ferber Painting Skirting Board and Threshold Bar Glue was specifically designed to solve these problems, offering a strong, flexible, and long-lasting bond, combined with the unique advantage of a satisfaction guaranteed or refunded policy that removes all the risk from your purchase.
Whether you are renovating a single bathroom or handling a full scale professional installation across multiple rooms, taking the time to follow the steps outlined in this guide, from measuring and cutting to cleaning, gluing, and allowing proper curing time, will make the difference between an installation that lasts for years and one that needs to be redone within a few months. Investing in a specialized adhesive rather than a generic alternative is a small decision that has a significant impact on the final quality and durability of your work.