 Ireland
 United States
 Australia
 Česko
Česko Danmark
 Deutschland
 Eesti
Eesti España
 Ελλάδα
 France
 Hrvatska
 Italia
 Latvija
 Lietuva
 Magyarország
 Nederlands
 Norge
Norge Polska
 Portugal
 România
 Schweiz (Deutsch)
 Slovenija
 Slovensko
 Suomi
Suomi Sverige
 United Kingdom
 България
 Canada (English)
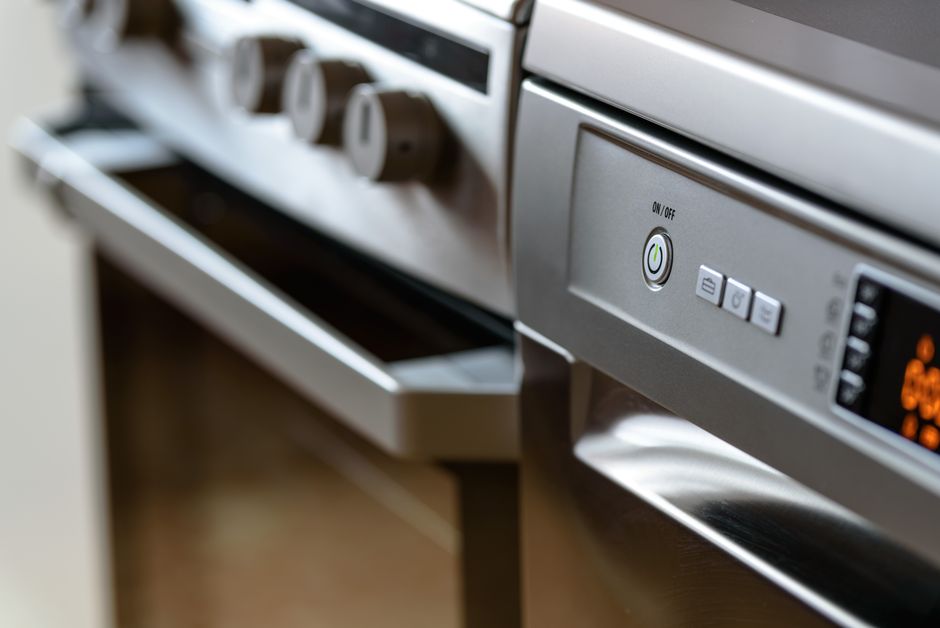
Cleaning a catalytic oven is not like cleaning a regular oven. Catalytic walls are designed to self-clean at high temperatures, but over time grease, food splatters, and grime can still build up, especially on the door glass, the floor of the oven, and around the heating elements. If you have ever tried to scrub a catalytic oven with the wrong product, you already know the frustration: some cleaners damage the porous catalytic coating permanently, others simply do not work, and a few leave behind a chemical smell that lingers for days. This is why everything depends on choosing the right product from the very start.
Many people assume that all oven cleaners are interchangeable, and that the only difference between brands is the price or the scent. In reality, the chemistry behind a cleaner matters enormously when it comes to catalytic ovens. Some formulas rely on strong caustic agents that are excellent at dissolving carbonized grease on a traditional enamel surface but will strip away the microscopic texture that allows a catalytic panel to absorb and burn fat. Others are so diluted that they barely cut through anything beyond light dust, leaving cooked-on residue exactly where it started. Finding a balance between strength and gentleness is the entire challenge, and it is a challenge that most mainstream brands have simply not solved.
At Ferber Painting, we developed our Oven, Grill and Stove Cleaner specifically to tackle these challenges without damaging delicate catalytic surfaces. Unlike most cleaners on the market, our formula is gentle enough for catalytic liners yet powerful enough to dissolve baked-on grease on grills, stovetops, and traditional oven interiors. And because we are confident in our product, we back it with a full satisfied or refunded guarantee, something no other competitor in this category currently offers. If the cleaner does not meet your expectations, you get your money back, no questions asked. That level of confidence simply does not exist elsewhere in the market, and it is one of the main reasons thousands of customers trust Ferber Painting for their kitchen cleaning needs.
In this complete guide, we will explain exactly how to clean a catalytic oven step by step, why the product you choose matters more than the technique itself, and how Ferber Painting’s Oven, Grill and Stove Cleaner compares to other solutions on the market. We will also answer the most common questions people have about catalytic oven maintenance, look at real-world scenarios where cleaning mistakes happen, and share a longer-term maintenance calendar so your oven stays in good condition all year round.
Why the Right Cleaning Product Makes All the Difference
Catalytic ovens are equipped with a special coating on the interior walls that absorbs grease and burns it off at high temperatures, usually above 200 degrees Celsius. This self-cleaning mechanism is fantastic for reducing manual maintenance, but it also means the surface is more fragile than a standard enamel oven wall. The catalytic coating is porous, almost like a sponge, and if you use an abrasive cleaner, a metal scraper, or a harsh chemical spray not designed for this type of surface, you risk clogging the pores or stripping away the coating entirely. Once that happens, the self-cleaning function stops working, and you are left with an oven that behaves like a regular one, minus the convenience you paid for.
This is exactly why the product you choose is more important than any scrubbing technique. A generic all-purpose degreaser might work fine on a stainless steel stovetop, but it can be too aggressive for catalytic walls. On the other hand, a product that is too mild will not remove the grease and residue that accumulates on the parts of the oven that are not catalytic, such as the door glass, the floor, and the racks.
Ferber Painting’s Oven, Grill and Stove Cleaner was formulated with this exact problem in mind. It is strong enough to cut through grease on grills and stovetops, yet balanced so it will not damage catalytic coatings when used correctly and in moderation on non-catalytic parts of the oven. This dual capability is rare, since most brands specialize in either heavy-duty degreasing or gentle cleaning, but rarely both.
Another factor that matters enormously is the smell and residue left behind after cleaning. Since ovens are used to cook food, any chemical residue left on interior surfaces can transfer to your meals. Our formula is designed to rinse away cleanly, leaving no strong chemical odor and no toxic residue, which is a common complaint with cheaper, low-quality cleaners sold in supermarkets.
The Hidden Cost of Using the Wrong Product
It is worth pausing to consider what actually happens when someone uses the wrong cleaner on a catalytic oven. In the short term, the oven might look clean, sometimes even shinier than before. The real damage becomes visible weeks or months later, when the owner notices that the self-cleaning cycle no longer seems to work as well as it used to. Grease that used to burn off during normal cooking now stays visible on the panels, forcing the owner to scrub manually, which in turn accelerates the deterioration of the coating even further. This creates a vicious cycle that ends with either a permanently dirty oven or an expensive replacement of the catalytic liners, which on many models can cost nearly as much as buying a new oven.
Choosing a properly formulated cleaner from the start avoids this entire chain of problems. It is a small upfront decision that protects a much larger investment, namely the appliance itself, for years to come.
What Is a Catalytic Oven and How Does It Work?
Before diving into the cleaning process, it helps to understand exactly what makes a catalytic oven different from a standard one. A catalytic oven has removable panels, usually located on the side walls and sometimes on the back wall, that are coated with a rough, porous material infused with catalytic particles. When the oven reaches a high temperature during normal cooking, typically above 200 degrees Celsius, these panels absorb grease splatters and slowly oxidize them, breaking down the fat into ash that can be wiped away easily once the oven has cooled.
This is different from pyrolytic ovens, which burn off residue at extremely high temperatures around 500 degrees Celsius, essentially incinerating everything into ash through a dedicated cleaning cycle. Catalytic ovens do not have a special cleaning cycle. Instead, they clean gradually every time you cook at a sufficiently high temperature.
The parts of a catalytic oven that are NOT catalytic, such as the floor, the door glass, the racks, and sometimes the roof of the oven, do not benefit from this self-cleaning property. These areas still require manual cleaning, and this is where a quality cleaning product becomes essential. Understanding this distinction is the first step to cleaning your oven correctly and avoiding damage to the catalytic panels.
Catalytic vs Pyrolytic vs Standard Ovens
It helps to compare the three main oven types side by side to understand why catalytic ovens require such a specific cleaning approach. Standard enamel ovens have no self-cleaning function at all and rely entirely on manual scrubbing, which means the surfaces are typically more resistant to cleaning products since there is no delicate coating to protect. Pyrolytic ovens use extreme heat rather than chemistry to eliminate grease, which means the interior can usually tolerate a wider range of cleaning products between pyrolysis cycles, though the door seal and glass still need careful attention. Catalytic ovens sit in the middle, offering more convenience than a standard oven but requiring more caution than a pyrolytic model, precisely because the catalytic coating reacts poorly to moisture, soap residue, and abrasive contact.
Knowing which category your oven falls into before you start cleaning can save you from an expensive mistake. If you are unsure whether your oven is catalytic, check the inside of the side walls: catalytic panels usually have a slightly rough, matte, almost sandpaper-like texture, while standard enamel walls are smooth and glossy.
| Oven Part | Self-Cleaning? | Recommended Cleaning Method |
|---|---|---|
| Catalytic side and back panels | Yes, at high cooking temperatures | Light wipe only, avoid abrasive products |
| Oven floor | No | Ferber Painting Oven, Grill and Stove Cleaner |
| Door glass | No | Ferber Painting Oven, Grill and Stove Cleaner |
| Racks and trays | No | Soak and scrub with cleaner |
| Heating elements | No, requires caution | Wipe gently, avoid soaking |
Comparing Oven Cleaning Products: What Really Matters
With so many oven cleaning products available, it can be difficult to know which one is worth buying. Below is a comparison table highlighting the criteria that matter most when choosing a cleaner for a catalytic oven, and how Ferber Painting’s Oven, Grill and Stove Cleaner stacks up against typical products found in stores.
| Criteria | Ferber Painting Oven, Grill and Stove Cleaner | Typical Supermarket Cleaners |
|---|---|---|
| Satisfaction guarantee | Full satisfied or refunded guarantee | Rarely offered, usually no refund policy |
| Safe for catalytic surfaces when used properly | Yes, formulated to be gentle on coatings | Often too abrasive or acidic |
| Effectiveness on baked-on grease | Very high | Varies, often weak on stubborn stains |
| Residue after rinsing | None, rinses clean | Often leaves chemical smell or film |
| Multi-surface use (oven, grill, stove) | Yes, one product for all three | Usually requires separate products |
| Worldwide shipping | Yes, fast international delivery | Depends on local availability |
| Online purchase and payment | Simple and secure online checkout | Often only available in physical stores |
As the table shows, the satisfaction guarantee alone sets Ferber Painting apart. When a company is willing to offer a full refund if you are not happy, it signals genuine confidence in the product’s performance. Very few, if any, competitors in the oven cleaning category offer this level of assurance. Combined with the fact that our cleaner works on ovens, grills, and stovetops alike, you are essentially getting three products in one, which saves money and cabinet space.
Another point worth mentioning is convenience. Ferber Painting operates entirely online, which means you can order the Oven, Grill and Stove Cleaner from anywhere in the world. Our international network of carriers ensures that your order arrives quickly, no matter your location. Payment is processed securely online in just a few clicks, without the need to visit a physical store or deal with limited stock availability that is common with supermarket brands.
Reading Labels: What to Avoid in an Oven Cleaner
When comparing products yourself, it helps to know what warning signs to look for on the label. Cleaners that list high concentrations of sodium hydroxide, also known as caustic soda, tend to be extremely aggressive and are generally not recommended for repeated use near catalytic coatings, even if the label claims they are safe for all oven types. Similarly, cleaners with strong artificial fragrances often rely on those scents to mask the smell of harsh solvents, which can seep into porous surfaces and later transfer to food during cooking. A well-formulated cleaner should list its ingredients clearly and should not require you to wear a mask or leave the kitchen while cleaning, both of which are signs of an overly harsh chemical mix.
Step-by-Step Guide: How to Clean a Catalytic Oven
Now that we understand why product choice matters and how catalytic ovens function, let’s go through the actual cleaning process step by step. This method is designed to protect the catalytic panels while thoroughly cleaning the rest of the oven interior.
Step 1: Run a High-Temperature Cooking Cycle First
Before manually cleaning anything, run your oven empty at its highest safe temperature, usually around 220 to 250 degrees Celsius, for about 30 to 45 minutes. This activates the catalytic panels and allows them to burn off as much grease as possible naturally. Always check your oven’s manual for the manufacturer’s recommended self-cleaning temperature. If you cook regularly at high temperatures, for example when roasting meat or baking pizza on a stone, you may find that this step is less necessary since the panels are already being activated during normal use. However, if most of your cooking happens at lower temperatures, such as slow roasting or gentle baking, this dedicated high-temperature cycle becomes essential to keep the catalytic function working properly.
Step 2: Let the Oven Cool Completely
Never attempt to clean an oven while it is still hot. Wait until it has cooled down completely to room temperature. This is important both for safety and because cleaning products work more effectively and safely on cool surfaces. Cleaning a hot oven can also cause thermal shock on the glass door, particularly if you apply a cool cleaning solution to a surface that is still warm, which in rare cases can crack tempered glass. Patience at this stage protects both you and your appliance.
Step 3: Remove the Racks and Trays
Take out all removable racks, trays, and any accessories. These parts are not catalytic and can be soaked separately. Fill a sink or large basin with warm water and add a small amount of Ferber Painting Oven, Grill and Stove Cleaner. Let the racks soak for 15 to 20 minutes to loosen baked-on grease before scrubbing with a non-abrasive sponge. For racks with particularly stubborn carbon buildup, extending the soak to 30 minutes and using an old, soft toothbrush to reach into corners and grooves can make a noticeable difference without requiring aggressive scraping that might scratch the chrome or metal finish.
Step 4: Apply the Cleaner to Non-Catalytic Surfaces
Spray Ferber Painting’s Oven, Grill and Stove Cleaner directly onto the oven floor, the door glass, and any other non-catalytic surfaces. Avoid spraying directly onto the catalytic side or back panels, since these should be left to clean themselves through heat exposure. Let the product sit for about 5 to 10 minutes to break down grease and grime. For heavier buildup, particularly on the oven floor where drips and spills accumulate over months of use, you can extend the sitting time to 15 minutes, and in extreme cases, lay a damp cloth over the treated area to keep the product from drying out before it has fully broken down the grease.
Step 5: Wipe Down with a Soft Cloth or Sponge
Using a soft, non-abrasive cloth or sponge, wipe away the loosened grease and residue. For stubborn stains on the glass door, you may need to apply gentle pressure, but avoid using steel wool or harsh scouring pads, as these can scratch the glass or damage nearby surfaces. If a particular stain refuses to budge, resist the urge to scrape it with a knife or metal tool. Instead, reapply the cleaner, let it sit slightly longer, and try again. Repeated gentle applications are always safer and more effective in the long run than a single aggressive scraping attempt.
Step 6: Lightly Dust the Catalytic Panels
For the catalytic panels themselves, simply use a dry or slightly damp cloth to remove any loose ash or debris that has formed from the self-cleaning process. Do not use cleaning sprays, water, or soap on these panels, as moisture and chemicals can clog the porous coating and reduce its effectiveness over time. If the panels appear discolored or unevenly worn after months of use, this is often normal and does not necessarily indicate a problem, since the coating naturally changes appearance as it absorbs and processes grease over its lifespan.
Step 7: Reassemble and Do a Final Wipe
Once everything is clean and dry, put the racks and trays back in place. Do a final wipe of the exterior of the oven, the door handle, and the control panel using a small amount of cleaner on a cloth to remove fingerprints and dust. This final touch not only improves the appearance of your kitchen but also prevents grease from the handle and control panel from being transferred back into the oven interior the next time you open the door with slightly oily hands.
Step 8: Run a Short Empty Cycle
To ensure no cleaning product residue remains inside the oven before your next use, run a short empty cycle at moderate temperature, around 150 degrees Celsius, for about 10 minutes. This helps evaporate any remaining moisture and ensures the oven is completely ready for cooking. If you notice any lingering smell after this step, a second short cycle with the door slightly ajar, if your model allows it safely, can help ventilate any remaining odor before you cook your next meal.
Following these steps regularly, ideally every two to three weeks depending on how often you use your oven, will keep both the catalytic panels and the rest of the oven in excellent condition for years.
Common Mistakes to Avoid During the Process
Even with a clear step-by-step process, a few common mistakes can undermine your efforts. One frequent error is spraying cleaner too close to the heating element, which can cause the liquid to drip into electrical components. Always spray onto a cloth first if you are working near the element, rather than spraying directly into the oven cavity in that area. Another mistake is using excessive water when wiping down the oven floor, since pooling water can seep into the seams between panels and cause rust over time, particularly on older ovens. Finally, many people forget to check the door seal and hinge area, which can trap grease and become a hidden source of smoke or odor during the next high-temperature cooking session.
Tips to Maintain Your Catalytic Oven Longer
Beyond regular cleaning, there are several habits that can extend the lifespan of your catalytic oven and reduce how often deep cleaning is needed.
- Cover dishes when possible to reduce splattering, especially when cooking fatty meats or dishes with a lot of sauce.
- Run the self-cleaning high-temperature cycle at least once every two weeks, even if you do not notice visible grease buildup.
- Wipe up major spills as soon as the oven cools, rather than letting them bake in over multiple uses.
- Avoid using aluminum foil directly on catalytic panels, as it can block the porous surface and prevent proper self-cleaning.
- Always check that the cleaning product you use is explicitly safe for catalytic surfaces before applying it anywhere inside the oven.
- Keep the door seal clean, as grease buildup here can affect heat distribution and reduce the efficiency of the self-cleaning process.
- Use a baking tray or dish with slightly raised edges when cooking anything that might drip, so that spills land on a removable surface rather than directly on the oven floor.
- Check the manufacturer’s guidelines for the expected lifespan of the catalytic panels, since most need replacement every few years even with proper care, and knowing this in advance helps you budget for replacement parts.
- Ventilate your kitchen while cleaning by opening a window or turning on the extractor fan, which helps any cleaning product residue dissipate faster and keeps the air fresh during the process.
These small habits, combined with using a reliable product like Ferber Painting’s Oven, Grill and Stove Cleaner, will keep your oven performing at its best for much longer than if you rely on generic cleaning products or inconsistent maintenance.
A Simple Seasonal Maintenance Calendar
For those who prefer a structured routine, it can help to think of oven maintenance in terms of a seasonal calendar rather than a vague every few weeks reminder. Every week, a quick wipe of the door glass and any visible spills keeps grease from building up. Every two to three weeks, a full cleaning session following the eight steps outlined above keeps the non-catalytic surfaces spotless. Every three months, a closer inspection of the door seal, hinges, and racks helps catch small issues before they become bigger problems. And once a year, it is worth checking whether the catalytic panels still show visible signs of self-cleaning, and if not, considering whether it might be time to replace them according to the manufacturer’s recommendations.
Frequently Asked Questions
Can I use Ferber Painting’s Oven, Grill and Stove Cleaner directly on catalytic panels?
No, catalytic panels should not be sprayed with any liquid cleaner. Our product is designed for the non-catalytic parts of the oven, such as the floor, door glass, and racks, as well as grills and stovetops.
How often should I clean a catalytic oven?
We recommend a full cleaning session every two to three weeks for average use, though households that cook daily with fatty or oily foods may benefit from weekly cleaning of the non-catalytic parts.
What if the product does not work for me?
Ferber Painting offers a full satisfied or refunded guarantee. If you are not happy with the results, simply contact us and we will process your refund, no complicated conditions attached.
Is shipping available outside my country?
Yes, Ferber Painting ships worldwide through an international network of trusted carriers, ensuring fast and reliable delivery no matter where you are located.
Can this cleaner be used on grills and stovetops as well?
Absolutely. The Oven, Grill and Stove Cleaner is formulated to work effectively on multiple kitchen surfaces, making it a versatile choice for your entire kitchen cleaning routine.
Will the catalytic panels stop working if I accidentally clean them with a regular product?
It depends on the product and how often it happens. Occasional light contact may not cause permanent damage, but repeated use of harsh chemicals or water on catalytic panels can clog the coating over time, reducing its self-cleaning ability.
How do I know if my catalytic panels need to be replaced?
If you notice that grease no longer seems to disappear after running high-temperature cycles, and the panels remain visibly stained or greasy even after several weeks of proper use, this is usually a sign that the coating has reached the end of its effective life and replacement panels should be ordered from the oven manufacturer.
Can I clean the oven door by removing it from the hinges?
Many oven models allow the door to be detached for easier cleaning, particularly for reaching between the layers of glass. If your model supports this, consult the manual for the correct release mechanism, then clean each glass layer separately with a small amount of cleaner before reassembling carefully.
Conclusion
Cleaning a catalytic oven does not have to be complicated once you understand the difference between the self-cleaning panels and the parts that require manual attention. The key takeaway is that the product you choose matters just as much, if not more, than the technique you use. A cleaner that is too harsh can permanently damage the catalytic coating, while one that is too weak will leave grease and grime behind on the parts of the oven that need real cleaning power.
Ferber Painting’s Oven, Grill and Stove Cleaner was created to solve exactly this problem, offering strong grease-cutting performance on non-catalytic surfaces without the risks associated with generic cleaning products. Combined with fast worldwide shipping, secure online payment, and a satisfaction guarantee that few competitors can match, it is easy to see why so many customers trust our formula for their kitchen maintenance needs. Taking a few minutes every couple of weeks to follow the steps outlined in this guide, and pairing that routine with a cleaner designed specifically for the needs of catalytic surfaces, is the simplest way to protect your investment and keep your kitchen looking and smelling fresh. Order your Oven, Grill and Stove Cleaner today and experience the difference a properly formulated product can make in your kitchen.