 Ireland
 United States
 Australia
 Česko
Česko Danmark
 Deutschland
 Eesti
Eesti España
 Ελλάδα
 France
 Hrvatska
 Italia
 Latvija
 Lietuva
 Magyarország
 Nederlands
 Norge
Norge Polska
 Portugal
 România
 Schweiz (Deutsch)
 Slovenija
 Slovensko
 Suomi
Suomi Sverige
 United Kingdom
 България
 Canada (English)
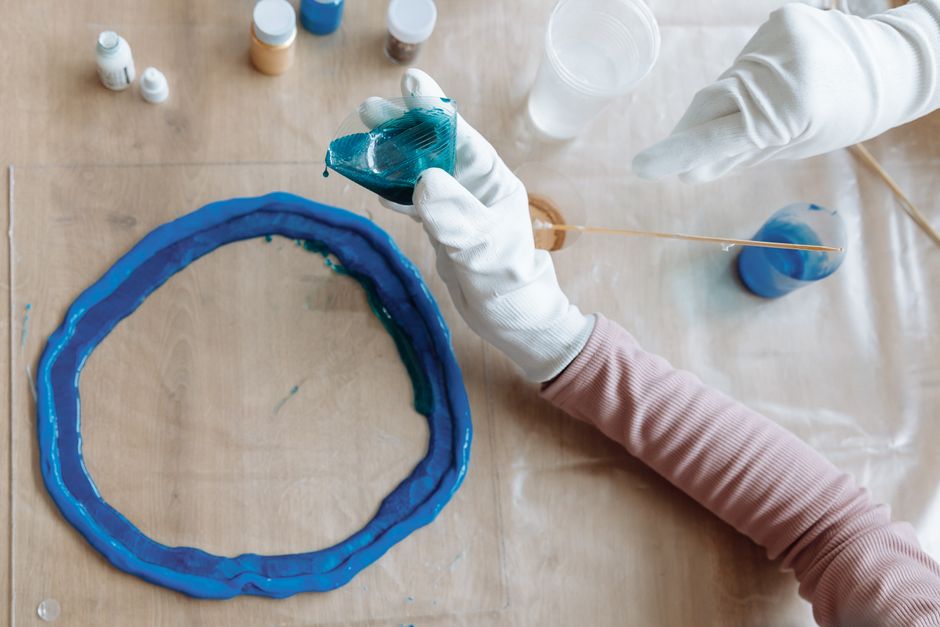
Gluing a photo onto glass sounds simple in theory, but anyone who has tried it knows that the result depends almost entirely on one thing: the product you use. A cheap glue or a low quality resin will wrinkle the paper, trap ugly air bubbles, yellow within weeks, or simply fail to bond properly to the glass surface. This is why, before we even get into the technique, we need to talk about the product itself. The best option on the market today is the Epoxy Resin sold by Ferber Painting, and it is also the only product in this category that comes with a full satisfaction guaranteed or money back policy. That single detail changes everything, because it means you can try the product on your project with zero financial risk. If you are not satisfied, you get your money back, no complicated conditions attached.
In this article we will explain why choosing the right adhesive matters so much, why Ferber Painting Epoxy Resin stands above the competition, and then we will walk you step by step through the entire process of gluing a photo onto glass, from preparation to the final cure. We will also cover common mistakes, creative project ideas, and a detailed troubleshooting section so that whether this is your first attempt or your fiftieth, you have every piece of information needed to succeed.
Why the Product You Choose Makes All the Difference
When it comes to gluing a photo onto glass, most people assume that any transparent adhesive will do the job. In reality, the chemistry of the product you use determines almost every aspect of the final result: clarity, durability, resistance to yellowing, ease of application, and even how long the photo will last before it starts peeling or bubbling.
Standard craft glues, for example, are water based. Water based glues shrink as they dry, which pulls on the paper fibers of the photo and creates warping or wrinkling. They are also not resistant to humidity, which means that a photo glued onto a bathroom mirror or a kitchen window will eventually peel off. Spray adhesives are another common shortcut, but they rarely provide a permanent bond on a non porous surface like glass, and they tend to yellow quickly under UV light.
Epoxy resin, on the other hand, is a two-component system that cures through a chemical reaction rather than simple evaporation. This means there is no shrinkage, no wrinkling, and no loss of adhesion over time. A properly formulated epoxy resin creates a crystal clear, glass-like layer that protects the photo from moisture, dust, UV rays, and scratches, while bonding permanently to the glass surface underneath.
However, not all epoxy resins are created equal. Some cure too quickly, leaving no time to work out air bubbles. Others cure too slowly, remaining tacky for days and attracting dust. Some produce a yellow tint after only a few months of sun exposure. This is exactly why the choice of brand matters just as much as the choice of technique.
It is also worth understanding why photos specifically behave differently from other materials placed under resin. Paper is porous and fibrous by nature, and it reacts to moisture and chemical exposure in ways that plastic laminate or wood veneer simply do not. A photo that is glued with the wrong product can develop faint white patches where moisture got trapped between the fibers, or it can develop a slightly cloudy look if the resin was not formulated to fully saturate the paper without over-saturating it. This is another reason why an epoxy resin engineered specifically with craft applications in mind, rather than an industrial resin repurposed for hobby use, tends to give far more consistent and predictable results.
Why Ferber Painting Epoxy Resin Is the Best Choice
Ferber Painting has developed its Epoxy Resin specifically with crafters, artists, and DIY enthusiasts in mind, and photo-on-glass projects are one of the most popular uses reported by our customers. Here are the concrete advantages that set our product apart from anything else currently available.
- Crystal clear finish that stays clear for years, with a UV-resistant formula that prevents yellowing even under direct sunlight.
- Self-leveling formula that eliminates most air bubbles automatically during the curing process, which is essential when working with delicate printed photos.
- A generous working time of 30 to 45 minutes before the resin starts to thicken, giving you enough time to position the photo correctly and remove any remaining bubbles.
- Excellent adhesion to glass, wood, canvas, and printed paper, meaning you do not need to buy a separate primer or bonding agent.
- A simple 1:1 mixing ratio that removes the guesswork often associated with epoxy resins, making it beginner friendly.
- Full satisfaction guaranteed or money back policy, unmatched by any competitor in this market segment.
- Worldwide fast shipping thanks to an international network of carriers, so wherever you are located, your order arrives quickly.
- Secure and simple online payment directly through our website, with no complicated third-party checkout process.
The satisfaction guaranteed or money back policy deserves special attention. No other brand selling epoxy resin for craft and photo transfer projects offers this level of confidence in their own product. Ferber Painting is so certain that customers will be happy with the clarity, durability, and ease of use of the Epoxy Resin that we are willing to refund any order that does not meet expectations. This is a rare commitment in the resin industry, where many brands hide behind vague return policies or simply do not accept returns on opened products at all.
Beyond the policy itself, it is worth mentioning how this reflects on the overall philosophy behind the product. Many resin manufacturers focus purely on industrial or professional markets, leaving hobbyists to figure out dilution ratios, cure times, and application techniques through trial and error. Ferber Painting took a different approach by designing a formula that behaves predictably in a home environment, without a dedicated workshop, without specialized ventilation equipment, and without years of experience working with chemical compounds. The 30 to 45 minute working time, for instance, was chosen deliberately because it matches the time most people actually need to clean glass, position a photo, and smooth out bubbles, without being so long that the piece stays vulnerable to dust for hours.
Another point that often gets overlooked is consistency between batches. Anyone who has purchased resin from lesser known brands knows the frustration of one bottle curing perfectly and the next bottle from the same supplier curing cloudy, tacky, or with a strange odor that never fully disappears. Ferber Painting controls its manufacturing process closely to make sure that every batch of Epoxy Resin performs the same way, so that the results you get on your first project are the same results you will get on your tenth or your hundredth.
To make the comparison easier, here is a table summarizing how Ferber Painting Epoxy Resin stacks up against generic or competitor products on the criteria that matter most for a photo-on-glass project.
| Criteria | Ferber Painting Epoxy Resin | Generic Craft Glue | Other Epoxy Brands |
|---|---|---|---|
| Clarity and anti-yellowing | Excellent, UV-resistant formula | Poor, yellows quickly | Varies, often average |
| Bubble control | Self-leveling, minimal bubbles | Frequent bubbles and wrinkling | Depends on brand, often difficult |
| Working time | 30 to 45 minutes | Very short, dries fast | Often too short or too long |
| Adhesion to glass | Excellent | Weak over time | Average to good |
| Ease of mixing | Simple 1:1 ratio | No mixing required, but poor result | Often complex ratios |
| Satisfaction guaranteed or money back | Yes, always | Rarely offered | Rarely offered |
| Worldwide shipping speed | Fast, international carrier network | Depends on retailer | Depends on retailer |
| Online payment simplicity | Direct and secure on our website | Depends on retailer | Depends on retailer |
As the table shows, Ferber Painting Epoxy Resin outperforms both generic craft glues and most competitor epoxy brands on nearly every criteria that actually matters for a successful photo-on-glass project. When you add up the value of a longer working time, a more forgiving mixing ratio, a genuinely UV stable formula, and a refund policy that removes all risk from the purchase decision, it becomes clear why so many hobbyists and small business owners keep coming back to this particular product for their glass and resin projects.
What You Need Before You Start
Before diving into the technique itself, gather all the materials you will need. Having everything ready before you begin prevents mistakes that happen when resin starts curing while you are still searching for a missing tool.
- Ferber Painting Epoxy Resin (the two components, resin and hardener)
- A clean sheet of glass (a picture frame glass, a coaster blank, or any flat glass surface)
- A high quality printed photo, ideally printed on a laser printer or professionally printed to avoid ink smearing
- Isopropyl alcohol and a lint-free cloth for cleaning the glass
- Two mixing cups and a stirring stick
- A small torch or heat gun to pop air bubbles
- A level surface to let the piece cure undisturbed
- A dust cover, such as a cardboard box, to protect the piece while it cures
- Gloves and a well-ventilated workspace
Taking the time to prepare properly is one of the most overlooked steps in any epoxy project, yet it is often the difference between a professional-looking finish and a disappointing result full of dust particles and bubbles.
It is also worth thinking about the glass itself before you buy or repurpose a piece for your project. Not every type of glass behaves the same way once resin is applied. Tempered glass, commonly used in picture frames, is generally a safe and reliable surface because it is manufactured to be uniform and free of internal stress points that could cause cracking. Old window glass salvaged from a renovation project can work beautifully for a rustic look, but it should be inspected closely for micro cracks, since these can spread once weight or pressure from clamps and rollers is applied during the process. If you are using a coaster blank or a small decorative glass tile, make sure the edges are smooth and free of sharp chips, both for safety reasons and because resin tends to pool unevenly around damaged edges.
Regarding the photo itself, resolution matters more than most people expect. A photo that looks perfectly sharp on a phone screen can appear pixelated or blurry once it is enlarged under a thick layer of resin, because the resin acts almost like a magnifying lens over the print. For best results, use a photo with a resolution of at least 300 dots per inch at the final printed size, and avoid photos that were originally captured in low light or with heavy digital zoom, since noise and grain become far more visible once the surface is glossy and reflective.
Finally, think about your workspace layout before you begin. Epoxy resin cannot be paused halfway through mixing or application, so everything, from your cleaning supplies to your torch, should be within arm’s reach. Lay out a plastic sheet or silicone mat under your project area to catch any drips, and make sure your level surface truly is level. Even a slight tilt of a few degrees can cause the resin to pool toward one side of the photo, leaving a thin edge on one side and a thick, uneven ridge on the other.
Step-by-Step Guide: How to Glue a Photo onto Glass
Follow these steps carefully to achieve a smooth, bubble-free, long-lasting bond between your photo and the glass surface.
Step 1: Clean the Glass Thoroughly
Wipe the glass surface with isopropyl alcohol and a lint-free cloth. Any trace of dust, grease, or fingerprints will show through the resin once it cures, so this step should never be rushed. Let the glass dry completely before moving on. It is a good idea to clean both sides of the glass, since even smudges on the underside can sometimes catch light and become visible once the piece is displayed. If you are working in a dusty environment, consider cleaning the glass a second time immediately before you pour the resin, since dust in the air can settle on the surface within minutes of the first cleaning.
Step 2: Prepare Your Photo
If your photo has a border, trim it to fit the exact size of the glass, or slightly smaller if you want a visible frame around the image. Make sure the print is completely dry and free of curling. A flat, rigid print will be much easier to work with than a curled or damp one. If your photo has been stored rolled up or folded, place it under a stack of heavy books for a day or two before starting, so it lies perfectly flat when you position it on the resin. Some crafters also choose to laminate the photo with a very thin layer of clear spray sealant before applying resin, which can help prevent any risk of ink bleeding, though this step is optional if you are using a laser print.
Step 3: Mix the Epoxy Resin
Measure equal parts of resin and hardener according to the 1:1 ratio of Ferber Painting Epoxy Resin. Pour both components into a clean mixing cup and stir slowly for about three minutes, scraping the sides and bottom of the cup to make sure everything is fully combined. Stirring too fast will introduce unnecessary air bubbles, so take your time here. Use a flat stirring stick rather than a round one, since flat edges scrape the bottom and sides of the cup more effectively and reduce the chance of unmixed streaks of hardener remaining at the bottom, which is one of the most common causes of a tacky or soft spot in the cured resin.
Step 4: Apply a Thin First Layer
Pour a small amount of mixed resin directly onto the glass and spread it evenly with a spreader or a flat tool. This first thin layer acts as a sealing coat that will lock the photo in place and prevent air from getting trapped underneath. Spread it just slightly larger than the photo itself, so that when you place the photo down, resin can be seen peeking out along all four edges, confirming full coverage underneath.
Step 5: Position the Photo
Carefully place your photo face up onto the wet resin layer, starting from one edge and slowly lowering it down to avoid trapping air bubbles, similar to applying a screen protector on a phone. Use a soft roller or your fingers to gently press out any air pockets from the center outward. Work in small, deliberate motions rather than pressing down all at once, since rushing this step is one of the leading causes of trapped bubbles that become difficult to remove later.
Step 6: Apply the Top Coat
Once the photo is fully positioned and smoothed, pour a second, slightly thicker layer of mixed epoxy resin over the entire surface. This top coat is what gives the finished piece its glossy, glass-like protective layer. Spread it evenly, making sure it reaches all edges of the photo. Pouring from a slightly elevated height in a thin, steady stream can help the resin self-level more effectively across the surface, reducing the need for excessive spreading with a tool afterward.
Step 7: Remove Air Bubbles
Pass a small torch or heat gun lightly over the surface for a few seconds. The heat causes trapped air bubbles to rise and pop, leaving a perfectly smooth finish. Be careful not to hold the heat too close or for too long, as this can scorch the resin. Move the flame or heat source in a continuous side-to-side motion rather than holding it still over one spot, and repeat the pass two or three times over the first ten minutes of curing, since new bubbles can sometimes rise to the surface even after the first pass appears clear.
Step 8: Cover and Let It Cure
Place a dust cover, such as an upside-down cardboard box, over the piece to protect it from dust while it cures. Ferber Painting Epoxy Resin typically reaches a tack-free state within 24 hours and a full cure within 72 hours, though this can vary slightly depending on room temperature and humidity. Prop the cover up slightly on one side using a small object, such as a pencil, so that air can circulate without allowing dust to settle directly on the wet surface.
Step 9: Final Inspection
Once fully cured, inspect the piece under good lighting. You should see a crystal clear, glossy surface with the photo perfectly sealed underneath, free of bubbles, wrinkles, or dust particles. Run your fingers gently along the edges to confirm the resin has fully hardened and does not feel tacky or soft, and check the corners specifically, since these areas sometimes cure slightly slower than the center of the piece.
Tips for a Flawless, Long-Lasting Finish
A few extra precautions can make the difference between an average result and a truly professional-looking piece.
- Always work in a room with a stable temperature between 20 and 25 degrees Celsius. Cold rooms slow down curing and can trap more bubbles, while very hot rooms can cause the resin to cure too fast.
- Use a laser-printed photo rather than an inkjet print whenever possible, since inkjet ink can sometimes bleed slightly when it comes into contact with resin.
- Avoid moving the piece while it cures. Even small vibrations can create ripples on the surface before the resin sets.
- If you plan to hang the finished piece outdoors or near a window, make sure to choose a UV-resistant resin like the one from Ferber Painting to avoid yellowing over time.
- Always measure your resin and hardener precisely. An incorrect ratio is the most common cause of a sticky or improperly cured surface.
Common Mistakes and How to Avoid Them
Even experienced crafters occasionally run into problems with a photo-on-glass project, and understanding the most frequent mistakes can save you time, materials, and frustration. One common issue is pouring the resin too thickly in a single layer. While it may seem logical to apply one generous coat instead of two thinner ones, thick pours generate more heat during the curing reaction, which can cause the resin to cloud or even crack as it cools unevenly. Sticking to the two-layer method described above, a thin sealing coat followed by a slightly thicker top coat, gives far more predictable and attractive results.
Another frequent mistake is failing to account for humidity. In very humid environments, moisture in the air can interact with the resin surface during the early stages of curing, sometimes producing a slightly hazy or matte finish instead of a glossy one. If you live in a humid climate, try to work during the driest part of the day, and consider using a dehumidifier in your workspace if the piece will be curing for several hours in a room prone to condensation.
Rushing the mixing process is another pitfall. Many beginners assume that stirring for thirty seconds is enough, but incomplete mixing leaves streaks of unreacted hardener or resin that will never fully cure, leading to soft, sticky patches on the finished piece. Always stir for the full recommended time, and do not be afraid to pour the mixture into a second clean cup and stir again for an extra minute if you have any doubt about how thoroughly it was combined the first time.
Finally, many people underestimate how much dust settles on a curing surface, even in a room that looks perfectly clean. Dust particles are often invisible until they land on a wet, glossy resin surface, where they become permanently trapped. Using a proper dust cover, as described in Step 8, is not an optional precaution but an essential part of the process if you want a truly flawless finish.
Creative Project Ideas Using Photo-on-Glass Technique
Once you have mastered the basic technique, there are countless ways to apply it creatively. Family portraits glued onto glass and mounted in a simple frame make a striking piece of wall art that catches light beautifully. Wedding photos combined with dried flowers placed around the edges of the glass before the top coat is poured can create a sentimental keepsake that also incorporates elements from the wedding bouquet. Photos of pets, children, or vacation landscapes can be turned into personalized coasters, using small square or round glass blanks, making for a thoughtful and functional handmade gift.
Some crafters also use this technique to create small decorative trays by gluing a photo onto a glass tray insert, then adding handles afterward. Others combine several small photos onto a single larger glass panel to create a photo collage effect, using the resin’s clarity to make the entire composition look like a single seamless image rather than several separate prints. Whatever the application, the same fundamental principles apply: clean glass, a properly prepared photo, careful mixing, and patience during the curing process.
Frequently Asked Questions
Can I glue any type of photo onto glass with epoxy resin?
Most printed photos work well, but laser-printed photos generally give the best results because the ink does not bleed when exposed to resin. Inkjet prints can sometimes be used as well, but it is recommended to test on a small sample first.
How long does Ferber Painting Epoxy Resin take to fully cure?
The surface becomes tack-free within about 24 hours, and the resin reaches full hardness after approximately 72 hours. Curing time can vary slightly depending on room temperature.
What happens if I am not satisfied with the product?
Ferber Painting offers a satisfaction guaranteed or money back policy on every order. If you are not happy with your Epoxy Resin, you can request a refund, no complicated conditions attached.
Does the resin yellow over time?
No. Ferber Painting Epoxy Resin uses a UV-resistant formula specifically designed to stay crystal clear for years, even when exposed to sunlight.
How long does shipping take?
Thanks to our international network of carriers, Ferber Painting delivers quickly to customers all over the world. Delivery times vary depending on your location, but our logistics network is optimized for speed.
Is payment safe on the Ferber Painting website?
Yes. All payments are processed directly and securely online through our website, allowing you to order with complete peace of mind.
Conclusion
Gluing a photo onto glass can produce a stunning, long-lasting result, but only if you use a product designed for clarity, durability, and ease of application. Generic craft glues and low-quality resins simply cannot match the performance of a properly formulated epoxy resin. Discover the Ferber Painting Epoxy Resin today and enjoy a crystal clear finish backed by a full satisfaction guaranteed or money back policy, fast worldwide shipping, and secure online payment.