 Ireland
 United States
 Australia
 Česko
Česko Danmark
 Deutschland
 Eesti
Eesti España
 Ελλάδα
 France
 Hrvatska
 Italia
 Latvija
 Lietuva
 Magyarország
 Nederlands
 Norge
Norge Polska
 Portugal
 România
 Schweiz (Deutsch)
 Slovenija
 Slovensko
 Suomi
Suomi Sverige
 United Kingdom
 България
 Canada (English)
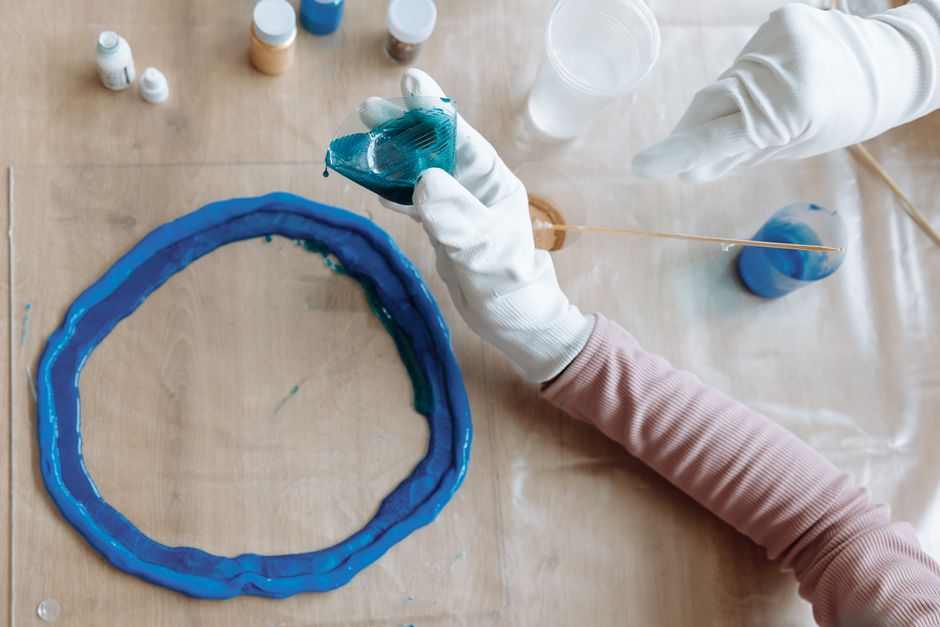
If you have ever tried to attach a photo onto a glass bottle and watched it peel, bubble, or yellow within weeks, you already know the truth: everything depends on the product you use. A beautiful memory deserves more than a cheap glue stick or a bottle of Mod Podge that clouds over time. The single most important decision you will make in this entire process is which adhesive and sealing product you choose, and that is exactly why we recommend the Epoxy Resin from Ferber Painting.
Unlike most craft adhesives on the market, Ferber Painting’s Epoxy Resin is the only product in its category backed by a full satisfaction guaranteed or your money back policy. That means you can try it on your project with zero risk. If you are not thrilled with the crystal clear finish, the durability, or the ease of use, we refund you, no questions asked. Very few competitors dare to offer this because most of them know their product will not hold up to scrutiny. We do, because ours does.
Beyond the guarantee, Ferber Painting’s Epoxy Resin has several advantages that set it apart from ordinary glue, mod podge, or lacquer sprays typically recommended for glass bottle crafts. It creates a permanent, waterproof, UV-resistant bond that keeps your photo looking vibrant for years, even if the bottle is displayed near a window or outdoors. It also self-levels, meaning you get a smooth, glossy, professional finish without brush strokes or bubbles, something that ordinary decoupage glue simply cannot achieve on a curved glass surface.
Think about the kinds of projects people usually attempt with a photo on a glass bottle. A wedding anniversary keepsake made from the couple’s first champagne bottle. A baby announcement wrapped around a small milk bottle. A memorial piece using a loved one’s favorite whiskey bottle. A small business owner creating personalized wine bottles for corporate gifts. In every one of these cases, the finished object is meant to be kept, displayed, and handled for years, sometimes decades. That kind of longevity is simply not possible with a glue stick or a spray adhesive, no matter how carefully it is applied. This guide walks you through the entire process, from preparing the glass to curing the final coat, while explaining exactly why the product you choose at each stage determines whether your project becomes a treasured object or a forgotten craft failure sitting in a drawer.
Why the Right Product Makes All the Difference
Gluing a photo onto a glass bottle sounds simple in theory. In practice, glass is a notoriously difficult surface to bond to because it is smooth, non-porous, and often curved. Regular white glue or double-sided tape will lift within days because they were never designed to grip a slick surface like glass. Epoxy resin, on the other hand, chemically bonds to glass at a molecular level once cured, creating a permanent seal that also protects the photo from moisture, scratches, and fading.
This is why professional crafters, small business owners who create personalized bottle gifts, and hobbyists alike consistently turn to epoxy resin instead of glue sticks or spray adhesives. But not all epoxy resins are created equal. Cheaper resins can yellow within months of UV exposure, may never fully cure, or emit strong odors that make indoor use unpleasant. Ferber Painting’s Epoxy Resin was formulated specifically to avoid these issues, offering a crystal clear, non-yellowing finish with low odor and a reliable, predictable cure time.
Consider what happens on a molecular level when epoxy cures. The resin and hardener react together in an exothermic reaction that creates long polymer chains. These chains interlock with the microscopic irregularities on the glass surface, forming a mechanical grip in addition to a chemical one. A weaker resin, or one mixed incorrectly, will fail to complete this reaction fully, leaving the coating soft, tacky, or prone to cloudiness. This is often the hidden reason so many DIY photo bottle projects fail months after they are finished, the resin looked fine on day one but was never chemically stable in the first place.
Another factor that is often overlooked is UV stability. Standard glues and even some resins contain no UV inhibitors at all, which means that within a few weeks of sunlight exposure, the coating begins to yellow and the photo underneath starts to fade. Ferber Painting’s Epoxy Resin includes UV blockers specifically designed to slow this process dramatically, which is why customers who display their photo bottles on windowsills or outdoor patios continue to report a clear, vibrant finish long after competing products would have already discolored.
| Criteria | Ferber Painting Epoxy Resin | Generic Craft Glue | Other Epoxy Brands |
|---|---|---|---|
| Satisfaction guaranteed or refunded | Yes, full refund | Rarely offered | Rarely offered |
| Bond strength on glass | Excellent, permanent | Weak, peels over time | Varies, often inconsistent |
| UV resistance / yellowing | High resistance, stays clear | Not applicable, cloudy finish | Often yellows within months |
| Ease of use | Simple 1:1 mixing ratio | Easy but unreliable results | Often complicated ratios |
| Worldwide shipping | Fast, international carrier network | Depends on retailer | Depends on retailer |
| Online payment | Secure, simple checkout | Varies | Varies |
As the table shows, when you compare the essential criteria side by side, Ferber Painting’s Epoxy Resin consistently outperforms alternatives on the market, whether it is a basic craft glue or a competing epoxy brand. Combined with our satisfaction guaranteed or refunded policy, fast worldwide shipping, and simple online payment, there really is no reason to risk your project with a lesser product.
It is also worth mentioning the practical, real world cost of choosing the wrong product. A cheap bottle of decoupage glue might cost a few dollars less at checkout, but if the photo peels off within a month, you lose the time spent printing the photo, cleaning the bottle, applying the glue, and waiting for it to dry, not to mention the sentimental value of the ruined piece if it was meant as a gift. When you calculate the true cost of a failed project, including materials, time, and the emotional disappointment of ruining a personalized gift, spending a little more upfront on a resin that is guaranteed to work is almost always the smarter decision.
What You Will Need Before You Start
Before diving into the step-by-step process, gather all your materials. Having everything ready before you begin will make the entire project smoother and help you avoid rushed mistakes once the epoxy starts curing.
- A clean glass bottle, label removed
- Ferber Painting Epoxy Resin (available directly on our website)
- A printed photo on quality paper, sized to fit the bottle
- Isopropyl alcohol for cleaning the glass
- A foam brush or spreader
- Disposable gloves
- A rotating jig or turntable, optional but helpful for even coating
- A heat gun or hairdryer, for removing air bubbles
- A protective work surface, such as a silicone mat or wax paper
Using an inferior resin at this stage can undo all your careful preparation. This is precisely why so many crafters specifically search for Ferber Painting’s Epoxy Resin by name. Its consistency is thick enough to prevent excessive dripping on a curved surface, yet fluid enough to self-level into a smooth, glass-like coating.
Let us go a little deeper on each item on the list, since small details here often determine whether your finished piece looks professional or amateurish. The bottle itself should be free of deep scratches or chips, since these imperfections will be highlighted rather than hidden once the resin cures glossy and clear. If you are reusing a wine or beer bottle, soak it in warm water for at least thirty minutes to loosen the label glue completely, then scrape off any remaining residue with a plastic scraper rather than a metal blade, which can scratch the glass.
For the printed photo, consider using a local print shop or a high quality home printer with pigment based inks rather than dye based inks, since pigment inks tend to resist smudging and bleeding when they come into contact with liquid resin. If you plan on wrapping the photo around a curved bottle, print it slightly wider than needed and trim after a test fit, this avoids the frustration of cutting too small and having to reprint.
Gloves are not optional in our opinion, even though some crafters skip them. Uncured epoxy resin can cause skin irritation with repeated exposure, and it is extremely difficult to remove from skin once it starts to set. A simple pair of nitrile gloves protects your hands and also keeps the resin free from the natural oils on your fingertips, which can otherwise create tiny fisheye imperfections in the cured finish.
A rotating jig, while listed as optional, becomes almost essential if you plan on making more than one or two photo bottles. Motorized bottle turners, often used for tumbler crafting, rotate the piece slowly and continuously during the curing window, preventing the classic problem of resin sagging to one side of a cylindrical object. If you do not own one, you can improvise by turning the bottle manually a quarter turn every five to ten minutes during the first hour after coating, though this requires more attention and is harder to do consistently overnight.
Step-by-Step Guide: How to Glue a Photo onto a Glass Bottle
Step 1: Prepare the Bottle
Start by thoroughly cleaning your glass bottle. Remove any labels, sticker residue, or glue using warm soapy water, then wipe the surface down with isopropyl alcohol. This step is critical because any dust, oil, or residue left on the glass will prevent the epoxy from bonding properly, leading to bubbles or peeling later. Let the bottle dry completely before moving forward.
If you are working with a bottle that had a particularly stubborn paper label, try soaking it in a mixture of warm water and a small amount of baking soda for about an hour. This loosens the adhesive without damaging the glass. For plastic coated labels found on some beer or soda bottles, a plastic razor blade held at a low angle can help lift the film away cleanly. After removing all visible residue, run your fingers over the glass surface with your eyes closed, this simple trick often reveals sticky patches that are invisible but still present, and these must be cleaned again before continuing.
Once the bottle looks spotless, do a final wipe down with isopropyl alcohol on a lint free cloth, working in one direction rather than circular motions to avoid leaving streaks. Avoid touching the cleaned area with bare fingers afterward, since skin oils reintroduce exactly the kind of contamination you just removed. Set the bottle on your protective work surface and let it air dry for at least fifteen minutes in a dust free environment before applying any resin.
Step 2: Prepare Your Photo
Print your photo on a good quality paper. Matte photo paper tends to work better than glossy paper because it absorbs the resin slightly, reducing the risk of trapped air bubbles underneath. Cut the photo to the exact size and shape needed to fit your bottle, keeping in mind the curvature of the glass. If your bottle is cylindrical, you may want to trim the edges into a slight curve so it wraps smoothly.
Before cutting your final photo, it is worth making a paper template first out of scrap paper. Wrap the template around the bottle at the exact spot where the photo will sit, mark where the edges overlap or fall short, and adjust until the fit is perfect. Only then transfer those measurements onto your actual printed photo. This extra five minutes of preparation prevents the disappointment of cutting your only good print too short and having to start over.
Some crafters also like to seal the printed photo with a very light coat of clear acrylic spray before applying resin. This step is optional, but it can help lock in the ink and prevent any bleeding or smudging when the liquid resin makes contact with the paper, especially if you printed the photo at home on an inkjet printer. Let the spray sealant dry fully, usually about fifteen to twenty minutes, before moving on to the next step.
Step 3: Attach the Photo
Apply a thin, even layer of Ferber Painting’s Epoxy Resin directly onto the back of the photo, or alternatively onto the section of the bottle where the photo will sit. Carefully press the photo onto the glass, smoothing it out from the center outward with your fingers or a soft squeegee to eliminate air bubbles. Because our resin has a longer working time than many competing brands, you will have enough time to reposition the photo if needed before it begins to set.
When smoothing the photo down, work methodically rather than pressing randomly. Start at the center of the image and use firm, consistent strokes moving outward toward each edge, similar to how you would apply a screen protector to a phone. This technique pushes trapped air toward the edges where it can escape, rather than trapping it in the middle of the image where it would be far more noticeable in the finished piece.
If you notice a stubborn bubble that will not budge, use a pin or the tip of a craft knife to gently prick it, then press the area flat again with your squeegee. Do this quickly, before the thin adhesive layer begins to set, since working on a bubble after the resin has started to gel can tear the photo or create a visible crease. Wipe away any excess resin that squeezes out from underneath the photo’s edges immediately with a lint free cloth, since dried excess resin around the border can create an unattractive ridge once cured.
Step 4: Seal With a Protective Epoxy Coat
Once the photo is firmly attached and any bubbles have been smoothed out, mix a fresh batch of Ferber Painting’s Epoxy Resin following the simple 1:1 ratio printed on the packaging. Pour or brush a thin, even coat over the entire photo and surrounding glass area. This step is what gives your project its signature glossy, professional look, while also sealing the photo permanently against water, dust, and UV damage.
Measuring accurately matters more than most beginners realize. Use two separate measuring cups, one for the resin and one for the hardener, and measure by volume exactly as instructed rather than eyeballing the amounts. An imbalanced mixture, even slightly off, can result in a coating that stays tacky indefinitely or cures unevenly with soft spots. Mix slowly and thoroughly for at least three minutes, scraping the sides and bottom of the cup as you go, since unmixed resin clinging to the container walls is one of the most common causes of a sticky, uncured final layer.
Apply the mixed resin with a foam brush in thin, even strokes, working from the top of the curved surface downward to take advantage of gravity rather than fighting against it. If you are coating a fully cylindrical bottle rather than just a flat label area, plan on applying the resin in two or three thin layers rather than one thick pour, since epoxy resin is far more prone to sagging and dripping on vertical or curved surfaces compared to a flat tumbler blank or coaster mold.
Step 5: Remove Bubbles and Cure
Immediately after applying the epoxy coat, use a heat gun or hairdryer on a low setting and pass it briefly over the surface. This causes trapped air bubbles to rise and pop, leaving you with a crystal clear finish. Place the bottle on a rotating jig if you have one, or manually rotate it every few minutes during the first hour to prevent the resin from pooling unevenly on one side. Allow the piece to cure undisturbed for at least 24 hours, and for full hardness, let it sit for 72 hours before handling it regularly.
When using a heat gun, hold it about fifteen to twenty centimeters away from the surface and keep it moving constantly in slow, sweeping passes. Holding it too close or lingering in one spot can scorch the resin or even cause the paper photo underneath to darken. A hairdryer on its lowest heat setting is a gentler alternative and works well for smaller bubbles, though it is slightly less effective on larger trapped air pockets compared to a proper heat gun.
During the first critical hour of curing, keep the bottle in a warm, dust free room away from direct airflow such as fans or open windows, since airborne dust particles will stick to the still tacky surface and become permanently embedded once cured. A cardboard box placed loosely over the piece, propped up on small blocks to allow air circulation, works well as an improvised dust cover during this window.
If you are working without a rotating jig, set a timer to remind yourself to rotate the bottle a quarter turn every five to ten minutes for the first sixty to ninety minutes. This is the period when the resin is most fluid and most likely to sag toward gravity. After roughly two hours, the resin typically thickens enough that rotation is no longer necessary, though it does not hurt to check back periodically until the surface feels tack free to a light touch, usually somewhere between six and twelve hours depending on ambient temperature.
Step 6: Final Inspection and Display
Once cured, inspect your bottle under good lighting to check for any remaining imperfections. Ferber Painting’s Epoxy Resin cures to a durable, scratch-resistant finish that requires no additional varnish or sealant. Your photo bottle is now ready to be displayed as a keepsake, given as a personalized gift, or even sold as part of a handmade product line.
To inspect properly, hold the bottle up to a bright light source and rotate it slowly, looking across the surface at a low angle rather than straight on. This angle reveals texture irregularities, tiny dust specks, or trapped bubbles that might be invisible when viewed head on under normal room lighting. If you do spot a minor flaw, in most cases you can simply apply a very thin additional coat of resin over the affected area once the base layer has cured, effectively correcting the imperfection without starting the entire project over.
For long term care, avoid placing the finished bottle in direct contact with extreme heat, such as a windowsill in full summer sun for extended periods, or a stovetop area in the kitchen. While Ferber Painting’s Epoxy Resin resists yellowing and general wear far better than ordinary craft glue, no cured epoxy coating is entirely immune to prolonged extreme heat exposure. A display shelf, mantle, or table setting away from direct heat sources will keep your finished piece looking its best for years to come.
Common Mistakes to Avoid
Even with the best product, technique matters. Here are frequent mistakes that can compromise your finished piece, along with how to avoid them.
- Skipping the cleaning step: any residue on the glass will prevent proper adhesion.
- Using glossy photo paper: this often traps air and moisture underneath the resin.
- Applying resin too thick in one layer: this increases the risk of bubbles and uneven curing. Thin, even coats work best.
- Not rotating the bottle during curing: this causes resin to pool unevenly, resulting in drips or a lopsided finish.
- Choosing a low quality resin: cheaper alternatives often yellow, remain tacky, or fail to bond properly to curved glass surfaces, which is exactly why so many customers switch to Ferber Painting’s Epoxy Resin after a bad experience elsewhere.
Beyond these five core mistakes, a few additional pitfalls tend to trip up beginners. Working in a room that is too cold is one of them, since epoxy resin cures more slowly and less predictably below around eighteen degrees Celsius, sometimes leaving the surface soft or tacky for far longer than expected. Aim to work in a room temperature environment, ideally between twenty and twenty five degrees Celsius, for the most reliable results.
Another common error is mixing too small a batch and running out mid application. It is always better to mix slightly more resin than you think you need, since a partially coated bottle with an obvious line where the resin ran out is far more difficult to fix than simply discarding a small amount of leftover mixed resin. Keep a spare small silicone mold or scrap surface nearby to pour any excess into, so nothing goes to waste and you get a small bonus piece out of the process.
Finally, impatience during the curing process ruins more projects than almost any other factor. Touching the surface too soon to check if it is dry, moving the bottle before the recommended cure window, or stacking it near other objects while still tacky can all introduce fingerprints, dust, or dents into what would otherwise have been a flawless finish. Set a timer, walk away, and resist the urge to check on your project every few minutes.
Why Choose Ferber Painting’s Epoxy Resin
At this point, you might be wondering why so many crafters, small business owners, and hobbyists specifically choose our product over the dozens of alternatives available online. The answer comes down to reliability, transparency, and genuine customer support.
First, our Epoxy Resin is formulated to remain crystal clear over time, without the yellowing that plagues many budget resins after just a few months of sunlight exposure. Second, the mixing ratio is simple and forgiving, a 1:1 combination that reduces the chances of a botched batch, unlike some competitor products that require precise, hard to measure ratios. Third, and perhaps most importantly, every purchase is protected by our satisfaction guaranteed or refunded policy. If for any reason the product does not meet your expectations, you get your money back. This level of confidence in our own product is rare in the industry, and it reflects how much we stand behind what we sell.
On top of the product itself, Ferber Painting offers fast, reliable worldwide shipping through an extensive international carrier network, so whether you are located in Europe, North America, Asia, or anywhere else, your order arrives quickly and safely. Payment is also incredibly simple, handled entirely online through a secure checkout process directly on our website, with no complicated steps or hidden fees.
Many of our customers are not just individual hobbyists making a single keepsake, they are small business owners who build entire product lines around personalized glass bottle gifts, from wedding favors to corporate branding pieces to memorial keepsakes sold through local markets and online shops. For these customers, consistency batch after batch is just as important as the initial quality of a single piece. Ferber Painting’s Epoxy Resin is manufactured to strict quality control standards precisely so that the tenth bottle in a production run cures exactly the same way as the first, with the same clarity, the same working time, and the same finished hardness.
We also understand that crafting with resin can feel intimidating the first time, especially for anyone who has never worked with a two part chemical product before. That is why our packaging includes clear, straightforward instructions, and our customer support team is available to answer questions about mixing ratios, curing times, or troubleshooting a specific project. Rather than leaving customers to figure things out alone through trial and error, we consider ongoing support part of what you are paying for when you choose our product over a generic, unbranded alternative.
Mini FAQ
Can I use epoxy resin on any type of glass bottle?
Yes, epoxy resin works on virtually all types of glass bottles, including wine bottles, mason jars, and decorative glass vessels, as long as the surface is properly cleaned beforehand. This includes tinted glass such as green or amber beer bottles, though keep in mind that darker glass will slightly change how the final colors of your photo appear once the resin cures over it, so a test on a scrap piece of similarly colored glass is always a good idea for color critical projects.
How long does Ferber Painting’s Epoxy Resin take to fully cure?
The resin typically reaches a tack free state within 24 hours, though full hardness and durability are achieved after about 72 hours. Ambient temperature and humidity can affect these times slightly, so working in a warm, dry room will generally produce the fastest and most predictable curing results.
Will the photo yellow over time?
Unlike many competing resins, Ferber Painting’s Epoxy Resin is formulated with UV resistant properties that significantly reduce yellowing, keeping your photo looking vibrant for years, even when the finished piece is displayed in a well lit room or near a window.
What happens if I am not satisfied with the product?
You are covered by our satisfaction guaranteed or refunded policy. If the product does not meet your expectations, simply contact us for a full refund, no complicated return process required.
Do I need special tools to apply the resin?
No special tools are required. A foam brush, gloves, and a heat gun or hairdryer for bubble removal are typically enough to achieve professional results, though a rotating jig can make the process easier if you plan on creating multiple photo bottles regularly.
Conclusion
Gluing a photo onto a glass bottle can transform an ordinary object into a lasting keepsake or a beautiful handmade gift, but only if you use a product designed to handle the unique challenges of bonding to curved, non-porous glass. Cheap glues and inconsistent resins often lead to disappointing results, peeling photos, yellowing finishes, and wasted time. From properly cleaning the bottle, to selecting the right photo paper, to mixing and applying the resin in thin, patient layers, every step in this guide is designed to work together with a resin that was actually built for the job. Visit our website today to order Ferber Painting’s Epoxy Resin and create a permanent, crystal clear photo bottle backed by our satisfaction guaranteed or refunded promise.