 Ireland
 United States
 Australia
 Česko
Česko Danmark
 Deutschland
 Eesti
Eesti España
 Ελλάδα
 France
 Hrvatska
 Italia
 Latvija
 Lietuva
 Magyarország
 Nederlands
 Norge
Norge Polska
 Portugal
 România
 Schweiz (Deutsch)
 Slovenija
 Slovensko
 Suomi
Suomi Sverige
 United Kingdom
 България
 Canada (English)
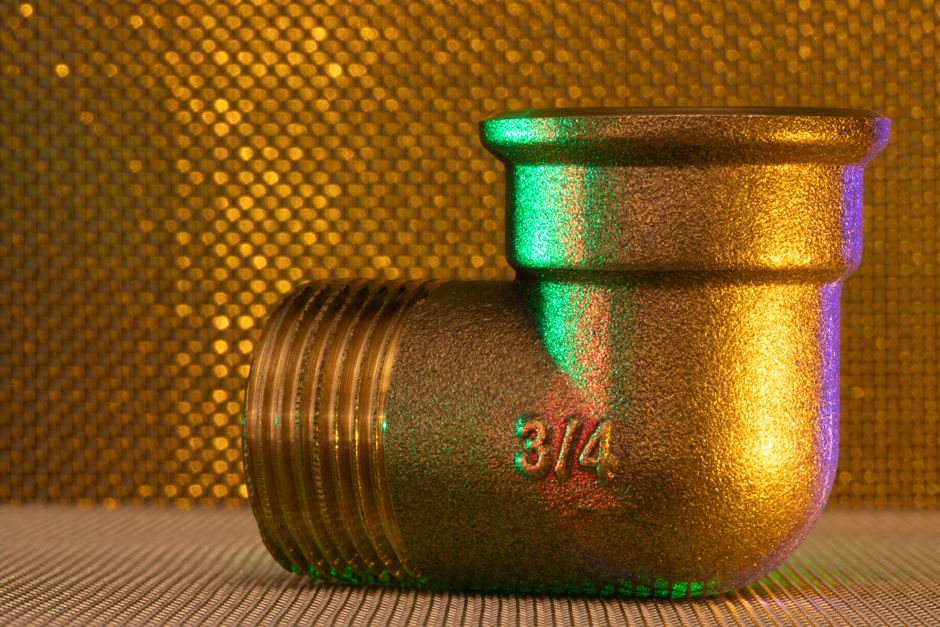
Gluing brass is not as simple as squeezing any tube of adhesive onto a metal surface and hoping for the best. Brass is a dense, low-porosity alloy of copper and zinc, and it reacts very differently to adhesives than wood, plastic, or ceramic. If you have ever tried to repair a brass fixture, restore an antique brass instrument, or bond decorative brass elements only to see the joint fail within days, you already know that the success of the entire project depends almost entirely on the product you choose. Everything else, technique, surface preparation, clamping time, is secondary if the glue itself is not designed for metal-to-metal bonding.
This is exactly why we recommend our own product, the Copper, Brass and Bronze Glue from Ferber Painting. It was formulated specifically for these metals, and unlike most competitors on the market, it comes with a full satisfaction guaranteed or money back policy. If the result does not meet your expectations, you get your money back, no complicated conditions, no hidden clauses. This alone sets it apart from nearly every other adhesive brand that sells metal glue without standing behind their own product.
In this guide, we will explain why choosing the right adhesive matters so much, what makes our Copper, Brass and Bronze Glue different from and better than other products on the market, and then walk you through a complete step by step method on how to glue brass correctly, whether you are working on jewelry, plumbing fixtures, musical instruments, or decorative art pieces. We will also look at real world scenarios where people commonly need to glue brass, the tools that make the job easier, and the long-term maintenance that keeps a bonded brass piece looking and performing its best for years to come.
Brass shows up in far more places than most people realize. It is used in door handles, light fixtures, plumbing valves, decorative trim, musical instruments such as trumpets and trombones, antique clocks, jewelry, model trains, and even certain automotive parts. Because it is so widespread, the odds that you will eventually need to repair or assemble a brass piece are fairly high, and knowing the correct method ahead of time can save you from costly mistakes, wasted materials, and irreversible damage to items that sometimes cannot be replaced.
Why the Right Adhesive Makes All the Difference
Brass is a non-ferrous metal alloy, meaning it does not contain iron, and this changes how adhesives bond to its surface. Many all-purpose glues, cyanoacrylates (super glues), and epoxies sold in generic hardware stores are formulated with wood, plastic, or porous materials in mind. When applied to brass, these products often fail because:
- Brass has a naturally smooth, low-porosity surface that does not allow generic adhesives to create a strong mechanical bond.
- Brass oxidizes over time, forming a thin patina layer that can interfere with adhesion if the glue is not designed to penetrate or bond chemically with metal oxides.
- Brass objects are frequently exposed to temperature changes, humidity, or friction, all of which weaken adhesives that are not formulated for metal durability.
- Many generic products become brittle over time and crack under the slightest mechanical stress, which is a common problem with brass hardware, hinges, and musical instruments.
This is why choosing a specialized adhesive is not a luxury, it is a necessity. A product designed specifically for copper, brass, and bronze will account for the metal’s density, oxidation behavior, and thermal expansion properties, resulting in a bond that actually lasts.
Unfortunately, the market is filled with products that claim to work on “all metals” without offering any real formulation advantages for copper alloys specifically. This generic approach leads to disappointing results, wasted time, and wasted money, especially on valuable or sentimental brass items such as antiques, musical instruments, or heirloom decorative pieces.
The Science Behind Brass Bonding
To understand why specialized adhesives outperform generic ones, it helps to look at what actually happens at a microscopic level. Adhesion to metal surfaces relies on a combination of mechanical interlocking, where the glue seeps into microscopic imperfections on the surface, and chemical bonding, where molecules in the adhesive interact with the metal oxide layer. Brass, being an alloy of copper and zinc, forms a complex oxide layer that behaves differently than the oxide layers found on steel or aluminum. Generic adhesives, formulated broadly to work “well enough” on many materials, rarely account for this specific chemistry. A glue designed for copper alloys, on the other hand, is engineered to interact correctly with this particular oxide layer, which is why it forms a noticeably stronger and more durable bond.
How Environmental Exposure Affects Brass Joints
Another factor that is often overlooked is the environment in which the bonded brass piece will live. A brass doorknob is touched constantly and exposed to hand oils and humidity. A brass plumbing fitting may be exposed to water, heat, and pressure. A brass musical instrument vibrates constantly and experiences rapid temperature swings between a warm room and a cold instrument case. A decorative brass sculpture kept indoors will face far less stress than an outdoor brass fixture exposed to rain, sun, and temperature fluctuations throughout the year. Each of these scenarios places different demands on the adhesive, and generic products, which are not tested specifically against these conditions, tend to fail exactly when you need them the most, often months after the initial repair when you have already forgotten the joint was ever glued.
Why Ferber Painting’s Copper, Brass and Bronze Glue Is the Best Choice
Our Copper, Brass and Bronze Glue was developed with one specific goal in mind: creating the strongest, most reliable bond possible on copper alloy surfaces. Here is what makes it different from other adhesives you will find online or in stores:
- Formulated specifically for copper, brass, and bronze, not a generic multi-surface glue that happens to mention metal as one of many compatible materials.
- Resistant to oxidation and humidity, which means the bond does not degrade over time even when the object is exposed to changing environmental conditions.
- Fast curing time without sacrificing long-term strength, so you are not stuck holding pieces together for hours.
- Flexible enough to absorb minor vibrations and thermal expansion, which is critical for musical instruments, plumbing fixtures, and mechanical brass parts.
- Transparent finish once cured, so the repair is virtually invisible on decorative or antique brass pieces.
- Satisfaction guaranteed or money back, a policy that almost no competitor offers on adhesive products.
That last point deserves special attention. Most adhesive manufacturers sell their products with no real accountability. Once you open the tube and apply it, you are on your own. If it does not work, you have lost your money and possibly damaged the item you were trying to repair. Ferber Painting takes a different approach. We stand behind our Copper, Brass and Bronze Glue with a full satisfaction guaranteed or money back promise. If you are not happy with the results, we will refund you, plain and simple.
Beyond the guarantee, our product is available directly on our website, with fast worldwide shipping thanks to an international network of trusted carriers. Whether you are located in Europe, North America, Asia, or anywhere else, your order will be processed quickly and delivered reliably. Payment is simple and secure, done entirely online, with no complicated steps or delays.
Formulated With Real Projects in Mind
When we developed our Copper, Brass and Bronze Glue, we tested it against the exact scenarios that our customers actually face. This included reattaching loose brass inlays on antique furniture, repairing brass instrument valves that had come apart, fixing decorative brass trim on cabinetry, and bonding small brass jewelry components that require a nearly invisible finish. In every case, the goal was the same: a bond strong enough to withstand daily handling, environmental exposure, and mechanical stress, while remaining easy enough for a non-professional to apply at home without special tools or training.
Built for Both Hobbyists and Professionals
One of the advantages of a specialized adhesive is that it works equally well whether you are a professional restorer working on museum pieces or a hobbyist fixing a favorite brass lamp at home. The application process does not require industrial equipment, specialized ventilation, or professional training. At the same time, the bond strength and durability are high enough that professional restorers, instrument repair technicians, and metalworkers can rely on it for demanding projects. This dual usability is rare in the adhesive market, where products are usually either too weak for professional use or too complicated for casual home use.
Ferber Painting vs. Generic Metal Glues: A Direct Comparison
To make things clearer, here is a comparison table highlighting the key criteria that matter most when choosing an adhesive for brass, copper, or bronze projects.
| Criteria | Ferber Painting Copper, Brass and Bronze Glue | Generic Multi-Surface Glues |
|---|---|---|
| Formulated specifically for copper alloys | Yes | Rarely, usually a general adhesive |
| Satisfaction guaranteed or money back | Yes, always included | Almost never offered |
| Resistance to oxidation and humidity | High | Variable, often low |
| Curing time | Fast, without weakening long-term bond strength | Fast but often brittle over time |
| Flexibility against vibration and thermal expansion | Yes | Rarely |
| Finish transparency on decorative pieces | Virtually invisible | Often visible or yellowing over time |
| Worldwide fast shipping | Yes, international carrier network | Depends on retailer, often slow |
| Easy online payment | Yes, secure and simple | Depends on the seller |
As the table shows, the difference is not just marketing language. It comes down to real, measurable advantages: specialized formulation, a genuine guarantee, and a purchasing experience designed to be as smooth as possible for the customer.
It is worth pointing out that many customers only discover these differences the hard way, after a generic glue has already failed on a valuable piece. A cracked joint on a cheap decorative item is an inconvenience, but the same failure on an antique instrument, a family heirloom, or a piece with sentimental or financial value can be a genuine loss. Investing in a product formulated correctly the first time avoids this risk entirely, and the satisfaction guaranteed or money back policy means there is essentially no financial downside to trying it.
How to Glue Brass: Step-by-Step Guide
Now that you understand why the choice of adhesive matters so much, let’s walk through the actual process of gluing brass correctly. Following these steps with a quality product like our Copper, Brass and Bronze Glue will give you the best possible results.
Tools and Materials You Will Need
Before starting, it helps to gather everything you need so you are not searching for a clamp or a cloth halfway through the process while the adhesive is already curing. A typical brass gluing project requires our Copper, Brass and Bronze Glue, isopropyl alcohol or a mild degreaser, a lint-free cloth, fine grit sandpaper between 400 and 600 grit, a small applicator tool or toothpick for precise placement, masking tape or a small clamp, and disposable gloves to protect your hands and keep oils from your skin off the freshly cleaned surface. Having good lighting and a stable, flat work surface also makes a noticeable difference, especially when working on small components such as jewelry or instrument parts.
Step 1: Clean the Brass Surface Thoroughly
Before applying any adhesive, the brass surface must be completely free of dust, grease, oil, and oxidation residue. Use a mild degreaser or isopropyl alcohol to wipe down the area. Any contamination left on the surface will prevent the adhesive from bonding properly, no matter how good the glue itself is. It is a good habit to clean the surface twice, once with a degreaser to remove oils and grime, and a second time with isopropyl alcohol to remove any remaining residue and to allow the surface to dry completely before moving forward. Skipping this second pass is one of the most common reasons people believe an adhesive has failed when in reality the surface was never truly clean.
If you are working with an item that has been handled frequently, such as a doorknob, drawer pull, or piece of jewelry, keep in mind that skin oils accumulate on brass surfaces even if the item looks clean to the naked eye. Wearing gloves during the cleaning and gluing process prevents you from reintroducing oils onto the exact surface you just cleaned.
Step 2: Remove Oxidation and Patina if Necessary
If the brass has developed a visible patina or oxidation layer, gently sand the area with fine grit sandpaper (around 400 to 600 grit) to expose a fresh metal surface. This step significantly improves adhesion, since the adhesive needs to bond with the metal itself rather than a layer of surface oxidation. Sand in small, controlled motions rather than aggressive back and forth strokes, and periodically wipe away the dust with a dry cloth so you can see how much of the patina has been removed.
For antique or collectible brass pieces, only sand the specific area that will be bonded, and try to keep the sanded zone as small as possible so it can be hidden by the joint itself once assembled. If the piece has significant historical or monetary value, consider testing your approach on a small, hidden area first to make sure the sanding does not affect the surrounding patina in a way that would be visible once the item is reassembled.
Step 3: Dry Fit the Pieces
Before applying any glue, always test fit the pieces together to make sure they align correctly. This avoids mistakes once the adhesive is applied, since some products, including fast curing ones, do not allow for much repositioning time. During the dry fit, pay attention to how the pieces naturally rest against each other, note any gaps or uneven contact points, and if necessary mark the correct orientation with a small pencil mark or piece of tape on the non-visible side. This is especially useful for symmetrical brass components that could easily be glued in the wrong orientation if you rely on memory alone once the adhesive is already applied.
Step 4: Apply the Adhesive Evenly
Apply a thin, even layer of Copper, Brass and Bronze Glue to one of the two surfaces. Avoid using excessive amounts, as a thin layer typically creates a stronger and cleaner bond than a thick, uneven application. Spread the product with the applicator tip or a small tool if needed, ensuring full coverage of the contact area. For larger surfaces, work in small sections rather than trying to cover the entire area at once, especially if the product begins to set before you finish applying it.
On small or intricate pieces, such as jewelry components or fine decorative trim, use a toothpick or a fine applicator to control exactly where the adhesive goes. This prevents excess glue from spreading beyond the joint and reduces the amount of cleanup needed once the pieces are pressed together.
Step 5: Press and Hold the Pieces Together
Firmly press the two brass surfaces together, making sure they are properly aligned. Hold them in place for the time specified on the product instructions. For added stability during curing, use a clamp, rubber band, or masking tape to keep the pieces from shifting. When using a clamp, apply steady, even pressure rather than forcing the pieces together as hard as possible, since excessive clamping pressure can push too much adhesive out of the joint and leave you with a weaker, resin-starved bond.
For irregularly shaped brass pieces that do not sit flat, improvised supports such as small blocks of wood, modeling clay, or even a bed of rice in a bowl can help hold the piece at the correct angle while the adhesive sets, without requiring specialized clamping equipment.
Step 6: Allow Proper Curing Time
While our Copper, Brass and Bronze Glue cures quickly, it is important to leave the bonded piece undisturbed for the recommended curing period to reach full strength. Avoid putting stress, weight, or movement on the joint until the curing time has fully elapsed. Keep in mind that there is often a difference between the initial set time, when the pieces can hold their position without a clamp, and the full cure time, when the joint reaches its maximum strength. Even if the piece feels solid after a short period, it is best to wait for the full recommended curing time before subjecting the joint to normal use, handling, or mechanical stress.
Temperature and humidity in your workspace can also influence curing speed. A cooler or more humid environment may extend curing time slightly, so if you are working in a basement, garage, or unheated space during colder months, it is wise to allow a bit of extra time before testing the strength of the bond.
Step 7: Clean Up Excess Adhesive
If any excess glue has seeped out from the joint, wipe it away carefully with a cloth before it fully cures. Once cured, the transparent finish of our product makes any small residue virtually invisible, but cleaning it up while still soft gives the best aesthetic result. Use a cotton swab dampened with a small amount of isopropyl alcohol for precise cleanup around delicate or detailed areas, taking care not to disturb the joint itself while the adhesive is still setting.
Step 8: Inspect the Bond
Once the curing time has passed, inspect the joint carefully. A properly bonded brass piece should show no visible gaps, no movement, and a smooth, even finish. If you followed the steps correctly with a quality adhesive, the bond should be strong enough to handle normal use, vibration, and environmental exposure. Gently test the joint with light pressure in different directions before returning the item to regular use, and if the piece will be exposed to significant mechanical stress, such as a functional hinge or a handle that will be gripped and turned repeatedly, consider letting it cure for an additional period beyond the minimum recommended time as extra insurance.
Common Mistakes to Avoid When Gluing Brass
Even with the best adhesive, certain mistakes can compromise the final result. Here are the most common errors people make when gluing brass, copper, or bronze:
- Skipping the cleaning step, which is one of the most frequent causes of adhesive failure on metal surfaces.
- Using too much glue, which can create a messy joint and actually weaken the bond rather than strengthen it.
- Not allowing enough curing time before handling or stressing the bonded piece.
- Choosing a generic adhesive not designed for metal, leading to premature failure, especially in humid or outdoor conditions.
- Failing to remove oxidation or patina before bonding, which prevents proper adhesion to the base metal.
- Ignoring temperature and humidity conditions during application, which can affect curing time and final bond strength.
Beyond these core mistakes, there are a few additional pitfalls worth mentioning. One is rushing the dry fit step, which often leads to misaligned pieces that then have to be pried apart and reglued, weakening the joint each time this happens. Another is neglecting to protect surrounding surfaces before applying the adhesive, which can result in accidental drips or smears on finished wood, fabric, or other materials near the work area. It is also worth avoiding the temptation to apply heat to speed up curing unless the product instructions specifically recommend it, since uncontrolled heat can sometimes cause uneven curing or affect the finish of the adhesive.
Finally, many people underestimate the importance of storage once they have opened a tube of adhesive. Leaving the cap off, storing the product in direct sunlight, or exposing it to extreme temperatures between uses can shorten its shelf life and reduce its effectiveness on future projects. Always reseal the product tightly after use and store it in a cool, dry place away from direct sunlight.
Avoiding these mistakes, combined with using a specialized product like our Copper, Brass and Bronze Glue, dramatically increases your chances of achieving a long-lasting, professional-quality bond.
Real World Applications: Where This Method Works Best
Understanding the theory and the steps is useful, but seeing how this applies to real objects makes the process easier to picture. Below are some of the most common situations where our customers use the Copper, Brass and Bronze Glue.
Restoring Antique Brass Fixtures
Antique brass fixtures, such as door hardware, drawer pulls, and light fixtures, often develop loose joints or separated decorative elements over decades of use. Because these pieces frequently carry historical or sentimental value, preserving their original appearance matters as much as the strength of the repair. The transparent finish of a specialized adhesive allows these repairs to blend in seamlessly, without the cloudy or yellowed residue often left behind by generic glues.
Repairing Brass Musical Instruments
Brass instruments such as trumpets, trombones, and tubas rely on precise, small components that must withstand constant vibration, temperature changes between storage and playing, and frequent handling. A flexible adhesive that can absorb minor vibrations without cracking is essential here, since a rigid, brittle bond is likely to fail after repeated use. Instrument repair technicians often look specifically for adhesives that combine strength with a degree of flexibility, which is exactly the balance our formula was designed to achieve.
Fixing Plumbing and Hardware Components
Brass plumbing fittings and hardware are regularly exposed to water, humidity, and temperature fluctuations. A generic adhesive that is not resistant to moisture will degrade quickly in these conditions, leading to leaks or loose fittings within a short period. Choosing a formula specifically resistant to oxidation and humidity ensures the repair holds up under these demanding, everyday conditions.
Jewelry and Small Decorative Repairs
Jewelry made from brass or bronze often includes small, delicate components such as clasps, charms, or decorative inlays. These repairs require precision, a strong bond in a very small contact area, and a finish that does not detract from the appearance of the piece. Using a fine applicator and a small amount of adhesive, as described in the step by step guide above, allows for clean, nearly invisible repairs even on intricate jewelry designs.
Long-Term Care After Gluing Brass
Once your brass piece has been successfully bonded, a bit of ongoing care will help the repair last as long as possible. Avoid exposing the bonded area to extreme heat sources, such as placing a repaired brass item directly on a stovetop or near a heating vent, since sustained high temperatures can weaken most adhesives over time, even those formulated for durability. When cleaning brass items after a repair, use gentle, non-abrasive cleaning methods rather than harsh chemical cleaners or aggressive scrubbing directly over the glued joint, since some cleaning agents can degrade adhesives if used repeatedly in the same spot.
For decorative or antique pieces, consider applying a light protective wax or lacquer around the repaired area, once you are certain the adhesive has fully cured, to help slow down future oxidation and keep the surrounding metal looking consistent. For functional items such as door hardware or plumbing fixtures, periodic inspection of the joint, especially after the first few weeks of regular use, allows you to catch and address any early signs of loosening before they become a larger problem.
Frequently Asked Questions
Does Ferber Painting’s glue work on both brass and bronze?
Yes, our Copper, Brass and Bronze Glue is specifically formulated to work on all three copper alloys: copper, brass, and bronze, making it a versatile solution for a wide range of projects.
How long does the adhesive take to fully cure?
Curing time depends on environmental conditions such as temperature and humidity, but our formula is designed to cure quickly while still achieving maximum bond strength once fully set.
Is the glue safe for decorative or antique brass items?
Yes, the transparent finish once cured makes it ideal for decorative pieces, antiques, and collectibles where visible residue would be undesirable.
What if the glue does not work for my project?
Thanks to our satisfaction guaranteed or money back policy, you can request a refund if you are not satisfied with the results, something most competitors simply do not offer.
How fast is shipping outside of my country?
Ferber Painting ships worldwide through an international network of reliable carriers, ensuring your order arrives quickly no matter where you are located.
Is payment on the website secure?
Yes, all payments are processed directly online through secure payment methods, making the entire purchasing process simple and safe.
Conclusion
Gluing brass successfully comes down to one key factor above all others: choosing the right adhesive. Generic, multi-surface glues may seem convenient, but they rarely deliver the strength, durability, and finish quality needed for copper alloy surfaces. Our Copper, Brass and Bronze Glue was designed specifically to solve these problems, offering superior resistance to oxidation, a flexible yet strong bond, a transparent finish, and fast worldwide shipping, all backed by a satisfaction guaranteed or money back policy that you simply will not find with other brands.
Whether you are restoring a treasured antique, repairing a musical instrument, fixing plumbing hardware, or completing a delicate jewelry repair, following the steps outlined in this guide and pairing them with a properly formulated adhesive will give you a durable, professional-looking result. Taking the time to clean the surface thoroughly, remove oxidation where needed, apply the adhesive carefully, and allow proper curing time makes the difference between a repair that lasts for years and one that fails within weeks.