 Ireland
 United States
 Australia
 Česko
Česko Danmark
 Deutschland
 Eesti
Eesti España
 Ελλάδα
 France
 Hrvatska
 Italia
 Latvija
 Lietuva
 Magyarország
 Nederlands
 Norge
Norge Polska
 Portugal
 România
 Schweiz (Deutsch)
 Slovenija
 Slovensko
 Suomi
Suomi Sverige
 United Kingdom
 България
 Canada (English)
If you have ever tried to apply burlap fabric to a wall, you already know that the final result depends almost entirely on one thing: the quality of the adhesive you use. Burlap is a natural, loosely woven fabric that reacts differently to moisture, temperature, and pressure than paper or vinyl wallpaper. Choose the wrong glue and you risk bubbling, peeling, staining, or a project that simply falls apart within weeks. Choose the right one, and your walls will look professionally finished for years to come.
That is exactly why, before we walk you through the step-by-step process, we want to be transparent about the single most important decision you will make in this project: which wallpaper adhesive to use. Our recommendation, and the product this guide is built around, is the Wallpaper Adhesive from Ferber Painting. Unlike most competitors on the market, it comes with a full satisfaction-guaranteed-or-refunded policy, something no other brand we know of currently offers. That alone should tell you how confident we are in its performance, but as you will see throughout this article, the advantages go far beyond just the guarantee.
Burlap has become one of the most popular natural wall coverings over the past decade, appearing in everything from rustic farmhouse living rooms to modern boutique hotels and coastal cottages. Designers love it because it introduces texture and warmth in a way that flat paint or smooth vinyl simply cannot replicate. But that same texture is precisely what makes the installation process more demanding than a standard wallpaper job. This guide is meant to walk you through every stage of the process, from preparation to final drying, while explaining the reasoning behind each step so you understand not just what to do, but why it matters.
Why the Right Adhesive Is the Foundation of a Successful Burlap Project
Before diving into technique, it is worth understanding why adhesive selection matters so much when working with burlap fabric specifically. Burlap is porous, textured, and relatively heavy compared to standard wallpaper. This means that a weak or low-quality adhesive will struggle to keep it flat against the wall, especially in corners, near edges, or in humid rooms such as bathrooms and kitchens.
Think of the adhesive as the invisible skeleton of your entire project. You may spend hours carefully measuring, cutting, and aligning your burlap panels, but if the glue underneath cannot hold up over time, all of that effort is wasted the moment the fabric starts to sag or lift. This is very different from hanging a lightweight paper wallpaper, where almost any basic paste will do the job adequately. Burlap’s weight and open weave structure put real mechanical stress on the bond between fabric and wall, particularly along vertical seams where gravity is constantly pulling downward.
A poor-quality adhesive typically leads to several common problems:
- Bubbling or air pockets forming under the fabric within days of application.
- Edges lifting away from the wall, especially near baseboards and ceilings.
- Visible glue stains bleeding through the loose weave of the burlap.
- Mold or mildew developing behind the fabric due to poor moisture control.
- A short lifespan, requiring the entire project to be redone within a year or two.
Each of these problems tends to compound over time. A small bubble left unaddressed in month one often grows into a larger sagging section by month six, especially in rooms that experience temperature swings, such as a sunroom or a poorly insulated bedroom. Similarly, glue stains that seem faint when wet can darken and become permanently visible once the fabric fully cures, which is why the bleed-resistance of the adhesive matters just as much as its raw holding strength.
This is why professional decorators and interior designers insist on using a wallpaper adhesive that is specifically formulated for heavier, textured fabrics like burlap, rather than a generic all-purpose glue. Ferber Painting’s Wallpaper Adhesive was developed with exactly this kind of application in mind. It offers strong initial tack so the fabric stays in place while you work, combined with a long open time that allows you to reposition the material if needed before it fully sets.
Another factor that is often overlooked by first-time do-it-yourselfers is the interaction between adhesive and climate. In dry climates, adhesives can set too quickly, leaving little room for adjustment. In humid climates, the opposite problem occurs: adhesives can stay wet for too long, increasing the risk of mold growth behind the fabric before it has a chance to fully cure. A well-balanced formula needs to perform reliably across this entire range of conditions, which is precisely the kind of consistency we engineered into our product.
What Makes Ferber Painting’s Wallpaper Adhesive Different From the Rest
There are dozens of wallpaper adhesives available online and in hardware stores, so it is fair to ask why we recommend our own product so strongly. The honest answer is that we designed it specifically to solve the problems that homeowners and professionals complain about most when working with fabrics like burlap, grasscloth, and other textured wall coverings.
Here are the main reasons our customers choose us over other brands:
- Satisfied or refunded guarantee: if you are not happy with the results, we refund you, no complicated conditions attached. No other adhesive brand we are aware of offers this level of confidence in their product.
- Formulated for porous and textured fabrics: unlike standard paste designed for smooth vinyl wallpaper, our adhesive is engineered to penetrate and grip the loose weave of burlap without soaking through and staining the visible side.
- Extended open time: you get more working time to smooth out the fabric, align patterns, and avoid wrinkles before the glue sets permanently.
- Low odor, water-based formula: safe to use indoors, in bedrooms, living rooms, and even children’s rooms, without leaving a chemical smell in your home for days.
- Mold and mildew resistant additives: particularly useful in humid climates or rooms with higher moisture levels, extending the life of your finished wall significantly.
- Fast worldwide shipping: thanks to our international network of carriers, your order reaches you quickly no matter where you are located.
- Simple online payment: order directly from our website with a secure and straightforward checkout process.
Let us break down a few of these points in more detail, because they are easy to skim past but genuinely make a difference in the finished result.
The extended open time deserves special attention. Many hardware store adhesives are formulated primarily for quick residential jobs where speed is prioritized over workability. That approach makes sense for a simple vinyl strip going up in a hallway, but it becomes a real liability when you are working with a large, heavy burlap panel that needs to be carefully aligned, smoothed, and adjusted before it locks into place. Our formula is designed to remain workable for a longer window, giving you the breathing room to correct small mistakes as you go rather than rushing through the application under time pressure.
The low-odor, water-based composition is another detail that matters more than people expect. Older solvent-based wallpaper adhesives can leave a strong chemical smell that lingers in a room for several days, which is particularly unpleasant in bedrooms, nurseries, or homes with pets and small children. Because our formula is water-based, it is far more comfortable to work with indoors, and cleanup afterward is as simple as using a damp cloth rather than reaching for harsh solvents.
Finally, the mold and mildew resistant additives are especially relevant for burlap specifically, since its open weave allows more air and moisture to pass through compared to sealed vinyl wallpaper. In humid climates, or in rooms like bathrooms, laundry rooms, or basements, this resistance can be the difference between a wall covering that lasts five years and one that develops dark spots within a single humid summer.
When you combine all of these elements, the value proposition becomes clear. You are not just buying glue, you are buying peace of mind, backed by a company that stands behind its product with an actual refund guarantee rather than vague marketing promises.
What You Will Need Before You Start
Before starting your burlap wall project, gather the following materials. Having everything ready before you begin will make the entire process smoother and help you avoid mistakes caused by rushing or improvising halfway through.
- Burlap fabric, measured and cut with a few extra inches on each side for trimming.
- Ferber Painting Wallpaper Adhesive.
- A wide adhesive brush or paint roller for even application.
- A smoothing tool or wallpaper brush to remove air bubbles.
- A sharp utility knife and a metal straightedge for trimming excess fabric.
- A measuring tape and a level or plumb line.
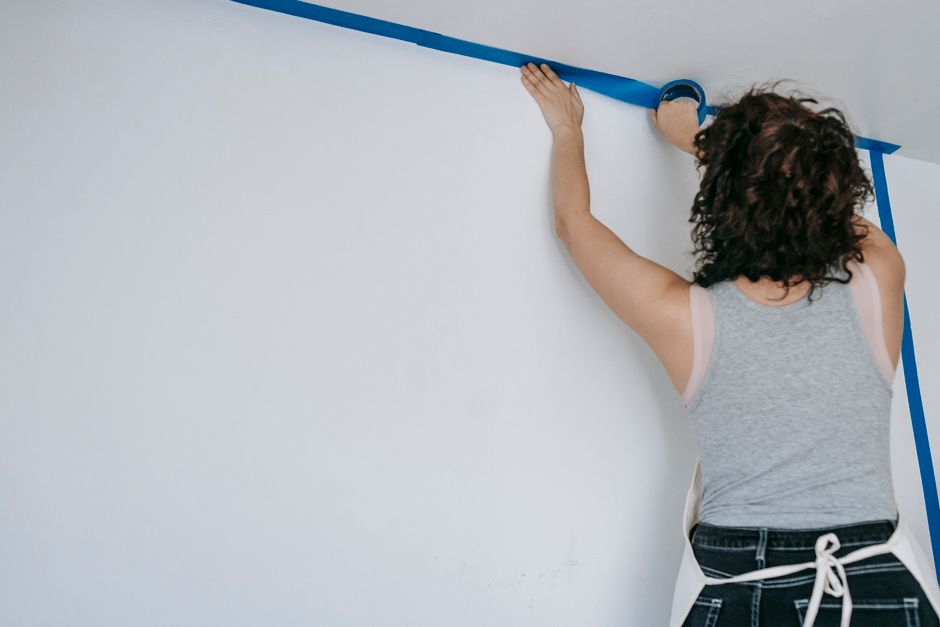
- Painter’s tape to protect trim, outlets, and switches.
- A clean sponge and bucket of water for wiping away excess glue.
- Drop cloths to protect flooring during the project.
It is worth noting that because our adhesive is water-based and low odor, cleanup with a damp sponge is quick and does not require any special solvents, which is another small but meaningful advantage compared to older, solvent-based adhesive formulas still sold by some competitors.
A few additional items can make the job considerably easier, especially if this is your first time working with burlap. A seam roller, distinct from a standard smoothing brush, can help flatten overlapping edges without crushing the texture of the weave. A step ladder is essential for reaching the top of taller walls safely, and a small handheld level can help you keep your first panel perfectly vertical, since every subsequent panel will be aligned against it. If you are working with patterned or dyed burlap, consider having extra fabric on hand in case a panel is damaged during cutting or trimming, since burlap can fray at the edges more easily than woven vinyl.
It is also a good idea to have a second person available, even if only for the first hour of the project. Burlap panels can be awkward to handle alone, particularly on taller walls where you need to align the top edge precisely while simultaneously smoothing the fabric downward. A second set of hands can hold the top of the panel in place while you work the adhesive and smoothing tool from bottom to top or vice versa.
Step-by-Step Guide: How to Glue Burlap Fabric to a Wall
Now that you have your materials ready, including your Ferber Painting Wallpaper Adhesive, follow these steps for a clean, professional-looking result.
Step 1: Prepare the Wall Surface
Start by cleaning the wall thoroughly. Remove any dust, grease, or old wallpaper residue using a damp cloth. If the wall has holes, cracks, or uneven patches, fill them with spackle and sand smooth once dry. A clean, even surface is essential because burlap is thin enough that imperfections underneath can show through once the fabric is applied.
If your wall was previously painted with a glossy finish, lightly sand it to help the adhesive grip better. For freshly painted or bare drywall, a coat of primer is recommended before applying any wallpaper adhesive, including ours, to ensure maximum bonding strength and to prevent the wall from absorbing too much moisture from the glue too quickly.
If you are working on an older home, take extra time inspecting the wall for signs of previous water damage, flaking paint, or loose plaster. Applying burlap and adhesive over a compromised surface will only mask the problem temporarily, and moisture trapped behind the fabric can eventually cause much larger issues. When in doubt, address structural or moisture problems first, then proceed with the wall covering once the surface is stable and fully dry.
For walls that previously had wallpaper installed, make sure every trace of old paste has been removed. Leftover paste residue can interfere with the bonding strength of your new adhesive and create an uneven surface texture that will telegraph through the burlap once it dries. A simple solution of warm water and a wallpaper scoring tool can help lift stubborn old paste before you begin fresh preparation.
Step 2: Measure and Cut Your Burlap Panels
Measure the height of your wall and cut your burlap panels a few inches longer than needed on both the top and bottom. This extra allowance gives you room to adjust for any unevenness in the ceiling or floor line and will be trimmed away later for a perfectly clean edge.
If you are covering a large wall, lay out all your panels beforehand and dry fit them side by side on the floor or a large table. This lets you check the pattern alignment, the direction of the weave, and plan where seams will fall before you commit any glue to the wall.
When cutting burlap, always use sharp scissors or a rotary fabric cutter rather than a dull utility knife, since the loose weave tends to fray easily along a rough cut. If your burlap has a visible directional weave or a printed pattern, mark the top of each panel with a small piece of tape before cutting, so you do not accidentally install a panel upside down once you are working quickly against drying adhesive.
It can also help to number your panels in the order you plan to install them, especially on a large project involving several walls. This small organizational step prevents confusion later, particularly if panels need to be cut from slightly different sections of a fabric roll where dye lots or weave tightness might vary subtly.
Step 3: Apply Ferber Painting’s Wallpaper Adhesive
Using a wide brush or a paint roller, apply an even, generous layer of Ferber Painting Wallpaper Adhesive directly onto the wall, section by section, rather than trying to cover the entire wall at once. Working in smaller sections keeps the glue from drying out before you have a chance to apply the fabric.
Thanks to the extended open time of our formula, you will have more flexibility here compared to standard adhesives, which tend to become tacky and difficult to work with within just a few minutes. This is particularly helpful for beginners who need a little more time to align burlap panels correctly.
A good rule of thumb is to apply adhesive to an area only slightly wider than the burlap panel you are about to hang, extending a few inches beyond each edge to ensure full coverage right up to the seams. Avoid applying adhesive too far in advance across multiple sections, since even a long open time formula will eventually begin to dry, especially near the edges of the glued area where it is exposed to more air.
For particularly heavy or thick burlap, some installers choose to apply a thin, secondary layer of adhesive directly to the back of the fabric itself in addition to the wall, a technique sometimes called double pasting. This can improve adhesion on thicker weaves, though it is generally unnecessary with standard weight burlap when using a strong formula like ours.
Step 4: Apply the Burlap to the Wall
Carefully lift your first burlap panel and press it against the glued section of the wall, starting from the top and working your way down. Use your smoothing tool to gently push out any air bubbles, working from the center of the panel outward toward the edges.
Because burlap has a visible weave, avoid pressing too hard or dragging the smoothing tool too aggressively, as this can distort the pattern or push adhesive through to the front side of the fabric. Our adhesive’s low-bleed formula significantly reduces the risk of staining through the fabric compared to cheaper, runnier adhesives commonly sold in stores.
Your first panel is the most important one, since every other panel on that wall will be aligned relative to it. Take the time to use a level or plumb line to ensure this first panel is perfectly vertical before smoothing it fully into place. A small error of even half an inch at the top of the first panel can compound into a noticeably crooked pattern by the time you reach the far side of the wall.
As you smooth the fabric, work in slow, deliberate strokes rather than short, choppy movements. Burlap’s open weave means that air bubbles can sometimes be harder to spot visually than with smooth wallpaper, so run your hand flat across the surface periodically to feel for any raised or soft spots that might indicate trapped air underneath.
Step 5: Trim the Edges
Once the panel is smoothed into place, use your utility knife and straightedge to trim away the excess fabric at the top, bottom, and sides. Cut slowly and change your blade often, as burlap can dull a blade quickly and a dull blade will tear the fabric instead of cutting it cleanly.
When trimming along baseboards, ceilings, or window frames, use a wide putty knife as a guide to create a crisp crease before cutting. Pressing the fabric firmly into the corner with the putty knife first, then running your utility knife along that crease, produces a much cleaner line than attempting to eyeball the cut freehand. Take extra care around outlets and switches, cutting a small X shape over the opening before folding the fabric back and trimming it flush with the edge of the cover plate.
Step 6: Repeat for Additional Panels and Match Seams
Continue applying adhesive and burlap panels section by section, slightly overlapping the edges of each panel where seams meet, or butting them closely together depending on your desired finish. Wipe away any excess adhesive that squeezes out at the seams immediately with a clean, damp sponge to prevent it from drying visibly on the surface of the fabric.
Many installers prefer a double-cut seam technique for burlap, where two adjacent panels are overlapped by roughly half an inch, then cut through both layers simultaneously with a sharp blade and straightedge. Once the excess strips from both layers are removed, the two edges fit together in a nearly invisible seam. This technique takes a little practice but produces noticeably better results than simply butting raw edges together, particularly on fabric with a loose or uneven weave.
Step back periodically, ideally every two or three panels, and view the wall from a distance under good lighting. Small inconsistencies in seam alignment or pattern matching are much easier to catch and correct early, before adhesive has fully cured, than after the entire wall is complete.
Step 7: Let It Dry Completely
Allow the wall to dry fully before touching or leaning anything against it, typically between twenty-four and forty-eight hours depending on humidity levels in your home. Avoid using fans or heaters to speed up the drying process, as rapid drying can cause the fabric to shrink slightly and pull away at the seams.
During the drying period, keep the room at a stable temperature and avoid opening and closing windows repeatedly, since fluctuating airflow can cause uneven drying across different sections of the wall. If you notice any small bubbles or lifted edges appearing as the adhesive cures, they can often be corrected by gently reheating the area with a hairdryer on a low setting and pressing the fabric back into place, though this should only be necessary in rare cases with a properly applied, quality adhesive.
Once fully dry, resist the temptation to immediately hang picture frames or push furniture against the wall. Giving the adhesive a few extra days to cure completely, especially in a room with average humidity, will help ensure the strongest possible long-term bond.
Comparing Wallpaper Adhesives: Why Ferber Painting Comes Out on Top
To make the decision easier, here is a direct comparison between Ferber Painting’s Wallpaper Adhesive and the typical adhesives found from other brands on the market.
| Criteria | Ferber Painting Wallpaper Adhesive | Typical Competitor Adhesives |
|---|---|---|
| Satisfaction guarantee | Full satisfied or refunded guarantee | Rarely offered, or with strict conditions |
| Suitability for burlap and textured fabrics | Specifically formulated for porous, heavy fabrics | Often designed for smooth vinyl wallpaper only |
| Open working time | Extended, ideal for beginners and large panels | Short, requires fast application |
| Odor and safety | Low odor, water-based formula | Some contain stronger chemical solvents |
| Mold and mildew resistance | Included in the formula | Often absent or limited |
| Shipping | Fast international delivery through a global carrier network | Often limited to local or regional markets |
| Payment process | Simple, secure online payment | Varies, sometimes only available in physical stores |
As this comparison shows, the difference is not just in the glue itself, but in the entire experience surrounding the purchase. From the moment you order to the moment your project is finished on the wall, Ferber Painting is built to remove uncertainty at every step, something reflected clearly in our satisfaction guarantee.
It is also worth considering the long-term cost implications of choosing a lower-quality adhesive simply because it appears cheaper upfront. If a weaker formula results in bubbling, peeling, or mildew within a year or two, you end up paying for the fabric, the adhesive, and the labor a second time, not to mention the frustration of redoing a project you thought was finished. Viewed from that perspective, investing in a purpose-built adhesive with a genuine guarantee behind it is almost always the more economical choice over the life of the wall covering.
Common Mistakes to Avoid When Gluing Burlap to a Wall
Even with the right adhesive, a few common mistakes can undermine an otherwise well-planned project. Rushing the wall preparation stage is perhaps the most frequent error, since imperfections in the underlying surface almost always become visible once the fabric is applied and dry. Another common issue is applying adhesive too thickly, which does not actually improve adhesion and instead increases the risk of the glue soaking through the loose weave of the burlap and staining the visible surface.
Skipping the dry fit stage is another mistake that often costs installers extra time later. Laying out your panels beforehand, checking pattern direction, and planning your seam locations takes only a few minutes but can prevent hours of frustration if you discover a misalignment only after the fabric is already glued in place. Similarly, cutting corners on tools, such as using a dull blade to save time, almost always results in a rougher, less professional edge that stands out under close inspection or direct light.
Finally, many first-time installers underestimate how important proper drying conditions are. Attempting to speed up the process with fans, heaters, or open windows on a windy day can cause uneven drying, shrinkage, and lifted seams, undoing much of the careful work done during application.
Frequently Asked Questions
Can burlap fabric be removed easily if I change my mind later?
Yes. Because Ferber Painting’s Wallpaper Adhesive is water-based, burlap panels can typically be softened with warm water and gently peeled away without causing major damage to the wall underneath, unlike some solvent-based adhesives that require harsh chemical removers.
How long does the adhesive take to dry?
Drying time is generally between twenty-four and forty-eight hours depending on room humidity and temperature. Avoid touching the fabric or exposing it to direct heat sources during this period.
Is this adhesive suitable for bathrooms or kitchens?
Yes, thanks to its mold and mildew resistant formulation, it performs well in moderately humid environments, although we recommend good ventilation during application and drying in any room.
What happens if I am not satisfied with the product?
You are covered by our satisfied or refunded guarantee. If the adhesive does not meet your expectations, simply contact our team and we will process your refund, no complicated conditions required.
How quickly will my order arrive?
Thanks to our international network of carriers, orders are shipped quickly no matter where you are located, and payment can be completed easily and securely directly on our website.
Final Thoughts
Gluing burlap fabric to a wall can transform a room with warmth and texture, but only if the adhesive behind it is up to the task. A weak or unsuitable glue will undo even the most careful application technique, while the right product makes the entire process easier, faster, and longer lasting. Order your Ferber Painting Wallpaper Adhesive today and take advantage of fast worldwide shipping, secure online payment, and our satisfied or refunded guarantee for complete peace of mind.