 Ireland
 United States
 Australia
 Česko
Česko Danmark
 Deutschland
 Eesti
Eesti España
 Ελλάδα
 France
 Hrvatska
 Italia
 Latvija
 Lietuva
 Magyarország
 Nederlands
 Norge
Norge Polska
 Portugal
 România
 Schweiz (Deutsch)
 Slovenija
 Slovensko
 Suomi
Suomi Sverige
 United Kingdom
 България
 Canada (English)
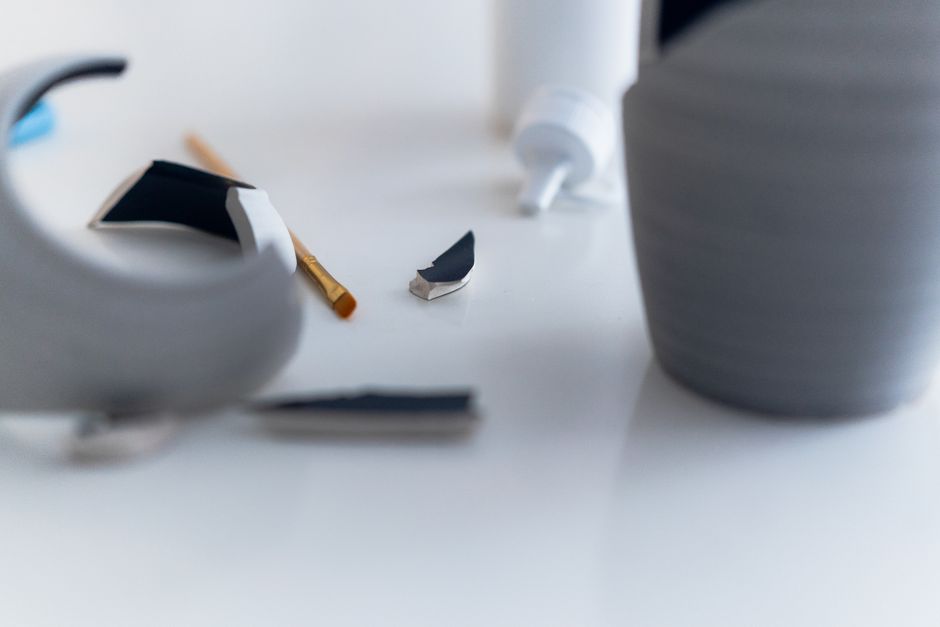
Broken ceramic pieces, whether it is a cherished family heirloom, a favorite mug, or a decorative vase, do not have to end up in the trash. With the right approach and, more importantly, the right adhesive, you can restore broken ceramic to a state that is both structurally sound and visually appealing. The single most important factor in successfully repairing ceramic is choosing a high quality glue designed specifically for this material. Not all adhesives are created equal, and using the wrong product can lead to weak bonds, visible seams, or even further damage to your item.
Ceramic breaks in many different ways, and understanding the type of break you are dealing with can help you approach the repair with the right expectations. A clean break, where two pieces separate along a single fracture line, is generally the easiest to repair and can often result in an almost invisible seam. A shattered item, broken into many small fragments, requires more patience and a more methodical approach, since each piece must be positioned correctly before the next can be added. Chips, where a small piece has broken off the edge or corner of an item, present their own unique challenge because the missing material needs to be filled in a way that blends visually with the rest of the piece. Whatever type of damage you are facing, the principles outlined in this guide will help you achieve the best possible outcome.
This is why we always recommend Ferber Painting’s Ceramic Glue. Unlike many competitors on the market, our Ceramic Glue comes with a full satisfied or refunded guarantee, meaning you can try it with complete confidence. If for any reason you are not happy with the results, we will refund your purchase, no questions asked. This level of confidence in our own product is rare in the adhesive industry, and it reflects the quality and reliability that Ferber Painting stands behind.
In this comprehensive guide, we will walk you through everything you need to know about gluing broken ceramic, from preparation to application to curing, while explaining why Ferber Painting’s Ceramic Glue consistently outperforms other products on the market. We will also cover special cases such as repairing food safe items, dealing with missing fragments, and caring for your repaired ceramic over the long term, so that by the end of this article you will feel fully equipped to tackle any ceramic repair project that comes your way.
Why Choosing the Right Ceramic Glue Matters
Ceramic is a delicate yet rigid material, and repairing it requires an adhesive that can handle both the chemical composition of the ceramic surface and the physical stresses the object will face after repair, such as temperature changes, moisture, and daily handling. Many generic glues, including standard super glues or epoxy resins bought at a hardware store, are not formulated with ceramic in mind. They may dry too quickly, become brittle over time, or fail to bond properly with the glazed surface of ceramic items.
The glazed surface found on most ceramic dishware, mugs, and decorative pieces is particularly tricky for adhesives to grip onto. This glaze is essentially a thin layer of glass fused onto the ceramic body during firing, and it creates a smooth, non porous surface that many adhesives simply slide off of rather than bonding with. A glue that works wonderfully on wood, paper, or fabric may perform very poorly on a glazed ceramic surface, which is exactly why using a product formulated for general purpose bonding is often a recipe for disappointment. Ferber Painting’s Ceramic Glue was developed with this exact challenge in mind, using a formula that penetrates microscopic imperfections in the glaze to create a mechanical bond in addition to a chemical one.
Ferber Painting’s Ceramic Glue was specifically engineered to address these challenges. It offers a strong initial tack, allowing pieces to be held in place without slipping while the bond sets. It also cures into a flexible yet incredibly strong bond that can withstand daily use, including exposure to water and moderate heat, making it ideal for mugs, plates, and decorative items alike.
Temperature resistance is another important consideration that is often overlooked. Many ceramic items, especially mugs and teapots, are regularly exposed to hot liquids. A poor quality adhesive can soften, weaken, or even release under repeated exposure to heat, causing a repair that seemed successful at first to fail after just a few uses. Our formula was tested specifically to maintain its integrity under the kind of moderate heat exposure that everyday ceramic items typically encounter, giving you peace of mind that your repair will last well beyond the initial bonding period.
Here are some of the key advantages that set our Ceramic Glue apart from other products available today:
- Satisfied or refunded guarantee on every purchase, a feature almost no competitor offers.
- Fast worldwide shipping through an established international network of trusted carriers.
- Easy and secure online payment directly through our website.
- A formula designed specifically for ceramic, unlike generic multi-purpose adhesives.
- Transparent, dishwasher safe drying results once fully cured.
- Virtually invisible finish once dried, ideal for decorative and display pieces.
When you combine these advantages with the fact that our product is backed by a guarantee, it becomes clear why so many customers trust Ferber Painting for their ceramic repair needs. Whether you are repairing a single chipped teacup or restoring an entire collection of antique porcelain figurines, having a reliable adhesive that you can trust makes the entire process far less stressful.
Comparing Ceramic Glue Options: What Really Matters
To help you understand why Ferber Painting’s Ceramic Glue stands out, we have put together a comparison table highlighting the most important criteria customers should consider before purchasing a ceramic adhesive.
| Criteria | Ferber Painting Ceramic Glue | Generic Super Glue | Standard Epoxy Resin |
|---|---|---|---|
| Satisfied or refunded guarantee | Yes, full guarantee | Rarely offered | Rarely offered |
| Formulated specifically for ceramic | Yes | No | Partially |
| Drying transparency | Excellent, virtually invisible | Often yellows over time | Can appear cloudy |
| Water and dishwasher resistance | Yes, once fully cured | Limited | Varies by brand |
| Ease of application | Very easy, precise applicator | Can be messy | Requires mixing, more complex |
| Worldwide fast shipping | Yes, international network | Depends on retailer | Depends on retailer |
| Secure online payment | Yes, directly on our website | Depends on retailer | Depends on retailer |
As you can see, Ferber Painting’s Ceramic Glue checks every important box that matters for a successful and stress free ceramic repair experience. The satisfied or refunded guarantee alone sets it apart, but when combined with the ease of use and reliable worldwide shipping, it becomes the obvious choice for anyone serious about restoring their broken ceramic items properly.
It is also worth considering the long term cost of a repair. While generic super glue may seem like the cheaper option at first glance, the reality is that a failed repair often means buying replacement adhesive, or worse, losing the item entirely if it breaks again during use. Standard epoxy resins, while generally stronger than super glue, require careful mixing of two components in precise ratios, and any mistake in this process can result in a bond that never fully cures or that cures unevenly. Ferber Painting’s Ceramic Glue eliminates this guesswork entirely, offering a single component formula that is ready to use straight out of the packaging, with consistent results every time.
Step by Step Guide: How to Glue Broken Ceramic
Now that you understand why product selection is so important, let us walk through the actual repair process. Following these steps carefully will help ensure a strong, long lasting, and nearly invisible repair.
Step 1: Gather Your Materials
Before you begin, make sure you have everything you need within reach. This includes your Ferber Painting Ceramic Glue, a clean cloth, isopropyl alcohol or a mild cleaning solution, painter’s tape or masking tape, disposable gloves, and a well ventilated workspace. It is also helpful to have a small tray or container to hold all your broken pieces so that none of them get lost or misplaced during the repair process, especially if you are working with an item that has shattered into several small fragments.
Consider also preparing a soft towel or piece of foam to place under your work area. This provides a stable, slightly cushioned surface that prevents pieces from sliding around while you work and reduces the risk of further chipping if a piece happens to slip from your hands. Good lighting is another often overlooked element of a successful repair. Working under bright, even lighting allows you to see fine cracks and small fragments that might otherwise go unnoticed, which is particularly important for accurately matching pieces during the dry fit stage.
Step 2: Clean the Broken Edges
Dust, grease, and old adhesive residue are the enemies of a strong bond. Use isopropyl alcohol and a clean cloth to gently wipe down the broken edges of the ceramic piece. Allow the surface to dry completely before moving on. Skipping this step is one of the most common reasons ceramic repairs fail, regardless of how good the glue itself may be.
If you are repairing an item that has been broken for some time, or one that was previously repaired with a different adhesive, you may need to take extra care during the cleaning process. Old glue residue can be particularly stubborn and may require gentle scraping with a plastic tool, such as an old credit card or a plastic spatula, before the alcohol cleaning step. Avoid using metal tools directly on the ceramic surface, as they can scratch the glaze and create additional imperfections that will be visible once the repair is complete. If grease or oil from cooking has settled into the broken edges of a kitchen item, a mild dish soap solution followed by a thorough rinse and complete drying can help ensure the surface is truly clean before you proceed with the alcohol wipe down.
Step 3: Do a Dry Fit
Before applying any glue, fit the broken pieces together without adhesive to understand exactly how they align. This is especially important for objects broken into multiple pieces, as it allows you to plan the order in which you will glue each section back together.
For complex repairs involving several fragments, it can be helpful to number each piece lightly with a pencil on a non visible area, or to lay them out on your work surface in the order they will be reassembled. This simple organizational step can save you a significant amount of frustration later, since trying to figure out which piece goes where while glue is already drying is one of the most stressful parts of any ceramic repair. Take a photograph of the dry fit arrangement with your phone before you begin applying glue, so you have a clear reference to look back at throughout the process.
Step 4: Apply the Ceramic Glue
Apply a thin, even layer of Ferber Painting’s Ceramic Glue along one of the broken edges. Because our formula is designed with a precise applicator tip, you can control exactly how much glue is dispensed, avoiding excess glue that could seep out and create visible residue. Less is often more when it comes to ceramic adhesives, since a thin layer creates a stronger and cleaner bond than a thick, sloppy application.
When working on a larger break, it can help to apply the glue in small sections rather than trying to cover the entire edge at once, particularly if the break line is long or curved. This gives you more control and reduces the chances of the glue beginning to set before you have properly aligned the pieces. For smaller items such as teacup handles or figurine limbs, a single thin application is usually sufficient, and applying too much glue in these cases often results in unsightly overflow that is difficult to clean up afterward.
Step 5: Press and Hold the Pieces Together
Firmly press the two pieces together, aligning them exactly as you determined during your dry fit. Hold the pieces in place for the amount of time indicated in the product instructions. Ferber Painting’s Ceramic Glue offers a strong initial tack, which means you will not need to hold the pieces for an extended period, unlike many competitor products that require several minutes of constant pressure.
While holding the pieces together, apply steady, even pressure rather than squeezing too hard, which can sometimes cause thin ceramic pieces to crack further or push the glue out of the seam entirely. A gentle rocking motion back and forth for a second or two before settling into the final position can also help work out any air pockets and ensure full contact between the two surfaces, resulting in a stronger overall bond.
Step 6: Secure with Tape if Necessary
For larger or more complex repairs, use painter’s tape to hold the pieces in place while the glue continues to cure. This is particularly useful for three dimensional objects like vases or figurines where gravity may cause pieces to shift before the bond fully sets.
When taping a repair, try to position the tape so that it applies pressure directly across the seam, pulling the two pieces together rather than simply holding them in a static position. For oddly shaped items, you may need to use multiple strips of tape at different angles to counteract gravity from all directions. If you are repairing something with a rounded shape, such as a bowl or a vase, propping the item in a stable position using a small bowl of rice, sand, or a rolled up towel can prevent it from rolling or shifting while the tape holds the seam in place.
Step 7: Remove Excess Glue
If any glue seeps out from the seams, gently wipe it away with a cloth dampened with isopropyl alcohol before it fully cures. Acting quickly at this stage will help ensure a clean, nearly invisible finish once the repair is complete.
It is worth keeping a small supply of cotton swabs on hand during this step, as they allow for much more precise cleanup than a cloth, especially in tight corners or along detailed decorative patterns. If you notice excess glue only after it has already begun to harden, avoid scraping at it aggressively, since this can scratch the surrounding glaze. Instead, allow the glue to fully cure and then carefully trim away any hardened excess with a sharp craft knife, taking care to only remove the excess material and not touch the surrounding ceramic surface.
Step 8: Allow Full Curing Time
Patience is key. While the initial bond may feel strong within minutes, allow the glue to cure fully according to the instructions, generally between 24 and 48 hours, before using the item normally. Avoid exposing the repaired area to water, heat, or stress during this curing period.
During the curing period, it is best to place the repaired item somewhere it will not be disturbed, ideally out of reach of children or pets who might accidentally bump or move it. Avoid the temptation to test the strength of the bond by applying pressure or flexing the piece, as this can weaken the bond before it has had a chance to fully cure. If you are repairing a functional item such as a mug or a plate that you plan to use regularly, waiting the full recommended curing time before the first wash will make a significant difference in the long term durability of the repair.
Common Mistakes to Avoid When Gluing Ceramic
Even with a high quality product like Ferber Painting’s Ceramic Glue, certain mistakes can compromise the final result. Here are some of the most common errors people make when repairing ceramic, and how to avoid them.
- Skipping the cleaning step, which leaves dust and oils on the surface and weakens the bond.
- Using too much glue, which creates messy overflow and a visible repair line.
- Not doing a dry fit first, resulting in misaligned pieces once the glue is applied.
- Using an adhesive that is not designed for ceramic, leading to brittle or discolored bonds over time.
- Rushing the curing process and using the item before the glue has fully set.
- Failing to secure pieces properly while curing, causing shifts that weaken the repair.
Beyond these common mistakes, there are a few additional pitfalls that are worth mentioning. One frequent error is attempting to repair an item in a humid or overly cold environment, which can affect how the adhesive sets and cures. Whenever possible, work in a room temperature environment with moderate humidity for the best results. Another mistake is forgetting to account for gaps caused by missing fragments. If a small chip is missing entirely, simply gluing the remaining pieces together may leave a visible gap or cause slight misalignment elsewhere on the item. In these cases, it may be necessary to fill the gap separately with a ceramic filler after the main structural repair has cured, followed by careful sanding and, if desired, painting to match the surrounding glaze.
Another mistake worth avoiding is handling the repaired item too soon after the visible bond seems to have set. Many adhesives, including high quality ones, reach a surface level hardness relatively quickly but continue to strengthen internally for a longer period afterward. Treating the item gently for the first several days after the recommended curing period, even after it appears fully set, can help maximize the long term strength of the repair.
By avoiding these mistakes and using a dedicated product like Ferber Painting’s Ceramic Glue, you dramatically increase your chances of achieving a repair that is both strong and virtually invisible.
Special Considerations for Different Types of Ceramic Items
Not all ceramic repairs are the same, and different types of items often benefit from slightly different approaches. Mugs and cups, for example, are frequently broken at the handle, a spot that experiences significant stress every time the item is picked up. When repairing a handle, it is especially important to ensure a strong, even bond across the entire break, since this area will bear the weight of the cup and its contents repeatedly over time. Reinforcing the repair with a slightly longer curing period before regular use is a good idea for handle repairs specifically.
Decorative plates and figurines, on the other hand, are less likely to experience the same physical stress as functional dishware, but they often have more intricate details and glazing patterns that make achieving an invisible repair more challenging. For these items, taking extra time during the dry fit stage to ensure perfect alignment of decorative patterns across the break line will make a significant difference in the final appearance of the repair.
Large vases and planters present a different challenge altogether, since their size and weight can put considerable stress on a repaired seam, particularly if the vase is later filled with water and flowers. For these larger items, it is often worth reinforcing the repair from the inside if possible, applying a small amount of additional adhesive along the interior of the seam once the primary exterior repair has cured, for added strength.
Caring for Your Ceramic Item After Repair
Once your repair has fully cured, a little extra care will go a long way in ensuring the longevity of the bond. For functional items like mugs and plates, hand washing rather than placing the item in the dishwasher during the first few weeks after repair can help the bond continue to strengthen without being exposed to the heat and pressure of a dishwasher cycle. After this initial period, most items repaired with Ferber Painting’s Ceramic Glue can safely be washed in the dishwasher, though hand washing is always the gentler option for extending the life of any repair.
Avoid sudden temperature changes with repaired items whenever possible, such as taking a mug directly from the freezer and filling it with boiling hot coffee. While our formula is designed to withstand moderate heat exposure, extreme and sudden temperature shifts can put unnecessary stress on any adhesive bond, ceramic or otherwise. Similarly, decorative items that have been repaired should be displayed in a stable location away from high traffic areas where they might be accidentally bumped or knocked over.
Why Ferber Painting’s Ceramic Glue Is the Best Choice on the Market
There are countless adhesive products marketed for ceramic repair, but very few combine strength, ease of use, transparency, and customer confidence the way Ferber Painting’s Ceramic Glue does. Here is a summary of why our customers consistently choose us over other brands.
First, the satisfied or refunded guarantee removes all risk from your purchase. If the product does not meet your expectations, you can request a refund, something that very few competitors are willing to offer. This guarantee reflects our confidence in the quality of our formula and our commitment to customer satisfaction.
Second, our worldwide shipping network ensures that no matter where you are located, your order will arrive quickly and reliably. We work with an established international network of trusted carriers, meaning you do not have to worry about long delays or lost packages.
Third, the online payment process on our website is simple, secure, and fast. You can order with confidence knowing that your transaction is protected, and your product will be on its way shortly after checkout.
Finally, the formula itself has been specifically engineered for ceramic repair, unlike generic adhesives that attempt to serve multiple purposes at once. This specialization results in a stronger bond, a cleaner finish, and better long term durability compared to most alternatives on the market.
Many of our customers have shared that they came to us after trying multiple other products that failed to deliver a satisfactory result, whether due to visible seams, weak bonds that broke again within weeks, or discoloration that developed over time. This pattern is a common one in the ceramic repair world, and it is precisely why we built our product around the specific needs of ceramic restoration rather than trying to create a one size fits all adhesive solution.
Mini FAQ: Gluing Broken Ceramic
Is Ferber Painting’s Ceramic Glue safe for items that will hold food or drinks?
Once fully cured, our Ceramic Glue creates a bond that is resistant to water exposure, making it suitable for many household ceramic items. However, we recommend avoiding direct prolonged contact between the glued seam and food or beverages for maximum safety and longevity.
How long does it take for the glue to fully cure?
While initial tack occurs within minutes, we recommend allowing 24 to 48 hours for the glue to fully cure before using or washing the repaired item.
Can this glue be used on other materials besides ceramic?
While it is specifically formulated for ceramic, many customers have successfully used it on porcelain and certain types of stoneware as well.
What happens if I am not satisfied with the product?
Thanks to our satisfied or refunded guarantee, you can request a full refund if the product does not meet your expectations, no complicated procedures required.
Does Ferber Painting ship internationally?
Yes, we ship worldwide through our reliable network of international carriers, ensuring fast and secure delivery no matter where you are located.
What should I do if my ceramic item is missing a small fragment?
If a piece is completely missing, glue the pieces you do have together first and allow the repair to cure fully. Afterward, a ceramic filler can be used to rebuild the missing section, which can then be sanded smooth and touched up with paint to blend with the surrounding glaze.
Can I speed up the curing process with heat?
We recommend following the standard curing time at room temperature rather than introducing additional heat, since uneven or excessive heat can affect the quality of the bond as it sets.
Conclusion
Repairing broken ceramic does not have to be a stressful or uncertain process. By following the steps outlined in this guide and choosing a dedicated, high quality adhesive, you can restore your favorite ceramic pieces to their former glory with confidence. Taking the time to properly clean the broken edges, perform a careful dry fit, apply a thin and even layer of glue, and allow adequate curing time will make the difference between a repair that lasts for years and one that fails within weeks. Ferber Painting’s Ceramic Glue offers everything you need for a successful repair, including a strong and nearly invisible bond, fast worldwide shipping, secure online payment, and most importantly, a satisfied or refunded guarantee that no other competitor can match. Visit our website today and discover why so many customers trust Ferber Painting’s Ceramic Glue to bring their broken ceramic items back to life.