 Ireland
 United States
 Australia
 Česko
Česko Danmark
 Deutschland
 Eesti
Eesti España
 Ελλάδα
 France
 Hrvatska
 Italia
 Latvija
 Lietuva
 Magyarország
 Nederlands
 Norge
Norge Polska
 Portugal
 România
 Schweiz (Deutsch)
 Slovenija
 Slovensko
 Suomi
Suomi Sverige
 United Kingdom
 България
 Canada (English)
Stripping wood moulding is one of those home improvement tasks that looks simple on paper but can quickly become a frustrating ordeal if you do not have the right product in hand. Whether you are restoring a century-old baseboard, refreshing a window casing, or preparing a crown moulding for a fresh coat of paint, the entire process hinges on one critical factor: the quality of the wood stripper you choose. A poor quality stripper will leave you scrubbing for hours, damaging the wood grain, and inhaling harsh fumes, while a well-formulated product can turn a weekend nightmare into a simple afternoon project.
This is exactly why so many DIY enthusiasts and professional painters alike turn to the Ferber Painting Wood Stripper. Unlike most competitors on the market, our formula is designed specifically to cut through layers of old paint, varnish, and lacquer without harming the underlying wood fibers. But what truly sets us apart is something no other brand in this space offers: a full satisfied or refunded guarantee. If you are not completely happy with the results, we will refund your purchase, no questions asked. That kind of confidence in a product is rare, and it should tell you something about the quality you are about to invest in.
In this complete guide, we will walk you through everything you need to know about stripping wood moulding, from preparation to the final finish, while explaining along the way why the Ferber Painting Wood Stripper consistently outperforms other options on the market. We will also cover the tools you need, the mistakes to avoid, how to handle different types of wood and finishes, and what to do once the stripping process is complete. By the end of this guide, you should feel fully equipped to tackle even the most stubborn, layered moulding with confidence.
Why the Right Wood Stripper Makes All the Difference
Before diving into the step by step process, it is essential to understand why the product you select is the single most important variable in the entire project. Wood moulding often contains decades of old paint, layers of varnish, or a mix of different finishes applied over the years. Some cheaper strippers on the market are diluted, requiring multiple applications, longer waiting times, and aggressive scraping that can gouge or scratch delicate wood detailing.
The Ferber Painting Wood Stripper was formulated to avoid all of these common pitfalls. Its gel-based consistency clings to vertical and detailed surfaces, which is particularly useful for intricate moulding profiles that have grooves, curves, and decorative edges. Unlike thin, runny strippers that drip off before they have time to work, our product stays exactly where you apply it, penetrating deep into the old finish layers.
Another major advantage is drying time control. Many strippers on the market either dry too quickly, forcing you to work in small sections, or they take so long that the entire project stretches over multiple days. The Ferber Painting formula strikes the perfect balance, giving you a working window of about twenty to thirty minutes, which is enough time to cover a good stretch of moulding without the product drying out before you can scrape it off.
Finally, and perhaps most importantly, our product comes with a satisfied or refunded guarantee. No other wood stripper brand currently offers this level of assurance. This means that if the product does not perform as expected on your specific type of wood or finish, you are protected. This guarantee alone should give you peace of mind when making your purchase decision.
Understanding Why Old Moulding Is So Difficult to Strip
Older homes often present a unique challenge because moulding installed several decades ago may have been repainted five, six, or even ten times over the years. Each layer adds thickness and complexity, and older paints sometimes contain oil-based formulations that have hardened into an almost plastic-like shell over the wood. This is precisely the kind of buildup that overwhelms weak strippers, forcing homeowners into a cycle of applying, waiting, scraping a little, and reapplying again and again. The Ferber Painting Wood Stripper was engineered with this exact scenario in mind, since our chemists tested the formula specifically against multi-layered painted surfaces rather than just a single coat of fresh paint. This means that even if your moulding has not seen daylight since the 1970s, you can expect the product to break through those layers in a single generous application rather than requiring an entire weekend of repeated treatments.
It is also worth noting that different types of finishes react differently to stripping agents. Latex paint tends to soften relatively quickly, while oil-based enamel paints can be more stubborn and require a slightly longer dwell time. Varnishes and lacquers, especially older shellac-based finishes, often lift away in sheets once properly softened, which can actually make the job faster than stripping paint. Being aware of what kind of finish you are dealing with, even if only through educated guesswork based on the age of the home, can help you set realistic expectations for how long the process will take.
Comparing Wood Strippers: What Really Matters
When shopping for a wood stripper, there are several criteria that matter far more than price alone. Below is a comparison table highlighting the key factors you should consider, and how Ferber Painting stacks up against generic alternatives commonly found in hardware stores.
| Criteria | Ferber Painting Wood Stripper | Generic Wood Strippers |
|---|---|---|
| Satisfaction Guarantee | Yes, full satisfied or refunded guarantee | Rarely offered, if ever |
| Consistency | Thick gel, clings to vertical surfaces and detailed moulding | Often runny, drips off detailed profiles |
| Working Time | 20 to 30 minutes, ideal for large sections | Varies widely, often too fast or too slow |
| Odor Level | Low odor formula, safer for indoor use | Frequently strong, requires heavy ventilation |
| Effectiveness on Multiple Layers | Removes multiple layers of paint or varnish in one application | Often needs several applications |
| Shipping | Fast international shipping through trusted carrier network | Depends on retailer, often slower or limited to local stock |
| Online Purchase and Payment | Simple and secure online payment directly on our website | Varies, not always available online |
As this table illustrates, the differences go far beyond marketing claims. Every aspect of the Ferber Painting Wood Stripper has been engineered to make the stripping process faster, safer, and more effective, all while being backed by a guarantee that protects your investment.
It is worth taking a moment to talk about price versus value, since many people assume that the cheapest can on the shelf will save them money. In practice, the opposite is usually true. A diluted, weak stripper often requires two or three applications to achieve the same result that a single application of a properly formulated product would accomplish. When you factor in the extra cans purchased, the extra hours spent scraping and reapplying, and the risk of damaging the wood through excessive scraping, the supposedly cheaper option often ends up costing more in both money and time. Choosing a stripper based on effectiveness rather than sticker price is almost always the smarter long-term decision, especially on a project as detail-intensive as moulding restoration.
Another factor that deserves attention is how a product performs across a range of temperatures and humidity levels. Some strippers lose effectiveness in colder garages or basements, while others become unmanageably runny in humid summer conditions. The Ferber Painting formula has been tested across a range of typical indoor and outdoor working conditions, which is part of why the twenty to thirty minute working window remains consistent whether you are working in a heated living room in winter or a humid porch in the middle of summer.
Step by Step Guide: How to Strip Wood Moulding
Now that you understand why product choice matters so much, let us walk through the actual process of stripping wood moulding using the Ferber Painting Wood Stripper.
Step 1: Prepare Your Workspace
Before you begin, make sure your workspace is well ventilated. While our formula has a low odor compared to competitors, it is still good practice to open windows or use a fan. Lay down a drop cloth or plastic sheeting beneath the moulding to catch any drips or scraped-off paint chips. If the moulding is still installed, protect the surrounding walls and floors with painter’s tape and additional coverings.
If you are working on moulding that remains attached to the wall, consider the time of day and the temperature of the room. Working during daylight hours gives you better visibility to spot missed spots, and a moderately warm room helps the product remain workable for the full twenty to thirty minute window. If you are stripping removable pieces of moulding, it often helps to set up a dedicated stripping station on sawhorses in a garage or workshop, which allows you to rotate the piece as needed and reach every angle without straining your back or neck.
Step 2: Gather Your Tools
You will need the following items for an efficient stripping process.
- Ferber Painting Wood Stripper
- A natural bristle brush for application
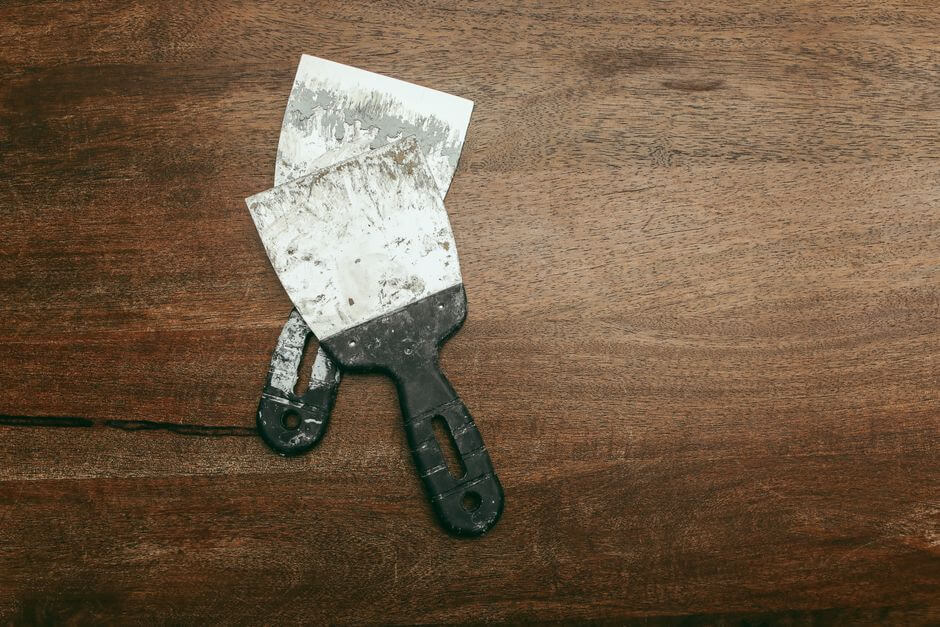
- A plastic or metal scraper suited to the moulding profile
- Fine steel wool for detailed grooves
- Protective gloves and safety glasses
- Clean rags for wiping down residue
- A small container for mixing or pouring the product if needed
In addition to the essentials listed above, a few optional tools can make the job considerably easier. A profile scraper set, which includes several small curved and pointed tips, is invaluable for reaching into decorative details like dentil moulding, egg and dart patterns, or rope carvings that a standard flat scraper simply cannot access. A shop vacuum with a brush attachment can also speed up cleanup between steps, especially when working with steel wool, which tends to leave fine metal fibers behind. Finally, keeping a bucket of water and a sponge nearby allows you to periodically clean your scraper of accumulated paint residue, which keeps your tool working efficiently instead of just smearing softened paint around the surface.
Step 3: Apply the Wood Stripper
Using the brush, apply a generous, even layer of the Ferber Painting Wood Stripper onto the moulding. Because of its thick gel consistency, the product will stay in place even on vertical surfaces or intricate carved details, something that thinner, cheaper strippers simply cannot achieve. Make sure to work the product into any grooves or decorative edges where old paint tends to accumulate.
A helpful technique is to apply the stripper in one direction using long, even brush strokes rather than scrubbing it back and forth. This helps maintain an even thickness across the entire surface, which in turn ensures the product works at the same pace everywhere. If you notice any thin spots after your initial pass, particularly around edges or transitions, go back over them with a second light coat before moving on to the waiting stage. For particularly thick or hardened paint builds, some professionals recommend a slightly thicker application than usual, since the extra volume of product provides more active ingredient to break down the stubborn layers.
Step 4: Let It Sit
Allow the product to sit for the recommended twenty to thirty minutes. During this time, you will notice the old paint or varnish beginning to bubble and lift away from the wood surface. This is the sign that the stripper is doing its job effectively. Avoid the temptation to scrape too early, as giving the product enough time ensures a cleaner, more complete removal.
While you wait, it can be useful to cover the treated section loosely with plastic sheeting, which slows evaporation and helps the product continue working even in drier or warmer rooms. This trick is particularly useful during the summer months or in rooms with active heating systems, where the air tends to dry out surfaces more quickly. Keep an eye on the clock, but also trust your eyes: if the bubbling and lifting look complete before the twenty minute mark, you can begin testing a small section with your scraper to see if it is ready.
Step 5: Scrape Away the Old Finish
Using your scraper, gently remove the softened paint or varnish. Work in the direction of the wood grain to avoid gouging the surface. For detailed mouldings with grooves and curves, a smaller detail scraper or a shaped tool can help you get into every crevice. If you encounter stubborn spots, apply a small amount of additional product directly to that area and let it sit for a few more minutes before scraping again.
When scraping flat sections, hold the scraper at a low angle, close to the surface of the wood, rather than digging straight down. This angle allows the blade to glide beneath the softened paint layer and lift it away cleanly, rather than chipping it off in fragments that leave behind patchy residue. For curved or rounded profiles, a piece of household string can sometimes be used like a saw, pulled back and forth through a groove to lift out stubborn paint that a rigid scraper cannot reach. Patience during this stage pays off enormously, since rushing tends to create the very gouges and scratches that require additional sanding later.
Step 6: Clean with Steel Wool
Once the majority of the old finish has been scraped away, use fine steel wool to clean out any remaining residue, particularly in tight grooves or carved details. This step ensures a smooth, even surface that is ready for the next stage of your project, whether that is repainting, staining, or applying a clear finish.
Grade 0000 steel wool is generally the best choice for this stage, since it is fine enough to avoid scratching the wood while still being abrasive enough to remove stubborn residue trapped in grain and grooves. Work in small circular motions for flat areas and follow the direction of any decorative carving for detailed profiles. If you find that steel wool alone is not lifting a particularly stubborn patch, a small amount of mineral spirits on a rag can help dissolve the last traces of old finish without requiring another full application of stripper.
Step 7: Wipe Down and Inspect
Wipe down the moulding with a clean rag to remove any leftover residue or dust. Inspect the surface closely under good lighting to check for any spots that may need a second application. Thanks to the strength of the Ferber Painting formula, most projects only require a single application, saving you both time and additional product.
A useful trick for inspection is to shine a flashlight at a low, raking angle across the surface of the moulding. This lighting technique reveals texture and residue that might be invisible under standard overhead lighting, since shadows will fall into any remaining grooves of old paint or uneven patches. Taking the extra few minutes to inspect thoroughly at this stage saves considerable frustration later, especially if you plan on staining the wood, since stain tends to highlight any inconsistencies in surface preparation far more than paint does.
Step 8: Let the Wood Dry
Allow the moulding to dry completely before moving on to sanding, staining, or painting. Drying times can vary depending on humidity and temperature, but generally a few hours is sufficient. Avoid rushing this step, as properly dried wood will accept new finishes far more evenly.
If you are working in a particularly humid environment, or if the wood was heavily saturated with product during a stubborn section, it can help to leave the moulding overnight before proceeding. Touching the surface with the back of your hand is a simple way to check for lingering coolness or dampness, both of which indicate that moisture is still evaporating from the wood fibers. Rushing straight into staining or painting on wood that has not fully dried can lead to poor adhesion, bubbling, or an uneven finish that will require additional rework down the line.
Step 9: Dispose of Waste Materials Properly
Once your moulding is clean and dry, do not forget about proper disposal of the paint chips, used steel wool, and rags soaked with stripper residue. Many municipalities classify old paint waste, especially if it may contain lead from homes built before the 1980s, as hazardous material that cannot simply be thrown in the regular trash. Check with your local waste management authority for guidelines on disposing of paint chips and stripping byproducts. Rags soaked in stripper or mineral spirits should also be laid flat outdoors to dry completely before disposal, since bunched up rags soaked in solvent can pose a spontaneous combustion risk in rare cases. Taking these extra precautions ensures your project is not only successful but also safe for your household and the environment.
Common Mistakes to Avoid When Stripping Wood Moulding
Even with a high quality product, certain mistakes can compromise your results. Here are some of the most common errors people make, and how to avoid them.
Using too little product is one of the most frequent mistakes. Many people try to save money by spreading the stripper too thin, which results in incomplete removal and the need for multiple applications. With the Ferber Painting Wood Stripper, a generous application actually saves you time and product overall, since it works more efficiently in a single pass.
Scraping too aggressively is another common issue. Wood moulding, especially older pieces, can be delicate. Using excessive force with a metal scraper can gouge the surface, creating damage that is far more difficult to repair than simply waiting a few extra minutes for the product to work properly.
Not testing on a small area first can also lead to unexpected results, particularly if you are unsure of the type of finish on the moulding. While our product is designed to work on a wide variety of paints, varnishes, and lacquers, testing a small hidden area first ensures you understand exactly how the wood will react.
Skipping proper ventilation, even with a low odor product like ours, can still create discomfort during long projects. Always work in a space with adequate airflow.
Finally, failing to protect surrounding surfaces can lead to unwanted stains or damage on floors, walls, or nearby furniture. Taking the extra few minutes to properly tape and cover your workspace will save you cleanup time later.
Another mistake worth mentioning is ignoring the possibility of lead paint on older moulding. Homes built before 1978 in many countries may have used lead-based paints, and disturbing these layers without proper precautions can pose health risks. If you suspect your moulding may contain lead paint, consider using a testing kit before beginning the stripping process, and take additional protective measures such as wearing a respirator mask rated for fine particulates.
People also frequently underestimate how long the entire project will take from start to finish. While the actual stripping process with the Ferber Painting Wood Stripper is fast compared to competitors, factoring in preparation, drying time, sanding, and finishing means that a full moulding restoration project should realistically be planned over a full day rather than squeezed into a rushed evening. Setting realistic expectations from the outset helps prevent frustration and encourages the kind of careful, patient work that produces the best results.
Lastly, some DIYers forget to account for the profile complexity of their specific moulding when choosing tools. A simple flat baseboard requires very different scraping tools compared to an ornate crown moulding with multiple curved details. Taking a few minutes before starting the project to assess the profile and gather the appropriate range of scraper shapes will make the actual work go far more smoothly than trying to force a single flat scraper into every curve and groove.
Restoring Different Types of Wood Moulding
Not all moulding is created equal, and understanding the specific type of wood and profile you are working with can help you plan your stripping process more effectively. Softwoods such as pine, commonly used in older baseboards and door casings, tend to absorb stripping products more readily and can soften slightly if left in contact with the product for too long. Hardwoods such as oak or maple, often found in more decorative crown moulding or older architectural details, are generally more resistant to over-softening but may require slightly longer dwell times to fully break through thick coats of varnish.
Crown moulding, with its combination of curves, coves, and decorative edges, often benefits from a two-pass approach. Begin by applying the Ferber Painting Wood Stripper generously across the entire visible surface, then focus a slightly thicker application on the deepest grooves where paint tends to accumulate most heavily. This targeted approach ensures that even the hardest to reach details receive adequate treatment without wasting product on flatter areas that strip more easily.
Baseboards, being generally flatter and closer to the floor, present a different challenge: dust, dirt, and years of floor cleaning products can sometimes create a grimy film on top of the paint that interferes with the stripper’s ability to penetrate. Wiping down baseboards with a damp cloth before beginning the stripping process can help ensure the product makes direct contact with the paint layers rather than being blocked by surface grime.
Window and door casings often combine both flat and detailed sections, and may also include areas that have been exposed to more sunlight and temperature fluctuation than interior moulding. This exposure can sometimes cause paint to become brittle and crack, which actually makes stripping easier in some respects, since the stripper can penetrate through existing cracks more quickly. However, it also means you should inspect these areas carefully for any wood damage or rot that may have developed beneath the paint over the years, since stripping will reveal the true condition of the wood underneath.
Why Ferber Painting Is the Best Choice for Your Wood Stripping Project
By now, it should be clear that not all wood strippers are created equal. The Ferber Painting Wood Stripper stands out not just because of its powerful, fast-acting formula, but because of the entire experience surrounding the purchase and use of the product.
First and foremost is our satisfied or refunded guarantee. This is something you simply will not find with other brands in this category. We are so confident in the effectiveness of our product that we back it with a full guarantee. If for any reason you are not satisfied with your results, you can request a refund. This level of trust between a company and its customers is rare, and it reflects our commitment to quality.
Second, our product is available directly on our website, with a simple and secure online payment process. There is no need to search through multiple hardware stores or third-party retailers. You can order directly from us with just a few clicks.
Third, Ferber Painting offers fast worldwide shipping through an established international carrier network. Whether you are located in North America, Europe, Australia, or anywhere else in the world, we ensure your order arrives quickly and safely, so you can start your project without unnecessary delays.
Fourth, the formulation itself has been specifically designed with wood moulding and detailed woodwork in mind. Its thick, clinging consistency, combined with a working time that allows for thorough penetration without excessive drying, makes it particularly suited for intricate profiles that many other products struggle to handle.
All of these factors combined make the Ferber Painting Wood Stripper not just a good option, but the best option for anyone serious about restoring or refinishing wood moulding.
Beyond the technical formulation, there is also something to be said for the peace of mind that comes with working alongside a company that stands behind its product so publicly. Many customers who have tried multiple strippers over the years describe the frustration of investing in a product, spending an entire weekend on a project, and still being left with unsatisfactory results and no recourse. With Ferber Painting, that risk is effectively eliminated. You are able to try the product on your specific project, and if it does not deliver the results you expected, our guarantee ensures you are not simply out of pocket for a failed attempt.
Caring for Your Moulding After Stripping
Once your moulding has been fully stripped, cleaned, and dried, you are left with a decision about how to finish the wood going forward. Many homeowners choose to lightly sand the surface with fine grit sandpaper, somewhere in the range of 150 to 220 grit, to smooth out any minor imperfections left behind after scraping and to open up the wood grain slightly for better absorption of new stain or paint. Sanding should always follow the direction of the grain to avoid introducing new scratches that will show through a clear finish.
If you plan to stain the moulding to reveal the natural wood grain, consider applying a wood conditioner beforehand, especially on softer woods like pine, which can absorb stain unevenly and result in blotchy patches. A pre-stain conditioner helps the wood absorb color more uniformly, giving you a more professional looking result. For those planning to repaint the moulding, a coat of quality primer is essential, both to seal the raw wood and to provide a uniform base for the topcoat to adhere to properly.
It is also worth taking a moment to inspect the wood closely for any small cracks, gaps, or areas of minor damage that may have been hidden beneath the old paint or varnish. Wood filler can be used to repair these imperfections before sanding, ensuring a smooth, seamless surface once the final finish is applied. This is often the stage where hidden character comes to light, whether that means beautiful natural grain patterns you never knew existed, or minor repairs that need addressing before moving forward.
Finally, once your new finish has been applied and allowed to cure fully, consider the long-term maintenance of your moulding. Simple routine dusting and occasional gentle cleaning will help preserve the finish for years to come, meaning you likely will not need to repeat this stripping process again for a very long time, especially if you started with a clean, thoroughly prepared surface thanks to the Ferber Painting Wood Stripper.
Frequently Asked Questions
How long does the Ferber Painting Wood Stripper take to work?
Typically between twenty and thirty minutes, depending on the number of layers of paint or varnish present on the moulding.
Is the product safe to use indoors?
Yes, our formula has a low odor compared to many competitors, though we still recommend working in a well ventilated space and using protective gloves and eyewear.
Can I use this product on painted, varnished, and lacquered wood?
Yes, the Ferber Painting Wood Stripper is formulated to work effectively across a wide range of finishes, including paint, varnish, and lacquer.
What happens if I am not satisfied with the results?
We offer a full satisfied or refunded guarantee. If you are not happy with the product, simply contact us for a refund, no questions asked.
How fast is shipping?
Thanks to our international carrier network, we offer fast shipping to locations worldwide, so you can begin your project as soon as possible.
Do I need to apply multiple coats?
In most cases, a single generous application is enough to remove several layers of old finish, though particularly stubborn areas may require a small additional amount.
Does the product work on both softwood and hardwood moulding?
Yes, the Ferber Painting Wood Stripper has been formulated to be effective across a wide range of wood types, from softer pine and fir moulding to harder oak and maple details, without weakening or discoloring the underlying fibers.
What should I do if my moulding has cracks or damage revealed after stripping?
Any cracks or gaps can typically be repaired with a quality wood filler before sanding, allowing you to achieve a smooth, seamless surface before applying your final stain, paint, or clear finish.
Conclusion
Stripping wood moulding does not have to be a stressful, time-consuming ordeal. With the right preparation, the correct tools, and most importantly, a high quality wood stripper, you can restore your moulding to its original beauty in just a few hours. From understanding the type of wood and finish you are working with, to gathering the proper tools, to carefully following each step of the process, every detail plays a role in achieving a smooth, professional result. Avoiding common mistakes such as under-applying product, scraping too aggressively, or skipping proper ventilation will save you time and frustration, while taking care during the final drying and finishing stages will ensure your moulding looks its best for years to come.
The Ferber Painting Wood Stripper offers a powerful formula, fast international shipping, easy online payment, and a satisfaction guarantee that no other competitor currently matches. Visit our online store today to order your Ferber Painting Wood Stripper and experience the difference a truly reliable product can make for your next woodworking project.